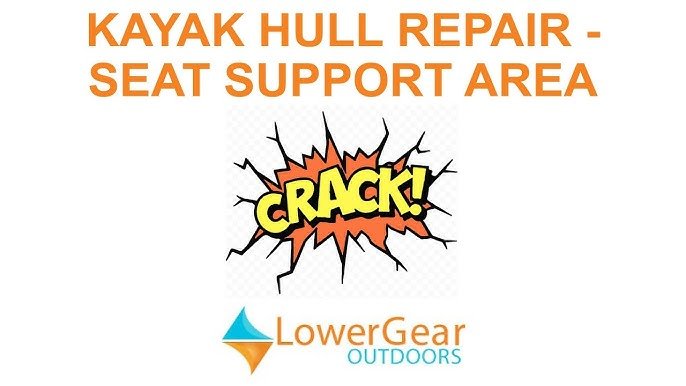
Have you ever found a tear or crack in your kayak and wondered if it’s the end of the road for your favorite watercraft? You might be asking yourself, “Can a kayak be repaired, or do I need to buy a new one?”
The good news is, in many cases, your kayak can be fixed, saving you money and the heartbreak of letting go. You’ll discover simple, effective ways to bring your kayak back to life. Stick with me, and by the end, you’ll feel confident about tackling those repairs yourself or knowing when to call in a pro.
Let’s dive into what it takes to keep your kayak afloat and ready for your next adventure.
Common Kayak Damages
Kayaks face wear and tear from regular use and rough conditions. Knowing common damages helps in proper care and repair. Some issues can be fixed at home, while others need professional help.
Below are the typical damages found in kayaks. Each type affects the kayak differently and requires specific repair methods.
Cracks And Holes
Cracks and holes in kayaks often happen after hitting rocks or sharp objects. They can cause leaks and reduce safety. Small cracks are usually repairable using patch kits or waterproof glue.
Large holes may need fiberglass or plastic welding repairs. Ignoring these damages can lead to more serious problems on the water.
Scratches And Abrasions
Scratches and abrasions happen from dragging the kayak or scraping against rough surfaces. These marks usually do not affect performance but can weaken the material over time.
- Minor scratches can be sanded and polished
- Deep abrasions may require filling and repainting
- Regular inspection helps catch damage early
Leaking Seams
Leaking seams occur when the kayak’s joints lose their seal. This causes water to enter the kayak, making it unsafe. Repairs include resealing with marine adhesive or replacing seam tape.
| Cause | Repair Method |
| Old or cracked sealant | Remove old sealant and apply new adhesive |
| Damaged seam tape | Remove tape and replace with waterproof seam tape |
| Loose stitching (for fabric kayaks) | Restitch or patch the seam |
Damaged Hardware
Hardware like handles, foot braces, and bungee cords can break or wear out. These parts are vital for comfort and control. Many hardware pieces can be replaced easily with new parts.
Common hardware repairs include:
- Replacing broken handles
- Fixing or swapping foot braces
- Changing worn bungee cords
Tools And Materials Needed
Kayaks can get damaged over time from rocks, branches, or rough water. Fixing a kayak is possible with the right tools and materials. Using proper supplies helps make strong repairs.
This guide explains the essential tools and materials you need to repair your kayak safely and effectively.
Repair Kits
Repair kits usually include everything for fixing holes or cracks. They come with patches, adhesives, and sometimes sandpaper. Choosing a kit made for your kayak’s material is important.
Repair kits save time because you get all parts in one package. They are good for small to medium damage.
Adhesives And Sealants
Adhesives join kayak parts and sealants block water leaks. Use waterproof and flexible products. They keep the kayak strong and watertight.
- Marine epoxy works well for tough repairs
- Silicone sealant fills small gaps
- Polyurethane glue sticks to plastics and rubber
Patching Materials
Patches cover holes or tears in the kayak’s body. Materials vary by kayak type. Vinyl and PVC patches work for inflatable kayaks. Fiberglass and plastic sheets suit hard kayaks.
- Vinyl patches for soft inflatable kayaks
- Plastic or polyethylene sheets for hard kayaks
- Fiberglass cloth with resin for strong repairs
Safety Gear
Wear safety gear to protect yourself during repairs. Some adhesives and patching materials release fumes or irritate skin. Use gloves, masks, and goggles when needed.
- Protective gloves to avoid skin contact
- Face mask to prevent inhaling fumes
- Safety goggles to protect eyes from splashes
Fixing Plastic Kayaks
Plastic kayaks can get cracks or holes from rocks or rough use. Fixing them is possible with the right tools and methods.
This guide explains how to repair plastic kayaks by welding, using epoxy, and sanding for a smooth finish.
Welding Techniques
Plastic welding uses heat to melt the plastic edges and join them. This method works well for cracks or splits in the kayak body.
- Clean the damaged area before welding.
- Use a plastic welding tool or a hot air gun.
- Apply heat evenly along the crack.
- Press the plastic pieces together firmly.
- Allow the weld to cool without moving it.
Using Epoxy And Adhesives
Epoxy and adhesives bond plastic parts without heat. They work well for small holes and surface cracks.
| Type | Use | Dry Time |
| Two-part epoxy | Strong bond for cracks and holes | 24 hours |
| Plastic adhesive | Quick fix for small cracks | 1-2 hours |
| Marine-grade adhesive | Waterproof repairs | 12 hours |
Sanding And Finishing
After welding or using epoxy, sanding smooths the repair. It helps the kayak look better and feel smooth to touch.
Follow these tips for good sanding:
- Use fine-grit sandpaper (around 220 grit).
- Smooth the edges of the repair gently.
- Clean the area after sanding to remove dust.
- Apply a plastic-safe paint if you want to match colors.
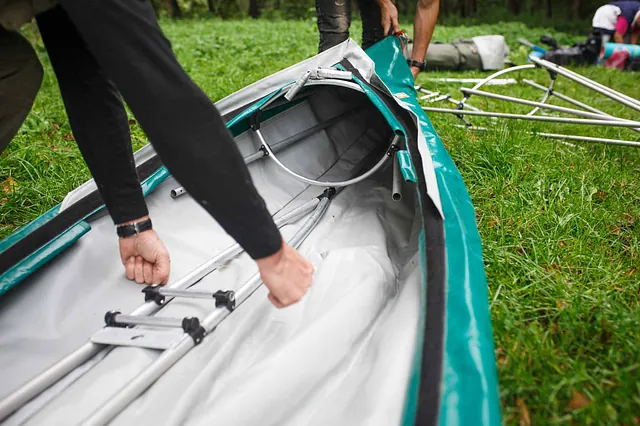
Repairing Inflatable Kayaks
Inflatable kayaks are fun and easy to carry. They can get small holes or leaks over time. Fixing them at home can save money and extend their life.
This guide helps you find leaks, apply patches, and keep valves working well.
Locating Leaks
To repair your kayak, you must first find where the air is escaping. Check the kayak carefully for any holes or weak spots.
- Inflate the kayak fully and listen for hissing sounds.
- Apply soapy water to the surface and watch for bubbles.
- Feel for air escaping with your hand.
- Mark the spots you find to repair later.
Patch Application
After finding leaks, you can fix them with patches. Use the right material and follow these steps to ensure a good seal.
- Clean the area around the leak with rubbing alcohol.
- Cut a patch that is larger than the hole by at least one inch on all sides.
- Apply glue designed for inflatable kayaks to both the patch and the kayak surface.
- Press the patch firmly over the leak and hold it in place for a few minutes.
- Let the glue dry for the recommended time before inflating the kayak again.
Valve Maintenance
Valves control the air in your kayak. Keeping them clean and working well helps prevent leaks and other problems.
| Valve Issue | Cause | Solution |
|---|---|---|
| Air leaks | Dirt or debris inside valve | Clean valve with fresh water and dry fully |
| Valve stuck | Salt buildup or damage | Rinse with fresh water and apply silicone lubricant |
| Valve won’t close | Broken valve parts | Replace valve with a new one from the manufacturer |
Restoring Fiberglass Kayaks
Fiberglass kayaks are strong and light. They can get cracks or holes after use. Fixing these damages can extend the kayak’s life and keep it safe on the water.
This guide explains how to check for damage, patch the fiberglass, and protect your kayak with paint and sealant.
Assessing Damage
Start by cleaning the kayak to see all damage clearly. Look for cracks, holes, or soft spots. Tap the surface gently to find weak areas. Mark all spots that need repair.
- Check both inside and outside surfaces
- Look for scratches that go deep
- Feel for dents or soft areas
- Note any water leaks
Fiberglass Patching Steps
Fixing fiberglass needs care and the right tools. Sand the damaged area to roughen it. Cut fiberglass cloth to cover the hole plus extra. Mix resin and hardener. Apply resin, then lay the cloth. Add more resin on top. Let it dry fully before sanding smooth.
- Sand the damaged area well
- Cut fiberglass cloth to size
- Mix resin with hardener
- Apply resin on the damage
- Place fiberglass cloth over resin
- Brush more resin onto the cloth
- Wait for full curing time
- Sand the patch smooth
Painting And Sealing
After patching, paint and seal the kayak to protect it. Use marine-grade paint made for fiberglass. Apply a primer first. Then add two to three coats of paint. Finish with a clear sealant. This stops water and sun damage.
| Material | Purpose | Dry Time |
| Primer | Helps paint stick | 4 hours |
| Marine Paint | Protects and colors kayak | 6 hours per coat |
| Clear Sealant | Water and UV protection | 12 hours |
Preventive Care Tips
Kayaks are a great way to enjoy water adventures. They need care to stay in good shape. Regular checks and proper storage help prevent damage.
Taking care of your kayak can save you from costly repairs. These tips will help keep your kayak in excellent condition.
Regular Inspections
Inspect your kayak often for cracks or dents. Look at the hull and seams closely. Small issues can become big problems if ignored.
Checking your kayak regularly keeps it safe to use. It also helps find issues before they get worse.
- Check for loose fittings
- Look for signs of wear and tear
- Ensure handles and straps are secure
Proper Storage
Store your kayak in a dry place. Keep it out of direct sunlight. UV rays can damage the material over time.
Make sure the kayak is supported evenly. This prevents warping. Hanging it is a good option if space is limited.
- Use a cover for protection
- Store it upside down or on its side
- Avoid stacking heavy items on top
Avoiding Common Hazards
Be careful of rocks and sharp objects. They can scratch or puncture your kayak. Always stay in designated water areas.
Pay attention to weather conditions. Strong winds and waves can be dangerous. Keep your kayak away from these hazards.
- Steer clear of shallow waters
- Avoid dragging your kayak on rough surfaces
- Monitor weather forecasts before heading out
When To Seek Professional Help
Repairing a kayak can be a challenging task. Some situations require professional assistance. Knowing when to seek help can save time and ensure safety.
If you face severe damage or complex repairs, consider consulting an expert. They have the skills and tools needed for effective repairs.
Severe Structural Damage
Severe structural damage can affect a kayak’s safety. This includes cracks, splits, or holes in the hull. These issues may require professional attention.
- Cracks longer than a few inches
- Damaged seams or joints
- Significant deformation in the kayak’s shape
Complex Repairs
Some repairs are complex and need specific skills. Professionals know how to handle them. This ensures your kayak remains safe and functional.
| Repair Type | Difficulty Level |
| Hull patching | High |
| Rudder replacement | Medium |
| Leak sealing | Varies |
Insurance And Warranty Considerations
Insurance or warranties can cover repair costs. Check your kayak’s policy details. This might save money and ensure quality repairs.
Frequently Asked Questions
Can All Types Of Kayaks Be Repaired?
Most kayaks, including plastic, inflatable, and fiberglass, can be repaired. The method depends on the material and damage type. Proper tools and materials are essential for effective repairs. Small cracks or punctures are usually easy to fix at home.
How Long Does Kayak Repair Typically Take?
Repair time varies based on damage severity and kayak type. Minor fixes can take a few hours, while major repairs may need days. Proper drying and curing times are crucial for long-lasting results. Professional repairs might be faster but costlier.
What Materials Are Needed To Repair A Kayak?
Repair materials depend on kayak type. Plastic kayaks need plastic welding kits or epoxy. Inflatable kayaks require patch kits with adhesives. Fiberglass kayaks use resin, fiberglass cloth, and sandpaper. Using the correct materials ensures a durable and safe repair.
Can I Repair My Kayak Myself Safely?
Yes, many kayak repairs can be done safely at home. Follow instructions carefully and use proper safety gear. Small punctures or cracks are beginner-friendly repairs. For complex damage, consider professional help to avoid safety risks.
Conclusion
A kayak can often be repaired with the right tools and steps. Small cracks, holes, and scratches do not mean the end. Repairs save money and extend kayak life. Learning basic fixes helps you stay on the water longer. Sometimes, professional help is best for big damage.
Always check the kayak carefully before each trip. Taking care of your kayak keeps it safe and fun. Repairing is worth the effort for many paddlers. Don’t give up on your kayak too soon.