

Applying for a visa can feel confusing and stressful, especially if English is not your first language. Many people worry about making mistakes or missing important steps. But the truth is, the process becomes much easier once you understand how it works.
Whether you want to travel, study, work, or join family in another country, getting a visa is often your first challenge. This guide breaks down the steps, explains key documents, and shares practical advice to help you apply successfully. You’ll learn how to avoid common errors, compare visa types, and find out what matters most at each stage.

36% off Today’s Exclusive Deals
Limited-time Exclusive Deals. Check current discount on Amazon.
Check Price on Amazon As an Amazon Associate I earn from qualifying purchases.By the end, you’ll feel more confident and prepared for your visa application.
Understanding Visa Basics
A visa is an official document or stamp in your passport. It allows you to enter, stay, or work in a foreign country for a specific period. Each country has its own visa rules, so the process can change depending on where you want to go and why.
Types Of Visas
Different visa types suit different needs. Here are the most common:
- Tourist visa: For short visits like vacations or sightseeing.
- Student visa: For studying at a school or university.
- Work visa: For working or doing business.
- Transit visa: For passing through a country on your way to another.
- Family visa: For joining relatives who live abroad.
- Medical visa: For seeking medical treatment.
Each visa has its own requirements and restrictions. For example, a student visa may require proof of admission to a school, while a work visa needs a job offer.
Visa-free And Visa-on-arrival
Some countries allow visitors from certain nations to enter without a visa (visa-free), or issue visas at the airport (visa-on-arrival). Check the rules for your destination before applying.
Choosing The Right Visa
Before you start the application, you must know which visa fits your purpose. Applying for the wrong visa can waste time and money.
Key Factors To Compare
| Visa Type | Duration | Purpose | Requirements |
|---|---|---|---|
| Tourist | 1-90 days | Travel, leisure | Proof of funds, return ticket |
| Student | 6-48 months | Study | Admission letter, financial proof |
| Work | 1-36 months | Employment | Job offer, skills certificate |
| Family | Varies | Family reunion | Relationship proof, sponsor |
Check Your Eligibility
Read the visa requirements carefully. Some visas need you to meet age, income, or health standards. For example, a student visa often requires a minimum language score, while a work visa may need you to show professional skills.
Hidden Insights
Many beginners overlook two important points:
- Some countries offer multiple-entry visas (you can enter and leave several times), while others issue single-entry visas only.
- Visa rules can change quickly. Always check the official embassy website before starting your application.
Gathering Required Documents
One of the main reasons visa applications fail is missing or incorrect documents. Every visa type asks for specific papers. Always double-check the list before submitting.
Common Documents Needed
- Passport (valid for at least 6 months beyond your travel date)
- Visa application form
- Passport photos (recent, correct size)
- Travel itinerary (flight bookings, hotel reservations)
- Proof of funds (bank statements, salary slips)
- Letter of invitation (if visiting family or friends)
- Admission letter (for student visas)
- Job offer letter (for work visas)
- Medical insurance (sometimes required)
- Proof of relationship (for family visas)
Document Comparison
Here’s how document needs differ for key visa types:
| Visa Type | Unique Document | Common Documents |
|---|---|---|
| Tourist | Travel itinerary | Passport, photos, funds |
| Student | Admission letter | Passport, photos, funds |
| Work | Job offer letter | Passport, photos, funds |
| Family | Proof of relationship | Passport, photos, funds |
Tips For Document Preparation
- Make clear copies of all documents.
- Translate documents if they are not in English (certified translation may be needed).
- Check photo guidelines (size, background color).
- Organize papers in the order listed on the embassy website.
Filling Out The Application Form
The application form is your official request for a visa. It’s important to fill it out carefully—mistakes or missing answers can cause delays or rejection.
Online Vs Paper Forms
Many countries now use online visa applications. You fill the form on the government website, upload documents, and pay fees online. Some embassies still accept paper forms, which you print and fill by hand.
Step-by-step Form Filling
- Read every question twice before answering.
- Use block letters if filling by hand.
- Double-check your spelling and dates.
- Answer all questions honestly. Do not leave blanks.
- Review the form before submitting.
Common Mistakes To Avoid
- Using nicknames instead of full legal names.
- Incorrect passport number or expiry date.
- Missing answers (even if not applicable, write “N/A”).
- Mismatched information between documents and the form.

Paying The Visa Fee
Every visa application requires a fee. The amount varies depending on visa type and country. Fees are usually non-refundable, even if your application is rejected.
How To Pay
- Online payment (credit card, bank transfer)
- At the embassy (cash or card)
- Through partner agencies
Keep your payment receipt—it is required for your application.
Fee Comparison Table
| Country | Tourist Visa Fee | Student Visa Fee | Work Visa Fee |
|---|---|---|---|
| USA | $160 | $160 | $190 |
| UK | $130 | $450 | $610 |
| Australia | $140 | $420 | $280 |
Submitting Your Application
After filling out the form and preparing documents, you must submit your application. This step can be done online or at the embassy, depending on the country.
Online Submission
- Upload scanned documents.
- Fill out the online form.
- Pay the fee online.
- Receive a confirmation email.
Embassy Submission
- Make an appointment (usually required).
- Bring all documents in a folder.
- Submit the form and documents to the visa officer.
- Pay the fee if not paid online.
Practical Insight
Some embassies require you to book an appointment weeks in advance. Plan ahead, especially during busy travel seasons.

Attending The Interview (if Required)
Not all visa applications need an interview. But for student, work, or long-term visas, an interview is common. The visa officer will ask questions to check your purpose and eligibility.
Preparing For The Interview
- Review your documents and application answers.
- Practice simple English answers if needed.
- Dress neatly and arrive early.
- Bring all original documents.
Common Interview Questions
- Why do you want to visit this country?
- How will you pay for your stay?
- What are your plans after your visa expires?
- Have you traveled abroad before?
Extra Tips
Many people forget to bring their appointment confirmation letter. Always check your documents before leaving home.
Waiting For The Decision
After submission and interview, you must wait for your visa decision. Processing times vary by country and visa type.
How Long Does It Take?
- Tourist visa: 3-15 days
- Student visa: 2-8 weeks
- Work visa: 1-3 months
Some embassies offer express processing for an extra fee. Track your application status online if available.
What Happens Next?
You’ll get a notification by email, SMS, or mail. If approved, your passport will have the visa stamp or sticker. If rejected, you’ll get a letter explaining the reason.
Hidden Insight
If your visa is rejected, you can often reapply or appeal. Many beginners think rejection is permanent, but mistakes can be fixed.
Common Mistakes And How To Avoid Them
Visa applications are often rejected due to small errors. Avoid these common mistakes:
- Incomplete documents: Double-check every paper and make sure nothing is missing.
- Wrong visa type: Make sure your purpose matches the visa you apply for.
- Incorrect form details: Spell your name as in your passport.
- Expired passport: Your passport must be valid for at least 6 months after your trip.
- Unclear travel plans: Explain your itinerary and purpose clearly.
- Poor interview preparation: Practice answering questions in simple English.
- Ignoring updates: Visa rules change. Always check the latest requirements.
Tips For A Successful Visa Application
Applying for a visa is easier when you prepare well. Here are some practical tips:
- Start early. Visa processing can take weeks or months.
- Organize your documents in folders by category.
- Use checklists to make sure nothing is missed.
- Read embassy instructions carefully—each country is different.
- Ask for help if you’re unsure. Many embassies have help lines or FAQs.
- Keep copies of everything you submit.
Special Advice For Beginners
- If English is hard for you, ask a friend or teacher to review your answers.
- Don’t guess answers on the form—always check your documents.
- If you need translation, use certified translators to avoid problems.
Real-life Example
Let’s see how Maria, a student from India, applied for a US student visa:
Maria wanted to study in the US. She started by checking the US embassy website for student visa requirements. She got her admission letter from the university and collected all documents, including bank statements and passport photos. She filled the online application form, paid the $160 fee, and booked a visa interview.
At the interview, she explained why she wanted to study in the US and showed her documents. After two weeks, she got her visa approved.
Maria’s success came from:
- Checking requirements carefully
- Preparing documents early
- Practicing for the interview
Using Visa Agencies Or Consultants
Some people use visa agencies to help with their application. These are private companies that guide you, check your documents, and sometimes book appointments. While this can make the process smoother, there are risks.
Pros And Cons
- Pros: Less stress, expert advice, help with English
- Cons: Extra cost, risk of scams, some agencies give wrong advice
Only use agencies with good reviews and official licenses. You can check trusted agencies at the embassy website or through government lists.
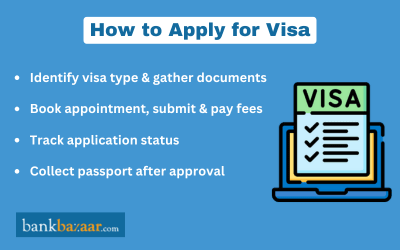
Tracking Your Application Status
Most embassies offer online tracking. You enter your application number on their website to see updates.
- Status: Received, In Process, Approved, Rejected
- You may get email or SMS updates
If you don’t hear back within the expected time, contact the embassy help desk.
What To Do After Getting Your Visa
Once your visa is approved, you need to prepare for your trip.
Steps To Take
- Check the visa details (dates, entry type, conditions).
- Book your flights and accommodation.
- Arrange health insurance if required.
- Learn about local laws and customs.
- Make copies of your visa and passport.
Remember, having a visa does not guarantee entry. The border officer can still ask questions or check documents.
Reapplying After Rejection
If your visa is rejected, don’t panic. Here’s what to do:
- Read the rejection letter carefully.
- Fix mistakes or missing documents.
- Reapply with corrected information.
- If you don’t understand the reason, contact the embassy for help.
Some embassies allow appeals. Follow their instructions and provide extra evidence if needed.
Frequently Asked Questions
What Documents Do I Need For A Tourist Visa?
You usually need your passport, visa application form, photos, proof of funds, travel itinerary, and sometimes hotel bookings. Always check the official embassy website for the exact list.
How Long Does A Visa Application Take?
Processing times vary. Tourist visas can take 3-15 days. Student visas may need 2-8 weeks. Work visas take longer, sometimes 1-3 months. Check your embassy’s website for the latest updates.
Can I Apply For A Visa Online?
Many countries offer online visa applications. You fill the form, upload documents, and pay the fee on their website. For example, you can check US visa info at US Department of State.
What Should I Do If My Visa Is Rejected?
Read the rejection letter to understand why. Fix mistakes or missing documents. You can reapply or appeal, depending on the embassy rules. Don’t give up—many people succeed after correcting problems.
Is It Safe To Use Visa Agencies?
Some visa agencies are helpful and professional, but there are risks. Only use agencies listed on official embassy websites or with strong reviews. Avoid agencies that ask for extra money or promise “guaranteed visas. ”
Applying for a visa is a big step toward your travel, study, or work goals. With careful planning, attention to details, and the right documents, you can improve your chances of success. If you feel confused, ask for help and check official sources.
Remember, patience and preparation are your best friends in the visa process. Safe travels and good luck!

