

Ironing clothes may seem simple, but it’s a skill that can make a big difference in your daily life. Wearing crisp, well-ironed clothes can help you feel more confident and make a great impression at work, school, or social events.
Ironing is not just about removing wrinkles; it’s about caring for your wardrobe, extending the life of your garments, and presenting yourself at your best. Yet, many people find ironing confusing or even intimidating. Which setting should you use? How do you avoid burning your favorite shirt?

36% off Today’s Exclusive Deals
Limited-time Exclusive Deals. Check current discount on Amazon.
Check Price on Amazon As an Amazon Associate I earn from qualifying purchases.What’s the fastest way to get perfect results?
If you’ve ever struggled with stubborn creases, shiny marks, or ruined fabrics, you’re not alone. With a few practical tips, the right tools, and some simple techniques, anyone can learn how to iron clothes effectively. This guide will take you through everything you need to know—whether you’re new to ironing or looking to improve your results.
We’ll look at choosing the right equipment, preparing your clothes, setting the correct temperature, and ironing different fabrics safely. You’ll also discover pro tips, common mistakes to avoid, and answers to frequent questions. By the end, you’ll feel ready to tackle that pile of laundry with confidence and skill.
Why Ironing Clothes Matters
Ironing is more than a chore—it’s an investment in yourself and your wardrobe. Wrinkle-free clothes show that you care about details, which can influence how others see you in job interviews, meetings, or special occasions. Ironing also helps clothing fibers return to their original shape, keeping garments looking new for longer.
In fact, according to a survey by the American Cleaning Institute, 67% of people notice when someone’s clothes are wrinkled. This small detail can impact first impressions, especially in professional settings. Well-ironed clothes can even boost your own self-confidence.
Essential Tools And Equipment
Before you start ironing, it’s important to have the right tools. The basic equipment you’ll need includes:
- Iron: There are several types of irons, each with unique features. Steam irons are most common and effective for everyday use.
- Ironing Board: A sturdy, adjustable board gives you a flat surface and can make ironing easier and safer.
- Spray Bottle: Useful for adding a little moisture to stubborn wrinkles.
- Pressing Cloth: A thin cotton cloth placed between the iron and delicate fabrics to prevent shine or burning.
- Distilled Water: Helps prevent mineral buildup in your iron, especially in hard water areas.
Choosing the right iron can make a big difference. Here’s a quick comparison of common iron types:
| Type | Pros | Cons | Best For |
|---|---|---|---|
| Steam Iron | Fast, effective on most fabrics, adds moisture | Needs water, heavier | Everyday use |
| Dry Iron | Lighter, simple to use | No steam for tough wrinkles | Delicate or vintage fabrics |
| Travel Iron | Compact, portable | Small water tank, less power | Travel, small loads |
| Garment Steamer | Quick, safe for delicate fabrics | Less crisp finish, not for heavy materials | Suits, silk, curtains |
Pro Tip: Always check if your iron has an automatic shut-off feature. This adds safety in case you forget to turn it off.
Preparing To Iron
Good results start with good preparation. Rushing into ironing can damage clothes or waste time. Here’s how to get ready:
1. Check Clothing Labels
Most clothes have a care label with ironing instructions. These symbols tell you the best temperature and whether it’s safe to iron:
- Iron with one dot: Low heat (synthetics, silk)
- Iron with two dots: Medium heat (wool, polyester blends)
- Iron with three dots: High heat (cotton, linen)
- Crossed-out iron: Do not iron
Ignoring these symbols is a common mistake and can lead to burned or shiny patches.
2. Sort Clothes By Fabric Type
Ironing clothes in the right order saves time and prevents accidents. Start with delicate fabrics that need low heat, then move to thicker, heat-resistant fabrics. For example:
- Synthetic fabrics (nylon, polyester)
- Silk or satin
- Wool or blends
- Cotton and linen
3. Fill The Iron With Water
If you’re using a steam iron, fill it with distilled water to avoid mineral deposits. Tap water may cause stains or reduce the iron’s life.
4. Set Up Your Ironing Area
Choose a flat, stable spot with enough room to move clothes around. Make sure your ironing board is at waist height to avoid back strain. Keep the iron’s cord out of the way.
5. Pre-dampen Clothes
Slightly damp clothes iron more easily. You can use a spray bottle to mist stubborn wrinkles. Some people also iron clothes straight from the washing machine while they’re still damp—this can speed up the process.
Non-Obvious Insight: Ironing clothes that are bone dry often requires more effort and can lead to uneven results. Pre-dampening makes a big difference.
Understanding Iron Settings
Modern irons come with adjustable temperature settings for different fabrics. Using the wrong setting is a leading cause of damage.
Here’s a quick guide:
| Fabric Type | Recommended Setting | Steam? | Special Tips |
|---|---|---|---|
| Synthetics (polyester, nylon) | Low (1 dot) | Optional | Use pressing cloth |
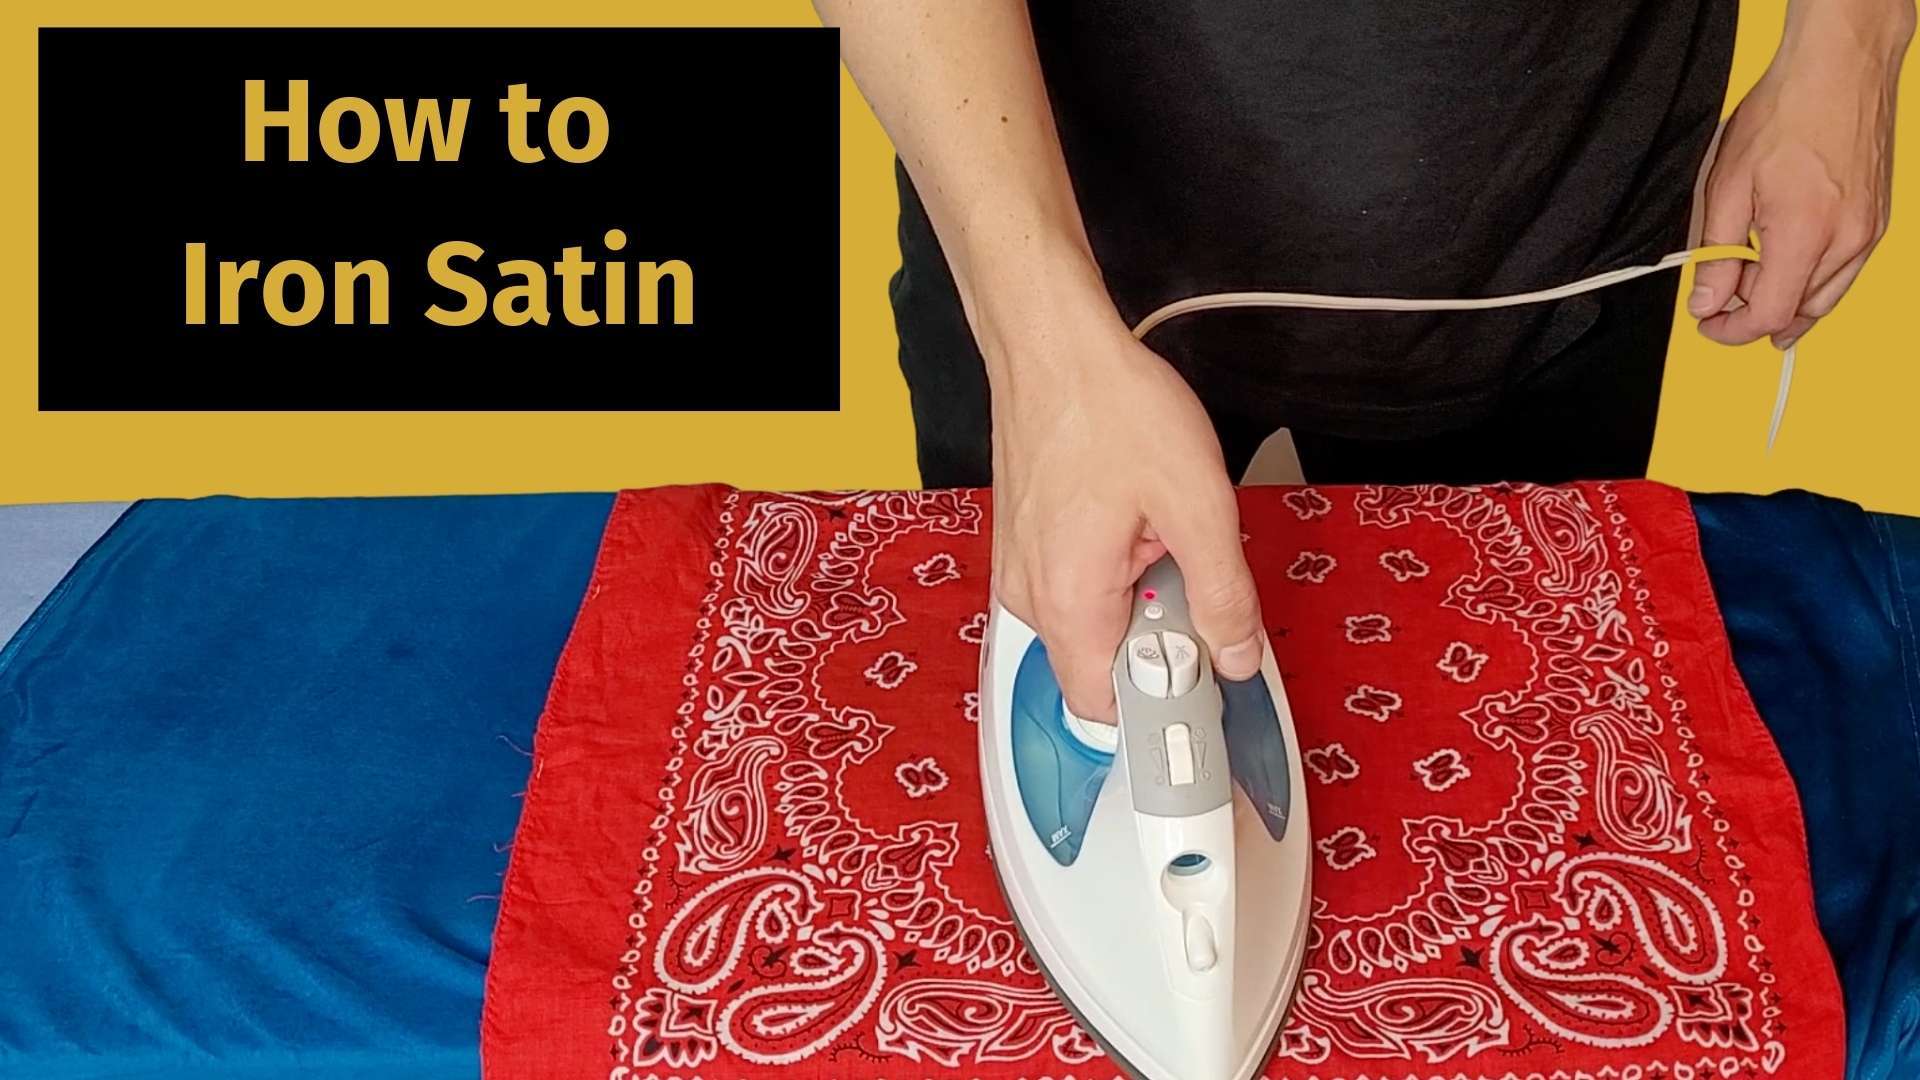
| Silk, Satin | Low (1 dot) | No | Iron inside out |
| Wool, Blends | Medium (2 dots) | Yes | Use pressing cloth |
| Cotton | High (3 dots) | Yes | Dampen fabric |
| Linen | High (3 dots) | Yes | Iron while damp |
Pro Tip: Start with the lowest setting and increase as needed. Irons heat up faster than they cool down.
Step-by-step Guide: How To Iron Clothes
Ironing can be broken down into a clear, repeatable process. Follow these steps for best results:
1. Plug In And Preheat The Iron
Turn on your iron and set it to the recommended temperature for your first garment. Wait until it’s fully heated—most irons have a light that indicates when they’re ready.
2. Prepare The Garment
Lay the item flat on the ironing board. Smooth out large wrinkles with your hands. If the garment is buttoned, unbutton it for easier access.
3. Iron In Sections
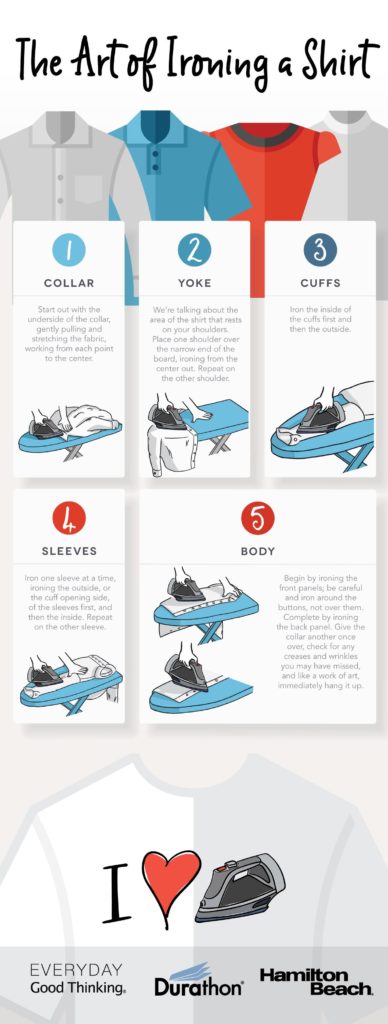
Work on one area at a time. For shirts, start with the collar, then move to the cuffs, sleeves, and finally the body. For pants, iron the waistband, pockets, and then the legs.
Order matters—ironing detailed sections first (like collars and cuffs) prevents new wrinkles from forming as you handle the garment.
4. Use The Steam And Spray Features
For tough wrinkles, press the steam button or lightly mist the fabric with water. Hold the iron just above the fabric to let the steam penetrate deep creases.
5. Move The Iron Smoothly
Glide the iron slowly and evenly. Don’t leave it in one spot for too long—this can scorch the fabric or leave shiny marks. Use gentle pressure, letting the iron’s weight do most of the work.
6. Flip And Repeat
For thicker items, iron both sides. For delicate fabrics, iron inside out to avoid shine.
7. Hang Or Fold Immediately
Once finished, hang the garment on a hanger or fold it neatly. This prevents new wrinkles from forming as it cools.
Non-Obvious Insight: Letting clothes cool before wearing or storing them helps set the pressed look and prevents wrinkles from returning.
Ironing Specific Garments
Different types of clothing require slightly different techniques. Here’s how to iron some of the most common items:
Shirts
- Collar: Lay flat, iron from the points to the center on both sides.
- Cuffs: Unbutton, iron inside first, then outside.
- Sleeves: Lay one sleeve flat, iron from the shoulder to the cuff, then flip and repeat.
- Body: Start with the yoke (shoulder area), then the front panels, and finally the back.
Tip: Use a sleeve board if you have one for crisp sleeves.
Pants And Trousers
- Waistband: Iron inside and out.
- Pockets: Pull inside out and iron flat.
- Legs: Lay one leg flat, iron from thigh to ankle. For creases, fold along the natural crease and press firmly.
Dresses
- Start with detailed areas like collars and cuffs.
- Iron the bodice, then move to the skirt.
- For pleats, hold the pleat in place and press along the fold.
Skirts
- Iron the waistband first.
- For pleated skirts, use a pressing cloth and iron each pleat separately.
T-shirts
- Use low to medium heat.
- Iron inside out to avoid shiny marks, especially on prints.
Common Mistake: Rushing or skipping detailed areas (like collars) leads to a less polished finish.
Handling Delicate And Difficult Fabrics
Some fabrics need special care to avoid damage:
Silk And Satin
- Use the lowest heat setting.
- Iron inside out, using a pressing cloth.
- Do not use steam.
Wool
- Use medium heat with steam.
- Always use a pressing cloth to avoid shiny spots.
- Iron in the direction of the nap (fiber direction).
Linen
- Iron while damp, using high heat and plenty of steam.
- For best results, iron on the reverse side.
Synthetics
- Use low heat.
- Avoid steam unless the label says it’s safe.
- Always test on a hidden area first.
How To Remove Stubborn Wrinkles
Some wrinkles just won’t go away with basic ironing. Here’s what you can do:
- Extra Steam: Hold the iron just above the fabric and use a burst of steam.
- Damp Cloth: Place a slightly wet pressing cloth over the wrinkle and iron on top.
- Re-Dampen: Spray water directly onto the crease and iron while still damp.
- Stretch and Iron: Gently stretch the fabric while ironing to smooth out deep creases.
Pro Tip: For really stubborn wrinkles, hang the garment in a steamy bathroom for a few minutes before ironing.

Safety Tips For Ironing
Irons get very hot and can be dangerous if not handled properly. Here’s how to stay safe:
- Always unplug the iron when filling with water or when not in use.
- Never leave a hot iron face down on fabric or the ironing board.
- Keep the cord away from the ironing area to avoid tripping.
- Store the iron only when completely cool.
- Keep children and pets away from the ironing area.
Statistic: According to the National Fire Protection Association, appliances like irons cause over 2,000 household fires per year in the US. Always stay alert when ironing.
Ironing Vs. Steaming: Which Is Better?
Both ironing and steaming remove wrinkles, but each has unique advantages. Here’s a quick comparison to help you decide:
| Method | Best For | Pros | Cons |
|---|---|---|---|
| Ironing | Cotton, linen, dress shirts | Crisp finish, sharp creases | More time, risk of burns |
| Steaming | Delicates, suits, curtains | Quick, gentle on fabric | Less crisp, hard for thick fabrics |
Experience-Based Guide: Many people find steaming easier for quick touch-ups, but ironing gives a sharper, more professional look. If you want both speed and perfect creases, consider owning both tools.
Storing And Maintaining Your Iron
A well-maintained iron lasts longer and works better. Here’s how to care for it:
- Empty the Water Tank: After each use, pour out leftover water to prevent mold.
- Clean the Soleplate: If you notice residue or sticking, wipe the soleplate with a damp cloth while the iron is cool. For stubborn buildup, use a paste of baking soda and water.
- Descale Regularly: If you live in a hard water area, descale your iron as recommended by the manufacturer. This keeps steam holes clear.
- Store Upright: Always store your iron upright and out of reach of children.
Non-Obvious Insight: Using distilled water in your iron not only prevents buildup but also reduces the risk of rusty stains on your clothes.
Common Ironing Mistakes And How To Avoid Them
Even experienced ironers make mistakes. Here are some common errors and how to prevent them:
- Using the Wrong Temperature: Always check the care label before setting the iron.
- Skipping the Pressing Cloth: On delicate or dark fabrics, always use a pressing cloth to avoid shine or burns.
- Not Cleaning the Iron: A dirty soleplate can transfer stains to clothes.
- Ironing Dirty Clothes: Heat can set stains, making them impossible to remove.
- Rushing: Moving too fast creates new wrinkles and can damage fabric.
Pro Tip: Take your time, follow the correct order, and use the right settings for each fabric.
Quick Fixes For Ironing Emergencies
Sometimes you don’t have time to iron, or you’re on the go. Here are a few fast fixes:
- Shower Steam: Hang the garment in the bathroom while you shower. Steam helps relax wrinkles.
- Hair Dryer: Lightly dampen the wrinkled area and blow dry on low heat.
- Wrinkle Release Spray: Available at most stores—spray, smooth, and let dry.
- Towel Roll: Lay the garment flat, roll it up in a damp towel, press gently, then hang.
These aren’t a replacement for ironing, but they work in a pinch.
Frequently Asked Questions
What Should I Do If My Iron Sticks To Clothes?
If your iron sticks, it may be too hot or the soleplate may have residue. Turn off the iron, let it cool, and clean the soleplate with a damp cloth or a baking soda paste. Always match the heat setting to the fabric.
Can I Iron Clothes Without An Ironing Board?
Yes. You can use a flat, heat-resistant surface like a table or countertop. Cover it with a thick towel for protection. Avoid ironing on beds, as the soft surface can cause uneven results.
How Often Should I Clean My Iron?
It’s best to wipe the soleplate after each use and descale the iron every few months, especially if you use tap water. Regular cleaning prevents stains and keeps the iron working smoothly.
Is It Safe To Iron Printed T-shirts?
Yes, but always iron printed T-shirts inside out and use a low to medium heat setting. Avoid direct contact between the iron and the print to prevent melting or sticking.
What Is The Difference Between Pressing And Ironing?
Ironing involves sliding the iron back and forth to remove wrinkles. Pressing means lifting and setting the iron down in one spot, which is useful for creating sharp creases or working with delicate fabrics.
Ironing is a practical skill that pays off in many ways. With the right tools, good preparation, and a few key techniques, you can keep your clothes looking sharp and extend their life. Remember to always check care labels, use the correct temperature, and handle your iron with care. Over time, you’ll find that ironing becomes faster and easier—and your wardrobe will thank you for it. For more in-depth fabric care tips, visit the Consumer Reports guide on ironing and laundry care.
Confidence in your appearance starts with the basics. With these tips, you’re ready to iron clothes like a pro—no matter what’s in your laundry basket.

