

Hanging shelves might look simple, but there’s a lot more to it than just drilling holes and screwing into the wall. Well-placed shelves can transform a room, create new storage space, and even showcase your personality through the things you display.
But poorly hung shelves can lead to headaches, damage your walls, or worse—cause accidents. Whether you’re a first-time DIYer or someone with a few projects under your belt, understanding the right way to hang shelves will save you time and trouble.

36% off Today’s Exclusive Deals
Limited-time Exclusive Deals. Check current discount on Amazon.
Check Price on Amazon As an Amazon Associate I earn from qualifying purchases.This guide will help you master the process with clear steps, practical tips, and insights that most beginners miss.
Choosing The Right Shelf For Your Space
Before you start drilling, you need to select a shelf that fits your needs and your space. Not all shelves are created equal, and your choice will affect how you hang them.
Types Of Shelves
- Floating shelves: These have hidden brackets, giving a clean look.
- Bracket shelves: The shelf sits on visible supports.
- Corner shelves: Designed to fit into corners.
- Modular shelves: Adjustable systems for flexible arrangements.
Each type has its own installation method and weight limits.
Material Matters
Most shelves are made from wood, MDF (Medium Density Fiberboard), or metal. Real wood is strong but heavier; MDF is cheaper but less sturdy. Metal shelves are durable but can be harder to install.
Weight Capacity
Always check the maximum weight rating for your shelf and brackets. Overloading can lead to shelf failure. As a rule, floating shelves support less weight than bracketed ones. For heavy objects (like books), opt for sturdy brackets and real wood.
Shelf Size And Placement
Measure your wall and think about what you’ll put on the shelf. Leave enough space above and below for items, and don’t place shelves too high or low. For living rooms, eye-level is usually best (about 48–54 inches from the floor).
Tools And Materials You Need
Having the right tools will make your job much easier and safer. Here’s what you’ll need for most shelf installations:
- Drill and drill bits (masonry bits for brick/concrete, wood bits for studs)
- Level (preferably a bubble or laser level)
- Tape measure
- Pencil
- Stud finder (for drywall installations)
- Screwdriver
- Anchors and screws (matched to your wall type and shelf weight)
- Shelving and brackets (as needed)
- Wall plugs (for hollow walls)
- Hammer (sometimes for wall plugs)
- Protective eyewear
For floating shelves, you may also need a mounting template (often included in kits).
Understanding Your Wall Type
Walls come in different materials, and each requires a slightly different approach. Using the wrong method can cause shelves to pull loose or damage your wall.
Common Wall Types
| Wall Type | Common In | Drilling Tool | Anchor Type |
|---|---|---|---|
| Drywall | Modern homes | Standard drill | Plastic or toggle anchors |
| Plaster | Older homes | Drill or masonry bit | Special plaster anchors |
| Brick/Concrete | Basements, exteriors | Masonry drill | Masonry anchors |
| Wood Stud | Behind drywall/plaster | Standard drill | Wood screws (no anchors) |
Pro tip: For maximum strength, always aim to anchor at least one bracket into a stud.
Planning Shelf Placement
Where you hang your shelf is just as important as how you hang it. Take the time to plan before making any holes.
Step-by-step Planning
- Identify wall obstacles: Look for light switches, outlets, or pipes inside the wall.
- Mark shelf height: Use a tape measure and pencil.
- Use a level: Draw a straight, level line where the shelf will sit.
- Check stud locations: Use a stud finder to locate studs. Mark their position along your line.
- Visualize the result: Hold the shelf up to the wall, or tape up paper templates to see how it looks.
Common mistake: Relying on “eyeballing” can result in crooked shelves. Always use a level.
Marking And Measuring For Accuracy
Precise measurements are the foundation of a good installation. A small error can mean a lopsided shelf.
Key Steps
- Measure bracket placement: If using brackets, measure equal distances from each end of the shelf.
- Transfer measurements: Mark bracket holes on the wall, double-checking the distance between them.
- Double-check alignment: Set your level on top of the marks to confirm everything lines up.
Insider tip: Mark the pilot hole locations for both the shelf and brackets. This makes installation faster and more accurate.
Drilling And Anchoring: Getting It Right
Drilling into the wall is the point of no return. Take your time to get this part right.
Pilot Holes
Always drill pilot holes first. They guide screws into the wall and reduce the chance of cracking.
- For drywall: Use a bit the size of your anchor.
- For wood studs: Use a slightly smaller bit than your screw.
Choosing The Right Anchor
Not all wall anchors are equal. Here’s a quick comparison:
| Anchor Type | Best For | Weight Limit | Notes |
|---|---|---|---|
| Plastic anchor | Light loads, drywall | Up to 20 lbs | Easy to install |
| Toggler/toggle bolt | Medium to heavy loads, drywall/plaster | Up to 50 lbs | Good grip, larger holes |
| Masonry anchor | Brick/concrete | Varies by size | Requires masonry drill |
| Wood screw | Studs | Up to 100 lbs | Best support |
Installing Anchors
- Drill pilot holes at your marked spots.
- Insert wall anchors (if needed).
- Tap gently with a hammer to set flush with the wall.
Special advice: For heavy shelves, use toggle bolts or screw directly into studs.

Mounting The Brackets Or Shelf
Now you’re ready to attach the shelf or its supports.
Bracket Shelves
- Hold brackets up to the wall, lining up holes with your anchors.
- Insert screws and tighten.
- Check that brackets are level before fully tightening.
Floating Shelves
- Attach the hidden mounting bracket to the wall first.
- Slide the shelf onto the bracket, following manufacturer instructions.
- Secure with set screws if provided.
Note: Floating shelves often require more precise mounting. If the bracket isn’t perfectly level, the shelf will not sit flat.
Testing Stability
After installation, gently apply pressure to check for movement. A properly mounted shelf should not wobble or sag.
Attaching The Shelf And Final Adjustments
With the supports in place, it’s time to finish the job.
- Place the shelf on the brackets, or slide it onto the floating supports.
- For bracket shelves, use screws from underneath to secure the shelf if holes are provided.
- Double-check with a level.
- Adjust as needed before loading any items.
Expert insight: Leave the shelf empty for a few hours to ensure it’s stable before adding weight.

Finishing Touches And Styling
Hanging the shelf is only half the story. The way you style and use the shelf makes a big difference.
Weight Distribution
Place heavier items near the brackets or wall anchors. Lighter objects can go toward the ends. This prevents sagging and extends shelf life.
Visual Balance
Mix objects of different heights and shapes for a visually pleasing look. Avoid overcrowding, which can make shelves look messy and add unnecessary weight.
Safety Tips
- For shelves above beds or couches, avoid displaying heavy or breakable items.
- If you have children, consider using anti-tip hardware or placing shelves higher.
Common Mistakes And How To Avoid Them
Even with instructions, it’s easy to slip up. Here are problems people often face and how to avoid them.
- Skipping the stud finder: Anchoring into drywall alone for heavy loads is risky. Always find a stud if possible.
- Not using a level: Eyeballing almost always leads to crooked shelves.
- Wrong anchors: Using light-duty anchors for heavy shelves will cause failure.
- Poor measurement: Rushing measurements leads to uneven shelves and extra holes.
- Ignoring wall type: Treating all walls the same can cause anchors to fail or wall damage.
- Overloading: Exceeding weight limits leads to sagging or collapse.
- Not checking for pipes/wires: Accidentally drilling into a wire or pipe is dangerous and expensive.
Unusual tip: Test the shelf’s stability by pressing down with both hands before adding items. This can reveal hidden weaknesses.
Advanced Shelf Hanging: Special Scenarios
Some spaces and shelf types require extra steps or creativity.
Corner Shelves
- Measure both walls for even placement.
- Use a level on both axes.
- Secure into studs if possible; use heavy-duty anchors if not.
Hanging Shelves On Tile
- Use masking tape on the tile before drilling to prevent the bit from slipping.
- Use a masonry bit.
- Drill slowly and steadily.
Installing Multiple Shelves
- Use a template or spacer to keep shelves evenly spaced.
- Mark all positions before drilling to ensure alignment.
- Check each shelf with a level before proceeding to the next.
Shelves On Uneven Walls
- Use shims (thin, wedge-shaped pieces) behind brackets to even out the shelf.
- Check with a level after installing each support.
Pro tip: For large, heavy-duty shelves, consider using a French cleat system—this is a woodworking method that creates a super strong, removable mount.
Shelf Maintenance And Long-term Care
Shelves don’t need much maintenance, but a few habits will keep them safe and looking great.
- Dust regularly to prevent buildup, which can hide damage or instability.
- Check brackets and anchors every few months, especially for shelves holding heavy items.
- For wooden shelves, avoid placing them in direct sunlight or near heat sources, which can cause warping.
- If shelves start to sag, reduce the load and check for loose screws or anchors.
Insider insight: If you hear creaking or see any movement when removing items, inspect immediately—small shifts can become big problems over time.
When To Call A Professional
Most shelves can be hung by a careful DIYer, but some situations call for expert help:
- Walls made of stone, glass, or unusually hard material.
- Heavy-duty shelving (supporting over 100 lbs).
- Uncertainty about what’s behind the wall (pipes, wiring).
- Complex arrangements, like wall-to-wall bookshelves.
A professional can ensure safety and a clean finish, especially for valuable or fragile walls.
Real-world Example: Living Room Transformation
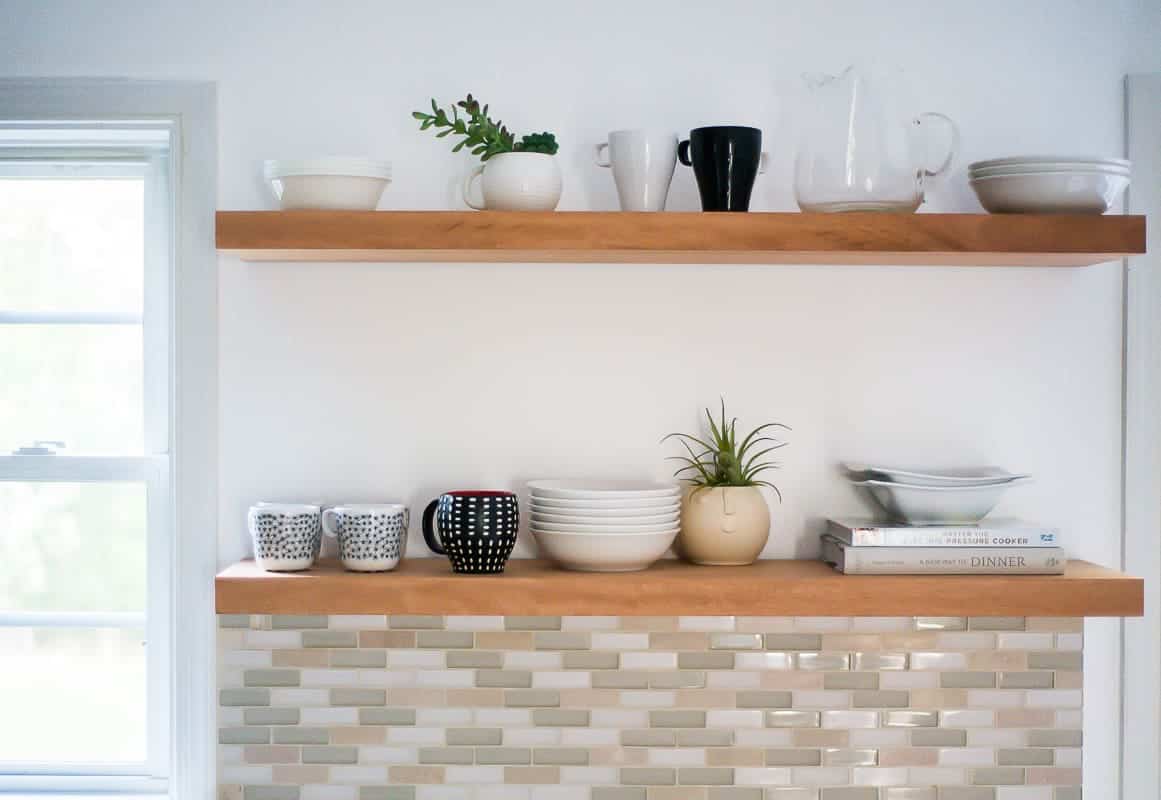
Consider a small living room with limited storage. By adding two floating shelves above the TV, you can display books and plants without taking up floor space. Using a stud finder, you anchor both shelves at two studs each and use heavy-duty floating brackets rated for 50 lbs.
After installation, the room feels brighter and more organized. This simple project adds both function and style—without clutter.
Eco-friendly Tips For Shelf Hanging
- Use recycled or reclaimed wood for your shelves.
- Choose water-based paints or finishes.
- Select hardware made from recycled metal where possible.
- Reuse existing brackets instead of buying new ones.
Little-known fact: Many home improvement stores now offer eco-friendly shelving options that look great and reduce your environmental impact.
Frequently Asked Questions
What Is The Safest Way To Hang Shelves On Drywall?
For drywall, the safest way is to anchor at least one bracket into a wall stud. Use a stud finder to locate studs. If you must hang between studs, use heavy-duty toggle or molly bolts designed for drywall. Always check the shelf’s weight rating and don’t overload.
How Much Weight Can A Floating Shelf Hold?
Most floating shelves hold 15–50 lbs depending on the quality of the bracket, wall type, and installation. Real wood and metal brackets generally support more than MDF or particle board. Always consult the manufacturer’s instructions, and don’t exceed the listed limit.
How Do I Hang Shelves Without Damaging The Wall?
If you want to avoid wall damage, consider adhesive shelf systems for light loads or use existing holes (from previous shelves or fixtures). For renters, removable wall hooks or tension pole shelves are good alternatives. However, these options hold less weight than drilled shelves.
Can I Hang Shelves On Tile Or Brick Walls?
Yes, but you’ll need the right tools. Use a masonry drill bit for brick or concrete, and drill slowly to avoid cracking tile. Insert masonry anchors or plugs before screwing in the bracket. Always wear safety glasses and check for hidden pipes.
What Are The Most Common Mistakes When Hanging Shelves?
The most common mistakes are not using a level, missing the studs, choosing the wrong anchors, poor measurements, and overloading the shelf. Take your time to plan, measure, and check each step, and your shelves will be safe and sturdy.
Hanging shelves is a project that can add value, style, and storage to any room. With careful planning, the right tools, and attention to detail, you can achieve a professional look and lasting results. If you ever feel uncertain, don’t hesitate to consult an expert or refer to trusted resources like Family Handyman for more advanced tips. Your shelves can become both a functional and beautiful part of your home—enjoy the process and the transformation!

