

Making your own bread is both simple and rewarding. The smell of fresh bread in your kitchen is unforgettable, and the taste is even better. You control the ingredients, the flavor, and the texture. Whether you want to bake for health, fun, or saving money, learning how to make bread is a skill that pays off every time you slice a warm loaf.
While bread seems basic, mastering it can feel magical. In this guide, I’ll show you how to make classic yeast bread, explain the science behind it, and offer practical tips for beginners. I’ll also cover common mistakes, troubleshooting, and ways to customize your loaf.

36% off Today’s Exclusive Deals
Limited-time Exclusive Deals. Check current discount on Amazon.
Check Price on Amazon As an Amazon Associate I earn from qualifying purchases.By the end, you’ll have the knowledge and confidence to bake bread at home, even if you’ve never tried before.
Understanding The Basics Of Bread
Bread is one of the oldest prepared foods. Most loaves use just four main ingredients: flour, water, yeast, and salt. Each plays a key role. Flour provides structure. Yeast makes the bread rise. Water activates the yeast and forms the dough. Salt adds flavor and controls yeast growth. But bread is more than just mixing these together; it’s about timing, patience, and a little science.
Many cultures have their own bread traditions. Some are flatbreads, some are sourdough, some are sweet. In this article, we’ll focus on a basic yeast-risen loaf, which is the best place to start for beginners.
Key Ingredients And What They Do
Flour
Most bread uses wheat flour because it contains gluten. Gluten is a protein that gives dough its stretch and helps trap the bubbles that make bread rise. Bread flour has more protein (about 12-14%) than all-purpose flour, leading to a chewier, higher loaf. All-purpose flour works too, but the loaf may be a little softer and lower.
Other flours like whole wheat, rye, or spelt add flavor and nutrition, but they behave differently. Beginners should start with white bread flour for the best results. Here’s a quick comparison:
| Flour Type | Protein Content (%) | Result in Bread |
|---|---|---|
| Bread Flour | 12–14 | High rise, chewy texture |
| All-Purpose Flour | 10–12 | Softer, lower loaf |
| Whole Wheat Flour | 13–15 | Denser, more flavor |
| Rye Flour | 7–9 | Dense, earthy flavor |
Yeast
Yeast is a living organism. It eats sugar and releases carbon dioxide, making the bread rise. There are two main types for home bakers: active dry yeast and instant yeast. Active dry yeast needs to be dissolved in water first, while instant yeast can be mixed directly into the flour.
Fresh yeast is used in bakeries but is less common at home. Always check the expiration date—old yeast may not work. If you want to learn more about yeast, the Wikipedia page on baker’s yeast has excellent background information.
Water
Water binds everything together. It also controls the dough’s texture. Too much water leads to a sticky dough, too little makes it dry and hard to knead. Most bread uses “hydration” between 60% and 75% (that’s the weight of water compared to flour).
Salt
Salt is more than just flavor. It strengthens gluten, slows down yeast for better flavor, and helps the crust brown. Don’t skip it—unsalted bread tastes flat and bland.
Optional Ingredients
- Sugar: Feeds yeast and helps browning.
- Butter/Oil: Adds softness and flavor.
- Milk/Eggs: Make bread richer and softer.
- Seeds, Nuts, Dried Fruit: For extra taste and nutrition.
Many classic recipes use only the four main ingredients. Add extras once you’re comfortable with the basics.
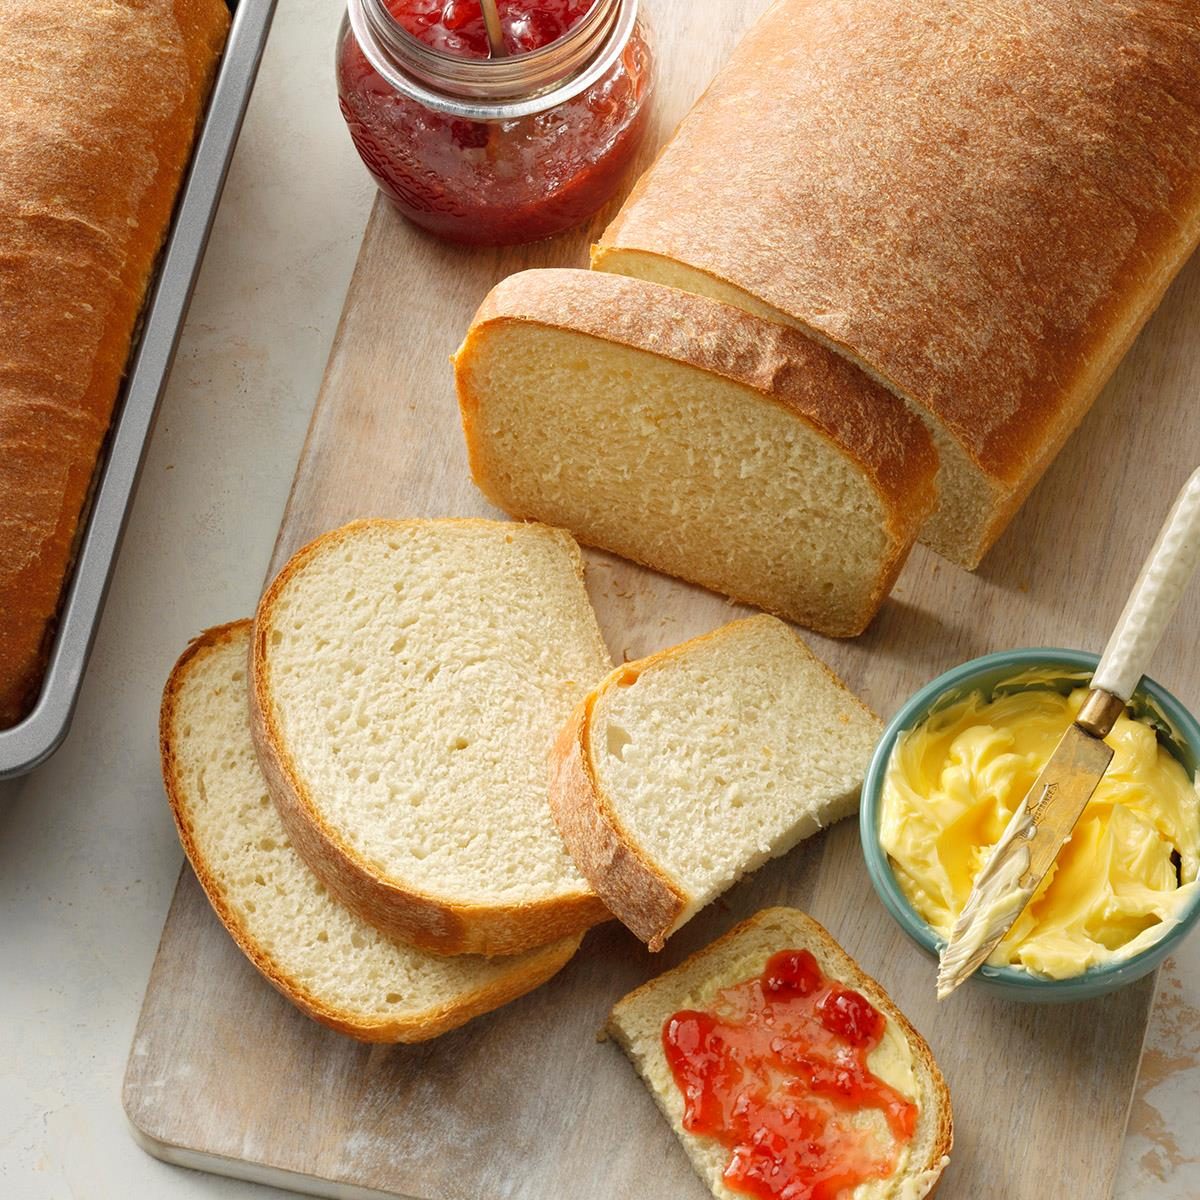
Tools You Need
Bread baking does not require fancy equipment. Here’s what you’ll need:
- Mixing bowl: Large enough for the dough to double in size.
- Wooden spoon or dough scraper: For mixing.
- Measuring cups or a kitchen scale: Weighing ingredients is more accurate.
- Loaf pan or baking sheet: Depends on the shape you want.
- Oven: Home ovens work fine.
- Kitchen towel or plastic wrap: To cover the dough as it rises.
- Cooling rack: Keeps bread crust crisp after baking.
A kitchen scale is a smart investment. It removes guesswork, especially with flour.
Classic White Bread Recipe
This recipe makes one standard loaf (about 1. 5 pounds) and is easy for beginners.
Ingredients
- Bread flour: 3 1/4 cups (400 grams)
- Water: 1 1/4 cups (300 ml), lukewarm (about 100°F/38°C)
- Instant yeast: 2 teaspoons (7 grams) or active dry yeast: 2 1/4 teaspoons (7 grams)
- Salt: 1 1/2 teaspoons (8 grams)
- Optional: 1 tablespoon sugar (12 grams) for a softer, sweeter loaf
Step-by-step Instructions
1. Mix The Dough
In a large bowl, combine the flour and salt. If using instant yeast, add it now. If using active dry yeast, dissolve it in the warm water with the sugar and let it sit for 5–10 minutes until bubbly.
Pour the water into the flour. Use a spoon or your hand to mix until it forms a rough dough. If it feels dry, add a little more water, a tablespoon at a time. The dough should be soft but not sticky.
2. Knead The Dough
Dust a clean surface with a little flour. Turn the dough out and knead for 8–10 minutes. Press with your palms, fold, and turn. The dough will become smooth, elastic, and only slightly tacky. If it sticks too much, use a bit more flour—but not too much, or your bread will be dry.
Non-obvious insight: Dough that’s too dry won’t rise well, and beginners often add too much flour while kneading. A slightly sticky dough is better than a stiff one.
3. First Rise (fermentation)
Place the dough in a lightly oiled bowl. Cover with a towel or plastic wrap. Let it rise in a warm, draft-free spot until doubled in size, about 1–2 hours.
Practical tip: If your kitchen is cold, place the bowl in your (turned-off) oven with the light on, or near a warm appliance.
4. Shape The Loaf
Punch down the dough to remove air. Turn it out and gently stretch into a rectangle. Roll it up tightly, pinch the seam, and place seam-side down in a greased loaf pan (or shape into a round and place on a baking sheet).
5. Second Rise (proofing)
Cover the dough again. Let it rise until it’s about 1 inch above the pan, 45–60 minutes.
Beginner mistake: Over-proofing. If the dough rises too much, it can collapse in the oven. It’s ready if it springs back slowly when poked with a finger.
6. Bake
Preheat your oven to 375°F (190°C). Bake for 30–35 minutes. The bread is done when golden brown and sounds hollow when tapped on the bottom. An instant-read thermometer inserted in the center should read about 200°F (93°C).
7. Cool
Remove from pan and cool on a rack. This keeps the crust crisp. Resist the urge to slice while hot; the steam finishes the cooking inside.
The Science Behind Bread
Bread baking is all about fermentation and gluten development.
- Fermentation: Yeast eats sugar, creating bubbles of gas that make the dough rise.
- Gluten: When you knead flour and water, gluten forms a stretchy network. It holds the gas, giving bread its structure.
Bread’s flavor improves with a slow rise. That’s why some recipes use less yeast and longer rising times (even overnight in the fridge). The slower the fermentation, the better the taste.
Common Mistakes And How To Avoid Them
Many first-time bakers run into similar problems. Here’s how to prevent them:
- Dense Bread: Usually from not kneading enough, or using cold water, or old yeast.
- Flat Loaf: Can happen if the dough was over-proofed (rose too long) or the oven wasn’t hot enough.
- Dough Too Sticky: Add flour slowly, but don’t overdo it. A sticky dough is normal at first.
- Crumbly Texture: Not enough water, or too much flour during kneading.
- Poor Flavor: Let the dough rise longer, or try a small amount of sugar for more depth.
- Gummy Center: Bread not baked long enough, or sliced too soon.
Non-obvious insight: Humidity and temperature in your kitchen can change how much water flour needs. Learn to adjust by “feel” rather than just following recipes.
Tips For Better Bread
- Weigh your ingredients for accuracy.
- Let dough rise in a clear, oiled container so you can see when it’s doubled.
- Slash the top of your loaf with a sharp knife just before baking for better oven spring and a nice look.
- For a crispier crust, place a pan of hot water in the oven to make steam.
- Experiment with longer, cooler fermentation (like overnight in the fridge) for better flavor.
Here’s a quick look at how rising time changes bread flavor and texture:
| Rising Time | Bread Flavor | Texture |
|---|---|---|
| 1 hour (warm) | Mild, yeasty | Softer, lighter crumb |
| 8–12 hours (cold) | Complex, tangy | Chewier, open crumb |
Simple Variations To Try
Once you’re comfortable with a basic loaf, try these easy changes:
- Swap half the flour for whole wheat for a nutty flavor.
- Add 2 tablespoons of olive oil for a softer, richer loaf.
- Mix in herbs (like rosemary) or seeds for extra taste.
- Brush the top with milk or egg for a shiny, golden crust.
- Sprinkle oats or sesame seeds on top before baking.
How To Store Homemade Bread
Fresh bread has no preservatives, so it can dry out quickly. Here’s how to keep it fresh:
- Cool completely before storing.
- Paper bag: Keeps crust crisp, but bread dries faster (good for same-day eating).
- Plastic bag or container: Keeps bread soft for 2–3 days.
- Freeze for longer storage: Slice first, wrap tightly, and freeze up to 3 months. Toast slices straight from frozen.
Do not refrigerate bread. Fridge temperatures make bread go stale faster.
Troubleshooting: When Things Go Wrong
Sometimes bread doesn’t turn out as expected. Here’s how to fix common issues:
Dough Didn’t Rise
- Check if the yeast is expired.
- Water may have been too hot (killed yeast) or too cold (yeast stayed asleep).
- Kitchen was too cold—try a warmer spot.
Bread Is Dense
- Not enough kneading.
- Too much flour added while shaping.
- Dough didn’t rise long enough.
Crust Too Hard Or Too Soft
- Hard crust: Baked too long or not enough steam in the oven.
- Soft crust: Cooled in the pan or wrapped while hot (traps steam).
Uneven Shape
- Dough wasn’t shaped tightly.
- Second rise was too short or too long.
Experimenting With Different Breads
Once you can bake a basic loaf, you can try more advanced styles:
- Sourdough: Uses wild yeast and bacteria for a tangy taste.
- Baguette: Crunchy crust, light inside, shaped long.
- Focaccia: Flat Italian bread, topped with olive oil and herbs.
- Enriched Breads: Add butter, eggs, or milk for softer, richer loaves (like brioche or challah).
Each style has its own method, but the core principles are the same.
Nutrition And Bread
Homemade bread can be healthier than store-bought. You control the ingredients—no unnecessary preservatives or additives. Whole grain flours add fiber, vitamins, and minerals. Even white bread can be part of a balanced diet if eaten in moderation.
A typical slice (about 40 grams) of plain white bread contains:
- Calories: 100
- Protein: 3 grams
- Carbs: 20 grams
- Fat: 1 gram
Whole wheat bread adds more fiber and nutrients. Adding seeds or nuts boosts protein and healthy fats.
Why Homemade Bread Beats Store-bought
There are several advantages to baking your own bread:
- Flavor: Nothing matches the taste of fresh-baked bread.
- Control: You choose the ingredients.
- No additives: Most store bread contains preservatives.
- Cost: Homemade bread is usually cheaper per loaf.
- Satisfaction: Baking is relaxing and rewarding.
Here’s a comparison between homemade and typical store-bought bread:
| Feature | Homemade Bread | Store-Bought Bread |
|---|---|---|
| Flavor | Fresh, customizable | Often bland or sweet |
| Ingredients | Simple, minimal | Preservatives, additives |
| Cost | Lower per loaf | Varies, often higher |
| Nutrition | Up to you | Standard, less fiber |
Frequently Asked Questions
How Do I Know When My Bread Is Done Baking?
Tap the bottom of the loaf—it should sound hollow. For extra accuracy, use a thermometer. Bread is done at an internal temperature of 200°F (93°C). If it’s pale or feels heavy, bake a few more minutes.
Can I Make Bread Without A Loaf Pan?
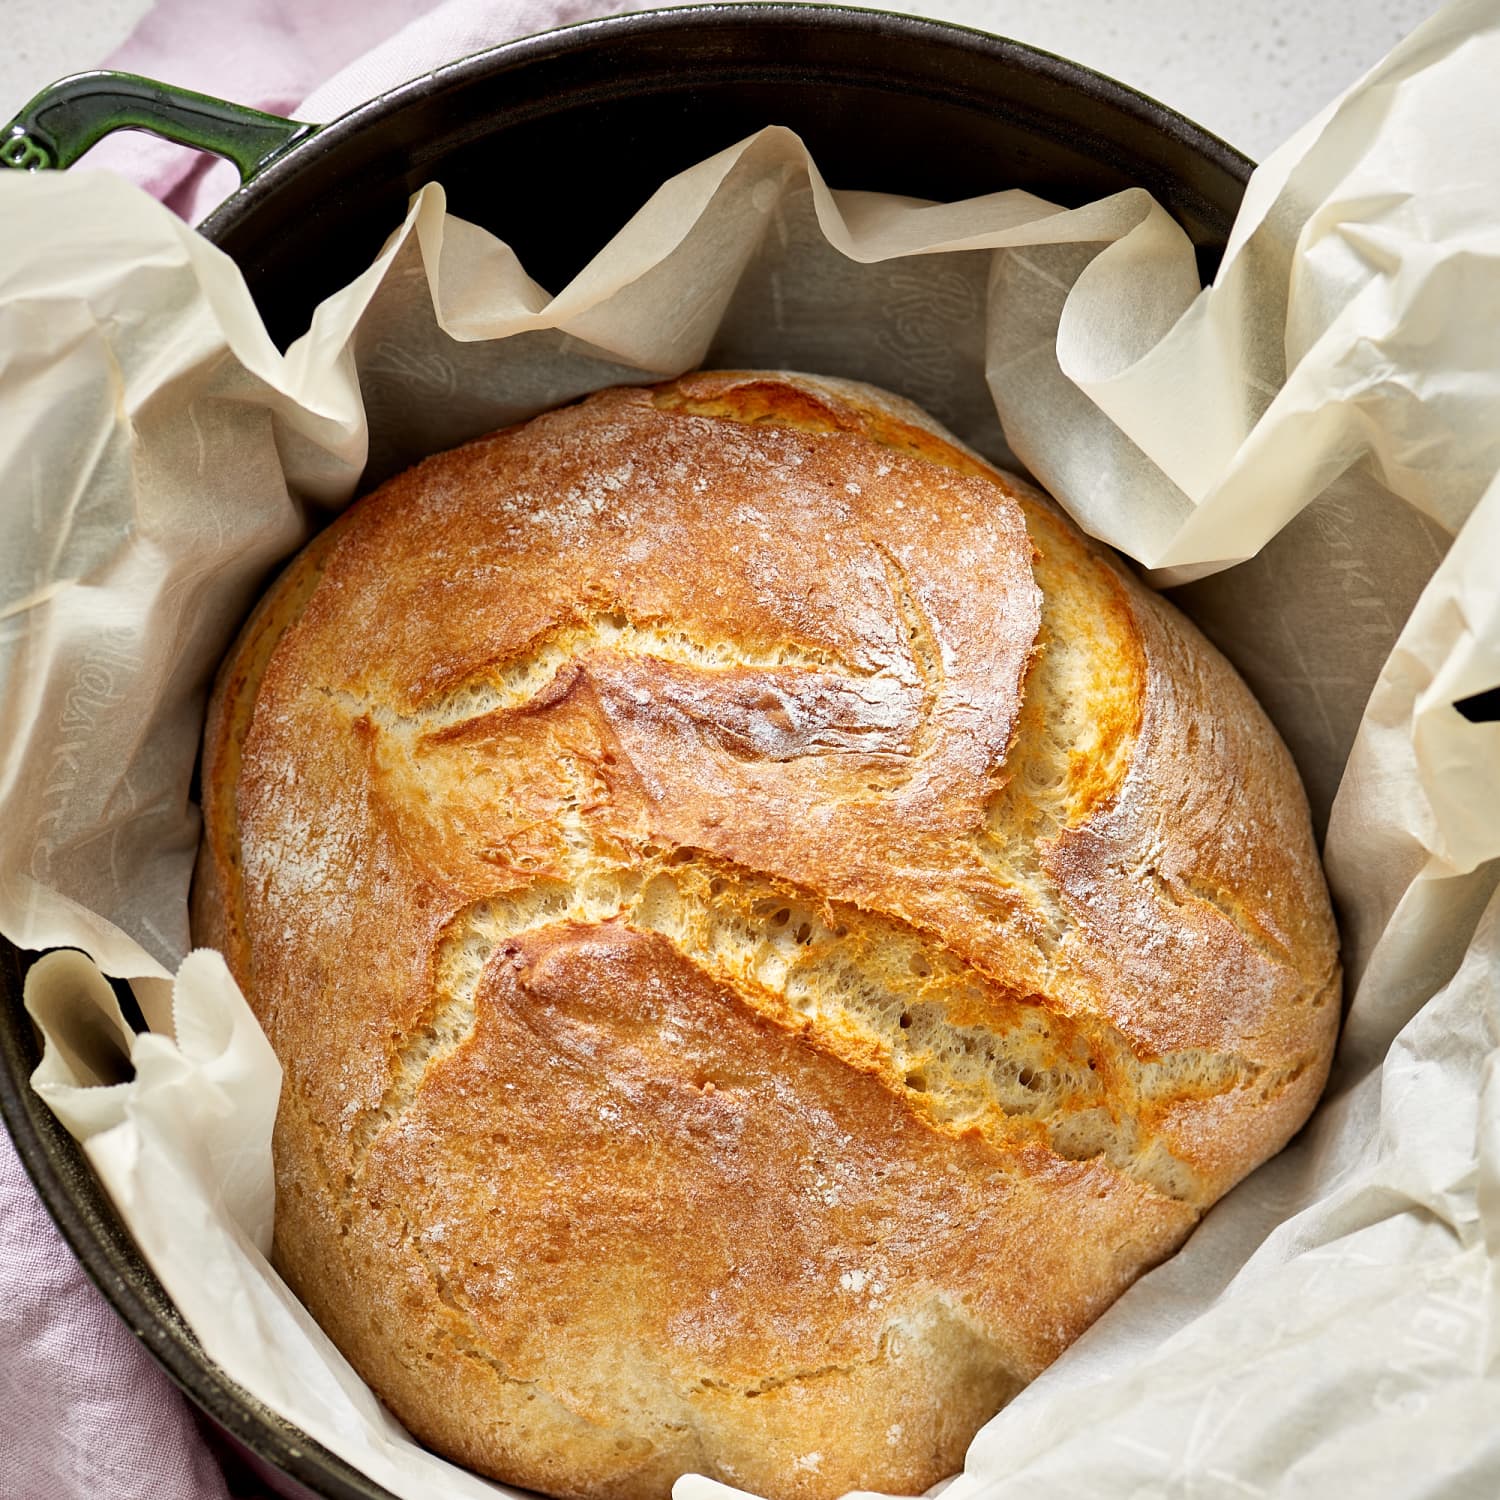
Yes. Shape the dough into a round or oval and bake on a parchment-lined baking sheet. This is called a “free-form” or “rustic” loaf. It will spread a bit more but still tastes great.
Why Is My Bread Dough Not Rising?
Possible reasons: old yeast, water too hot or cold, or the kitchen is too cool. Check your yeast before baking. Let dough rise in a warmer spot if possible.
How Can I Add More Flavor To My Bread?
Try a longer, colder rise (overnight in the fridge). Use whole grain flour, add a little olive oil, or mix in herbs, seeds, or spices. A touch of honey or malt syrup also boosts flavor.
How Do I Store Homemade Bread To Keep It Fresh?
Let it cool fully, then store in a plastic bag or airtight container for 2–3 days. For longer storage, slice and freeze the bread. Do not refrigerate—bread stales faster in the fridge.
Baking bread is as much about practice as recipes. Each loaf teaches you something new. With these steps and tips, you’ll soon enjoy fresh, delicious bread from your own oven. Happy baking!


