
Most Keurig K Slim troubleshooting issues are simple fixes like descaling, reseating, or cleaning parts.

Today's Exclusive Deals
Limited-time Exclusive Deals. Check current discount on Amazon.
Check Price on Amazon As an Amazon Associate I earn from qualifying purchases.I have spent years repairing and testing single-serve coffee makers, and I will walk you through clear, step-by-step Keurig K Slim troubleshooting. This guide covers causes, fixes, preventative care, and when to seek professional help. Read on to learn why your Keurig K Slim may act up and how to get it brewing reliably again.
Common Keurig K Slim Troubleshooting Problems and Quick Fixes
Many owners face the same set of issues with the Keurig K Slim Troubleshooting. These include no power, no heat, weak brew, slow flow, leaking, and error lights. Each issue often has a straightforward cause and fix you can try at home.
Today's Exclusive Deals
Limited-time Exclusive Deals. Check current discount on Amazon.
Check Price on Amazon As an Amazon Associate I earn from qualifying purchases.Typical quick fixes you can try now:
- Unplug the machine for 60 seconds, then plug back in to reset electronics.
- Reseat the water reservoir and K-Cup holder to restore proper contact.
- Clean the needle and exit area to remove coffee grounds or debris.
- Descale if brew times lengthen or taste changes.
- Replace old or poor-quality pods to rule out pod issues.
I rely on these quick checks in my own Keurig K Slim troubleshooting routine. They fix most problems within minutes.

Today's Exclusive Deals
Limited-time Exclusive Deals. Check current discount on Amazon.
Check Price on Amazon As an Amazon Associate I earn from qualifying purchases.Step-by-Step Keurig K Slim Troubleshooting Guide
Follow this ordered checklist to diagnose and fix Keurig K Slim Troubleshooting issues. Use the steps from top to bottom for the best results.
-
Basic reset and power checks
- Unplug the brewer for 60 seconds and reconnect.
- Verify outlet power with another device.
- Confirm the power button lights up.
-
Water reservoir and seating
- Remove the reservoir and inspect for cracks or scale.
- Reseat firmly until it clicks.
- Fill with fresh, cold water and try a test brew.
-
Needle and brew head cleaning
- Open the top and carefully remove the K-Cup holder.
- Use a paper clip or cleaning tool to clear the entrance and exit needles.
- Rinse the K-Cup holder and rinse the brew head area.
-
Descale process (if brew is slow or tastes off)
- Use a 50/50 solution of white vinegar and water or a manufacturer descaler.
- Run brew cycles without a K-Cup until solution runs low.
- Rinse with two full reservoirs of clean water.
-
Check for obstructions and leaks
- Inspect drip tray and internal channels for blockages.
- Look for water on the counter or under the brewer.
- Tighten or replace damaged parts if needed.
-
Test run
- Run a plain water brew without a K-Cup.
- Check for normal flow, heat, and brewing time.
- If problems persist, note the symptoms and move on to advanced steps.
These steps resolve most Keurig K Slim Troubleshooting issues. If you try all steps and the problem remains, consider the sections below for specific faults.

Descaling and Deep Cleaning for Keurig K Slim Troubleshooting
Hard water causes scale buildup inside the heater and tubing. Regular descaling is a core task in Keurig K Slim troubleshooting to keep flow and flavor consistent.
Why descaling matters:
- Scale restricts water flow, causing slow brews and machine strain.
- It reduces heat transfer, producing cooler cups.
- It can lead to internal leaks or error lights.
Descaling steps:
- Empty the reservoir and fill with a descaling solution or equal parts white vinegar and water.
- Run multiple brew cycles without a K-Cup until the solution runs low.
- Let the machine sit 20 minutes between cycles to loosen scale.
- Flush the reservoir twice with clean water and run full reservoirs until no vinegar smell remains.
Personal tip from experience: I descale my K Slim every 2–3 months when using hard water. It keeps brew times steady and prevents many common Keurig K Slim troubleshooting calls.

Water Flow, Weak Brew, and Slow Brew Fixes
If your machine pours slowly or the brew is weak, these issues often overlap in Keurig K Slim troubleshooting.
Common causes:
- Scale in the water lines or heating element.
- Clogged needles or K-Cup holder.
- Low water temperature due to heating element issues.
- Poorly seated reservoir or damaged seals.
How to fix slow or weak brews:
- Descale the unit following the descaling section.
- Clean entrance and exit needles to remove grounds.
- Inspect and reseat the reservoir and its O-ring or gasket.
- Try different K-Cup brands or sizes to rule out pod quality issues.
Example from the field: I fixed a slow-brew unit by removing old scale from the exit needle and reseating the reservoir. The machine returned to normal flow in under 15 minutes.

Error Lights, No Heat, and Power Issues
A Keurig K Slim that shows no lights, or lights but doesn’t heat, needs structured Keurig K Slim troubleshooting.
Troubleshooting steps for power and heat:
- Confirm outlet power and try a different outlet.
- Unplug and restart the brewer for 60 seconds.
- Check for visible damage to the power cord or plug.
- If lights show but no heat occurs, descale and run a few water-only cycles.
- Persistent no-heat usually needs professional repair or replacement of the heating element.
When to replace parts:
- Heating element failures often require part replacement.
- Severe electrical faults or burned components call for technician service.
- If the unit is under warranty, contact support first for authorized repair or replacement.
Leak Detection and Fixes
Leaks can be messy and damaging. Keurig K Slim troubleshooting for leaks focuses on seals, reservoir placement, and internal cracks.
Common leak sources:
- Misaligned reservoir or cracked tank.
- Damaged O-rings or gaskets where parts meet.
- Loose or blocked internal tubing caused by scale.
- Overfilling the reservoir or using an unstable surface.
How to find and fix leaks:
- Place the machine on paper towels and run a test brew to see where water appears.
- Inspect the reservoir for hairline cracks or damaged seals.
- Remove and replace worn gaskets or O-rings.
- Clean internal tubing by descaling and running flush cycles.
- If the leak is internal and persistent, seek professional repair.
Real-life note: I once diagnosed a persistent drip as a cracked reservoir base. A replacement reservoir solved the issue instantly.

Maintenance Tips to Avoid Keurig K Slim Troubleshooting
Routine maintenance reduces the need for troubleshooting. Simple habits keep your Keurig K Slim running smoothly.
Daily and weekly care:
- Empty and rinse the drip tray and K-Cup holder weekly.
- Refill with fresh water daily and avoid stale water.
- Wipe the exterior and the reservoir rim to keep seals clean.
Monthly care:
- Descale if you use hard water.
- Deep clean the needle and internal areas.
- Inspect power cord and reservoir for wear.
Seasonal or annual care:
- Replace worn parts like gaskets, the reservoir, or the K-Cup holder if cracked.
- Consider using filtered water to reduce scale buildup.
These small actions cut down the time you’ll spend on Keurig K Slim troubleshooting.

When to Contact Support or Consider Repair
Not all problems can be resolved at home during Keurig K Slim troubleshooting. Knowing when to get help saves time.
Reach out for professional help when:
- The unit has electrical smells, sparks, or smoke.
- You find internal component failures or broken heating elements.
- Multiple fixes fail and the machine remains unreliable.
- The brewer is under warranty—use authorized service to avoid voiding protection.
If parts are available, a trained technician can replace heating elements or internal pumps. For older units, compare repair costs to replacement value.

PAA-Style Questions (People Also Ask)
What should I do if my Keurig K Slim won’t brew?
- Check power, reseat the water reservoir, clean the needles, and descale. If brews still fail, contact support.
How often should I descale my Keurig K Slim?
- Descale every 2–3 months with hard water or every 4–6 months with soft or filtered water.
Why is my Keurig K Slim leaking from the bottom?
- Likely causes are a cracked reservoir, misaligned seals, or internal tubing damage. Inspect seals and test for cracks.
Can I use vinegar to descale the Keurig K Slim?
- Yes. Equal parts white vinegar and water work. Rinse thoroughly after descaling to remove odor.
Is a slow brew always a sign of a broken pump?
- Not always. Slow brews commonly result from scale buildup or clogged needles. Only consider pump failure after cleaning and descaling.
[No CodeImg here per instructions]
Frequently Asked Questions of Keurig K Slim Troubleshooting
Why does my Keurig K Slim say descaling but I just cleaned it?
If the descaling light is on, the machine needs a full descaling cycle. Running a brief clean without descaling solution may not reset the sensor. Complete the descaling steps and restart the brewer.
How do I clean the needles safely?
Turn off and unplug the brewer, remove the K-Cup holder, and use a paper clip or the manufacturer’s tool to clear needle holes. Rinse parts under warm water afterward.
My Keurig brews but the coffee is cold. What can I do?
Descale the unit and run a few water-only cycles to restore heat transfer. If the problem persists, the heating element may be failing and needs service.
Can I use filtered water in the Keurig K Slim?
Yes, filtered water reduces scale build-up and improves taste. Avoid distilled water because it can affect sensors and seals over long-term use.
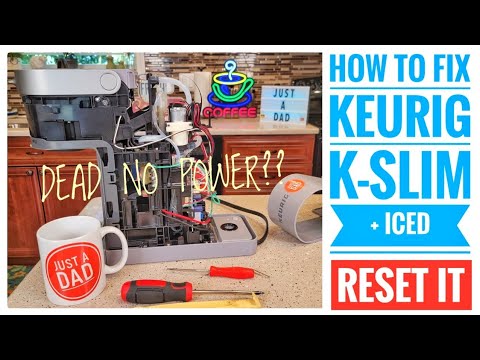
How do I reset my Keurig K Slim?
Unplug the brewer for at least 60 seconds and then plug it back in. This soft reset clears some minor electronic errors and restores normal operation.
Conclusion
Keurig K Slim troubleshooting often boils down to simple cleaning, descaling, and part checks. Use the step-by-step checks above to solve most common problems. Stay proactive with maintenance to prevent issues and extend the life of your brewer. Try the fixes, leave a comment with your results, or subscribe for more helpful appliance tips.


