Are you thinking about getting a walking pad but wondering if you’ll have to spend hours putting it together? You’re not alone.
Many people ask, “Do walking pads require assembly? ” Because the last thing you want is to deal with complicated instructions or missing parts before you even start using your new device. You’ll discover exactly what to expect when your walking pad arrives, how much effort assembly usually takes, and tips to get it ready quickly.
Keep reading—you’ll soon see just how easy it is to get moving with your walking pad.
Assembly Needs For Walking Pads
Walking pads are popular for home exercise. Many wonder if they need assembly before use. The answer depends on the model you buy.
This guide explains what to expect when setting up a walking pad. It covers pre-assembled models, parts included, and tools needed.
Factory Pre-assembled Models
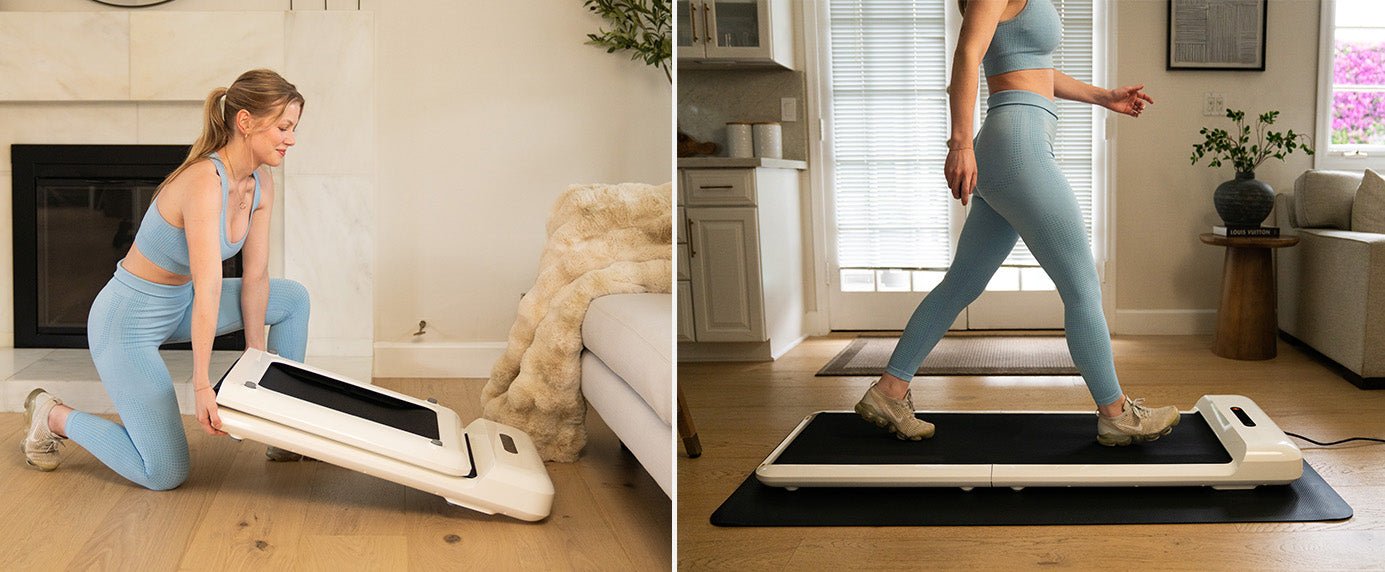
Some walking pads come mostly assembled from the factory. These models need little to no setup.
You can usually start using them right out of the box. This saves time and effort during setup.
Parts Typically Included
Walking pads often come with several key parts. These parts may need to be connected or adjusted.
- The walking belt or treadmill surface
- Side rails or handles
- Control panel or remote
- Power adapter and cables
- Safety key or clip
Check the parts list in the manual to confirm all pieces are included before assembly.
Tools Required For Assembly
Most walking pads need simple tools for assembly. Many models include the basic tools you need.
- Hex keys or Allen wrenches
- Screwdrivers (usually Phillips)
- Wrenches or spanners
- Sometimes a small hammer or mallet
If tools are not included, check the product manual or contact the seller. Using the right tools makes assembly easier and safer.

Step-by-step Setup Guide
Walking pads are easy to set up. You do not need special tools or skills. This guide will help you assemble your walking pad quickly.
Follow these simple steps to get your walking pad ready for use. Each step is clear and easy to understand.
Unboxing And Inspection
Start by carefully opening the package. Remove all parts and check for any damage during shipping. Make sure you have all components before assembly.
- Main walking pad unit
- Handlebars
- Power adapter and cables
- User manual
- Safety keys or accessories
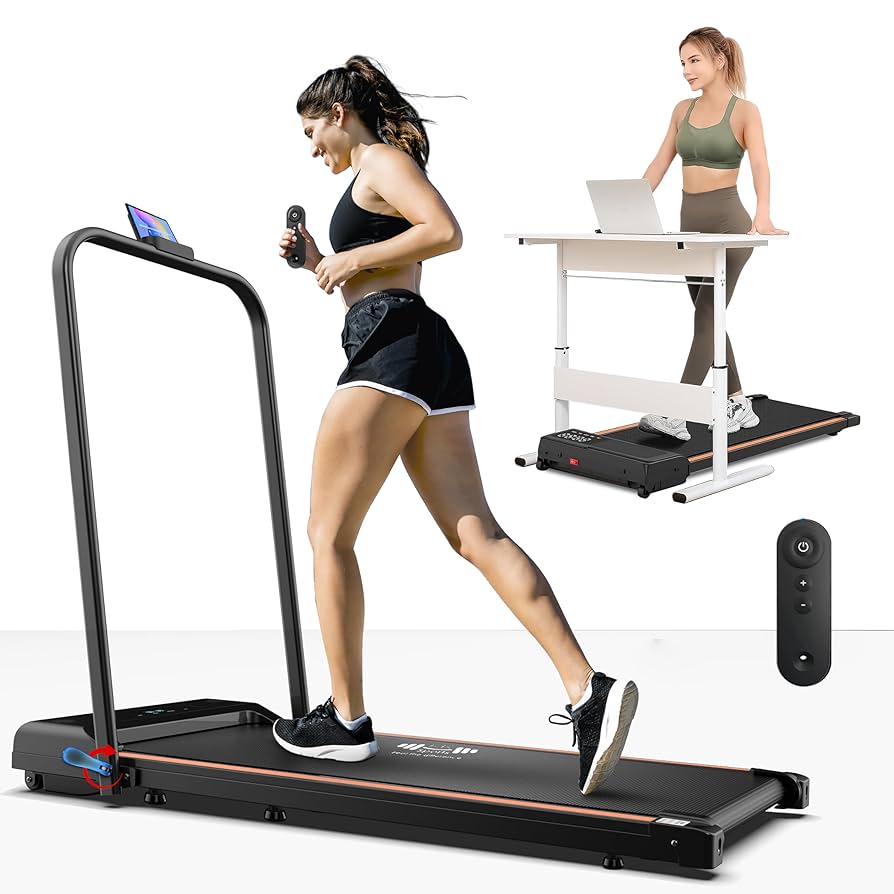
Attaching The Handlebars
Find the handlebar parts and align them with the slots on the walking pad. Insert and secure the handlebars firmly. This step is important for safety and control while walking.
- Locate the handlebar connectors
- Slide handlebars into place
- Use screws or clips if provided
- Check stability by gently shaking
Connecting The Power Supply
Plug the power adapter into the walking pad and then into a wall outlet. Ensure the power connection is secure. Avoid loose plugs to prevent interruptions.
- Attach power cable to walking pad
- Plug adapter into a nearby outlet
- Turn on the power switch if available
- Check for indicator lights
Initial Calibration
After power is connected, the walking pad may need calibration. This process sets the device for accurate speed and safety. Follow the on-screen or manual instructions.
- Turn on the walking pad
- Allow it to run without weight for a few seconds
- Step on slowly to test speed controls
- Adjust settings as needed using the control panel
Common Assembly Challenges
Walking pads often require some assembly before use. This process can be tricky for many users. Knowing the common problems helps to prepare for them.
Many people face similar issues when setting up their walking pads. This guide covers the most frequent challenges and how to handle them.
Misaligned Components
Misaligned parts are a common problem during walking pad assembly. This can cause the device to wobble or not work correctly.
Check all parts before tightening screws. Adjust parts gently to line them up well. Make sure the walking surface is flat and even.
Loose Screws And Bolts
Loose screws and bolts can make the walking pad unsafe or noisy. They may also cause parts to fall off during use.
Use the correct tools to tighten all screws firmly. Avoid over-tightening, which can strip threads or damage parts.
- Check each screw and bolt twice
- Tighten screws evenly across parts
- Use hand tools instead of power tools for control
Power Connection Issues
Power connection problems may stop the walking pad from turning on. Loose plugs or damaged cables cause this issue.
Ensure the power cable is fully inserted. Look for any visible damage on the cord or plug. Test the outlet with another device if needed.
Maintenance Tips Post-assembly
After assembling your walking pad, proper maintenance helps it last longer. Simple care keeps it working well every day.
Regular checks and cleaning prevent damage and ensure smooth use over time.
Regular Cleaning
Keep your walking pad clean to avoid dust buildup. Dust can block parts and cause problems.
Use a soft cloth to wipe the belt and frame after each use. Avoid water on electrical parts.
- Wipe belt and handles gently
- Use a dry or slightly damp cloth
- Clean dust from motor area carefully
Lubrication For Smooth Operation
Lubricate the walking pad belt regularly. This reduces friction and prevents wear.
Apply silicone-based lubricant under the belt every one to two months. Check the user manual for specific instructions.
- Lift the belt slightly
- Apply lubricant evenly under the belt
- Run the pad for a few minutes to spread it
Checking For Wear And Tear
Look for signs of damage on the belt and frame. Early spotting of issues prevents bigger problems.
Check screws and bolts often. Tighten any loose parts to keep the walking pad safe and steady.
- Inspect the belt for cracks or fraying
- Check the frame for dents or bends
- Tighten loose screws and bolts
Troubleshooting Setup Problems
Walking pads usually need some assembly before use. Sometimes, you might face problems during setup. This guide helps you fix common issues.
Check these tips if your walking pad does not work right after assembly. Fixing small problems can save time and effort.
Device Not Powering On
If your walking pad does not turn on, first check the power source. Make sure the plug is fully connected to the outlet and the device.
Inspect the power cord for any damage. A loose or broken cable can stop the device from powering on.
- Confirm the outlet has power by testing with another device
- Ensure the power switch is in the ON position
- Look for any visible damage to the power cable
- Check if the fuse or circuit breaker is intact
Unusual Noises During Use
Strange sounds can mean parts are not fitted correctly. Loose screws or bolts may cause rattling or squeaking.
Check if the walking pad is on a flat surface. Uneven flooring can create noise and affect performance.
- Tighten all screws and bolts securely
- Place the device on a level floor
- Clean dust and debris from moving parts
- Lubricate the belt if recommended by the manual
Belt Slippage Or Misalignment
If the belt slips or moves off center, it needs adjustment. A loose belt can reduce safety and damage the device.
Check the belt tension and alignment. Adjust the screws at the back or sides to fix the belt position.
- Turn off the device before adjusting the belt
- Use a wrench or screwdriver to tighten the belt tension screws
- Align the belt so it runs straight in the middle
- Test the walking pad after adjustments for smooth operation

Frequently Asked Questions
Do Walking Pads Come Pre-assembled?
Most walking pads arrive partially assembled. You usually need to attach the handlebar or remote. Assembly is simple and requires basic tools.
How Long Does Walking Pad Assembly Take?
Assembly typically takes 5 to 15 minutes. Instructions are clear and straightforward, making setup quick and easy.
Are Special Tools Needed For Walking Pad Assembly?
No special tools are usually required. Most walking pads include necessary tools like Allen keys for assembly.
Can I Assemble A Walking Pad Alone?
Yes, one person can easily assemble a walking pad. It is designed for simple and quick self-assembly.
Conclusion
Walking pads often require minimal assembly. Most come with user-friendly instructions. You might only need to attach a few parts. This makes setup quick and easy. Perfect for beginners and fitness enthusiasts alike. Always check the package contents. Ensure all parts are included.
This avoids any last-minute hassles. Walking pads offer a convenient fitness solution. Simple to assemble. Easy to use. They fit well in small spaces. No need for a large workout area. Enjoy walking at home anytime. Improve your health with ease.
A walking pad can be a great investment for wellness.