
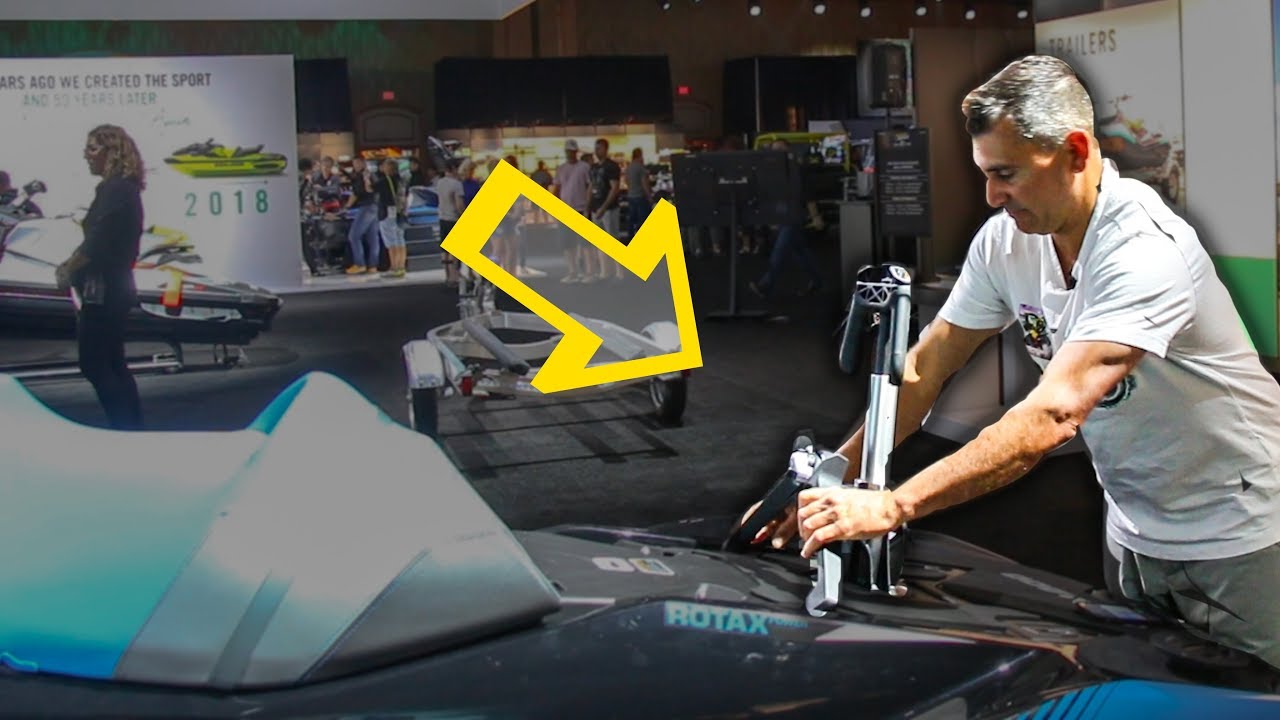
Installing a Sea-Doo ski pylon can transform your watercraft into a more versatile machine, perfect for towing skiers, wakeboarders, or tubes. If you’re new to this, the process might seem complex. But with the right guidance, tools, and a careful approach, you can make your Sea-Doo ready for water sports in just a few hours.
This guide will walk you through every step, highlight important tips, and share common mistakes so you don’t waste time or risk damaging your equipment. Whether you’re looking to upgrade your fun on the water or preparing for your first installation, you’ll find clear answers and practical advice here.
What Is A Sea-doo Ski Pylon?
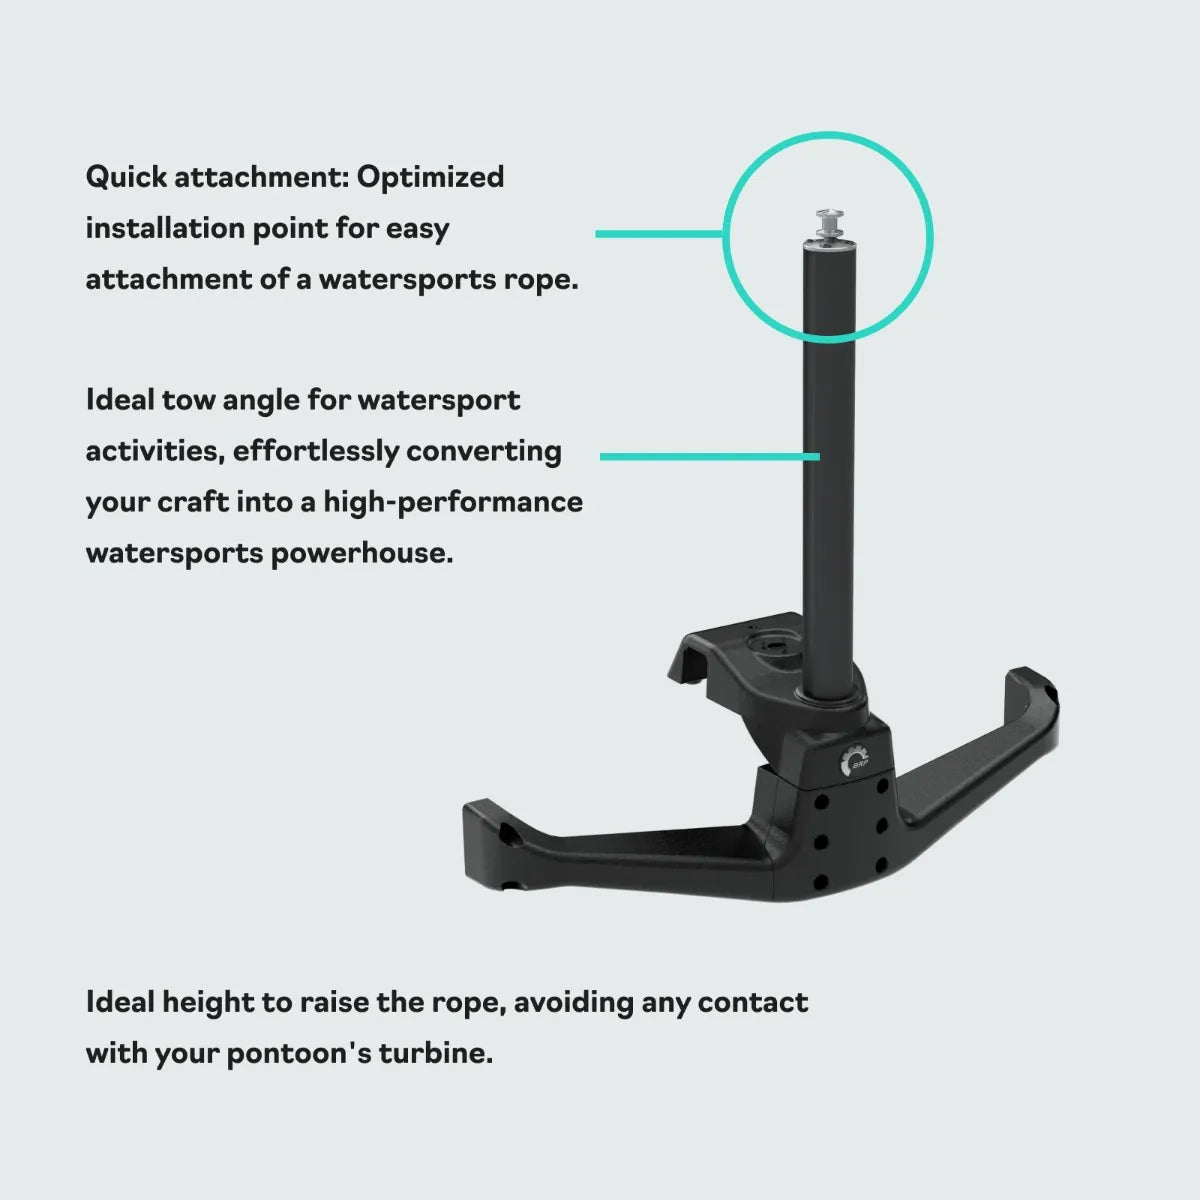
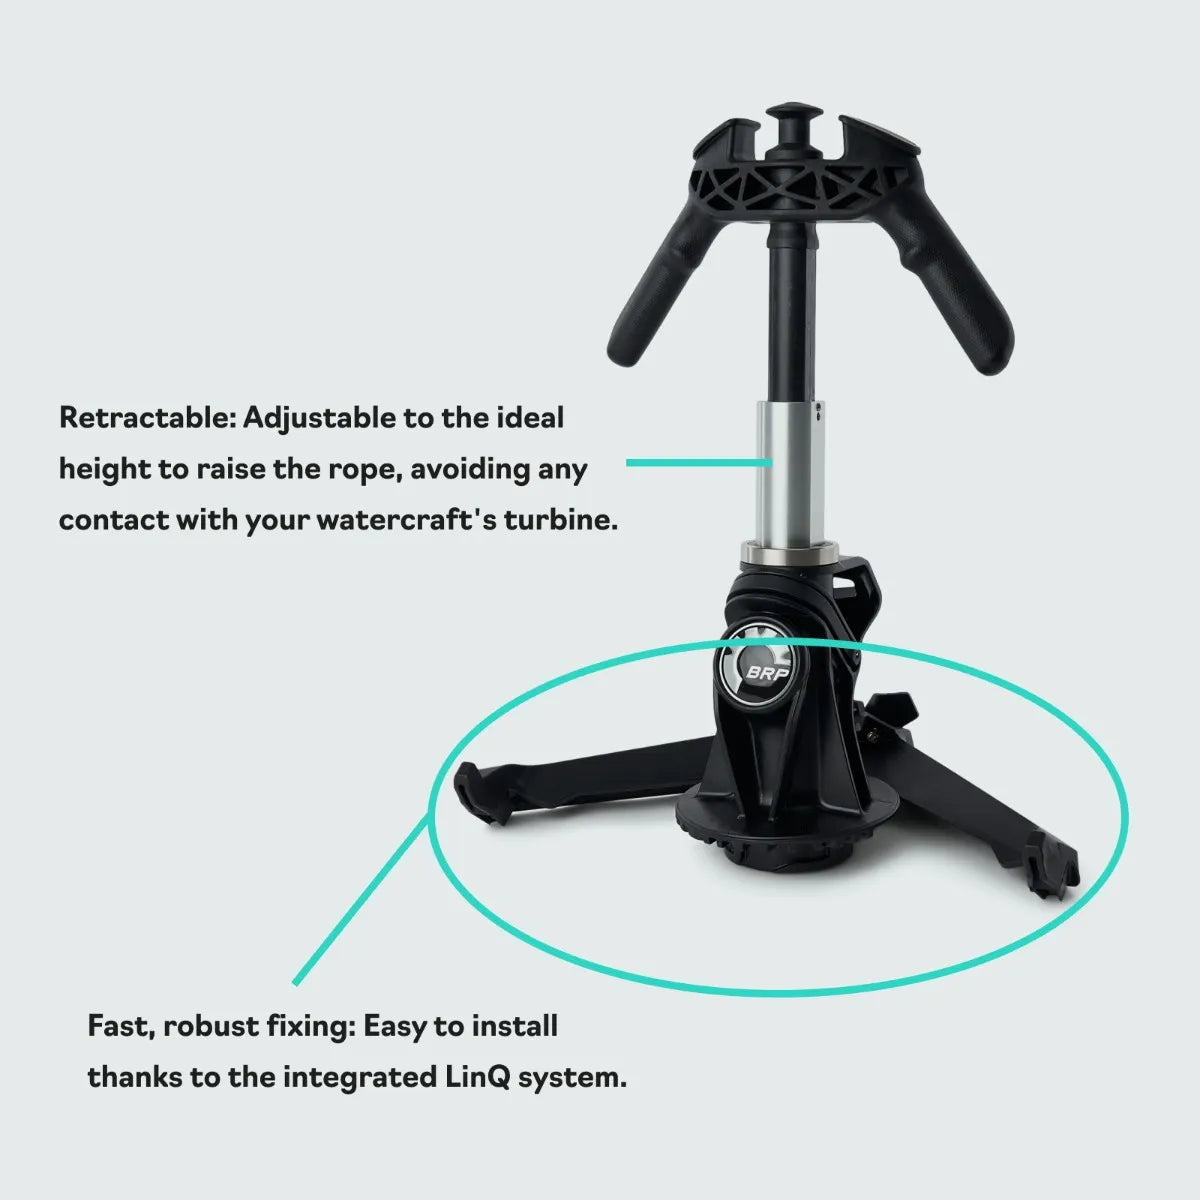
A Sea-Doo ski pylon is a vertical post installed on your personal watercraft to create a higher tow point for ropes. It’s designed specifically for pulling skiers or wakeboarders. The higher tow point helps the person being towed get up on the water more easily and reduces drag on the rope. Some pylons are removable, while others are fixed. Most modern Sea-Doo models accept the Retractable Ski Pylon, which is a popular accessory.
You’ll find that a ski pylon makes towing safer and smoother. It also keeps the rope clear of the jet nozzle and rear deck, preventing tangles and damage.
Why Install A Ski Pylon On Your Sea-doo?
Adding a ski pylon brings several benefits:
- Better towing experience: The rope stays elevated, giving skiers and wakeboarders a smoother pull.
- Enhanced safety: Keeps the rope away from the watercraft’s engine and jet nozzle.
- Versatility: Allows your Sea-Doo to tow tubes, wakeboards, and skis.
- Improved resale value: Watercraft with ski pylons are more attractive to buyers who want water sports capabilities.
If you tow regularly, a ski pylon is almost essential. It’s also a safer option compared to makeshift solutions, which can stress your Sea-Doo’s hull or damage the rear deck.
Choosing The Right Ski Pylon For Your Sea-doo
Before you begin installation, you need to pick the right ski pylon model. Not all Sea-Doos support the same pylon. Here are the main options:
Types Of Ski Pylons
1. Retractable Ski Pylon
Most new Sea-Doo models (like the GTI, GTR, and WAKE series) can use the official Retractable Ski Pylon. It pops up when needed and folds down when not in use.
2. Fixed Ski Pylon
Older Sea-Doos or some specific hull designs may require a fixed pylon. These are usually bolted directly to the deck and cannot be removed easily.
3. Aftermarket Ski Pylon
Brands like TurboSwing or custom pylon kits may fit a wider range of watercraft. Always check compatibility.
Compatibility Table
Here’s a quick comparison of popular Sea-Doo models and which ski pylons they accept:
| Sea-Doo Model | Retractable Pylon | Fixed Pylon | Aftermarket Option |
|---|---|---|---|
| GTI SE | Yes | No | Yes |
| WAKE PRO | Yes | No | Yes |
| RXT-X | No | Yes | Yes |
| Older SPX | No | Yes | Possible |
Key tip: Always check your Sea-Doo’s owner manual or contact your dealer before buying a ski pylon. Some models need a specific kit or extra reinforcement.
Tools And Materials Needed
You don’t need many special tools, but having the right equipment makes installation easier and safer. Here’s a typical list:
- Cordless drill with bits (for mounting holes)
- Socket wrench set
- Screwdrivers (Phillips and flat-head)
- Measuring tape
- Marker or pencil (for marking drill points)
- Marine sealant (to prevent water leaks)
- Safety glasses and gloves
Extra insight: Use stainless steel hardware. Regular steel will rust quickly in marine environments.
Preparing Your Sea-doo For Installation
Before drilling or mounting anything, prepare your watercraft:
- Clean the rear deck: Remove dirt, sand, or debris. This prevents scratches and ensures strong adhesion for sealant.
- Check the battery and electronics: Disconnect the battery to avoid electrical accidents.
- Read the instructions: Always review both your Sea-Doo’s manual and the pylon kit instructions.
Beginner mistake: Many people skip cleaning and end up with leaks because sealant doesn’t bond well to dirty surfaces.
Step-by-step Installation Guide
This guide covers installing a Retractable Ski Pylon (the most common type). If you’re using a fixed or aftermarket pylon, steps may differ—always refer to the specific kit instructions.
Step 1: Locate The Mounting Points
Most Sea-Doo models have pre-marked spots or mounting brackets for ski pylons. Look for:
- Small holes or indents on the rear deck (usually behind the seat)
- Brackets under the deck
- Check your owner’s manual for diagrams
If your model doesn’t have pre-marked points, you’ll need to measure carefully. Use the measuring tape and marker to mark the exact spot, centered and at the right distance from the seat.
Step 2: Drill Mounting Holes
Put on safety glasses and gloves.
- Use the cordless drill to make holes at the marked points.
- Drill slowly to avoid cracking the hull or deck.
- The diameter should match the bolts provided in your pylon kit.
Non-obvious tip: Place masking tape over the drill spot to minimize chipping.
Step 3: Apply Marine Sealant
Before inserting any bolts, squeeze marine sealant around the holes. This creates a waterproof barrier and protects against corrosion.
- Use a generous amount, but don’t overdo it—excess can squeeze out and make a mess.
Beginner insight: Many installers forget sealant, leading to leaks and water damage inside the hull.
Step 4: Attach The Pylon Base
Position the ski pylon base over the holes.
- Insert bolts through the base and into the holes.
- Tighten with a socket wrench. Don’t overtighten—this can crack the deck.
If your kit includes washers, place them under the bolt heads for extra strength.
Step 5: Assemble The Pylon
Most retractable pylons come in two or three parts:
- The main vertical pole
- A telescoping or folding section
- Rope hooks or handles
Follow the kit’s instructions to assemble these parts. Usually, you insert the pole into the base and secure it with locking pins or screws.
Step 6: Test The Mechanism
Extend and retract the pylon several times.
- Check for smooth operation.
- Make sure locking pins engage fully.
- Inspect for any wobble or loose parts.
If you notice wobbling, check all bolts and tighten as needed.
Step 7: Reconnect Battery And Electronics
Reconnect the battery and any electronics you disconnected earlier.
- Confirm nothing interferes with wiring under the deck.
- Turn on the watercraft briefly to check for warning lights.
Step 8: Inspect For Leaks And Finalize
Fill a bucket with water and pour it around the base area. Look inside the hull for any signs of water leaking in.
- If leaks appear, dry the area and add more sealant.
- Clean off excess sealant from the deck.
Extra tip: Let the sealant cure for 24 hours before towing anything.
Safety Checks Before Use
Installing the pylon is only the first step. Before towing anyone, do these safety checks:
- Check all bolts and pins: Tighten as needed.
- Inspect the pylon for cracks or bends.
- Test the retractable mechanism: It should extend and lock smoothly.
- Verify rope hooks are secure.
Data point: According to Sea-Doo user forums, most towing accidents happen because of loose or improperly installed pylons. Always double-check before use.
Maintenance Tips For Your Ski Pylon
A ski pylon lives in a harsh environment—saltwater, sun, and constant vibration. Regular maintenance keeps it safe and functional.
- Rinse after every use: Saltwater can corrode metal quickly.
- Lubricate moving parts: Use marine-grade lubricant every few months.
- Inspect bolts and pins: Check for rust or wear.
- Check sealant: Reapply if you see cracks or gaps.
- Store pylon retracted: When not in use, keep it folded down to reduce UV damage.
Non-obvious insight: Don’t use WD-40 on the pylon; it’s not marine safe and can attract dirt.
Troubleshooting Common Installation Problems
Even careful installers can run into trouble. Here are common issues and solutions:
Problem: Pylon Wobbles After Installation
Solution:
- Tighten all bolts.
- Check for missing washers.
- Inspect the deck for cracks—if you see any, stop using the pylon and repair the deck.
Problem: Water Leaks Around The Base
Solution:
- Remove the pylon and dry the area.
- Apply more marine sealant.
- Reinstall and test again.
Problem: Retractable Mechanism Won’t Lock
Solution:
- Clean and lubricate the locking pins.
- Check for debris or sand in the mechanism.
- If still stuck, contact the manufacturer for replacement parts.
Problem: Rope Gets Tangled
Solution:
- Make sure the rope is threaded through the hooks, not under the pylon.
- Use a tow rope with a float attached.
Comparing Ski Pylon Vs. Tow Hook Vs. Turboswing
Some Sea-Doo owners wonder if a ski pylon is the best option. Here’s a comparison of popular tow solutions:
| Tow Solution | Advantages | Disadvantages |
|---|---|---|
| Ski Pylon | High tow point, smoother for skiers, safer | Needs installation, not always compatible |
| Tow Hook | Easy install, cheap, works for tubing | Low tow point, rope can drag in water |
| TurboSwing | Attaches to jet nozzle, works on most models | More expensive, sometimes harder to install |
Key takeaway: For serious water sports, the ski pylon is usually the best choice. But if you only tow tubes, a tow hook may be enough.
Practical Tips For A Smooth Installation
Installing a ski pylon isn’t just about following steps. Here are practical tips that make the job easier:
- Have a friend help: Holding the pylon base steady while you drill makes installation safer.
- Double-check measurements: Mark twice, drill once. Deck repairs are expensive.
- Use a torque wrench: Avoid overtightening bolts, which can crack the deck.
- Keep a parts tray: Don’t lose pins or washers; missing hardware leads to weak installations.
- Take photos: Snap a picture of each step. If you need help later, photos make troubleshooting easier.
Real example: On Sea-Doo forums, users report that installations done with two people take half the time and result in fewer mistakes.
Sea-doo Ski Pylon Installation Costs
The cost depends on the model and whether you do it yourself or hire a pro.
- Retractable Ski Pylon kit: $250–$400
- Aftermarket pylon: $200–$600
- Professional installation: $100–$300
DIY saves money, but you must be careful. Many dealers include installation when you buy a new Sea-Doo WAKE model.
Data: In a 2023 survey, 61% of Sea-Doo owners installed their own ski pylons, while 39% paid for professional help.
Legal And Warranty Considerations
Installing a ski pylon may affect your warranty. Always use official kits and follow instructions.
- Warranty risk: If you damage the deck or hull, Sea-Doo may not cover repairs.
- Legal: In some states, your Sea-Doo must be registered as a tow vessel to pull skiers. Check local rules.
External resource: For more details on watercraft safety and legal requirements, see the US Coast Guard Boating Regulations.
Frequently Asked Questions
How Long Does It Take To Install A Sea-doo Ski Pylon?
Most installations take 2–3 hours for beginners. If your Sea-Doo has pre-marked mounting points, the job is easier and faster. If you need to measure and drill new holes, add another hour.
Can I Install A Ski Pylon On Any Sea-doo Model?
Not all models accept ski pylons. Check your owner’s manual or consult your dealer. Some models need special kits or reinforcement. Aftermarket pylons can fit more models, but always confirm compatibility.
Is It Safe To Tow With A Ski Pylon?
Yes, if installed correctly. Ski pylons are designed for towing and keep the rope away from the jet nozzle. Always do safety checks before use, and never tow if the pylon feels loose or damaged.
Will Installing A Ski Pylon Void My Warranty?
Using official Sea-Doo kits and following instructions should keep your warranty safe. Improper installation or using non-approved parts may void the warranty. Always check with your dealer.
What Is The Difference Between A Ski Pylon And A Tow Hook?
A ski pylon raises the tow point, making it easier for skiers and wakeboarders. A tow hook is lower and works best for tubing or simple towing. Ski pylons are safer and give a better experience for water sports.
Installing a Sea-Doo ski pylon is one of the best ways to enjoy water sports safely and comfortably. With careful planning, the right tools, and attention to detail, you can complete the installation in a single afternoon. The process may seem intimidating at first, but each step is manageable.
Remember, safety and precision matter more than speed. Take your time, double-check everything, and enjoy the new possibilities your Sea-Doo brings to the water.

