

Setting up a security camera in your home or business is one of the smartest steps you can take for safety. With crime rates and break-ins still a concern in many areas, having visible security cameras not only helps deter criminals but also gives you peace of mind.
But for many people, the idea of installing a security camera can feel overwhelming. Wires, technical details, and choosing the right spot all sound complicated if you haven’t done it before. The good news? Installing a security camera today is easier than ever, and you don’t need to be a tech expert to do a good job.

36% off Today’s Exclusive Deals
Limited-time Exclusive Deals. Check current discount on Amazon.
Check Price on Amazon As an Amazon Associate I earn from qualifying purchases.This guide will walk you through the entire process step by step, from choosing the right camera to understanding the different types, planning your setup, wiring, setting up your system, and making sure your camera works well. You’ll also learn about mistakes to avoid, how to keep your footage safe, and get answers to the most common questions people have.
By the end, you’ll feel confident to install your own security camera—saving time and money, and improving your security right away.
Why Install A Security Camera?
The benefits of installing a security camera go beyond just watching for intruders. Cameras can:
- Deter theft and vandalism by making criminals think twice
- Help monitor deliveries and visitors when you’re not home
- Provide evidence for police if an incident happens
- Allow you to check on loved ones or pets remotely
- Lower home insurance costs in some cases
A recent study by the University of North Carolina found that nearly 60% of convicted burglars said they would avoid a property with visible security cameras. This shows how effective a simple camera can be.
Types Of Security Cameras
Choosing the right security camera is the first and most important step. Not every camera suits every need. Here are the main types:
Wired Cameras
These use cables for both power and data. Wired cameras are reliable, with stable video quality and no worries about Wi-Fi drops. Installation is more complex because you must run wires through walls or ceilings.
Wireless Cameras
Wireless cameras transmit video using Wi-Fi or other wireless signals. They are easy to install—no drilling or cables needed. However, they rely on your wireless network, which can have range issues or interference.
Battery-powered Cameras
These are a subset of wireless cameras that run on batteries. They are very flexible because you can place them almost anywhere. The downside is you need to recharge or replace batteries periodically.
Ptz (pan-tilt-zoom) Cameras
PTZ cameras can move horizontally (pan), vertically (tilt), and zoom in and out. You can control them remotely to get a better view. These are best for larger areas.
Dome Cameras
These cameras come in a dome-shaped case. They are usually mounted on ceilings and are hard to tamper with. Dome cameras are common in stores and offices.
Bullet Cameras
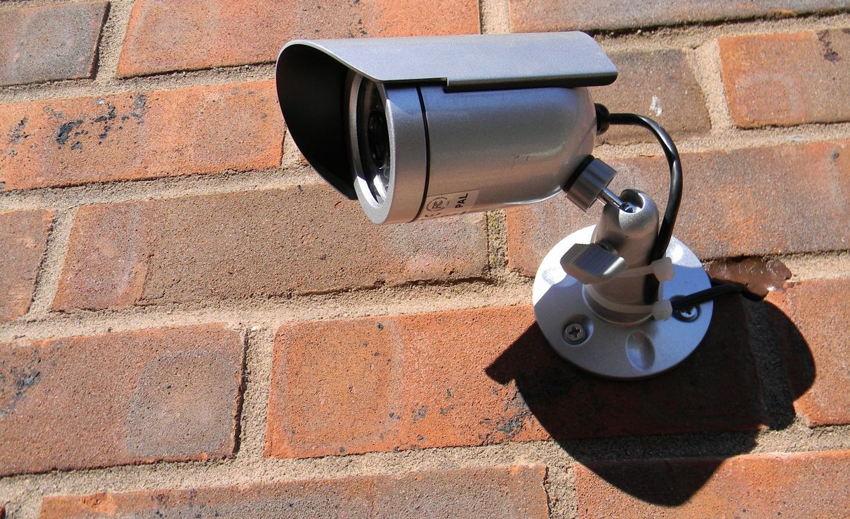
Bullet cameras have a long, cylindrical shape. They are easy to spot and act as a deterrent. Their design helps resist weather if placed outdoors.
Indoor Vs Outdoor Cameras
Outdoor cameras are built to withstand rain, wind, and extreme temperatures. Indoor cameras are usually smaller and may not have weather protection.
Table: Camera Type Comparison
Here’s a quick comparison of common camera types:
| Type | Installation Difficulty | Best For | Weatherproof | Power Source |
|---|---|---|---|---|
| Wired | High | Permanent Installations | Yes/No (model-dependent) | Power Outlet |
| Wireless | Low-Medium | Easy DIY Setups | Yes/No | Power Outlet |
| Battery-Powered | Low | Temporary or Remote Spots | Yes | Batteries |
| PTZ | Medium-High | Large Areas | Yes | Power Outlet |
| Dome | Medium | Ceilings, Indoors | Yes/No | Power Outlet |
| Bullet | Low-Medium | Walls, Outdoors | Yes | Power Outlet |
Non-obvious Insight: Many beginners think wireless means “no wires at all,” but most wireless cameras still need a power cable unless they are battery-powered.
Choosing The Right Security Camera For Your Needs
When selecting a security camera, consider these factors:
- Location: Will it be indoors or outdoors? Outdoor cameras need to resist rain, dust, and extreme temperatures.
- Coverage Area: Wide areas may need PTZ or cameras with wide-angle lenses.
- Resolution: Higher resolution (like 1080p or 4K) gives clearer images, which helps with identification.
- Night Vision: Important for areas without good lighting. Look for infrared or color night vision.
- Storage: Decide if you want local storage (SD card, DVR/NVR) or cloud storage. Cloud storage lets you view footage from anywhere but may have monthly fees.
- Budget: Prices range from $30 for basic models to $300+ for advanced cameras.
- Smart Features: Motion detection, facial recognition, and alerts can be useful.
Table: Feature Comparison
To help you compare, here are some common features:
| Feature | Basic Cameras | Advanced Cameras |
|---|---|---|
| Resolution | 720p | 1080p/4K |
| Night Vision | Infrared (Black & White) | Color Night Vision |
| Motion Alerts | No | Yes |
| Storage | SD Card | Cloud/NVR/DVR |
| Smart Integration | No | Alexa/Google Assistant |
Tip: Don’t overpay for features you don’t need. For example, if you only need to watch your front door, a basic camera with night vision might be enough.
Planning Your Camera Placement
Good camera placement is just as important as the camera itself. Here’s how to plan:
Identify Key Areas
Think about the spots you want to monitor. The most common areas are:
- Front door: 34% of burglars enter through the front door.
- Back door: Another common entry point.
- Windows: Especially those not facing the street.
- Garage and driveway: Useful for watching cars and deliveries.
- Hallways: For indoor setups, these cover movement between rooms.
Avoiding Blind Spots
Walk around your property and look for hidden corners or spots where someone could hide. Try to cover all entry points but avoid overlapping too much, which wastes resources.
Height And Angle
Mount cameras at least 8-10 feet above the ground. This keeps them out of easy reach but still gives a clear view of faces. Angle the camera slightly downward to capture details.
Protect From Weather And Sunlight
Don’t point cameras directly at the sun, as this can make footage too bright during parts of the day. For outdoor cameras, place them under eaves or use weather shields.
Non-obvious Insight: Many people install cameras too high, thinking it gives a better view. But mounting too high (over 12 feet) often results in missing faces and key details.
Tools And Equipment Needed
Before you start, gather these basic tools and equipment:
- Drill and bits: For making holes in walls or ceilings
- Screwdriver: For mounting brackets
- Ladder: To reach high spots safely
- Measuring tape: For precise placement
- Cable clips or ties: To organize and secure wires
- Ethernet cable: For wired cameras (length depends on distance to router/NVR)
- Power adapter or extension cord: If outlets are far away
Some cameras include mounting kits, but check before you buy.
Step-by-step Security Camera Installation
Let’s break down the installation process into clear steps. We’ll focus on the most common setup: a Wi-Fi camera (wired for power) with cloud or local storage. Wired and battery models will be mentioned where they differ.
1. Unbox And Test The Camera
Before drilling holes or mounting, plug in the camera near your router. Connect it using the app or desktop software. Make sure it works, updates its firmware, and streams video correctly.
2. Plan Cable Routes
If your camera needs power (most do), plan how you’ll run the cable. For outdoor cameras, running the cable through a small hole in the wall is typical. For indoor use, hide cables along baseboards or behind furniture.
3. Mount The Bracket
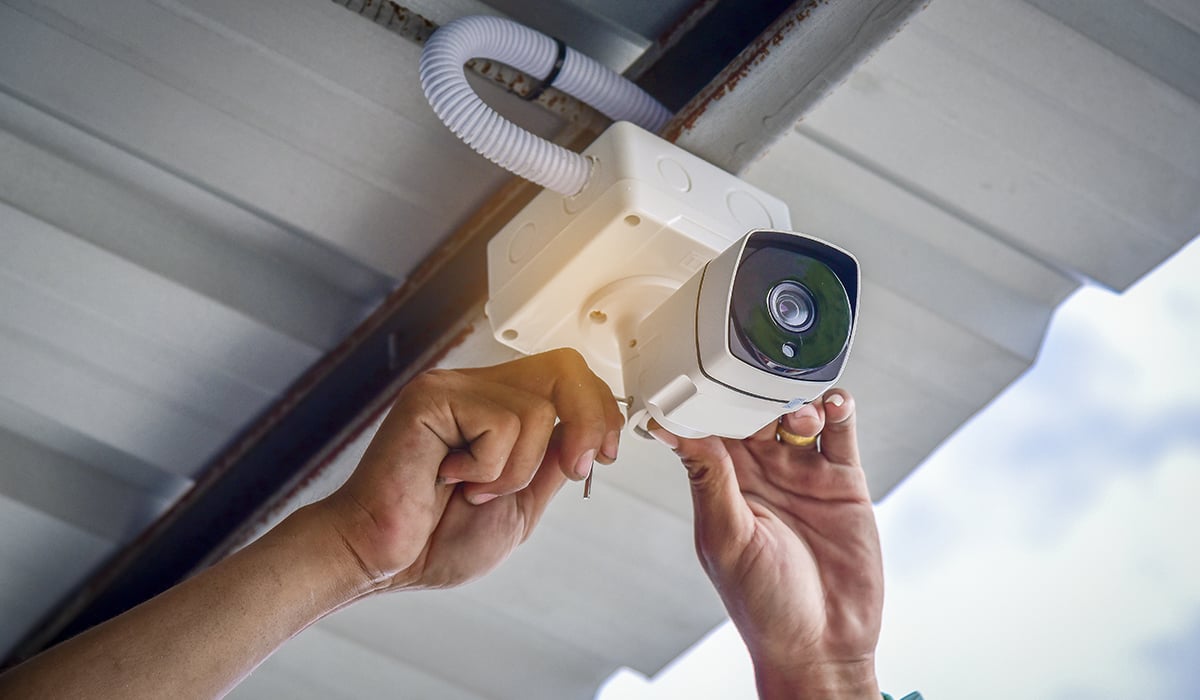
Hold the mounting bracket against the wall or ceiling where you want the camera. Use a pencil to mark the screw holes. Drill pilot holes, then screw the bracket into place.
4. Attach The Camera
Clip or screw the camera onto the bracket. Adjust the angle so it covers your target area. Most cameras have ball-and-socket joints for easy positioning.
5. Connect And Power Up
Plug in the camera’s power adapter. If it’s a wired model, also connect the Ethernet cable to your router or NVR. For battery cameras, insert charged batteries.
6. Set Up The Software
Download the manufacturer’s app or desktop software. Follow the steps to add your camera. This usually involves scanning a QR code or entering a serial number. Connect the camera to your Wi-Fi network if needed.
7. Adjust Settings
Most apps let you:
- Set up motion detection zones to avoid false alerts (like moving trees)
- Change recording quality
- Set notification preferences
- Schedule when the camera should record
8. Test The System
Check the live feed on your phone or computer. Walk around the camera’s field of view to see if it captures the right spots. Adjust the angle if needed.
Quick Checklist
- Camera works before mounting
- Cables hidden and secured
- Camera angle covers key area
- App or software connected
- Notifications set up

Wiring And Power Considerations
For wired cameras, running cables is the hardest part. Here are a few tips:
- Use Ethernet cables (Cat5e or Cat6) for power and data if your camera supports PoE (Power over Ethernet).
- For long runs (over 150 feet), use higher-quality cables and avoid sharp bends.
- Weatherproof any outdoor cable entry points with silicone sealant.
- Avoid running cables parallel to power lines to prevent interference.
If you’re not comfortable drilling holes or working with electricity, consider hiring a professional for this part.
Battery-powered cameras skip most wiring headaches but remember to keep spare batteries or a charger handy.
Connecting To Storage And Viewing Devices
You need a way to store and watch your camera footage. There are three main methods:
Cloud Storage
Most modern cameras offer cloud storage. You pay a monthly fee, and footage is saved online. This means you can view recordings from anywhere, but it relies on a good internet connection.
Local Storage
Some cameras have SD card slots for local recordings. Others use a DVR (digital video recorder) or NVR (network video recorder) for multiple cameras. Local storage is more private but less accessible remotely.
Direct Viewing
You can view most cameras live on your smartphone or computer. Many also work with smart home devices like Alexa or Google Home.
Table: Storage Options
Here’s how the options compare:
| Storage Type | Accessibility | Cost | Privacy | Reliability |
|---|---|---|---|---|
| Cloud | Anywhere | Monthly Fee | Depends on Provider | Depends on Internet |
| Local (SD/DVR) | On-site Only | One-time | High | High |
| Hybrid | Both | Medium | Medium | High |
Tip: For maximum safety, use both local and cloud storage. That way, footage is safe even if one method fails.
Common Installation Mistakes To Avoid
Many first-time installers make simple errors that reduce camera effectiveness:
- Installing too high or low: This can miss faces or important details.
- Not securing cables: Loose wires can be pulled or damaged.
- Ignoring lighting: Cameras facing bright lights or darkness can lose image quality.
- Overlooking Wi-Fi range: Far cameras may have poor connections. Use Wi-Fi extenders if needed.
- Forgetting firmware updates: Outdated software can have security holes.
Extra insight: Always check your camera’s field of view at different times of day. Shadows and sunlight change, which can affect what the camera sees.
Keeping Your Security Camera Footage Safe
Security isn’t just about recording—it’s also about protecting your footage:
- Use strong, unique passwords for your camera and its app.
- Enable two-factor authentication if available.
- Regularly update camera firmware.
- Avoid sharing camera feeds with people you don’t trust.
- If you use cloud storage, choose a reputable provider with good privacy policies. For example, Consumer Reports shares tips for secure camera use.
Advanced Tips For A Smarter Security Setup
If you want to go beyond basic setup:
- Integrate cameras with a smart home system for automation.
- Set up motion-activated lights to improve night footage.
- Use privacy zones in the app to block out areas you don’t want to record (like neighbors’ windows).
- Schedule automatic backups of your footage to a separate drive or cloud service.
- For businesses, consider cameras with license plate recognition or people-counting features.
Pro tip: If you travel often, set up push notifications for motion alerts so you know immediately if something happens at home.
Frequently Asked Questions
What Is The Best Place To Install A Security Camera?
The best locations are entry points like front and back doors, side gates, and first-floor windows. Garages and driveways are also important. Place cameras high enough to avoid tampering but low enough to capture faces clearly.
Can I Install A Security Camera By Myself?
Yes, most modern security cameras are designed for DIY installation. Wireless and battery-powered models are especially easy. Wired setups may require drilling or running cables, but many people can manage with basic tools.
How Can I Make Sure My Camera Isn’t Hacked?
Use strong passwords, enable two-factor authentication, and update your camera’s firmware regularly. Only buy cameras from reputable brands. Avoid using the default login information.
Do I Need Wi-fi For A Security Camera?
Not always. Wired cameras can work without Wi-Fi if connected to a DVR/NVR. However, Wi-Fi is needed for most wireless cameras and for viewing footage remotely.
How Much Does It Cost To Install A Security Camera?
The price depends on the type of camera, features, and whether you hire a professional. DIY setups with one or two cameras can cost as little as $50–$200. Professional multi-camera installations may cost $500–$2,000 or more.
Setting up a security camera is one of the most practical ways to boost your safety and peace of mind. With a bit of planning and care, anyone can install a camera that works well and keeps their property secure. Remember: take your time, double-check your camera’s view, and keep your system updated for the best results. Once you’re done, you’ll not only feel safer—you’ll actually be safer.

