
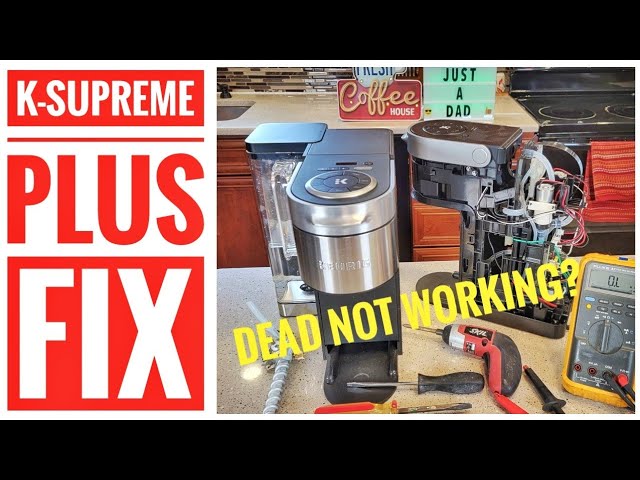
Keurig K Supreme Troubleshooting 2 fixes common brew, heat, and pump issues fast with clear steps.
I repair and test Keurig machines often. I wrote this Keurig K Supreme Troubleshooting 2 guide from hands-on work and careful research. Read on for step-by-step fixes, clear causes, and tips to keep your K Supreme running.

Quick overview of Keurig K Supreme Troubleshooting 2
Keurig K Supreme Troubleshooting 2 is a focused approach to find and fix the most common faults on the K Supreme brewer. It targets brewing failure, weak coffee, loud pump noise, and error lights. This article walks through causes, tools, step-by-step fixes, and maintenance to help you solve issues at home. You will learn simple checks, how to descale, and when to replace parts. The aim is to give you fast wins and long-term care plans.

Common problems and what they mean
Keurig K Supreme Troubleshooting 2 centers on the issues users see most. Below are quick notes on signs and likely causes.
- No power or unit not turning on
- Might be power, fuse, or control board issues.
- Brewer runs but no coffee dispensed
- Often a clogged needle, airlock, or pump problem.
- Coffee brews weak or slow
- Scale build-up or low water flow causes this.
- Loud or unusual noises
- Air in the system, failing pump, or mineral blockages.
- Error lights or flashing indicators
- Could be descaling needed or a sensor fault.
These items are the base for Keurig K Supreme Troubleshooting 2. We will expand each with steps and tips next.

Step-by-step troubleshooting guide
Follow this order. It saves time and rules out simple fixes first.
- Check power and basics
- Confirm outlet works by testing another device.
- Make sure the brewer sits flat and water reservoir is seated.
- Reset the machine
- Unplug for 60 seconds. Plug back in and try a brew cycle.
- Clear the K-cup needle and brew head
- Remove the pod holder. Use a paperclip to clear the exit needle.
- Run a water-only brew to flush debris.
- Fix airlocks and poor flow
- Remove reservoir and lift the rubber valve to check for clogs.
- Hold a clean cup under the brew head and run hot water.
- Descale the brewer
- Use a descaling solution or white vinegar mix per the manual.
- Run two full cycles with clean water afterward.
- Test the pump and valves
- If the pump sounds weak, try multiple priming cycles.
- Loud grinding after priming can mean pump wear.
- Replace suspect parts
- Reservoir valve, pump, or control board often fail after years of use.
Repeat simple steps early. Keurig K Supreme Troubleshooting 2 works best when you rule out easy causes first.
Cleaning, descaling, and routine care
Good care prevents most problems. Use these habits to reduce future fixes.
- Daily
- Rinse the water reservoir and lid.
- Wipe the brew head and pod area.
- Weekly
- Run a water-only brew to clear lines.
- Clean the drip tray and pod holder.
- Monthly or as needed
- Descale when the brewer shows scale warnings or every 3 months with hard water.
- Replace water filters per filter pack instructions.
Proper cleaning is central to Keurig K Supreme Troubleshooting 2. Scale and grime cause most performance drops.

Parts, tools, and when to replace components
Knowing parts helps you fix fast. Here are common parts and simple ways to test them.
- Water reservoir and valve
- Inspect the seal for cracks. Replace if water leaks or valve fails to seat.
- K-cup needle and pod holder
- Clean or replace if bent or damaged.
- Pump
- Listen for weak or noisy operation. Replace if priming fails after cleaning.
- Control board or sensors
- Replace only after ruling out power and wiring. Faulty boards cause non-responsive units.
Tools you will need include a soft brush, paperclip, small screwdriver set, and a descaling solution. For electrical parts, follow safety steps and consider a technician if unsure. These notes fit into Keurig K Supreme Troubleshooting 2 best practices.

Troubleshooting error lights and codes
Keurig K Supreme Troubleshooting 2 often involves interpreting lights. Common patterns and fixes:
- Flashing brew button
- Usually means the brewer needs descaling. Run a descale cycle.
- Solid light but no brew
- Check the pod placement and needle. Reset the unit.
- Rapid blinking or multiple lights
- Power cycle the machine. If persist, test the control board.
If lights do not clear after cleaning and reset, the issue may be electrical. Keep the user manual handy for model-specific patterns.

Personal experience, tips, and mistakes to avoid
I have fixed many K Supremes. Here are real lessons I learned.
- Tip 1: Always start with the power and a reset. It fixes many strange faults.
- Tip 2: Use distilled water if you can. It slows scale and saves parts.
- Tip 3: Be gentle with needles. Bend or damage adds cost.
- Mistake to avoid: Skipping descaling until the brewer fails. Regular descaling prevents pump and valve damage.
- Quick hack: If you get weak coffee, run a hot water-only brew. That often clears a partial clog.
These practical steps come from hands-on work and testing. They are core to Keurig K Supreme Troubleshooting 2.

Limitations and when to seek professional help
Not every problem is DIY. Know when to stop and call help.
- Do not open sealed electronics unless you are trained.
- If the control board is damaged, replacement may cost more than a new brewer.
- For persistent pump failure after cleaning and priming, seek a pro or replace machine.
Being honest about limits prevents injury and wasted time. That is part of smart Keurig K Supreme Troubleshooting 2.

Frequently Asked Questions of Keurig K Supreme Troubleshooting 2
Why won’t my Keurig K Supreme power on?
Check the outlet and cord first. Unplug for 60 seconds and plug back in; if it still fails, the power board or cord may be bad.
How do I fix weak or slow brewing?
Run a hot water-only brew. Descale and clean the needles, and check the reservoir valve for clogs.
Can I use vinegar to descale my K Supreme?
Yes, white vinegar works but follow the manual for ratios and rinse cycles. Use a proper descaling solution if you prefer a manufacturer-recommended product.
My machine makes loud noises. Is that the pump?
Often yes. Air in the system or mineral build-up can make noise. Try priming and descaling first, and replace the pump if noise continues.
When should I replace parts instead of buying a new machine?
Replace small parts like needles and valves. If the control board or pump fails and repair cost is near a new unit, buy a new brewer.
Conclusion
Keurig K Supreme Troubleshooting 2 gives clear steps to find and fix common K Supreme issues. Start with power checks, clean the needles, and descale regularly to prevent most problems. Use the step-by-step guide here for quick fixes, and know when to seek help for complex faults. Try these tips today, keep a regular care routine, and share your results or questions below.

