

Painting a room can seem simple, but there’s much more to it than just rolling some color on the walls. With the right steps and tools, you can transform a space, boost your home’s value, and enjoy the satisfaction of a job well done.
For many people, painting is their first DIY project. But beginners often miss key details that make the difference between a smooth, professional finish and a patchy, frustrating result. Whether you want to refresh a bedroom, brighten a kitchen, or add personality to your living area, this guide will help you paint a room like a pro—even if you’re new to home improvement.

36% off Today’s Exclusive Deals
Limited-time Exclusive Deals. Check current discount on Amazon.
Check Price on Amazon As an Amazon Associate I earn from qualifying purchases.Choosing The Right Paint
The first step is picking the best paint for your room. The right choice depends on the room’s purpose, the wall material, and your budget.
Paint Types
Most rooms use latex paint. It dries quickly, cleans easily, and is less toxic than oil-based paints. For kitchens and bathrooms, choose semi-gloss or satin finish. These resist moisture and are easier to clean. Living rooms and bedrooms often use matte or eggshell finish for a soft look.
Oil-based paint is rare in homes today. It’s good for trim and doors because it’s durable, but it smells strong and takes longer to dry.
Paint Colors
Light colors make rooms look bigger and brighter. Dark colors can add drama but sometimes make spaces feel smaller. Always test a color with a sample before buying gallons. Paint color changes with light and time of day.
Paint Coverage And Quality
Not all paints cover equally. Cheap paint may need three coats; higher-quality brands often cover in one or two. The average room (12×12 feet) needs about 2 gallons for walls, plus extra if you’re painting ceilings or trim.
| Paint Type | Finish | Best For | Estimated Coverage (sq ft/gallon) |
|---|---|---|---|
| Latex | Matte/Eggshell | Living rooms, bedrooms | 350-400 |
| Latex | Satin/Semi-gloss | Kitchens, bathrooms | 350-400 |
| Oil-based | Gloss | Trim, doors | 300-350 |
Non-obvious insight: Many people forget to check for VOC (volatile organic compounds). Low-VOC paints are healthier, especially in bedrooms and homes with children.
Gathering Tools And Supplies
A successful paint job needs more than just paint. Missing tools lead to mistakes and wasted time. Here’s what you’ll need:
- Paint rollers and roller covers (choose 3/8” nap for smooth walls, 1/2” nap for textured walls)
- Paint brushes (2-3 inch angled for trim and corners)
- Painter’s tape for clean edges
- Drop cloths to protect floors and furniture
- Paint tray and liners
- Extension pole for high walls or ceilings
- Sandpaper (120-220 grit) for smoothing walls
- Putty knife and spackle for patching holes
- Ladder if needed
- Gloves and mask for safety
Many stores offer paint kits with basic tools. But quality matters—cheap brushes and rollers shed bristles and leave streaks.
| Tool | Purpose | Cost Range |
|---|---|---|
| Roller | Covers large areas fast | $6-$15 |
| Angled Brush | Edges and corners | $5-$12 |
| Painter’s Tape | Sharp lines | $4-$8 |
| Drop Cloth | Protects surfaces | $7-$25 |
Tip: Invest in a quality brush. It can last for years and makes cutting-in much easier.

Prepping The Room
Preparation is the secret to a great paint job. Skipping this step is a common mistake, but it’s where professionals spend most of their time.
Clearing And Protecting
Move furniture out or to the center of the room. Cover everything with drop cloths. Use plastic sheets for electronics and fabric drop cloths for floors. Remove or cover light switches, outlets, and hardware.
Cleaning Walls
Dust, grease, and old paint affect how new paint sticks. Wash walls with a mild soap and water solution. For kitchens, use a degreaser. Let walls dry fully before painting.
Repairing Imperfections
Fill holes and cracks with spackle. For deep holes, use a patch. Sand rough spots until smooth. If walls have stains (water, nicotine, etc.), use a stain-blocking primer.
Taping Edges
Apply painter’s tape to baseboards, trim, windows, and any areas you don’t want painted. Press tape firmly to prevent leaks. Remove tape while paint is still slightly wet for best results.
Priming
Primer helps paint stick and covers stains or dark colors. Use primer if:
- Walls are new drywall
- There are patched areas
- You’re painting over a dark color with a light one
Some paints are “paint and primer in one. ” These work for minor color changes, but for big changes or problem walls, a separate primer is better.
Non-obvious insight: Clean walls with a tack cloth after sanding. This removes fine dust that can ruin your finish.
Painting Techniques For Best Results
Painting is not just rolling paint on the wall. There’s an art to it. Learning the right technique gives you a smoother, longer-lasting finish.
Cutting In
Start by “cutting in” around edges with a brush. Paint a border (2-3 inches wide) along ceilings, corners, trim, and baseboards. This prevents roller marks near edges.
Using The Roller
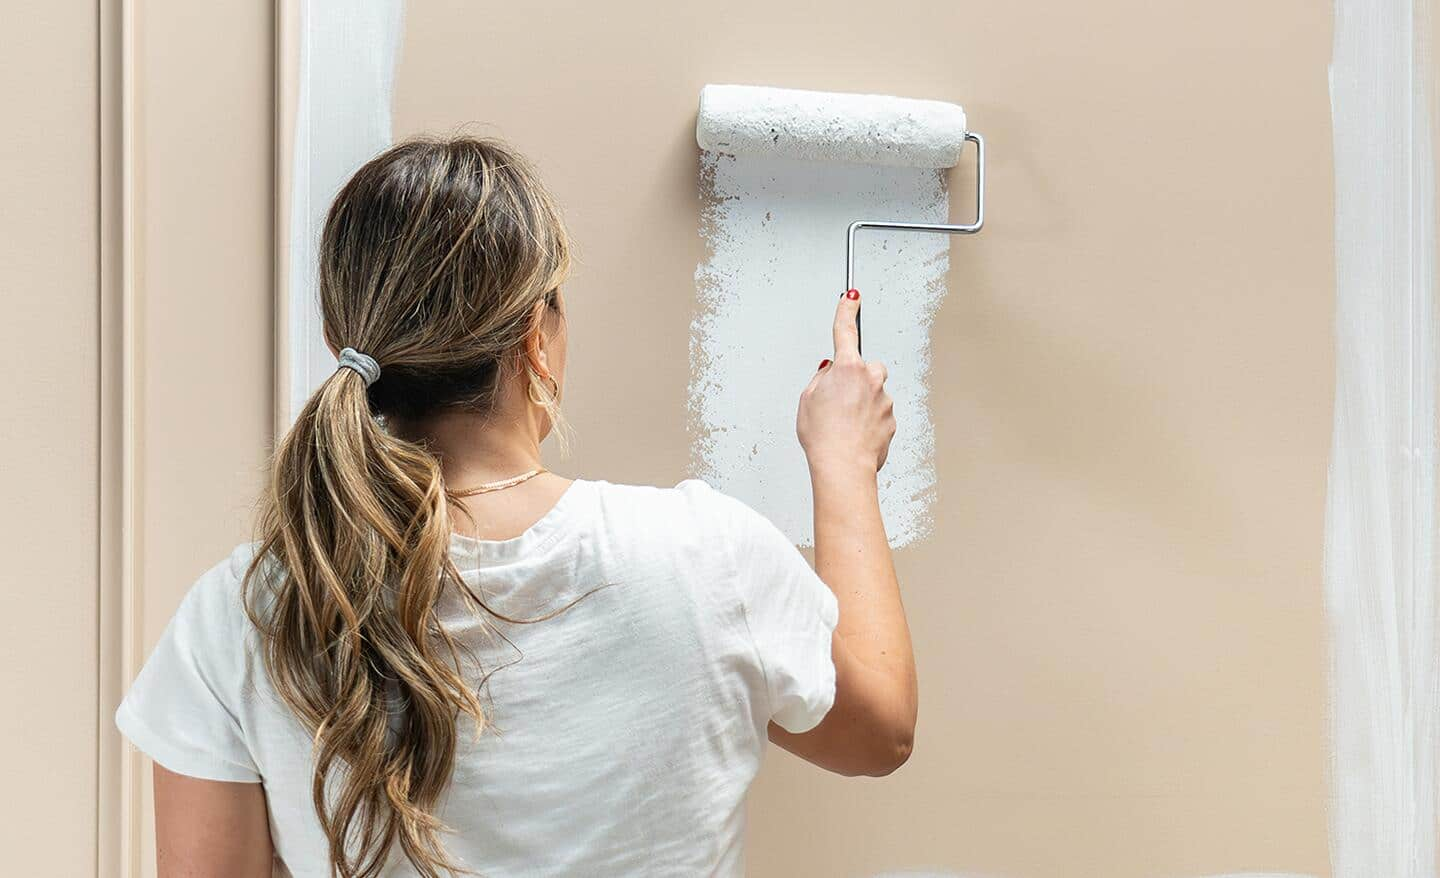
Dip your roller into the tray, then roll off excess paint. Start in the middle of the wall and roll up and down, overlapping each stroke. Use a “W” shape to avoid lines. Don’t press too hard; let the roller do the work.
Applying Multiple Coats
Most rooms need two coats for full coverage. Wait until the first coat is dry (usually 2-4 hours) before adding the second. Don’t rush—paint needs time to set.
Painting Ceilings
If you’re painting the ceiling, do it before the walls. Use a thicker nap roller (3/4”) for rough surfaces. Light colors are best for ceilings.
Painting Trim And Doors
Use a small, angled brush for trim. Paint doors with a brush or small roller. Remove hardware if possible for a cleaner finish.
| Technique | Tool | Common Mistake | Pro Tip |
|---|---|---|---|
| Cutting In | Angled Brush | Skipping edges | Paint edges first |
| Rolling | Roller | Uneven coverage | Use a “W” pattern |
| Trim | Small Brush | Overlapping paint | Paint trim last |
Tip: Don’t overload the roller. Too much paint causes drips and uneven coverage.
Drying And Curing
Paint needs to dry before you touch or move anything back. But curing (hardening) takes longer.
- Touch dry: 1-2 hours
- Recoat time: 2-4 hours
- Full cure: 7-30 days (depends on paint type)
Keep windows open for ventilation. If you must close the room, use fans to help the paint dry.
Non-obvious insight: Even after paint feels dry, it’s still soft. Wait at least a week before cleaning or hanging heavy objects.
Cleaning Up
Once painting is done, clean up carefully to protect your tools and keep your space safe.
Removing Tape
Pull tape at a 45-degree angle, slowly. If paint has dried, score the edge with a knife before removing.
Cleaning Brushes And Rollers
Latex paint washes out with soap and water. Oil-based paint needs mineral spirits. Clean tools right after use. Dry brushes flat to avoid bent bristles.
Storing Paint
Seal leftover paint tightly. Write the room name and date on the can for later touch-ups. Store paint in a cool, dry place.
Disposing Of Paint
Don’t pour paint down the drain. Many cities have hazardous waste disposal for old paint. Check local rules.
Tip: Keep a small container of leftover paint for repairs. It’s easier than reopening a whole can.
Common Mistakes And How To Avoid Them
Beginners often make errors that ruin the look or waste time. Here are some common mistakes—and how to avoid them:
- Skipping prep: Not cleaning or sanding leads to peeling and rough finishes.
- Cheap tools: Low-quality brushes leave marks and shed bristles.
- Overloading roller: Causes drips and uneven coverage.
- Rushing coats: Painting too soon causes smearing and weak paint.
- Ignoring humidity: Paint dries slower in humid rooms.
- Bad tape removal: Pulling tape too late or too fast tears the paint.
- Wrong finish: Using flat paint in kitchens makes cleaning hard.
Pro advice: Take your time. Most mistakes happen from rushing or skipping steps.
Practical Tips For A Professional Finish
Small details make a big difference. Here are tips from experienced painters:
- Paint in natural light for true color.
- Cover screws and nails with masking tape before painting. Remove when dry.
- Use a paint grid instead of a tray for less mess.
- Keep a wet edge—work quickly enough so paint stays wet as you move across the wall.
- For stripes or patterns, measure carefully and use level tape lines.
- If you spill, clean with a damp cloth right away.
Friendly reminder: Practice on a small area first if you’re unsure. Better to make mistakes on a hidden spot.
How Painting A Room Affects Home Value
Painting is one of the cheapest ways to improve a home’s value. A fresh coat can increase a home’s sale price by 2-5%, according to real estate experts.
- Neutral colors appeal to more buyers.
- Well-painted rooms look larger and cleaner.
- Updating paint can cover stains and damage that lower value.
A professional-looking paint job gives your home a “move-in ready” feel. If you plan to sell, stick to popular colors like off-white, light gray, or soft beige.
Cost And Time Estimates
Knowing the cost and time helps you plan your project. Here’s what to expect for a standard 12×12 room:
- Paint: $40-$70 per gallon (2 gallons for walls)
- Supplies: $40-$100 (brushes, rollers, tape, drop cloths)
- Prep materials: $20-$40 (spackle, sandpaper, primer)
- Total cost: $140-$220 (DIY)
- Professional painters: $300-$700 for labor
Time needed: 1-2 days for DIY, including prep and drying.
Note: Prices vary by region and brand. Always check local stores for exact costs.
Environmental And Health Considerations
Modern paints are safer, but some still contain chemicals. Here’s what to watch for:
- Choose low-VOC or no-VOC paints for bedrooms and nurseries.
- Keep windows open and wear a mask if sensitive to fumes.
- Dispose of paint responsibly—never in drains or regular trash.
Learn more about paint safety at EPA Safer Choice.
Frequently Asked Questions
How Many Coats Of Paint Do I Need?
Most rooms need two coats for full coverage. Dark colors or rough walls may need three. Always let each coat dry before adding the next.
What Is The Best Way To Paint Corners And Edges?
Use a 2-3 inch angled brush for corners and edges. Paint a border before rolling the main wall. This prevents roller marks near edges.
How Long Should I Wait Before Moving Furniture Back?
Wait at least 24 hours before moving furniture. For heavy items or cleaning, wait 7 days for full paint curing.
Can I Paint Over Wallpaper?
It’s possible, but not recommended. Remove wallpaper and clean walls for best results. If you must paint over, use a primer first.
How Do I Fix Paint Drips Or Uneven Spots?
Let the paint dry, then sand the area gently. Wipe with a tack cloth and repaint. For small spots, use a brush; for larger, use a roller.
Painting a room is a rewarding project that transforms your space and adds value. With careful prep, the right tools, and a patient approach, anyone can achieve a professional finish. Remember, the details matter—clean walls, good brushes, and careful taping all lead to better results.
Enjoy your refreshed room, and don’t forget to take a step back and admire your work.

