
Most Keurig K Slim issues are solvable with cleaning, descaling, and a simple reset.
I’ve worked with many Keurig machines and fixed dozens of K Slim problems. This guide on Keurig K Slim Troubleshooting 2 gives clear steps, real tips, and simple tests you can run at home. Read on to learn why problems happen, how to fix them fast, and how to prevent repeat issues with easy maintenance.
Common Problems and Quick Fixes for Keurig K Slim Troubleshooting 2
Here are the top issues owners report and the fast fixes that work most of the time. Each fix is simple. Try them in order and check the machine between steps.
-
Machine won’t power on
Check the outlet and cord. Try a different outlet and a different power cord if you have one. -
Machine won’t brew or starts then stops
Remove the K-Cup and run a water-only brew. Clean the needle and descale if needed. -
Coffee tastes weak or watery
Use fresh K-Cups and fill the reservoir fully. Descale to restore heat and flow. -
Slow brew or low flow
Clean the exit needle and descale. Check for kinks in the reservoir and internal tubing. -
Leaks from the base or reservoir
Reseat the reservoir. Inspect the reservoir for cracks. Clean the seal and lid.
These fixes are part of the Keurig K Slim Troubleshooting 2 routine I use in field repairs. They solve most consumer problems quickly.

Step-by-Step Troubleshooting Guide for Keurig K Slim Troubleshooting 2
Follow this ordered checklist. Work from the easiest steps to more involved ones. Test the machine after each step.
-
Power and reset
- Unplug the machine for 60 seconds. Plug it back in. This soft reset clears simple faults.
- If no lights appear, test the outlet with another device.
-
Check the water reservoir and lid
- Remove and reseat the reservoir. Fill it above the minimum line.
- Clean the fill area to remove debris that can block valves.
-
Clean the entrance and exit needles
- Lift the handle and remove the K-Cup holder. Use a paperclip or the tool in the manual to clear needles.
- Run two water-only brews to flush debris.
-
Descale the machine
- Use a descaling solution or white vinegar per the manual instructions.
- Run the descale cycle fully. Rinse with two full reservoirs of fresh water.
-
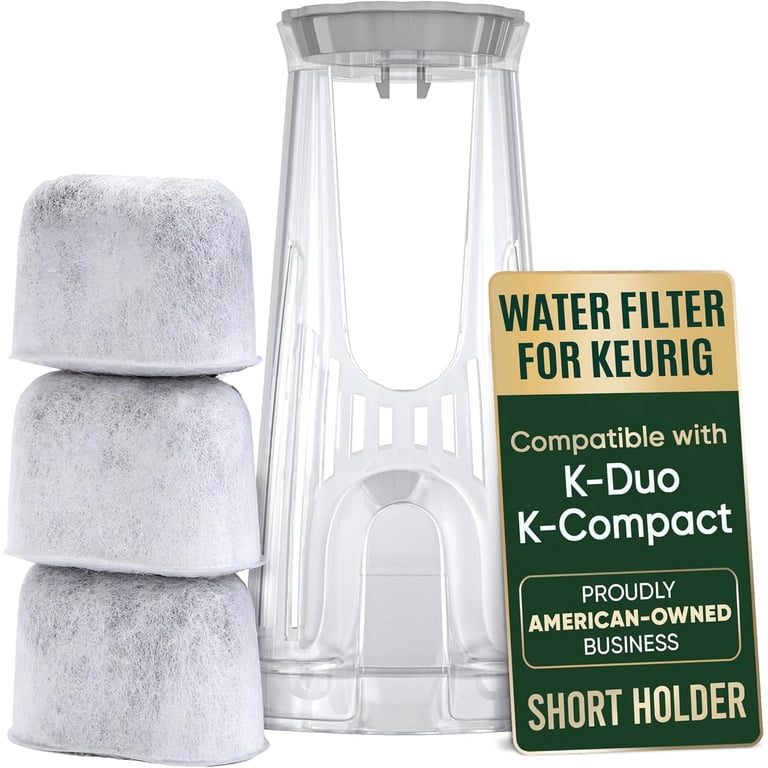
Replace the water filter and test water quality
- If your model uses a filter, replace it every two months. Hard water reduces performance.
- Consider filtered or bottled water if scale returns quickly.
-
Check for error lights and codes
- Note the light pattern. Reset and repeat the problem steps. If lights persist, go deeper.
-
Inspect internal seals and drip tray
- Remove the drip tray and clean. Check for overflow and cracks.
- Small leaks often come from worn seals in the reservoir or brew head.
-
Firmware and advanced checks
- K Slim models do not often need firmware updates. If a persistent electronic fault occurs, contact support.
These steps form a solid Keurig K Slim Troubleshooting 2 workflow. They help isolate the cause and avoid unnecessary repairs.

Maintenance and Prevention Tips for Keurig K Slim Troubleshooting 2
Routine care reduces breakdowns. Set a simple schedule and follow it.
-
Weekly
- Empty and rinse the drip tray and reservoir. Wipe the brew head.
-
Monthly
- Clean needles and run two water-only cycles. Replace water filter if used.
-
Every 3–6 months
- Descale the machine. Frequency depends on water hardness and use.
-
Best practices
- Use fresh K-Cups and avoid re-using pods.
- Keep the machine on a stable surface and away from direct sunlight.
- Use filtered water to slow scale buildup.
I once skipped descaling for six months. The brew time doubled and the coffee cooled faster. A single descale fixed that in 20 minutes. That error taught me to schedule descales like clockwork. These small steps lower the need for Keurig K Slim Troubleshooting 2 fixes later.
When to Contact Keurig Support or a Technician for Keurig K Slim Troubleshooting 2
Some faults need pro help. Know when to stop DIY and call support.
-
Persistent heating failure after descale and reset
- This can mean a failed heating element or thermostat.
-
Electrical faults or burning smell
- Turn the machine off and unplug it immediately. Get professional inspection.
-
Internal leaks not fixed by reservoir replacement
- Internal gaskets or tubing may need repair.
-
Repeated error lights with no change after reset
- The control board might be failing.
If your machine is under warranty, contact the manufacturer first. Keep receipts and note the steps you tried. Saying you ran the full Keurig K Slim Troubleshooting 2 checklist helps speed up support calls.

PAA-style Questions (People Also Ask) — Quick Answers
What to do if my K Slim won’t brew?
- Unplug and reset the machine. Clean the needles and descale. If still not brewing, check the reservoir placement.
How often should I descale my K Slim?
- Descale every 3 months with average use. If you have hard water, descale every 1–2 months.
Why does my K Slim leak from the base?
- Leaks often mean a cracked reservoir or worn seal. Reseat parts and check seals, then replace if needed.
Can I use vinegar to descale my Keurig K Slim?
- Vinegar works but may leave odor. Use a manufacturer-approved descaler for best results.
Is it safe to clean the needles with a paperclip?
- Yes. Use a straightened paperclip to clear the needles gently after removing the K-Cup holder.
Frequently Asked Questions of Keurig K Slim Troubleshooting 2
Why won’t my Keurig K Slim power on?
Unplug the machine and test the outlet. If the outlet works and the K Slim still won’t power on, the power board or cord may be faulty and need service.
My Keurig makes noise but doesn’t brew. What should I do?
Noise with no brew usually means a blocked needle or low water flow. Clean the needles and run a water-only cycle. Descale if the problem continues.
How do I descale the K Slim safely?
Empty the reservoir, add descaling solution or white vinegar diluted per instructions, run brew cycles, then rinse thoroughly with fresh water until smell is gone. Follow the manual for exact steps.
The coffee tastes weak even with new K-Cups. Why?
Weak coffee often comes from low brew temperature or low brew volume. Descale to restore heat and ensure you use the correct cup size setting.
My Keurig K Slim shows an error light after cleaning. What now?
Try a full reset by unplugging for 60 seconds and replugging. Re-seat the reservoir and run a water-only cycle. If the error remains, record the light pattern and contact support.
Can I fix internal leaks myself?
Minor leaks can be fixed by reseating or replacing the reservoir and seals. For internal tubing or heater leaks, seek professional repair to avoid electrical hazards.
How long should a Keurig K Slim last with proper care?
With regular maintenance and descaling, a K Slim can last 3–5 years or longer. Heavy use and hard water shorten that lifespan.
Conclusion
This Keurig K Slim Troubleshooting 2 guide gives clear steps to diagnose, fix, and prevent the most common problems. Start with simple resets and cleaning. Move to descaling and filter changes when needed. Keep a short maintenance routine and you will save time and money. Try the steps, note what worked, and share your results below or subscribe for more tips.

