

Applying makeup can feel confusing, even if you’ve watched hundreds of online tutorials. Maybe you want a simple look for work, a polished appearance for a big event, or just to feel more confident day-to-day. The truth is, makeup is both art and technique.
But anyone can learn to apply it well with the right steps and a bit of practice.

36% off Today’s Exclusive Deals
Limited-time Exclusive Deals. Check current discount on Amazon.
Check Price on Amazon As an Amazon Associate I earn from qualifying purchases.This guide will walk you through how to apply makeup from start to finish. You’ll learn why each step matters, tips for choosing the right products, and how to avoid common mistakes that frustrate beginners. Whether you want a full glam look or just want to enhance your natural features, this article will make the process clear and simple.
Understanding The Makeup Basics
Before you touch a brush or sponge, it’s important to know what each makeup product does. This helps you pick the right items for your skin and style.
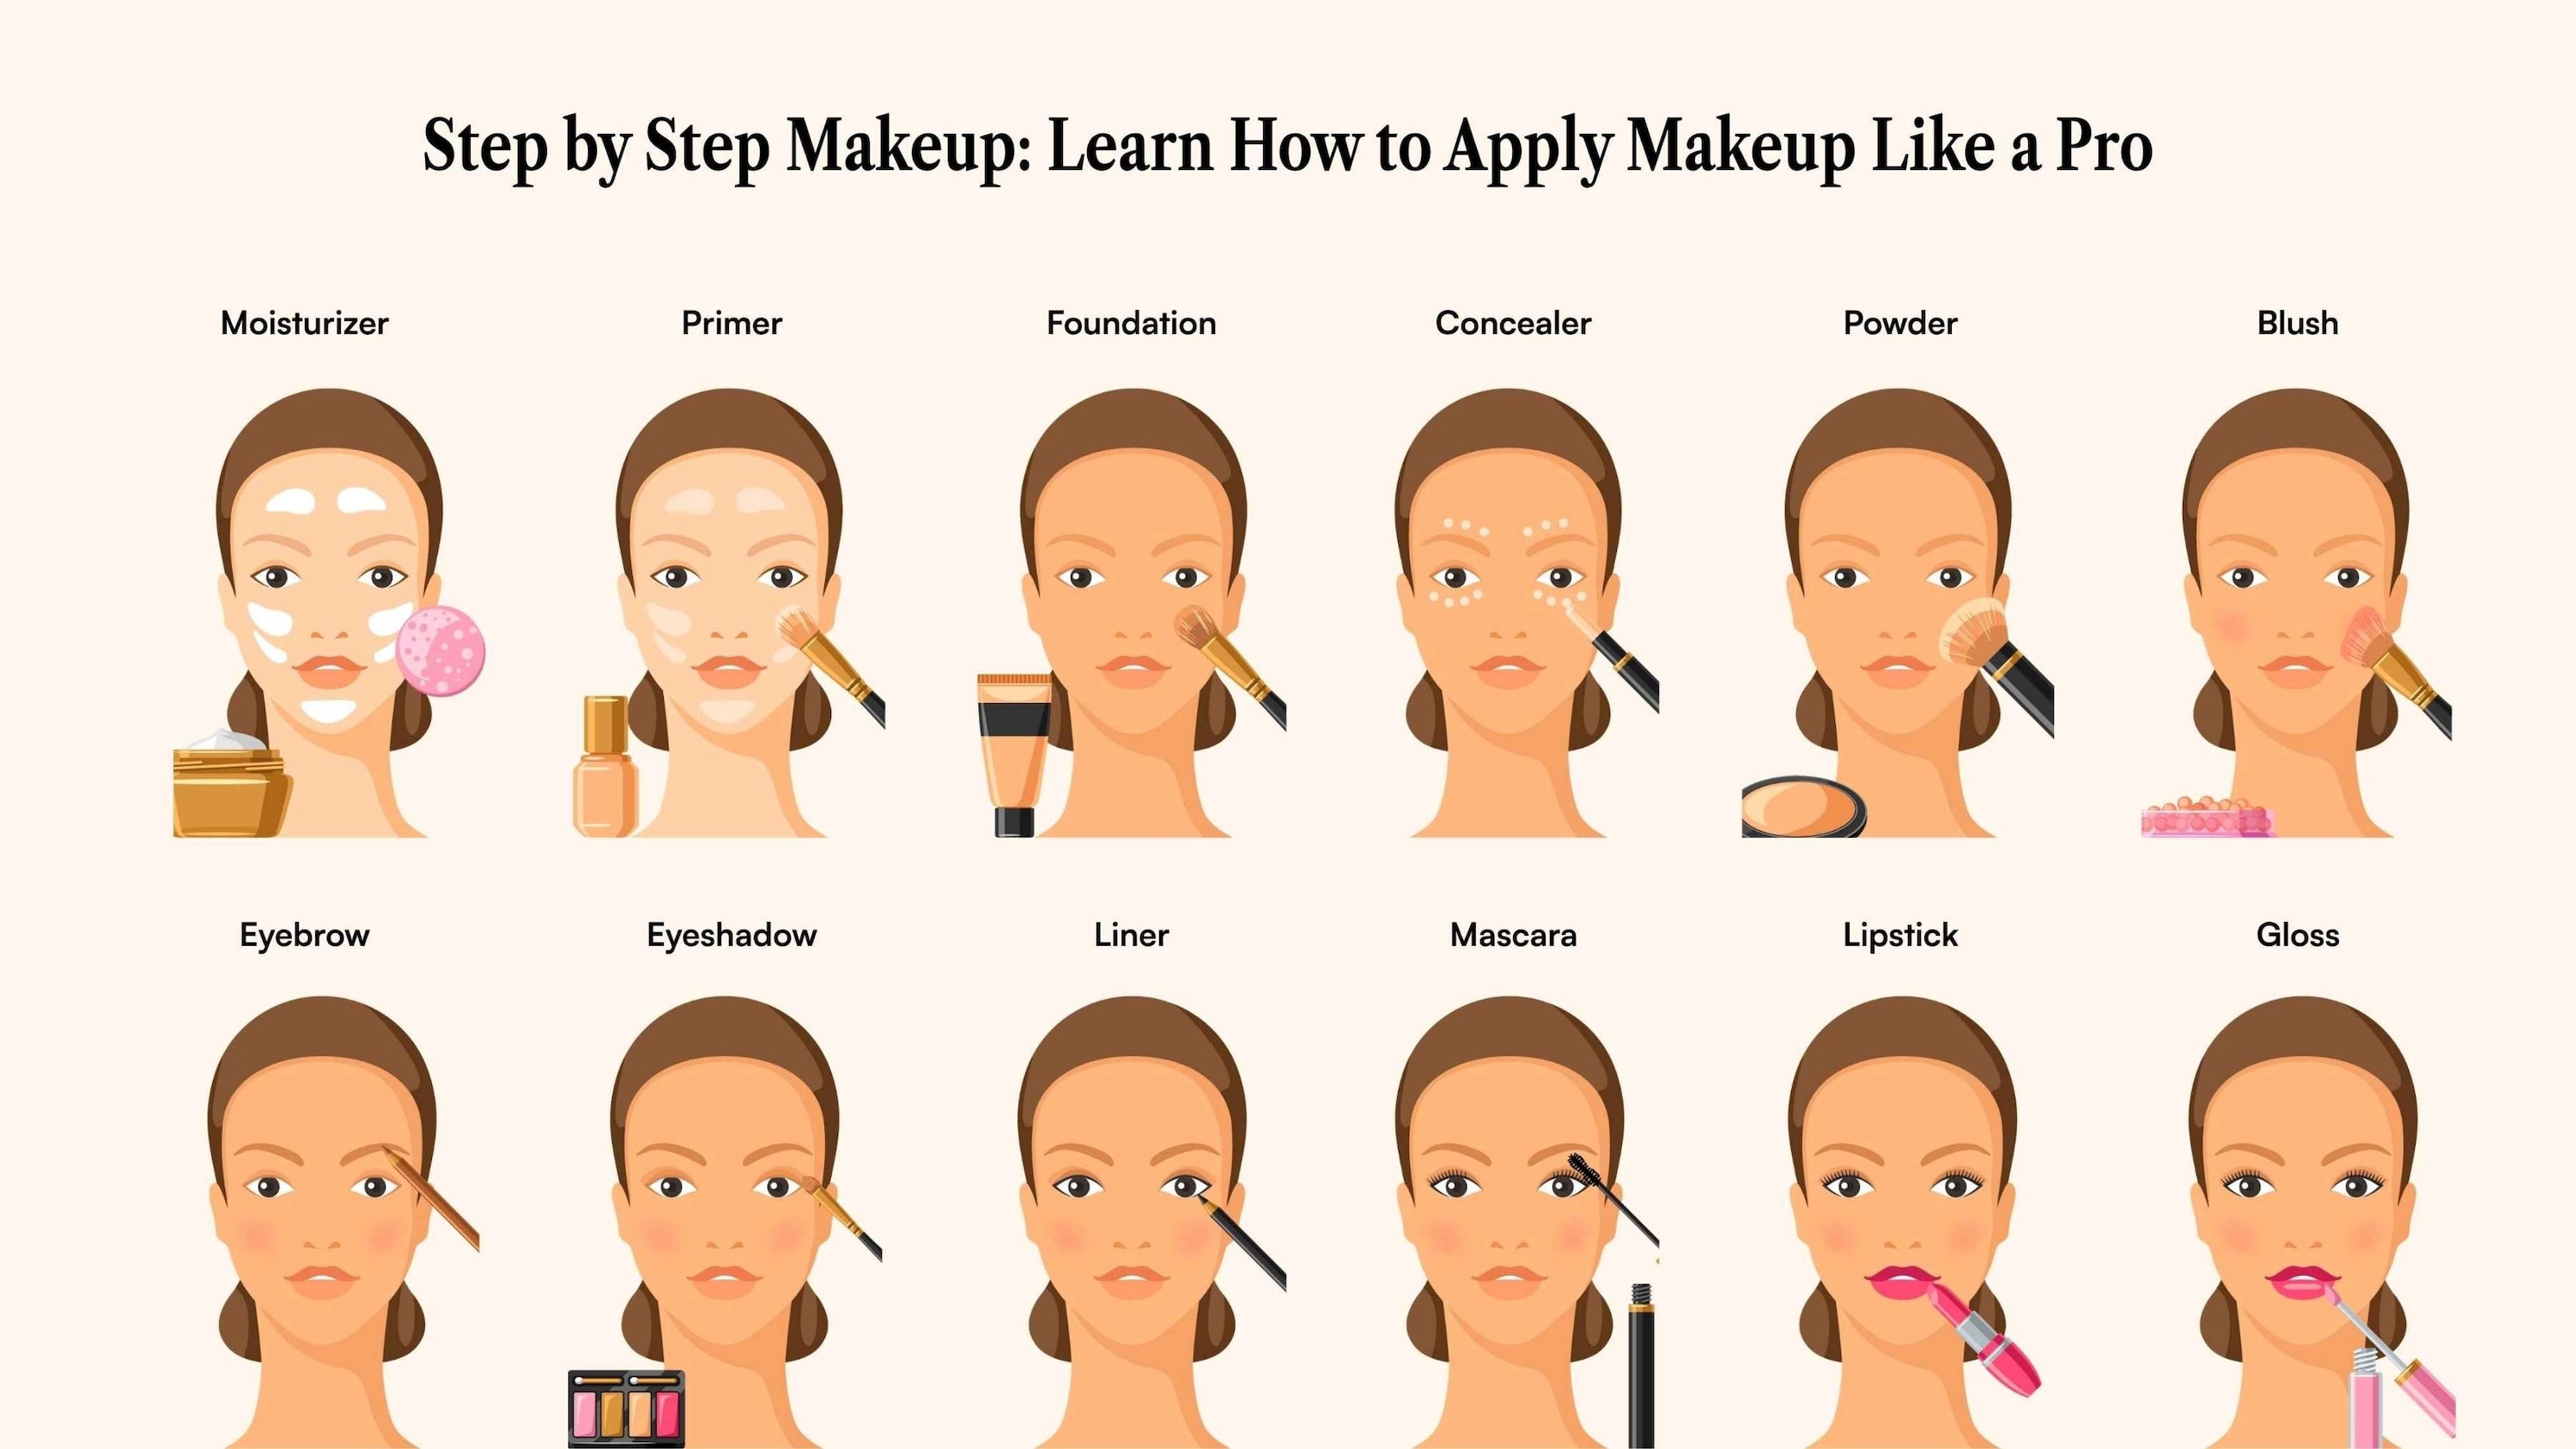
Primer prepares the skin so makeup lasts longer and looks smoother. Foundation creates an even skin tone. Concealer hides dark circles or blemishes. Powder sets your makeup and reduces shine. Blush adds color to your cheeks, while bronzer warms your skin. Highlighter makes certain areas glow. For eyes, you have eyeshadow, eyeliner, and mascara. Don’t forget brow products for shaping and lip color for finishing.
Some beginners think every product is required, but you can skip steps or use less based on your needs. For example, oily skin types often need powder, while dry skin types may skip it. The key is choosing what works for you, not following every trend.
Preparing Your Skin
Makeup looks best on healthy, clean skin. Proper skin prep helps makeup sit evenly and last longer.
- Cleanse: Wash your face with a gentle cleanser to remove oil and dirt.
- Moisturize: Apply a lightweight moisturizer, even if your skin is oily. This stops makeup from looking patchy.
- SPF: If you’re going out during the day, use sunscreen to protect your skin.
- Prime: Use a primer suited for your skin type. For example, mattifying primer for oily skin or hydrating primer for dry skin.
A common mistake is skipping moisturizer. Even oily skin needs hydration. Dry skin often makes foundation look flaky if not moisturized.
Choosing The Right Tools
Good tools make a big difference in your makeup results. You don’t need a huge collection—just a few basics.
| Tool | Best For | Why It Matters |
|---|---|---|
| Foundation brush/sponge | Foundation, blending | Creates a smooth, even base |
| Concealer brush | Spot correction | Helps target small areas |
| Powder brush | Setting powder | Distributes powder evenly |
| Blush brush | Blush/bronzer | Blends color for a natural look |
| Eyeshadow brushes | Applying and blending shadow | Improves precision and blending |
| Spoolie/brow brush | Brow grooming | Shapes and tames brows |
Sponges can give a more natural, dewy look, while brushes often provide more coverage. It’s smart to clean your tools weekly to avoid skin irritation.
Applying Foundation
Foundation evens out your skin tone and provides a base for other makeup.
- Choose your shade: Test a few shades along your jawline, not your hand. The right color should disappear into your skin.
- Select your formula: Liquid works for most skin types, powder is good for oily skin, and stick formulas are easy for travel.
- Apply: Use a damp sponge for a natural finish, or a brush for more coverage. Start in the center of your face and blend outward. Don’t forget your jawline and neck for a seamless look.
Common Foundation Mistakes
- Using too much product—build up coverage slowly.
- Choosing a shade too light or dark for your neck.
- Applying in poor lighting—use natural daylight when possible.

Using Concealer
Concealer hides dark circles, redness, and blemishes.
- For under-eye circles, pick a concealer slightly lighter than your skin tone. Dot it under your eyes and blend with a small brush or finger.
- For blemishes or redness, use a concealer that matches your foundation. Dab on spots and blend edges.
- To highlight, apply a lighter concealer to the center of your forehead, down your nose, and on your chin.
Always blend gently—press, don’t rub, to avoid moving your foundation.
Setting With Powder
Powder helps makeup last longer and controls shine, especially in the T-zone (forehead, nose, chin).
- Loose powder gives a light finish.
- Pressed powder is easy to carry for touch-ups.
- Use a large brush to apply powder lightly. Focus on oily areas.
If you have dry skin, you might only need powder under your eyes or in areas that crease.

Adding Color: Blush, Bronzer, And Highlighter
These steps bring warmth and life to your face.
- Blush: Smile and apply to the apples of your cheeks. Blend back toward your hairline.
- Bronzer: Use a fluffy brush to sweep bronzer along your hairline, under your cheekbones, and jawline for a sun-kissed look.
- Highlighter: Lightly brush highlighter on the tops of your cheekbones, brow bones, and the bridge of your nose.
Here’s a quick comparison of where to apply each:
| Product | Main Areas | Effect |
|---|---|---|
| Blush | Cheeks | Healthy, rosy glow |
| Bronzer | Hairline, cheeks, jaw | Warmth, soft contour |
| Highlighter | Cheekbones, nose, brows | Glow, lifted look |
Tip: Less is more. It’s easier to add a little at a time than to fix too much color.
Perfecting Your Brows
Well-groomed brows frame your face and make eyes stand out.
- Shape: Brush your brows upward with a spoolie. Use a brow pencil or powder to fill in sparse areas with short, hair-like strokes.
- Set: Use a clear or tinted brow gel to hold hairs in place.
Avoid pressing too hard or making brows too dark. They should look natural, not drawn on.
Creating Beautiful Eyes
Your eye makeup can be simple or bold, depending on your mood and the occasion.
Eyeshadow
- Prime lids with concealer or eyeshadow primer for lasting color.
- Start with a neutral shade close to your skin tone all over the lid.
- Use a medium shade in the crease for depth.
- Add a darker shade to the outer corner for dimension.
- Brighten the inner corner or brow bone with a light, shimmery shade.
Blending is key—use a clean brush to soften any harsh lines.
Eyeliner
- Pencil is easiest for beginners.
- For a classic look, line your upper lash line. For more drama, add a small “wing” at the outer edge.
- Brown liner gives a softer look than black.
Mascara
- Curl lashes first for more lift.
- Apply mascara from root to tip, wiggling the brush to separate lashes.
- Use two coats for more volume, letting the first coat dry before the second.
If you smudge, wait for mascara to dry, then gently remove with a cotton swab.
Applying Lip Color
Lips are the finishing touch. There are many options: balm, gloss, lipstick, or stain.
- Prep: Smooth lips with a gentle scrub and balm.
- Line: Use a lip liner for shape and to prevent color from bleeding.
- Fill: Apply your chosen color with a brush for precision or straight from the tube for speed.
- Blot: Press lips together on a tissue for longer wear.
Matte lipsticks last longer but can be drying. Glossy finishes give a fresh, plump look.
Setting Your Makeup
Setting sprays or powders help makeup stay fresh for hours.
- Spray: Hold the bottle 8–10 inches away and mist your face lightly.
- Powder: If you get shiny, gently press powder on your T-zone with a puff.
This step is especially helpful for long days or special occasions.
Everyday Makeup Routine (10 Minutes)
If you’re short on time, you can still look put-together. Here’s a quick routine:
- Moisturizer + SPF
- Concealer (under eyes, blemishes)
- Powder (T-zone)
- Brow gel
- Mascara
- Blush
- Lip balm or natural lipstick
This routine takes less than 10 minutes and uses minimal products. You’ll look awake and fresh with little effort.
Makeup For Different Skin Types
Everyone’s skin is different. Knowing your skin type helps you pick the right products and steps.
| Skin Type | What Works Best | What to Avoid |
|---|---|---|
| Oily | Oil-free primer, powder foundation, mattifying powder | Heavy creams, dewy foundations |
| Dry | Hydrating primer, cream foundation, liquid blush | Powder products, matte finishes |
| Combination | Matte primer for T-zone, hydrating products for dry areas | Skipping moisturizer |
| Sensitive | Fragrance-free, hypoallergenic products | Strong fragrances, alcohol-based products |
Tip: Test new products on a small area of skin before using them on your whole face.
Removing Makeup Properly
Never sleep in your makeup—it can cause breakouts and dull skin.
- Use a gentle makeup remover or micellar water to take off eye and lip makeup.
- Follow with a cleanser to remove any leftover residue.
- Moisturize after cleansing to keep your skin healthy.
Double cleansing (oil-based remover followed by regular face wash) is great for heavy makeup.
Common Beginner Mistakes (and How To Avoid Them)
- Wrong shade foundation: Always test on your jawline, not your hand.
- Not blending enough: Take your time to blend foundation, blush, and eyeshadow.
- Using too much product: Start with less—you can always add more.
- Skipping primer or moisturizer: Skin prep is essential for smooth makeup.
- Forgetting the neck: Blend foundation and bronzer down to your neck for a natural look.
- Ignoring expiration dates: Old makeup can harbor bacteria and cause irritation.
A non-obvious tip: Invest in good lighting. Many makeup mistakes happen because of poor or yellow lighting. Natural daylight is best.
How To Adjust Makeup For Different Occasions
- Work/School: Keep it light—concealer, mascara, brow gel, and a natural lip.
- Date Night: Add eyeliner, bold lips, and a touch of highlighter.
- Outdoor Events: Use SPF, waterproof mascara, and a setting spray.
- Photos: Avoid SPF-heavy foundations (they can cause flashback), and add a bit more blush and definition.
Experiment on weekends to find what makes you feel comfortable and confident.
Hygiene And Makeup Safety
Cleanliness keeps your skin healthy and your makeup looking its best.
- Wash brushes and sponges weekly with gentle soap.
- Replace mascara every 3 months to avoid eye infections.
- Don’t share makeup with others.
- Store products in a cool, dry place.
If you get irritation or breakouts, check ingredient lists and switch to hypoallergenic options.
Staying Up-to-date And Learning More
Makeup trends and products change often. Stay curious and keep learning. You can find more detailed guides and tutorials from trusted sources like Allure.
Try new products in small amounts, and always check reviews to avoid wasting money.
Frequently Asked Questions
How Do I Choose The Right Foundation Shade?
Test foundation on your jawline in natural light. The best shade should blend into your skin without looking too light or dark. If you’re between shades, mix two colors or pick the slightly lighter one and use bronzer for warmth.
How Can I Make My Makeup Last All Day?
Start with a primer, use long-wear formulas, and set with powder or spray. Avoid touching your face during the day and carry blotting papers for oily areas.
What’s The Best Way To Cover Pimples Without Looking Cakey?
Use a small amount of full-coverage concealer that matches your skin. Dab on with a clean brush and blend the edges. Avoid thick layers, which can draw attention to texture.
How Do I Stop Lipstick From Smudging?
Prep your lips with balm, outline with a lip liner, and fill in with lipstick. Blot with tissue and add a thin layer of powder before a final coat. Matte lipsticks usually stay in place longer.
Is Makeup Safe For Sensitive Skin?
Yes, but choose hypoallergenic, fragrance-free products. Always patch-test new items on your wrist or behind your ear. If irritation happens, stop use and consult a dermatologist.
Applying makeup is about enhancing your natural beauty, not hiding it. With practice and the right techniques, you’ll find a routine that makes you look and feel your best. Remember, confidence shines brighter than any highlighter. Enjoy the process and don’t be afraid to experiment—makeup should be fun!

