
Most Maytag Neptune dryer issues stem from venting, thermostats, or simple electrical faults.
I have repaired dozens of Maytag Neptune dryers over the last decade. I know how these machines behave when something goes wrong. This guide to Maytag Neptune Dryer Troubleshooting gives clear steps you can follow. Read on to learn how to diagnose, fix, and prevent common problems quickly and safely.

How a Maytag Neptune dryer works and why troubleshooting matters
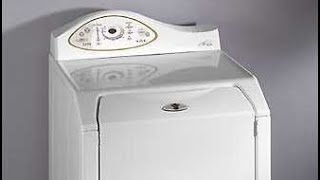
A Maytag Neptune dryer moves air through heated coils and a tumbling drum. Sensors and a control board manage temperature and run time. When one part fails, the dryer shows symptoms like no heat, no tumbling, or odd noises. Knowing how the system works makes Maytag Neptune Dryer Troubleshooting faster and more accurate.
Common problems and likely causes
Most failures are small and fixable. Here are the problems I see most with Maytag Neptune dryers.
- No heat
- Blocked venting, failed heating element, or a faulty thermostat can cause no heating.
- Drum won’t turn
- Broken belt, worn rollers, or motor faults often stop the drum from spinning.
- Dryer runs too long or short
- Faulty moisture sensor or thermostat causes poor cycle control.
- Loud noises or grinding
- Worn drum rollers, idler pulley, or foreign objects in the drum cause noise.
- Odors or burning smell
- Lint buildup in the vent, stuck clothing, or an overheating element may cause smells.
Each issue above relates directly to Maytag Neptune Dryer Troubleshooting steps that follow. I recommend checking vents and filters first. They are easy to inspect and often fix the problem.
Step-by-step Maytag Neptune Dryer Troubleshooting guide
Follow these steps in order. Start with the simplest checks. Take safety precautions and unplug the dryer before opening panels.
- Visual and basic checks
- Confirm power: Verify the dryer gets 240V at the outlet.
- Inspect the lint filter: Clean it and check for trapped debris.
- Check the vent path: Feel for airflow at the outside vent during a run.
- If there is no heat
- Clean lint from venting and blower housing.
- Test continuity of the heating element and thermal fuses with a multimeter.
- Replace failed thermostats or thermal fuses as needed.
- If the drum won’t turn
- Open the cabinet and inspect the belt for breaks or slack.
- Spin the drum by hand to feel rough bearings or stuck rollers.
- Replace belt, rollers, idler, or motor if you find wear or failure.
- If the dryer won’t start or trips
- Check door switch and start switch for continuity.
- Inspect the control board for burned components or bad solder joints.
- If cycles are inconsistent
- Clean and test moisture sensors.
- Check the thermostat and temperature sensors for proper readings.
- If you find error codes or blinking lights
- Note the pattern and consult the user manual for that Neptune model.
- Follow diagnostic steps from the manual for the specific code.
I once repaired a Neptune dryer where the homeowner blamed the control board. The real issue was a nearly blocked dryer vent. After cleaning the vent and replacing the thermal fuse, the dryer ran like new. Little checks often save time and money.

Error indicators, lights, and user-display tips
Maytag Neptune dryers may use blinking lights, codes, or no display at all. These indicators help narrow the problem quickly.
- Blinking lights or a fault code
- Record the blink pattern or code. It points to sensors, motor issues, or control faults.
- No display or dead control
- Confirm power, fuses, and the main control board.
- Smells, smoke, or overheating
- Stop the dryer immediately. Check vents, heating components, and wiring.
Always consult the model’s manual for exact code meanings. If you don’t have the manual, write down the code or blink pattern before searching for diagnostics. That step speeds up Maytag Neptune Dryer Troubleshooting and reduces guesswork.

Maintenance and preventive care to avoid common failures
Regular care prevents most Maytag Neptune dryer problems. Follow these simple habits.
- Clean the lint filter after every load to improve airflow.
- Vacuum the lint trap housing and the vent hose twice a year.
- Inspect and clean the exterior vent hood yearly to remove nests and lint.
- Keep the dryer level and avoid overloading the drum.
- Replace worn belts, rollers, and seals at the first sign of wear.
I recommend scheduling vent cleaning by a pro every 1–2 years if you dry many loads. In humid climates, check seals more often. Preventive care reduces the need for Maytag Neptune Dryer Troubleshooting visits.

When to call a technician and what parts you may need
Some repairs are simple DIY. Others need a pro with tools and training.
- Call a technician if:
- The dryer has electrical burning smells or smoke.
- Motor or control board replacement is required.
- You are unsure about handling high-voltage checks.
- Typical parts you might need:
- Thermal fuse, heating element, thermostats, belt, drum rollers, idler pulley, motor, vent hose, and control board.
If a control board is faulty, a tech can test and replace it safely. I often advise homeowners to replace both worn mechanical parts and the venting at the same time. That prevents repeat service calls and improves dryer life.

People also ask (PAA-style questions)
How do I fix a Maytag Neptune dryer that won’t heat?
First clean the vent and lint screen. Then test the heating element and thermal fuse for continuity and replace faulty parts.
Why is my Neptune dryer making loud noises?
Noises typically come from worn drum rollers, idler pulleys, or foreign objects. Inspect and replace worn moving parts.
How often should I clean the dryer vent?
Clean the lint trap after every load and inspect the entire vent at least once a year. Heavily used dryers may need vent cleaning every six months.
Frequently Asked Questions of Maytag Neptune Dryer Troubleshooting
What does a dryer thermal fuse do?
The thermal fuse stops power to the dryer if it overheats. Replace it if it shows no continuity after checking venting.
How can I test the dryer motor?
Unplug the dryer then use a multimeter to check motor windings for continuity. If readings are out of range or there is a short, replace the motor.
Can I run the dryer with a damaged vent?
Running with a blocked or damaged vent reduces efficiency and risks overheating. Fix the vent before regular use.
Why does my dryer take too long to dry clothes?
Restricted airflow or failed heating components make drying slow. Clean venting and test the thermostat and element.
Is it worth repairing an old Maytag Neptune dryer?
If mechanical parts and the motor are in good shape, repairs are often cost-effective. If the control board, motor, and drum parts all fail, replacement may be better.
Conclusion
Maytag Neptune Dryer Troubleshooting starts with simple checks. Clean vents and filters first. Then move to sensors, fuses, belts, and motors in order. Use safety steps and call a technician for high-voltage or complex board issues. Try these steps to fix common problems and extend the life of your dryer. If this guide helped, leave a comment, subscribe for more tips, or share your own repair story.

