
A detailed guide to diagnose and fix Eaton Ultrashift Plus transmission issues quickly.
I have worked on heavy trucks and transmissions for years, and this Eaton Ultrashift Plus Troubleshooting Manual guide bundles hands-on tips, clear diagnostics, and repair steps you can trust. Read on for a structured, easy-to-follow manual that covers causes, fixes, preventive care, tools, and real-world tips to keep Eaton Ultrashift Plus systems running smoothly.
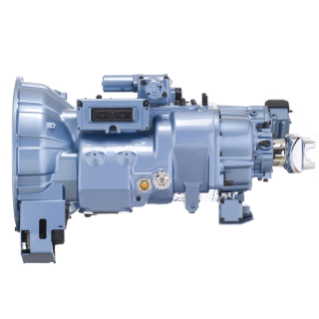
What is the Eaton Ultrashift Plus Troubleshooting Manual?
The Eaton Ultrashift Plus Troubleshooting Manual is a practical guide for diagnosing and repairing Eaton Ultrashift Plus automated transmissions. It explains fault codes, sensor checks, hydraulic tests, and shift logic. The manual is meant for technicians, fleet managers, and owners who need a clear path to find and fix problems fast.
Key points the manual covers:
- Definitions of common error codes and their meanings.
- Step-by-step diagnostic flow for electrical and hydraulic faults.
- Recommended tests and expected readings for components.
- Safe procedures for in-vehicle and bench testing.
Common faults, causes, and fixes
This section lists common failures the Eaton Ultrashift Plus Troubleshooting Manual addresses. Each entry links a symptom, typical cause, and a practical fix.
Shift hesitation or hard shifts
- Symptom: Slow or harsh gear changes.
- Cause: Low hydraulic pressure, worn clutch packs, or faulty solenoids.
- Fix: Check system pressure, test solenoids, and inspect clutch pack wear. Replace worn parts and bleed the system.
No communication or ECU faults
- Symptom: Loss of link between transmission and vehicle ECU or diagnostic tool.
- Cause: Damaged wiring, loose connectors, or ECU software mismatch.
- Fix: Inspect harnesses and grounds. Update ECU software and clear codes after repairs.
Stuck in limp or single gear
- Symptom: Transmission stays in one gear or enters limp mode.
- Cause: Faulty sensors, low fluid level, or failed shift actuator.
- Fix: Check fluid level, run sensor tests, and swap or bench-test actuators.
Leaks and overheating
- Symptom: Transmission fluid leaks or high operating temps.
- Cause: Worn seals, cooling circuit blockages, or overworked duty cycle.
- Fix: Replace seals, inspect cooler and lines, and verify proper cooler flow and fan operation.
Electrical intermittent faults
- Symptom: Random fault codes or sudden shift issues.
- Cause: Corrosion, vibration damage, or poor grounds.
- Fix: Clean and secure connectors, perform wiggle tests to replicate faults, and repair harness as needed.
Step-by-step troubleshooting workflow
A consistent workflow reduces time to repair. Use this ordered approach from the Eaton Ultrashift Plus Troubleshooting Manual.
- Safety first
- Park on level ground and chock wheels.
- Remove ignition key and follow lockout-tagout for heavy vehicles.
- Gather initial data
- Record fault codes and freeze frame data.
- Ask the driver about symptoms and repeat conditions.
- Visual inspection
- Check fluid levels, external leaks, and obvious wiring damage.
- Inspect connectors for corrosion and secure all grounds.
- Electrical checks
- Use a multimeter to check power, ground, and signal voltages.
- Backprobe sensors and solenoids while capturing live data.
- Hydraulic and pressure tests
- Measure line pressure at key ports.
- Compare readings to manual specs and note deviations.
- Component isolation
- Swap known-good sensors or solenoids when practical.
- Use bench testing for suspected failed units.
- Software and calibration
- Ensure the transmission ECU has the latest calibrations.
- Re-flash or update software only after hardware faults are cleared.
- Road test and verify
- Perform controlled road tests with data logging.
- Confirm that faults do not return and shifts are normal.
Tools, resources, and software needed
The Eaton Ultrashift Plus Troubleshooting Manual lists tools that make diagnosis faster and safer.
Essential tools
- Diagnostic scan tool compatible with Eaton transmission ECUs.
- Multimeter and clamp meter for voltage and current checks.
- Pressure gauges and adapter kits for hydraulic testing.
- Basic hand tools and torque wrench for mechanical work.
Helpful accessories
- Wiring diagrams and connector pinouts.
- Service bulletins and calibration files for ECU updates.
- Data logger to capture live signals during drives.
Software notes
- Use only approved software versions from Eaton or authorized dealers.
- Keep a repository of latest calibrations and install instructions.
Maintenance tips to avoid issues
Regular care cuts downtime. These preventive steps come from field experience and recommendations in the Eaton Ultrashift Plus Troubleshooting Manual.
Daily and weekly checks
- Monitor fluid levels and top to spec using the correct fluid.
- Look for fresh leaks and check cooler lines for debris.
Scheduled service
- Replace filter elements and fluid at prescribed intervals.
- Inspect clutch packs and seals during major service cycles.
Good habits
- Train drivers to avoid aggressive starts when cold.
- Log all fault codes and repairs for trend analysis.
Limitations, safety warnings, and when to call the dealer
The Eaton Ultrashift Plus Troubleshooting Manual is a guide. Some repairs require dealer tools, special parts, or factory calibrations.
Know the limits
- ECU internal failures or complex calibration issues may need factory tools.
- Structural or internal gearbox damage may require overhaul at a shop.
Safety warnings
- High hydraulic pressure can cause injury—always depressurize before work.
- Never bypass safety interlocks or override limp modes for road tests.
When to escalate
- Persistent communication faults after harness repair.
- Repeated failures after parts replacement.
- Major internal damage revealed by pressure or bench tests.
Personal experience and practical tips
From years in fleet service I learned small checks save big costs. One truck had repeated limp mode faults. The manual pointed to ECU communication loss, but the real cause was a crushed harness behind an aftermarket bracket. Replacing the harness and securing the bracket fixed the issue.
Lessons learned
- Start simple: checks and scans catch most problems.
- Keep an organized parts and document log for each machine.
- Always test under the same conditions that caused the fault.
Tips to save time
- Keep spare solenoids and sensors for quick swaps.
- Photograph connector pinouts before disconnecting.
- Use a consistent naming and logging method for fault history.
Quick PAA-style questions
How do I read Eaton Ultrashift Plus fault codes?
Use a compatible diagnostic tool to read and clear codes. Note freeze frame data and conditions when the code set.
Can I update the Ultrashift ECU software myself?
Only if you have approved software and calibration files. Many updates require dealer access or special licenses.
What fluid should I use for Eaton Ultrashift Plus?
Use the manufacturer-recommended transmission fluid. Consult the manual for the exact spec and change intervals.
Frequently Asked Questions of Eaton Ultrashift Plus Troubleshooting Manual
What is the most common cause of shift hesitation?
Shift hesitation often comes from low hydraulic pressure or worn clutch components. Check fluid level, pressure, and clutch wear.
How do I clear fault codes on an Ultrashift Plus?
Use an Eaton-compatible diagnostic tool to clear codes after repairs. Verify faults do not return during a road test.
Why does the transmission go into limp mode?
Limp mode protects the system from damage due to sensor faults, low pressure, or ECU issues. Diagnose the root cause before clearing the mode.
How often should I change the transmission fluid?
Follow Eaton service intervals in the manual; intervals vary by duty cycle. Inspect fluid condition more often on heavy-use vehicles.
Are wiring harness problems common?
Yes, vibration and abrasion often cause harness faults. Regular visual checks and securing loose sections reduce risk.
Can I bench-test Ultrashift solenoids?
Yes, you can bench-test solenoids for coil resistance and actuation when safe. Use the manual specs for resistance and test procedures.
When should I replace the transmission ECU?
Replace the ECU only after exhaustive checks for harness, sensor, and power issues. Confirm failure with diagnostic data and dealer guidance.
Conclusion
This Eaton Ultrashift Plus Troubleshooting Manual style guide gives you a clear path from symptom to repair. Use the stepwise workflows, safety checks, and maintenance tips to cut downtime and avoid repeat failures. Start by recording fault data, follow the manual diagnostics, and call a dealer when the issue needs factory tools or calibration. Try these steps on your next Ultrashift issue, subscribe for more guides, or leave a question below so I can share a specific fix for your problem.

