

Vacuum cleaners make our homes cleaner and healthier, but many people forget that these machines also need regular cleaning. If you notice a bad smell, weaker suction, or dust escaping from your vacuum, it’s a clear signal: your vacuum cleaner needs attention. Cleaning your vacuum isn’t just about hygiene—it helps the machine last longer and work better. A neglected vacuum can quickly spread dust and allergens instead of removing them. The good news? You don’t need to be an expert to keep your vacuum in top shape. With a few basic tools and clear steps, you can restore your vacuum’s power and protect your home’s air quality.
This article will guide you through how to clean a vacuum cleaner for all major types: upright, canister, stick, and robot vacuums. You’ll also learn practical tips, common mistakes, and maintenance routines that even seasoned users often overlook. We’ll compare cleaning needs by vacuum type, address special cases like pet hair or allergy concerns, and answer the most common questions people have. By the end, you’ll know how to give your vacuum a full refresh—inside and out.

36% off Today’s Exclusive Deals
Limited-time Exclusive Deals. Check current discount on Amazon.
Check Price on Amazon As an Amazon Associate I earn from qualifying purchases.Why Cleaning Your Vacuum Cleaner Matters
It’s easy to forget that a vacuum cleaner is a machine that handles a lot of dirt. Over time, dust, hair, and debris build up inside, clogging filters and reducing performance. According to the Environmental Protection Agency (EPA), indoor air can be two to five times more polluted than outdoor air.
A dirty vacuum can make things worse by recirculating dust and allergens.
Benefits of cleaning your vacuum regularly:
- Stronger suction: Less blockage means more power.
- Longer lifespan: Clean parts last longer, saving you money.
- Better air quality: Clean filters trap dust, pollen, and pet dander.
- Less odor: No more musty or burnt smells.
Many people clean the dustbin but forget about hoses, filters, and rollers. These hidden spots often cause the most trouble. Regular cleaning is especially important if you have pets, allergies, or live in a dusty area.
How Often Should You Clean Your Vacuum?
Not all vacuums need cleaning at the same frequency. The right schedule depends on your usage, floor type, and whether you have pets.
| Vacuum Part | Recommended Cleaning Frequency | Signs It Needs Cleaning |
|---|---|---|
| Dustbin/Bag | After every use | Full or smells bad |
| Filters | Monthly (washable); every 3-6 months (replaceable) | Weaker suction, dust escape |
| Brush roll | Monthly or as needed | Hair or threads wrapped |
| Hoses and attachments | Every 2-3 months | Blockage or loss of suction |
| Exterior | Monthly | Dusty or sticky |
Pro tip: If you vacuum daily or have pets, check parts more often. Listen for odd noises or smells—they often mean it’s time for cleaning.
Tools And Supplies You’ll Need
Cleaning a vacuum doesn’t require fancy tools. Here’s what helps:
- Scissors or seam ripper: For cutting hair from brush rollers.
- Soft brush or old toothbrush: For scrubbing filters and parts.
- Microfiber cloth: Picks up dust without scratching surfaces.
- Mild dish soap: For washing washable filters and bins.
- Compressed air can: Blows dust out of hard-to-reach spots.
- Replacement filters or bags: Have spares ready for best results.
Never use harsh chemicals or soak electronic parts. Always check the vacuum’s manual for specific cleaning instructions, especially for filters and electrical sections.
Step-by-step Guide: How To Clean A Vacuum Cleaner
Let’s break down the cleaning process, covering all the major vacuum types. The steps are similar but not identical. Always unplug your vacuum before starting.
1. Empty The Dustbin Or Replace The Bag
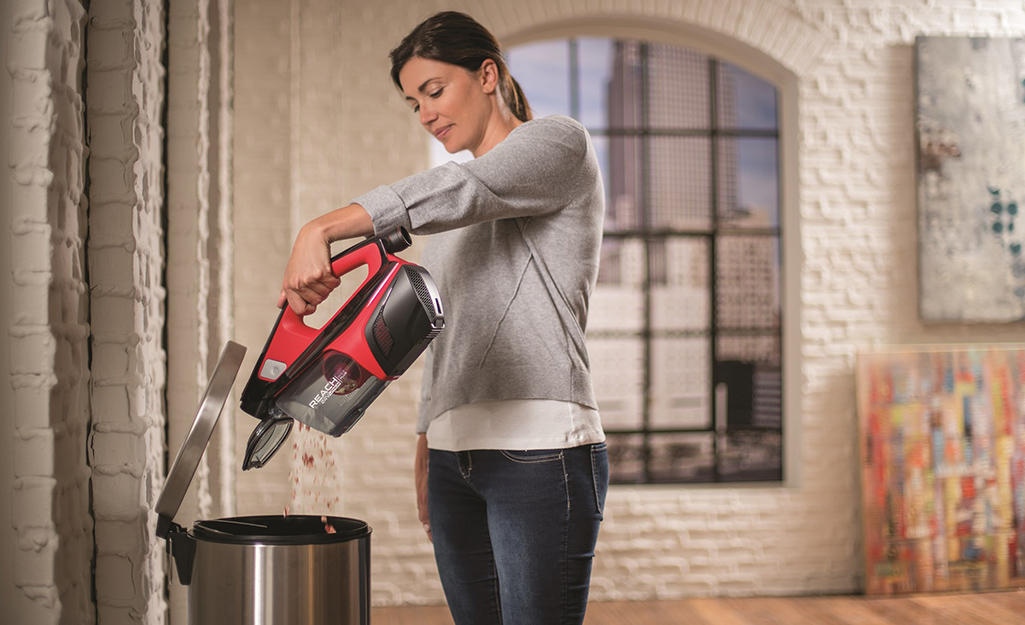
- Bagless vacuums: Remove the dustbin. Hold it over a trash can and empty all contents. Tap gently to loosen stuck dust.
- Bagged vacuums: Replace the bag when it’s about two-thirds full. Don’t wait until it’s overstuffed—this can damage the motor.
Tip: If your dustbin is washable, rinse it with warm soapy water. Dry completely before reinserting.
2. Clean Or Replace Filters
Filters are the lungs of your vacuum. Most vacuums have two types:
- Pre-motor filter: Protects the motor from dust.
- HEPA or exhaust filter: Traps fine particles.
Washable filters: Rinse under lukewarm water. Do NOT use soap unless the manual says it’s safe. Squeeze out excess water and let air dry for at least 24 hours.
Non-washable or HEPA filters: Gently tap to remove dust, or replace as needed. Never wash a filter unless it’s marked “washable.”
Common mistake: Putting a damp filter back in can cause mold and damage.
3. Untangle And Clean The Brush Roll
Hair, string, and fibers can wrap tightly around the roller brush.
- Remove the brush roll according to your vacuum’s instructions.
- Use scissors or a seam ripper to cut away hair and debris.
- Wipe with a damp cloth to remove dust and grease.
- Check the roller bearings for tangled threads or dirt.
For pet owners: Remove hair weekly. It can build up quickly, even if you don’t see it.
4. Check Hoses And Attachments
Blockages in hoses are a common cause of lost suction.
- Detach all hoses and tools.
- Look through the hose—if you can’t see light at the other end, there’s a clog.
- Use a broom handle or flexible brush to gently push out debris.
- Rinse plastic hoses with soapy water if needed. Allow to dry fully.
- Wipe attachments with a damp cloth.
Non-obvious insight: Even “clean” looking hoses can hold dust that triggers allergies. A quick rinse every few months helps a lot.
5. Wipe Down The Exterior And Wheels
A dusty vacuum can spread dirt as you move it.
- Use a microfiber cloth to wipe all surfaces, buttons, and wheels.
- For sticky spots, use a small amount of mild soap.
- Avoid wetting any electrical parts.
Hidden tip: Dust often collects in crevices and wheels. A cotton swab can help clean these small areas.
6. Deep Clean For Specific Types
Upright And Canister Vacuums
Most upright and canister models have similar steps, but canisters often have extra filters and longer hoses. Check the manual for any hidden filters or washable parts.
Stick And Cordless Vacuums
Stick vacuums are lighter but often have smaller dustbins and filters that clog quickly.
- Clean filters and bins more often.
- Battery-powered models: Never get the battery area wet.
Robot Vacuums
Robot vacuums need special care:
- Empty the dustbin after every run.
- Wash or replace filters monthly.
- Remove and clean side brushes and main brush weekly.
- Wipe sensors and charging contacts with a dry cloth.
- Clear wheels and undercarriage of hair and dust.
Surprising fact: Dirty sensors can make robots get stuck or miss dirt.
Comparing Cleaning Needs By Vacuum Type
Some vacuums are easier to clean than others. Here’s how the main types compare:
| Vacuum Type | Cleaning Difficulty | Main Trouble Spots |
|---|---|---|
| Upright | Moderate | Brush roll, filters, dustbin |
| Canister | Moderate | Hoses, filters, wheels |
| Stick/Cordless | Easy to Moderate | Filters, dustbin, brush |
| Robot | Easy | Sensors, brushes, bin |
| Handheld | Easy | Filters, bin |
Extra insight: Upright vacuums often hide extra filters under the dustbin—many owners never clean these, causing slow loss of suction over time.
Handling Pet Hair, Allergies, And Special Cases
Pet Hair
Pet hair is tough on vacuums. It wraps around rollers, clogs filters, and fills bins quickly.
- Clean brush rolls weekly.
- Use a vacuum with a tangle-free brush if possible.
- Wash or replace filters more often—pet dander builds up fast.
Allergies
If you or your family have allergies, clean more often:
- Use HEPA filters if possible.
- Wear a mask when cleaning the vacuum.
- Don’t shake out dust indoors—empty bins outside.
Quick tip: HEPA filters can remove up to 99.97% of particles as small as 0.3 microns, including pollen and dust mites.
Wet Or Smelly Debris
Never vacuum up wet materials unless your vacuum is designed for wet cleaning. Moisture can cause mold and ruin filters.
If your vacuum smells bad:
- Wash all washable parts.
- Sprinkle baking soda in the dustbin and let it sit for an hour, then empty.
- Replace filters if the smell remains.
Signs Your Vacuum Needs Cleaning
Don’t wait for problems! If you notice any of these, it’s time to clean:
- Weaker suction: Usually a clogged filter or hose.
- Loud noises: Something stuck in the roller or motor area.
- Smells: Bacteria, mold, or old dust in filters or bins.
- Visible dust escaping: Broken seals, clogged filters, or full dustbin.
- Brush roll not spinning: Hair or threads wrapped around the brush.
Cleaning Mistakes To Avoid
Some cleaning steps can actually harm your vacuum. Here’s what not to do:
- Washing non-washable filters: Always check the manual first.
- Reassembling while wet: Moisture causes mold and damages electronics.
- Using harsh chemicals: Stick to mild soap and water.
- Forcing out clogs: Use gentle pressure to avoid damaging hoses.
- Ignoring hidden filters: Many vacuums have pre-motor or exhaust filters that need attention.

Maintenance Schedule For A Healthy Vacuum
A simple routine helps you remember what to clean and when.
| Task | Frequency |
|---|---|
| Empty dustbin or replace bag | After every use |
| Clean filters | Monthly |
| Replace HEPA filters | Every 3–6 months |
| Clean brush roll | Monthly (or weekly with pets) |
| Wipe exterior | Monthly |
| Check hoses/attachments | Every 2–3 months |
Setting a phone reminder or marking your calendar can help you remember these tasks.
Storage And Handling Tips
How you store your vacuum affects its cleanliness and lifespan.
- Store in a dry place to prevent mold.
- Keep power cords wrapped to avoid tangles.
- Don’t leave the vacuum in direct sunlight—plastic parts can fade or crack.
- Store attachments in a bag or holder to keep them dust-free.
If your vacuum is cordless, store it near an outlet so it’s always ready.
Upgrading And Replacing Parts
Even well-maintained vacuums need new parts sometimes.
- Filters lose effectiveness over time. Replace them as recommended.
- Brush rolls wear out, especially with lots of pet hair.
- Batteries in cordless models may need replacing every 2–4 years.
- Belts (in some upright vacuums) may stretch or break.
Check the manufacturer’s website or manual for compatible parts. Using generic filters sometimes saves money, but original parts often fit better and last longer.
When To Seek Professional Service
DIY cleaning solves most problems, but sometimes you need an expert.
- The motor sounds odd or won’t start.
- There’s a burning smell even after cleaning.
- Major parts (like the power cord or motor) are damaged.
- The vacuum is under warranty—don’t risk voiding it.
For expensive or high-end models, annual servicing by a technician can be a wise investment.
Eco-friendly Cleaning And Disposal
Consider the environment when cleaning or replacing parts.
- Dispose of old filters and bags according to local recycling rules.
- Use washable filters when possible to reduce waste.
- Never pour dirty water from cleaning the vacuum into storm drains.
Some brands offer filter recycling programs or make vacuums from recycled materials. Check for eco-friendly options if you’re buying a new vacuum.
Where To Find More Information
If you’re unsure about any step, check your vacuum’s user manual—it often has diagrams and detailed cleaning tips for your specific model. Many manufacturers also have helpful videos and FAQs on their websites.
For more general information about vacuum cleaners and indoor air quality, the EPA’s indoor air quality page is a trusted resource.
Frequently Asked Questions
How Often Should I Clean My Vacuum’s Filter?
Most washable filters need cleaning once a month. Replace non-washable or HEPA filters every 3–6 months, or as the manufacturer recommends. If you have pets or allergies, check and clean more often.
Can I Wash All Parts Of My Vacuum With Water?
No. Only washable filters, dustbins, and plastic hoses can usually be rinsed. Never wet electrical parts or non-washable filters. Always read your vacuum’s manual to see which parts are safe to wash.
Why Does My Vacuum Smell Bad Even After Cleaning?
Persistent odors can come from old dust, pet hair, or moldy filters. Wash all washable parts, let them dry completely, and replace filters if the smell remains. Cleaning with baking soda can help remove stubborn odors.
What Should I Do If My Vacuum Loses Suction?
Check for a full dustbin or bag, clogged filters, and blockages in hoses or brush rolls. Clean or replace filters, remove any debris, and make sure all parts are dry and assembled correctly. Weak suction is almost always caused by a clog or dirty filter.
Is It Safe To Use Generic Replacement Filters?
You can use generic filters if they match your vacuum’s model. However, original parts are often better quality and fit more precisely. If you have allergies, stick with HEPA-certified filters for best results.
Keeping your vacuum cleaner in good shape doesn’t take much time, but the benefits add up fast: cleaner floors, healthier air, and a longer-lasting machine. With the right routine, your vacuum will always be ready for the next cleaning job.

