
An AC manifold gauge set measures system pressures, checks for leaks, and helps charge or evacuate refrigerant.
I’ve worked on HVAC systems for years, and this guide explains how to use an AC manifold gauge set step by step. You’ll learn safety checks, how to read low and high side pressures, how to connect and charge, common mistakes to avoid, and practical tips from real field experience.

What an AC manifold gauge set is and why it matters
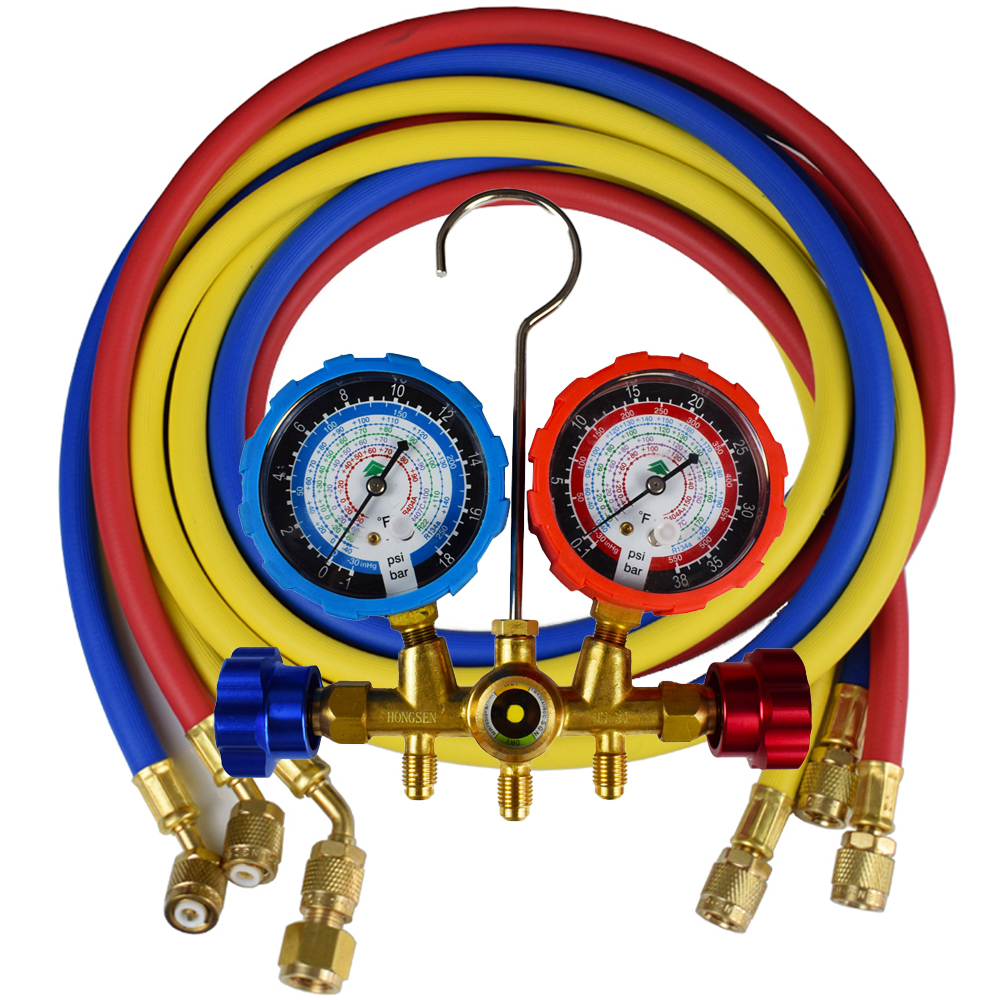
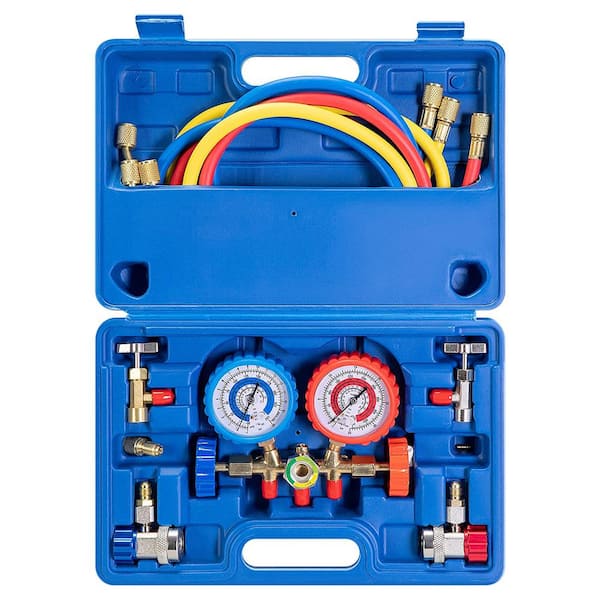
An AC manifold gauge set is a tool used to read refrigerant pressure on the low and high sides of an air conditioning or heat pump system. It has two gauges, a center manifold, and hoses that connect to service ports. Technicians use it to diagnose issues, recover refrigerant, evacuate systems, and add refrigerant safely.
Using an AC manifold gauge set gives immediate, reliable pressure data. That data tells you system charge, compressor health, and whether there’s a restriction or leak. For safe and accurate HVAC work, learning to use this tool is essential.

Key parts of the gauge set and what they do
Know your tool before you use it. A typical AC manifold gauge set includes these parts:
- Low-side gauge (usually blue) showing suction pressure.
- High-side gauge (usually red) showing discharge pressure.
- Center manifold block with service valves to open or close flow.
- Three hoses: blue to low port, red to high port, yellow to vacuum/charge bottle or recovery machine.
- Adapters and valve-core depressors for different service ports.
Understanding each part helps prevent leaks and damage. I always check hoses and valve threads before connecting. That small habit saves time and avoids mistakes.
Safety checks and preparation before connecting
Safety first. Follow these steps before you attach an AC manifold gauge set:
- Turn off power to the unit at the breaker and confirm the compressor is off.
- Wear safety glasses and gloves to guard against cold refrigerant and oil spray.
- Inspect hoses for cracks, kinks, or weak fittings.
- Identify the low and high service ports; mark them if needed.
- Verify the system’s refrigerant type to select correct service procedures.
I once saw a tech mix refrigerant types because they skipped the prep step. It cost the customer a compressor and a full system flush. Don’t skip prep.
Step-by-step: How to use an AC manifold gauge set safely
Follow these ordered steps to use an AC manifold gauge set. Keep each step calm and deliberate.
- Leave both manifold valves closed and connect blue hose to low port and red hose to high port. Torque by hand firmly, not over-tight.
- Attach yellow hose to your vacuum pump, charging cylinder, or recovery machine depending on the task.
- Turn on the vacuum pump or recovery machine if evacuating or recovering. Open manifold valves slowly to allow flow.
- Read static pressure with the compressor off to help identify charge and temperature conditions.
- Start the system and observe running pressures on both gauges. Record values and compare to expected ranges for the refrigerant.
- To add refrigerant, open the center valve slowly while watching the low-side gauge and referring to manufacturer specs.
- Close valves, remove hoses in the correct order, then replace service port caps and restore power.
Practice builds skill. I recommend doing a full wiring of steps on a demo unit at least a few times before working live systems.

Reading and interpreting pressures (common checks and tips)
Pressure readings tell a story. Here’s what to look for:
- Normal low-side pressure varies with refrigerant type and ambient temperature. Low suction pressure often means undercharge, restriction, or failing compressor.
- High-side pressure shows condensing pressure. High readings can mean overcharge, poor airflow, or a blocked condenser.
- Large pressure difference with low suction usually points to restriction; equal low and high side near ambient points to a failed compressor.
Ask these quick practical questions as you read gauges:
What is a normal low-side pressure for R-410A?
Normal low-side pressure depends on evaporator temperature and load, but typical running low-side pressures for R-410A often range in the mid-100s psi at full load; check manufacturer specs for exact targets.
How does ambient temperature affect gauge readings?
Higher outdoor temps raise high-side pressures and can drop efficiency, so adjust expectations and target pressures based on the load and temperature.
Can I diagnose a leak with static pressure?
Static pressure helps but isn’t definitive. A closed system with low static pressure likely has a leak, but you should confirm with leak detection tools.

Charging and evacuating: best practices
Charging and evacuating are core uses for an AC manifold gauge set. Use these best practices:
- Evacuate to recommended deep vacuum levels before charging to remove moisture and non-condensables.
- Never charge by pressure alone; weigh refrigerant to reach manufacturer-specified charge by mass when required.
- Use a dry charging method (liquid charge for certain systems) only when specified. Many split systems require vapor charging at the compressor inlet.
A real-world tip: I always weigh refrigerant in and out. Estimating by gauge alone once led to an overcharged unit that cycled frequently. The scale fixed the issue.

Common mistakes and how to avoid them
Avoid these frequent errors when you use an AC manifold gauge set:
- Mixing refrigerant types – always verify the refrigerant before connecting.
- Over-tightening fittings – can damage Schrader valves and cause leaks.
- Charging based on high-side pressure alone – use temperature-pressure charts and weight when possible.
- Not replacing port caps – contaminants can sneak in fast.
Correcting these mistakes is simple if you build a checklist and stick to it. My checklist saved me on busy days when I might rush.

Maintenance, calibration, and storage of your gauge set
Keep your AC manifold gauge set in good condition with routine care:
- Rinse and dry hoses after recovery work; store upright in a clean case.
- Replace O-rings and gaskets annually or when worn.
- Check gauge calibration periodically; modern digital gauges may need less frequent calibration but still require verification.
- Keep spare service port caps and adapters in your kit.
Proper care extends tool life and improves measurement accuracy. I label service dates on the case, which helps track calibration needs.

Troubleshooting tips and quick fixes
When readings confuse you, try these steps:
- Verify gauges are zeroed with hoses disconnected. Non-zero zero indicates a leak or gauge problem.
- Swap hoses or use a second gauge set to rule out faulty hose or gauge.
- Compare temperatures at the evaporator and condenser with pressure readings to confirm conditions.
- If stuck, isolate the system and use a leak detector and thermometer to narrow the issue.
A tip from the field: if the low side reads very low and the compressor runs hot, check for liquid floodback and a stuck TXV or metering device.
Practical examples and real-life scenarios
Example 1: Undercharged split system
- Symptoms: Weak cooling, low suction pressure, high superheat.
- Action: Evacuate, weigh in recommended refrigerant, confirm pressures and temperatures.
Example 2: Restricted refrigerant flow
- Symptoms: High head pressure, low suction pressure, frosted metering device.
- Action: Recover refrigerant, replace filter/drier and inspect for kinked lines, then evacuate and recharge.
I handled a job where gauges showed normal static but poor cooling. The issue was a collapsed suction line under insulation. Gauges pointed me in the right direction after I checked temperatures and pressures carefully.
Small tips that save time
- Use color-coded hoses and leave service caps labeled.
- Keep a digital thermometer and refrigerant scale in your bag with the gauge set.
- Log readings for each job to spot trends over time.
- Practice on demo units before working on customer systems.
These small habits improve speed and accuracy. They also build trust with customers.
Frequently Asked Questions of How do you use an AC manifold gauge set?
How do I identify the low and high service ports?
Low-side ports are usually larger and marked L; high-side ports are smaller and marked H. Confirm with unit documentation when unsure.
Can I use an AC manifold gauge set on any refrigerant?
Most mechanical sets read pressure for any refrigerant, but charts and charging methods differ by refrigerant type. Ensure compatibility and follow manufacturer recommendations.
Is it safe to leave gauges connected while the system runs?
Yes, gauges are designed for live readings. Keep valves set properly and stay clear of moving parts and hot surfaces while monitoring.
How often should I calibrate my gauges?
Check calibration annually or if readings seem off. Digital gauges may need less frequent checks but still require verification.
What if the low-side gauge reads zero while the compressor is running?
Zero on the low side with a running compressor usually indicates a restriction, closed service valve, or a failed compressor. Stop the system and diagnose before operating further.
Conclusion
Using an AC manifold gauge set is a core skill for safe, accurate HVAC work. Start with good prep, understand each part of the tool, follow step-by-step connection and charging procedures, and use pressure readings with temperature checks and weight measurements. Practice on demo units, keep a checklist, and maintain your gear for reliable results.
Take action: next time you work on a system, run through the steps here and log your readings. If you found this useful, try a practice session or subscribe for more HVAC how-tos and tips.

