
Installing an Apus RV tankless water heater transforms your mobile living experience. You get endless hot water, better energy efficiency, and more space inside your RV. But the installation requires care, the right tools, and a clear understanding of both your RV’s plumbing and electrical systems. Whether you’re replacing an old unit or installing a new one, getting it right means comfort on your travels—and avoiding leaks or electrical issues. This guide walks you through every step, explains what to watch out for, and gives you practical tips most first-timers miss.
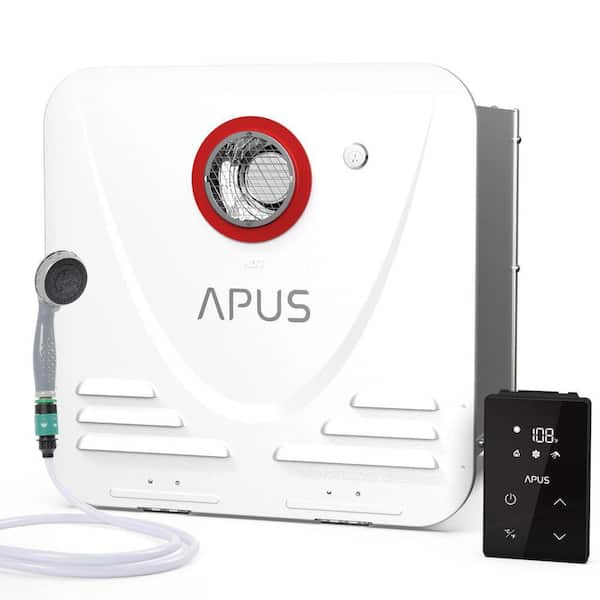
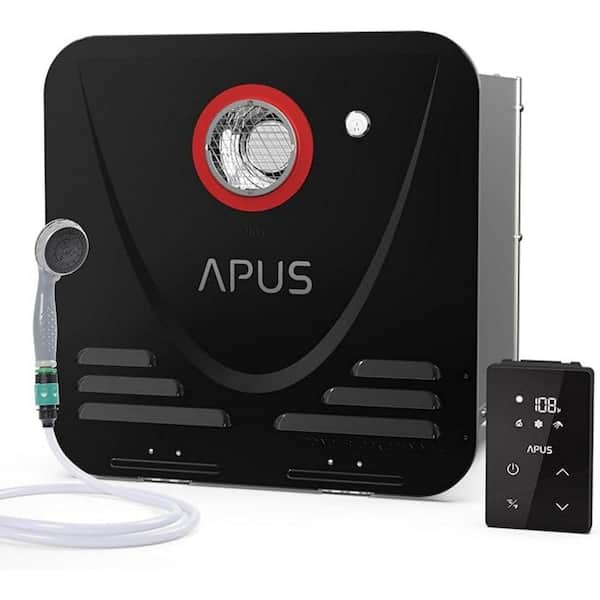
Understanding The Apus Rv Tankless Water Heater
Before you begin, know what makes the Apus tankless water heater unique. Unlike traditional tank heaters, tankless models heat water only when you need it. This means:
- Continuous hot water: No waiting for a tank to refill.
- Energy savings: Heats water on demand, so less wasted energy.
- Space-saving design: Compact units fit small RV spaces.
Apus models are designed for RVs, so they’re lighter and use less power or propane compared to home units. However, installation is more involved than simply plugging in a countertop appliance.
Key Features Of Apus Rv Tankless Water Heaters
- Digital temperature controls
- Safety shut-off systems
- Low water pressure requirements
- Multiple venting options
Most models operate on 12V DC power for electronics and propane for heating. Double-check your unit’s exact model number for specs.
Tools And Materials Needed
Gathering the right tools before starting saves hours of frustration. For this installation, you’ll need:
- Phillips and flathead screwdrivers
- Adjustable wrench
- Pliers
- Cordless drill with bits
- Pipe cutter or tubing cutter
- Teflon tape (plumber’s tape)
- Pipe sealant (RV-safe)
- Level
- Stud finder (for wall mounting)
- Wire stripper/cutter
- Multimeter (for testing connections)
- Propane leak detector solution
Materials:
- Flexible water hoses (correct diameter for your RV plumbing)
- Propane hose and fittings rated for RV use
- Electrical wiring (if your model requires direct wiring)
- Weatherproof sealant (for exterior wall penetrations)
- Mounting screws or bolts (usually included with unit)
- Wire connectors or terminal blocks
Pro tip: Always check your Apus manual for any model-specific requirements or adapters.
Pre-installation Preparation
Take time to plan. A rushed install can lead to leaks, poor performance, or safety hazards.
1. Turn Off Utilities
Turn off your RV’s water supply and propane gas at the main valve. Disconnect the RV from shore power if you’ll be working near electrical lines.
2. Choose The Right Location
Your heater needs:
- Access to cold water in and hot water out lines
- Close proximity to the propane line (for gas models)
- Venting to the outside (never vent into the RV)
- Enough space for maintenance and airflow
Most people install tankless heaters where the old tank heater was. If not, pick an exterior wall with enough clearance.
3. Remove The Old Water Heater (if Replacing)
- Drain the tank fully.
- Disconnect power, water, and gas lines.
- Remove mounting screws.
- Pull the old unit out carefully.
Inspect the opening for damage and measure to ensure the new Apus unit fits.
4. Inspect And Prep Connections
Check your RV’s water lines for scale or corrosion. Replace old, brittle hoses. Clean the propane line end. Test the electrical connection with a multimeter for proper voltage.
Step-by-step Installation Guide
Let’s walk through the installation. Every RV is a little different, but these are the main steps.
1. Mount The Heater
- Hold the unit in position.
- Use a level to make sure it’s straight.
- Mark mounting holes.
- Drill pilot holes if needed.
- Secure the heater with screws or bolts.
Tip: Don’t overtighten—plastic RV walls can crack.
2. Connect Water Lines
- Wrap threads with Teflon tape.
- Attach flexible hoses to the cold water inlet and hot water outlet.
- Use a wrench to tighten, but don’t overdo it—over-tightening can crush washers or crack fittings.
- Double-check that hoses are not kinked or pinched.
If you’re adapting from rigid lines, use the correct RV hose adapters.
3. Connect Propane Gas Line
- Apply pipe sealant to threads (never use Teflon tape on gas).
- Attach the propane line and tighten with a wrench.
- Use a propane leak detector solution (or soapy water) to check for leaks after you turn the gas back on. Bubbles mean a leak—fix before proceeding.
4. Electrical Wiring
Most Apus units use 12V DC for controls. Depending on your model:
- Connect positive (red) and negative (black) wires to the appropriate RV circuit.
- Use wire connectors or terminal blocks for secure connections.
- If your unit uses 110V AC, make sure it’s on a dedicated breaker.
- Test with a multimeter before turning power back on.
5. Venting
Tankless units must vent outdoors. Follow your Apus manual’s instructions exactly.
- Slide the vent pipe through the wall opening.
- Seal edges with weatherproof sealant.
- Secure the vent cap on the outside.
- Ensure nothing blocks the vent path.
Common mistake: Using old venting from a tank heater. Only use vent parts approved for your Apus model.
6. Final Checks Before Start-up
- Inspect all connections—water, gas, and electric.
- Double-check for leaks.
- Make sure the unit is mounted securely.
- Remove any tools or debris from the area.

Start-up And Testing
When you’re confident everything’s connected correctly, it’s time to test.
1. Turn On Water Supply
- Open the main water valve.
- Check for leaks at all connections.
- Open a hot water faucet inside your RV to let air out of the lines.
2. Turn On Propane
- Open the main propane valve.
- Listen and smell for leaks.
- If you suspect a leak, shut off immediately and fix before continuing.
3. Power Up The Unit
- Turn on the power to the heater.
- Most Apus units have a control panel or display. Follow the manual to set your preferred temperature (often 115–125°F is comfortable).
4. Test Hot Water
- Open a hot water tap.
- The heater should fire up and produce hot water within a few seconds.
- Check the temperature and water flow.
- Watch the vent outside for proper exhaust.
5. Monitor For Issues
Let the unit run for several minutes. Watch for:
- Leaks at any connection
- Error codes on the display
- Odd sounds or smells
If all is well, your installation is a success.
Common Mistakes And How To Avoid Them
Many RV owners make similar mistakes on their first install. Avoid these for a smooth experience.
- Skipping leak tests: Never assume connections are tight enough. Always test with water and propane.
- Poor venting: Failing to vent properly can allow dangerous gases inside.
- Using the wrong adapters: Mismatched hose sizes or types can lead to leaks or bursts.
- Over-tightening fittings: Too much force can break plastic parts or strip threads.
- Not supporting hoses: Flexible hoses should be clamped or supported to prevent vibration damage.
- Ignoring electrical polarity: Reversing wires can cause malfunctions or damage.
- Setting temperature too high: Overheating risks scalds and wastes energy.
Comparing Tankless Vs. Traditional Rv Water Heaters
Understanding the advantages of your new unit helps with troubleshooting and maintenance.
| Feature | Tankless Heater | Traditional Tank Heater |
|---|---|---|
| Hot Water Supply | Endless (on demand) | Limited by tank size |
| Energy Efficiency | High (heats only when needed) | Lower (keeps water hot 24/7) |
| Space Required | Compact | Bulky |
| Maintenance Needs | Descale annually | Flush and inspect tank |
| Initial Cost | Higher | Lower |
Key Installation Specs: Apus Models At A Glance
Before you buy or install, compare these common Apus specs:
| Model | Max Flow Rate (GPM) | Power Source | Min. Water Pressure (PSI) | Dimensions (inches) |
|---|---|---|---|---|
| Apus RV-Pro 6L | 1.6 | Propane + 12V DC | 15 | 13 x 11 x 7 |
| Apus RV-Eco 8L | 2.1 | Propane + 12V DC | 20 | 15 x 12 x 8 |
| Apus RV-Max 10L | 2.6 | Propane + 12V DC | 15 | 17 x 13 x 9 |
Maintenance Tips After Installation
To keep your Apus tankless water heater running smoothly:
- Descale annually: Hard water causes mineral buildup. Flush with vinegar or a descaling solution.
- Inspect vent and intake: Check for blockages (leaves, nests) monthly.
- Test for leaks: Check water and gas connections every few months.
- Clean the filter: Most units have an inlet filter to catch debris—rinse it out as needed.
- Monitor error codes: Keep your manual handy for troubleshooting.
Ignoring maintenance can shorten your heater’s life or void the warranty.
Safety Precautions And Codes
RV water heater installs involve water, propane, and electricity. Always follow safety rules:
- Never smoke or create sparks near propane.
- Use only RV-rated hoses, sealants, and wiring.
- Follow your RV manufacturer’s recommendations.
- Respect all local building and RV codes.
If you’re uncomfortable with plumbing, gas, or electrical work, hire a certified RV technician. Some warranty claims require professional installation.
Real-world Example: First-time Installation Experience
Consider Jim and Sara, RV owners who installed an Apus RV-Pro 6L themselves. They watched online tutorials but missed one crucial step: leak-testing the propane line. After firing up the unit, they smelled gas. Luckily, they caught the problem fast, shut off the supply, and fixed a loose fitting.
Key lessons they shared:
- Never skip leak tests, even if you’re in a hurry.
- Take photos during disassembly—makes reassembly easier.
- Label each wire and hose as you disconnect.
- Don’t throw out the old heater until the new one runs perfectly.
Learning from others’ mistakes can save you time and stress.
Troubleshooting Common Issues
If your Apus tankless water heater isn’t working right after install, try these tips:
- No hot water: Check for power to the unit, open propane valve, and water flow.
- Unit won’t ignite: Inspect the vent for blockages. Make sure all connections are tight.
- Error code displays: Consult the manual for code meanings—often it’s a simple fix like low water pressure.
- Water is too hot or too cold: Adjust the digital temperature setting. If still wrong, check for proper water flow.
- Strange noises: Humming or rattling usually means loose mounting or hoses.
If problems persist, contact Apus customer support or a certified RV technician.
Saving Energy And Water In Your Rv
Tankless heaters help, but you can do more:
- Turn off the unit when you leave the RV for long periods.
- Use low-flow showerheads to save water and propane.
- Insulate exposed pipes to prevent heat loss.
- Set the temperature only as high as needed—lower is safer and more efficient.
When To Call A Professional
Installing an Apus RV tankless water heater is doable for many RV owners, but call a pro if:
- You’re unsure about propane or electrical connections.
- The install location needs new vent holes or significant plumbing changes.
- The unit doesn’t work after careful troubleshooting.
Professional installation can cost $150–$400, depending on your RV and location, but it’s worth the peace of mind.
Useful Resources
Read your Apus owner’s manual thoroughly—it contains model-specific steps and tips. For more detail, check online RV forums, instructional videos, and the RV Industry Association’s safety guidelines.
For a deeper dive into RV plumbing and propane safety, visit the RVDA (Recreational Vehicle Dealers Association).
Frequently Asked Questions
How Long Does It Take To Install An Apus Rv Tankless Water Heater?
Most installations take 2–4 hours if you have basic tools and some DIY experience. Replacing an old unit is usually faster because water, gas, and vent lines are already in place.
Can I Install An Apus Tankless Heater In Any Rv?
Most Apus models fit standard RV cutouts, but always measure your space and check the unit’s dimensions before buying. Some older or custom RVs may need extra plumbing or venting work.
Is It Safe To Install A Tankless Water Heater Myself?
If you follow the manual, have the right tools, and test all connections, it’s safe for most DIYers. However, working with propane and electricity has risks. If unsure, hire a certified technician.
Will A Tankless Heater Work With Low Water Pressure?
Yes—Apus heaters are designed for RVs, so they often work at pressures as low as 15 PSI. If your water pressure is too low, the heater may not ignite or keep a steady temperature.
What Maintenance Does My Apus Tankless Water Heater Need?
Flush the system with descaler each year, clean the intake filter regularly, and check for leaks and vent blockages. This keeps your system safe and efficient.
Installing an Apus RV tankless water heater is one of the best upgrades for comfort and efficiency on the road. Take your time, double-check every connection, and soon you’ll enjoy endless hot showers wherever your adventure takes you.

