
Getting your RV ready for the open road after winter is an exciting time. But before you hit the highway, there’s a crucial step you can’t skip: de-winterizing your Suburban Advantage RV tank water heater. Skipping this process can lead to damage, unpleasant odors, and even health risks. If you’re not sure where to begin, don’t worry. This guide walks you through every step, using simple language and real-world tips for success.
Why De-winterize Your Suburban Advantage Rv Water Heater?
Winterizing protects your water heater from freezing by draining water and sometimes adding antifreeze. When warmer weather returns, de-winterizing reverses these steps so you can safely use hot water again. If you don’t de-winterize properly, leftover antifreeze can contaminate your water, and trapped air or debris can harm your heater’s performance.
RV experts estimate that improper de-winterizing is one of the top causes of water heater problems each spring. Taking the time to do it right can extend the life of your unit and keep your travels smooth.
Tools And Supplies You’ll Need
Gather these items before starting. Having everything on hand saves time and helps avoid mistakes.
- Adjustable wrench or socket set
- Water heater bypass kit (if not already installed)
- RV-safe non-toxic antifreeze (for flushing, if needed)
- Garden hose (preferably drinking water safe)
- 5-gallon bucket
- Teflon tape (for threads)
- New anode rod (optional, for replacement if corroded)
- Owner’s manual (for your specific Suburban model)
- Screwdriver
- Protective gloves and eyewear
Step-by-step De-winterizing Process
Follow these steps in order. Each one prepares your Suburban Advantage water heater for safe and effective operation.
1. Inspect The Water Heater Exterior
Walk around your RV and locate the water heater access panel. Open it and check for:
- Cracks or damage from ice or rodents
- Rust or corrosion near fittings
- Signs of leaking or loose connections
If you spot serious damage, consult a technician before continuing.
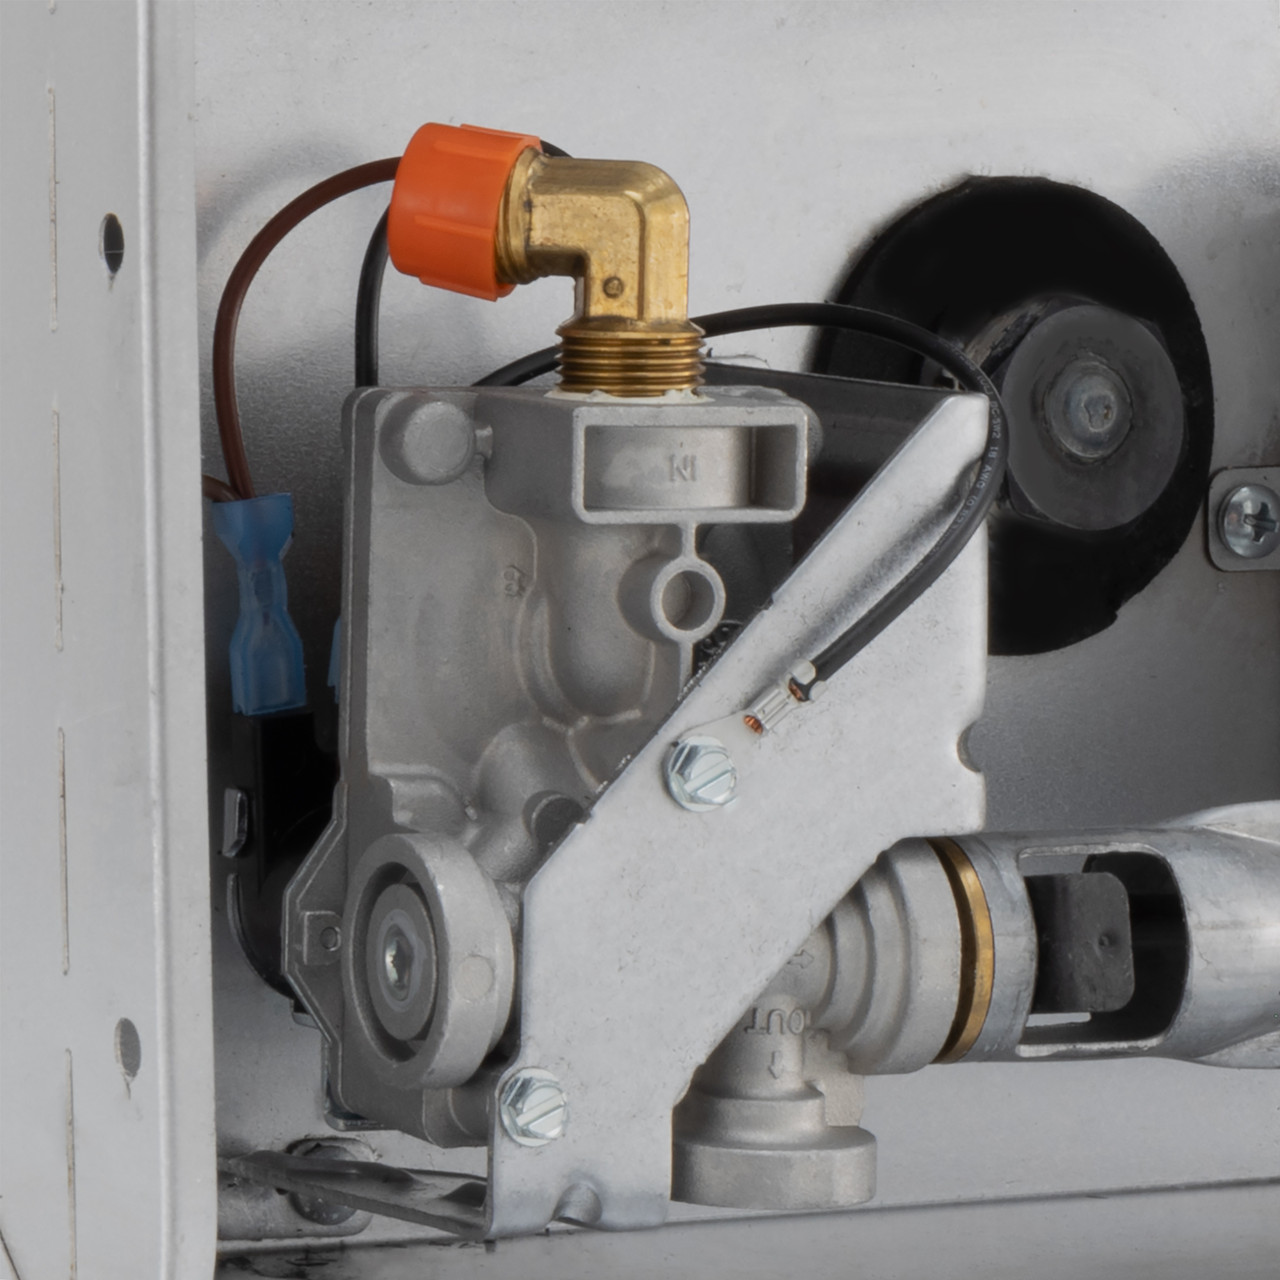
2. Remove The Water Heater Bypass (if Installed)
Many RVs have a bypass kit that isolates the water heater during winterization. This prevents antifreeze from entering the tank.
- Locate the bypass valves inside your RV, usually near the back of the water heater.
- Set the valves from “bypass” to “normal” or “use” position.
- If you’re unsure, your owner’s manual has diagrams.
Missed Insight: Many RVers forget to return the bypass valves, leading to no hot water or antifreeze taste in the water.
3. Drain Any Remaining Antifreeze
Before adding fresh water, remove all traces of RV antifreeze.
- Make sure the water heater is off and cool.
- Remove the drain plug or anode rod at the bottom of the tank using an adjustable wrench.
- Catch liquid in a bucket.
- If a lot of pink liquid comes out, wait until it fully drains.
- Rinse the opening with clean water.
- Replace the drain plug or anode rod, using Teflon tape on threads.
Tip: Check your anode rod for heavy corrosion. If more than half is missing, replace it now to protect your tank.
4. Flush The Water Heater
Flushing removes sediment and leftover chemicals.
- Connect a garden hose to the city water inlet.
- Open all hot water faucets inside the RV (kitchen, bathroom, shower).
- Turn on the water supply and let it run until the water flows clear at every faucet. This can take 10–20 minutes.
- Close the faucets.
Non-obvious advice: Don’t forget the outdoor shower if your RV has one. Many people miss this, leaving antifreeze in the lines.
5. Fill The Water Heater Tank
Your Suburban Advantage tank holds 6 or 10 gallons, depending on the model.
- With the bypass valves in “normal,” turn on the water pump (if not using city water).
- Open a hot water faucet and listen for air to escape. When a steady stream flows, the tank is full.
- Close the faucet.
Extra tip: If you hear constant sputtering, check for leaks or open drains.
6. Check For Leaks
Carefully inspect all connections:
- Around the drain plug/anode rod
- At the inlet and outlet pipes
- Inside the RV near the heater
If you find drips, tighten fittings gently. Never overtighten, as this can damage soft parts.
7. Purge Air From The System
Air trapped in the tank and lines can cause “banging” or uneven heating.
- Open each hot water faucet, one at a time, until all sputtering stops.
- Start with the faucet closest to the heater and move to the farthest.
Beginner’s mistake: Skipping this step can lead to false alarms about heater problems later.
8. Re-ignite The Water Heater
If you have a gas model:
- Confirm the tank is full of water. Running the heater dry can destroy it.
- Turn the gas control to “pilot” or “on.”
- Use the igniter or match to light the pilot (see your manual).
- Wait for the burner to ignite.
- Set to your desired temperature.
If you have an electric model:
- Ensure the tank is full.
- Switch the unit to “on” at the breaker or control panel.
Warning: Never turn on a Suburban Advantage water heater without water in the tank. This burns out the heating element or damages the tank.
9. Test For Proper Operation
Wait 30–60 minutes for the tank to heat. Test with a hot water faucet:
- Water should be hot, clear, and odor-free.
- Listen for normal burner or heating element sounds.
If the water smells odd, flush the system again. If it’s still cold, re-check your bypass valves and power supply.
Sample Comparison: Gas Vs. Electric Suburban Advantage Water Heaters
Here’s a quick look at the main differences between gas and electric models.
| Feature | Gas | Electric |
|---|---|---|
| Heating Time | Faster (20-30 min) | Slower (40-60 min) |
| Energy Source | Propane | 110V AC |
| Efficiency | High, but uses fuel | Lower, but convenient |
| Maintenance | Needs venting checks | Check element condition |

How To Sanitize Your Water Heater And Lines
After de-winterizing, it’s smart to sanitize the tank and water lines. This step keeps your water safe for drinking, cooking, and bathing.
- Close all drain valves.
- Mix 1/4 cup of household bleach per 15 gallons of tank capacity in a gallon of water.
- Pour the mixture into the freshwater tank using a funnel.
- Fill the rest of the tank with fresh water.
- Turn on the water pump.
- Open every faucet until you smell bleach, then close.
- Let sit for 4–12 hours.
- Drain the tank and refill with clean water.
- Run all faucets until the bleach smell is gone.
Extra insight: Sanitizing removes bacteria and algae that can grow during storage. Don’t skip this, even if your water looks clear.
Common Mistakes To Avoid
Many first-time RV owners make errors that lead to costly repairs or poor water quality. Here are some to watch for:
- Forgetting to switch bypass valves: This is the most common mistake and causes no hot water.
- Not replacing the anode rod: A worn rod exposes the tank to rust and leaks.
- Turning on the heater with an empty tank: This burns out elements or cracks the tank.
- Ignoring leaks: Small drips can cause water damage inside walls.
- Not flushing all fixtures: Antifreeze left in one faucet can contaminate the whole system.
How Often Should You De-winterize And Service?
You need to de-winterize every spring or whenever you take your RV out of long-term storage. It’s also smart to do a quick flush and check if you use the RV only on weekends and it sits for weeks at a time. Annual maintenance should include:
- Inspecting and replacing the anode rod if needed
- Checking for leaks and corrosion
- Flushing sediment from the tank
Troubleshooting: When Things Don’t Go As Planned
If something isn’t working, don’t panic. Use this quick guide to solve common issues.
| Problem | Possible Cause | Solution |
|---|---|---|
| No hot water | Bypass valve still on, empty tank, power/gas off | Set valve to “normal,” fill tank, check power/gas |
| Water leaks | Loose drain plug, damaged gasket | Tighten plug, replace gasket/anode rod |
| Strange smell/taste | Leftover antifreeze, bacteria | Flush and sanitize system |
| Heater won’t ignite | No gas, faulty igniter, air in line | Check gas supply, purge line, inspect igniter |

Real-world Example: De-winterizing In Action
Let’s say your Suburban Advantage water heater sat unused all winter. You open the access panel and see no damage. You drain pink antifreeze from the tank, flush with fresh water, and switch the bypass valves. After refilling and checking for leaks, you turn on the gas and hear the burner light.
In less than an hour, you have hot water for your morning coffee.
Key takeaway: Following each step avoids surprises and gets you ready for adventure.
Extra Tips From Experienced Rvers
- Keep a log of maintenance dates and what was done.
- Store your tools and spare parts (like anode rods and Teflon tape) in a labeled bin.
- Always test water quality before your first use—especially if kids or pets will drink it.
- Carry a spare drain plug or anode rod for emergencies.
- If you’re unsure, check the manufacturer’s instructions or visit the official Suburban water heater manual for diagrams and troubleshooting.
Frequently Asked Questions
How Do I Know If All Antifreeze Is Out Of My Water Heater?
Run water through all hot faucets until it’s clear and there’s no pink color or sweet smell. If in doubt, repeat the flushing process.
Can I Use Household Bleach To Sanitize My Rv Water Heater?
Yes, but only in small amounts. Mix about 1/4 cup bleach per 15 gallons of tank water, then flush thoroughly to remove any bleach taste or odor.
What If I Turned On My Water Heater With No Water In The Tank?
Turn it off immediately. Check for damage to the heating element (for electric) or tank (for gas). If you notice leaks or no hot water, contact a service professional.
How Often Should I Replace The Anode Rod?
Inspect the anode rod every year. Replace it if more than half is corroded or worn away. This protects your tank from rust and extends its life.
Is It Safe To Drink Water From My Rv After De-winterizing?
Yes, if you flushed all antifreeze and sanitized the system. Test water quality and flush lines before use, especially after long storage.
Getting your Suburban Advantage RV tank water heater ready for travel doesn’t have to be stressful. By following these clear steps and tips, you’ll enjoy safe, reliable hot water all season long—without unexpected problems. Happy travels and enjoy your RV adventures!

