

Cutting your own hair at home is a skill more people are learning today. Maybe you want to save money, need a quick trim, or just like the idea of doing it yourself. Whatever your reason, learning to cut your own hair can feel challenging at first.
But with the right approach, you can get great results and avoid common mistakes. This guide will take you step by step, from choosing tools to finishing touches, so you can cut your own hair with confidence.

36% off Today’s Exclusive Deals
Limited-time Exclusive Deals. Check current discount on Amazon.
Check Price on Amazon As an Amazon Associate I earn from qualifying purchases.Understanding Your Hair Type
Before you start, it’s important to know your hair type. Your hair’s texture, thickness, and how it falls will affect how you cut it.
- Straight hair shows mistakes more easily but is simple to section and cut.
- Wavy hair can hide small uneven spots, but shrinks when dry.
- Curly hair needs careful sectioning, as curls spring up after cutting.
- Thick hair may require thinning or layering for a lighter feel.
- Fine hair can look thin if over-layered and needs gentle handling.
People often overlook how hair type impacts cutting results. For example, curly hair should be cut dry or slightly damp, as wet curls can look much shorter when dry. Also, thicker hair needs sharper scissors and more patience for even sections.
Choosing The Right Tools
Using the right tools makes cutting your own hair much easier and safer. Here are the essentials you’ll need:
- Hair-cutting scissors: Never use kitchen or regular scissors. Professional shears are sharper and give a clean cut.
- Comb: A fine-tooth comb helps make straight lines and even sections.
- Clips: Sectioning clips keep hair organized.
- Mirror setup: A wall mirror plus a handheld mirror lets you see the back of your head.
- Spray bottle: Use for dampening hair as needed.
- Trimmer or clippers: Essential for short styles or men’s haircuts.
- Cape or old towel: To keep hair off your clothes.
Investing in proper tools is one of the best ways to avoid rough, uneven cuts. Cheap scissors can cause split ends and are harder to control. You don’t need salon-grade gear, but avoid the lowest-quality options.
Here’s a quick comparison of basic home haircutting tools:
| Tool | Best For | Price Range | Comments |
|---|---|---|---|
| Hair-cutting scissors | All styles | $10–$50 | Sharper and safer than regular scissors |
| Clippers | Short cuts, fades | $20–$100 | Includes guides for length control |
| Comb | Sectioning, smoothing | $2–$10 | Fine-tooth works for detail |
| Mirror set | Seeing back of head | $15–$40 | Essential for self-cuts |
Preparing To Cut
Preparation is as important as the cut itself. A rushed or messy setup leads to mistakes.
- Wash your hair: Clean hair is easier to cut and shows its true texture. Dry, greasy hair can clump, making even cuts harder.
- Detangle: Brush or comb out all knots.
- Dampen hair: Most people find it easier to cut hair when it’s damp, not soaking wet. Use a spray bottle to control moisture.
- Create a cutting space: Choose a place with good lighting, a large mirror, and easy clean-up. Bathrooms are common, but kitchens with tile floors work too.
- Wear an old shirt or cape: Hair clippings can be itchy and messy.
One thing many beginners skip is setting aside enough time. Don’t rush—give yourself at least 30 to 45 minutes if it’s your first time.
Sectioning: The Key To Even Cuts
Proper sectioning is what separates a neat home haircut from a choppy one. Here’s how to do it:
- Divide hair into layers: Use clips to separate the top, sides, and back. For longer hair, part it down the middle and create 2–4 sections.
- Work with small sections: Cutting too much hair at once leads to uneven results.
- Secure with clips: Keep sections you aren’t working on clipped away.
Sectioning gives you control and makes it easier to see what you’re doing—especially at the back. Many new DIY cutters forget this step, leading to uneven layers.
Here’s a visual overview of common sectioning for self-haircuts:
| Haircut Type | Sectioning Method | Tips |
|---|---|---|
| Long hair trim | 2 halves, then split each into top and bottom | Work from bottom up |
| Bangs/fringe | Triangle at front hairline | Use a fine-tooth comb for sharp lines |
| Men’s clipper cut | Divide into top, sides, and back | Clip top out of the way |

Basic Home Haircut Techniques
There are several techniques you can use, depending on your desired style. Here are the most useful for beginners:
The Straight Trim
This is the simplest way to remove split ends or tidy up long hair.
- Part hair down the middle and comb it flat.
- Pull all hair to the front of your shoulders.
- Decide how much to cut. Start small—about a quarter inch.
- Hold hair between your fingers and cut straight across.
- Check for evenness in the mirror. Trim any uneven bits.
The Point Cut
Point cutting softens the ends, making the result look more natural.
- After the straight cut, hold a small section of hair.
- Turn your scissors vertical.
- Snip into the ends with the tips of the scissors, about 1/4 inch deep.
- Repeat for each section.
Cutting Bangs (fringe)
Bangs need extra care since they’re front and center.
- Section off a small triangle at the front.
- Comb hair flat and twist it slightly.
- Cut less than you think—bangs shrink as they dry.
- Use point cutting for a softer look.
Layering
Layers add movement and reduce bulk.
- Take a small section from the top of your head.
- Hold it straight up.
- Decide the length of your shortest layer and cut.
- Use this as a guide as you move around the head.
Layering is trickier for beginners. Always cut less than you think you need. You can always take more off, but you can’t put it back.
Using Clippers
Great for short styles and men’s haircuts.
- Choose a guard length (the number on the guard = hair length in millimeters).
- Start at the sides and back, moving clippers upward.
- For fades, switch to a shorter guard near the bottom.
- Use scissors to blend the top.
It’s easy to rush with clippers, but slow, even strokes are best. Go over each section more than once to catch missed hairs.
Step-by-step: How To Cut Your Own Hair (long, Medium, Short)
Let’s break down the process for the three most common self-haircut types.
1. Trimming Long Hair
- Wash and detangle hair.
- Part down the middle and bring all hair forward.
- Decide on length—start with less.
- Cut below your fingers in small, straight snips.
- Check both sides in the mirror for evenness.
- Use point cutting for a softer finish.
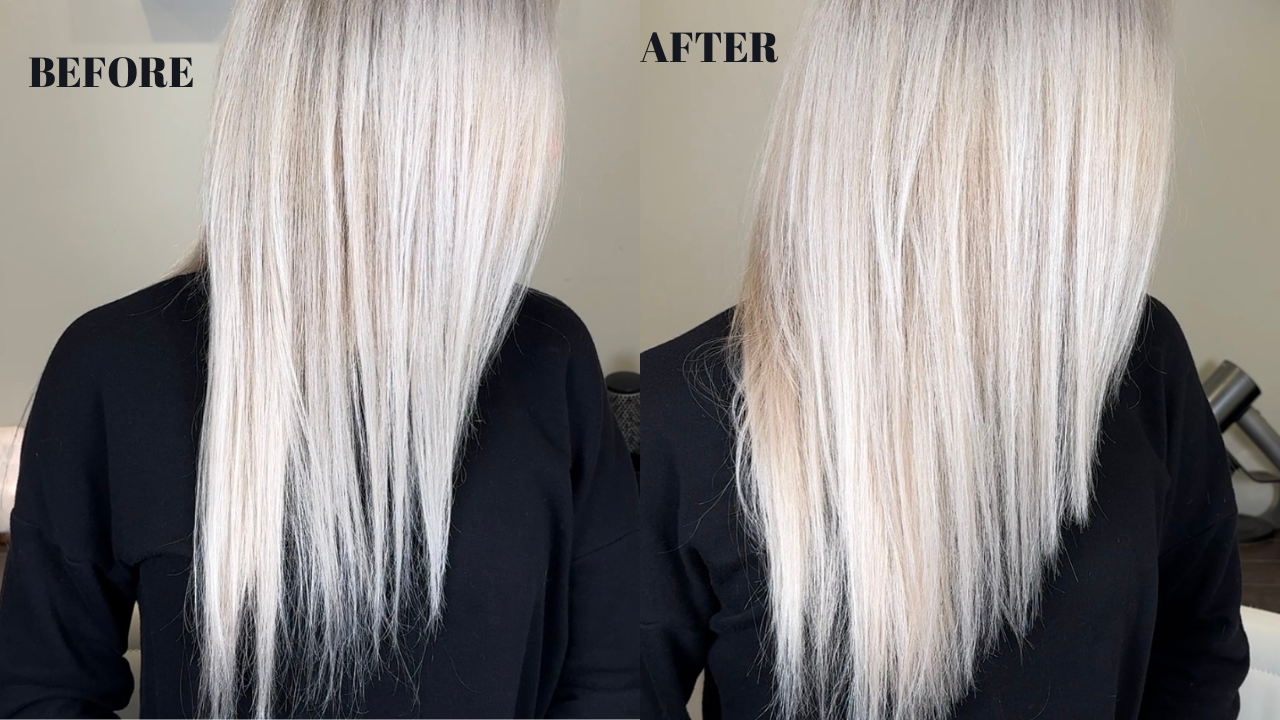
Tip: If you want a V-shape or U-shape at the back, cut the middle section slightly shorter than the sides.
2. Cutting Medium Length Hair
- Section hair into top and bottom halves.
- Clip the top half up.
- Start with the bottom, trimming straight across.
- Release the top half, comb it down, and blend with the bottom.
- Use point cutting for layers.
Insight: For a slight layered look, pull sections up at a 45-degree angle before cutting.
3. Short Hair Or Men’s Haircut
- Use clippers with a guard for the sides and back.
- Move against the direction of hair growth.
- For the top, use scissors and a comb (“scissor over comb” method).
- Blend the transition between lengths.
- Check the back with a mirror.
Pro Tip: If you’re unsure, start with a longer guard. You can always go shorter, but you can’t reattach hair.
Cleaning Up And Styling After The Cut
Once you finish cutting, some final steps make a big difference:
- Check for missed spots: Use both mirrors to look for uneven areas or long hairs.
- Shake out your hair: Move your head and run your fingers through to spot any mistakes.
- Wash and style: This helps see how your cut looks when styled.
- Tidy up: Sweep or vacuum hair clippings right away.
A step many forget: Hair can look different when dry. If you cut while wet, check again after drying for small touch-ups.
Common Mistakes And How To Avoid Them
Even confident DIYers make mistakes. Here are the most frequent and how to prevent them:
- Cutting too much at once: Always start with small trims.
- Not checking the back: Use a second mirror to avoid uneven layers.
- Skipping sectioning: Leads to choppy results.
- Using dull scissors: Causes split ends and tears hair.
- Cutting hair when it’s too wet: Wet hair shrinks as it dries, so you may cut off more than planned.
- Rushing: Take your time, especially for the first few cuts.
- Not accounting for hair’s natural fall: Curly or wavy hair can bounce up when dry.
Non-obvious insight: For curly hair, only cut when your curls are styled how you normally wear them. This prevents uneven shrinkage.

When To See A Professional
Cutting your own hair is practical, but some situations need a professional touch:
- Drastic changes: Going from long to very short is risky at home.
- Complicated layers or bobs: Precision cuts are hard to do yourself.
- Correcting major mistakes: Sometimes, a salon visit is the best fix.
Remember, a stylist can always help fix uneven spots or give you tips for next time. If you want to know more about hair types and care, the American Hair Loss Association explains the science behind different hair textures.
Safety And Hygiene Tips
Keeping things safe and clean helps you avoid infections and accidents:
- Disinfect scissors and combs before and after each use.
- Keep tools out of reach of children.
- Cut in a well-lit space to avoid mistakes.
- Don’t rush—accidents happen when you hurry.
- Dispose of hair properly to avoid clogging drains.
If you accidentally cut yourself, clean the wound with soap and water. Seek medical help for deep cuts.
How To Maintain Your Cut Between Trims
Maintaining your haircut keeps it looking fresh:
- Trim every 4–8 weeks, depending on style and growth.
- Use conditioner to avoid split ends.
- Avoid heat styling too often.
- Use a silk pillowcase to reduce frizz and breakage.
Non-obvious tip: For men’s clipper cuts, a quick tidy-up around the ears and neck every two weeks keeps the cut looking sharp.
Comparing At-home Vs Salon Haircuts
Before you commit to regular DIY haircuts, consider the pros and cons.
| Aspect | At-Home Haircut | Salon Haircut |
|---|---|---|
| Cost | Low (after tool investment) | Medium to high per visit |
| Convenience | Anytime, at home | Need appointment, travel |
| Quality | Good for simple cuts | Best for complex styles |
| Risk | Higher for big changes | Minimal, professional correction |
Practical Tips For Specific Styles
For Curly Hair
- Always cut dry or only slightly damp.
- Work curl by curl.
- Don’t pull curls straight—cut them where they naturally fall.
For Bangs
- Twist the hair slightly before cutting for a softer line.
- Go slow—bangs are easy to overcut.
For Layers
- Pull hair straight up for the shortest layer.
- Keep sections small for control.
For Fades (clipper Cuts)
- Use multiple guard sizes for blending.
- Move slowly to avoid harsh lines.
What To Do If You Make A Mistake
Mistakes happen. Here’s how to handle them:
- Too short? Style with gel, mousse, or clips until it grows.
- Uneven? Even it out with small snips.
- Choppy layers? Blend with point cutting or ask a pro for help.
Don’t panic—hair grows about half an inch per month. Most mistakes are fixable with time or a little creativity.
Frequently Asked Questions
How Often Should I Cut My Own Hair?
It depends on your style. Most people trim every 6–8 weeks to keep hair healthy and maintain the shape. Short styles or bangs may need touch-ups every 3–4 weeks.
Can I Cut My Own Hair If It’s Curly Or Textured?
Yes, but it needs a different approach. Cut dry or only slightly damp, and trim curls where they naturally fall. Don’t stretch curls straight, or you’ll cut too much.
What’s The Biggest Mistake Beginners Make?
The most common mistake is cutting off too much at once. Always start with small trims, and remember hair shrinks as it dries—especially curly or wavy hair.
Should I Cut My Hair Wet Or Dry?
Most people find it easier to cut damp hair, but for curly or wavy textures, cut hair dry or styled as usual. This prevents cutting off more than you intended.
What Tools Do I Really Need For A Basic Home Haircut?
You need sharp hair-cutting scissors, a fine-tooth comb, sectioning clips, and a mirror setup. Clippers are helpful for short styles. Never use household scissors, as they can damage your hair.
Cutting your own hair can be rewarding and practical. With the right tools, preparation, and care, you can achieve a fresh look at home and even enjoy the process. Mistakes are part of learning—take your time, start small, and you’ll get better with each cut.

