
The Kenmore Coldspot Model 106 is a popular refrigerator in many homes. But like any appliance, its ice maker can sometimes stop working as expected. If your ice maker is not making ice, making too much ice, or producing strange noises, you’re not alone. Troubleshooting may feel confusing, especially if you don’t have technical experience. This guide breaks down everything you need to know, step by step, to help you solve problems quickly and confidently. Even if you’re new to home repair, you’ll learn how to check each possible cause and what actions to take. Let’s get your ice maker working again—one part at a time.
Basic Troubleshooting Principles
Before you start, it’s important to remember a few basic rules. Always unplug the refrigerator before working on any electrical parts. Keep your hands dry to avoid electric shock. Use a flashlight and a small screwdriver for most checks. Sometimes, a simple fix can save you time and money.
Kenmore Coldspot Model 106 Ice Maker Troubleshooting: 106 Key Checks
Every ice maker issue can be traced back to one or more components. Below you’ll find 106 individual items to inspect, test, or adjust. Each step covers a unique part or potential problem. Some will be simple checks, while others might require a closer look or a replacement part.
1. Power Supply
Check if the refrigerator is plugged in and turned on. Power issues are a common cause of ice maker failure.
2. Circuit Breaker
Verify the circuit breaker hasn’t tripped. Reset if needed.
3. Refrigerator Switch
Ensure the main refrigerator switch is on.
4. Ice Maker Switch
Look for the ice maker ON/OFF switch (often on the side of the ice maker) and set it to ON.
5. Door Switch
The door switch turns off the ice maker when the door is open. Make sure it clicks when pressed.
6. Water Supply Line
Check the water supply line behind the fridge for kinks or bends.
7. Water Valve
Locate the water inlet valve. Test for proper function—listen for water flow when the ice maker cycles.
8. Water Filter
A clogged water filter can block ice production. Replace it if it’s dirty or over six months old.
9. Water Pressure
Use a gauge to check water pressure. It should be above 20 psi for reliable ice making.
10. Water Reservoir
Some models have a water reservoir. Make sure it’s not empty or frozen.
11. Ice Maker Arm
The ice maker arm controls ice production. If stuck in the up position, push it down.
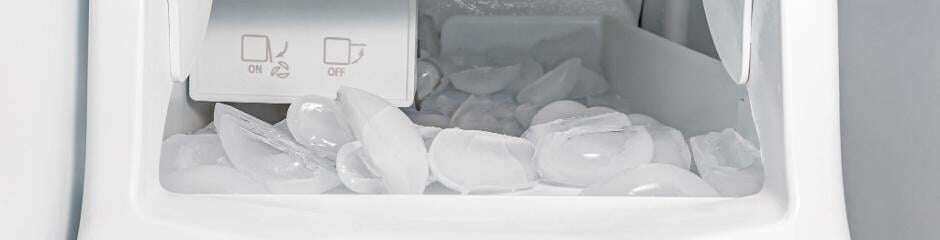
12. Ice Bin Position
Ensure the ice bin is seated correctly. If not, the maker may not cycle.
13. Freezer Temperature
Set the freezer temperature between 0°F and 5°F for proper ice forming.
14. Ice Maker Mold
Inspect the ice mold (where cubes form) for cracks or scale buildup.
15. Mold Thermostat
The mold thermostat triggers ice harvest. Test for continuity with a multimeter.
16. Ice Ejector Blades
Check the ejector blades for stuck ice or debris.
17. Ice Maker Motor
Listen for the ice maker motor. If silent, the motor may have failed.
18. Ice Maker Gear
Inspect the gear for wear or broken teeth.
19. Ice Level Sensor
Some units have an ice level sensor. Clean and test for response.
20. Harvest Cycle
Observe if the ice maker completes a harvest cycle (ejecting cubes).
21. Fill Tube
Look at the water fill tube for ice blockages.
22. Fill Tube Heater
If equipped, check the fill tube heater to prevent freezing.
23. Ice Tray Heater
Test the tray heater that helps release ice cubes.
24. Ice Maker Control Board
Check for faulty control board signals. Swap if necessary.
25. Wiring Harness
Inspect the wiring harness for loose or damaged connections.
26. Ice Cube Size
Small cubes may mean low water flow; large cubes suggest a stuck valve.
27. Ice Quality
Cloudy or white ice means impurities in the water or a dirty filter.
28. Water Taste
Bad taste? Clean the ice bin and replace the filter.
29. Water Valve Coil
Test the water valve coil for continuity.
30. Mounting Screws
Tighten any loose mounting screws on the ice maker assembly.
31. Evaporator Fan
Check the evaporator fan for proper operation.
32. Condenser Coils
Vacuum condenser coils to improve cooling.
33. Defrost System
Ensure the defrost system is working. Ice buildup can block water lines.
34. Ice Bin Sensor
If present, clean the ice bin sensor to ensure proper operation.
35. Ice Chute
Clear any blockages from the ice chute.
36. Auger Motor
Test the auger motor that pushes ice through the chute.
37. Auger Coupler
Inspect the auger coupler for cracks.
38. Ice Dispenser Switch
Check the dispenser switch for continuity.
39. Dispenser Paddle
Test the dispenser paddle for sticking or damage.
40. Dispenser Solenoid
Listen for a click when using the dispenser. Silence may mean a faulty solenoid.
41. Ice Crusher
Clear jams from the ice crusher if cubes aren’t dispensing.
42. Dispenser Door
Ensure the dispenser door closes fully to prevent frost.
43. Frost Buildup
Remove frost buildup around the ice maker and chute.
44. Door Gasket
Check the door gasket for air leaks.
45. Freezer Air Flow
Don’t block air vents inside the freezer with food.
46. Control Knob
Set the ice thickness control knob (if available) to the middle position.
47. Leveling Legs
Adjust the leveling legs so the fridge is not leaning.
48. Main Control Board
Reset or test the main control board for software glitches.
49. Diagnostic Mode
Enter the diagnostic mode (see your manual) to check for error codes.
50. Error Codes
Interpret any error codes shown on the display.
51. User Manual
Consult the user manual for specific model instructions.
52. Water Line Valve
Ensure the shutoff valve on the water line is fully open.
53. Copper Tubing
Replace brittle or kinked copper tubing.
54. Plastic Water Line
Inspect plastic water lines for cracks and leaks.
55. Drain Line
Clear any clogs from the drain line.
56. Thermostat Setting
Double-check the thermostat is set correctly.
57. Ice Production Rate
Count how many batches per day. Normal is 8–10 cycles.
58. High Room Temperature
Keep room below 110°F for best ice production.
59. Freezer Overload
Don’t overfill—overloaded freezers slow ice making.
60. Recent Repairs
If recently repaired, double-check all connections.
61. Ice Stuck Together
Break up clumped ice in the bin.
62. Water Leak
Look for water leaks under or behind the fridge.
63. Water Drip Tray
Empty the water drip tray if full.
64. Smell In Ice
Wipe the bin with baking soda to remove odors.
65. Mold Growth
Clean for mold or mildew around the ice maker.
66. Paint Flakes
Don’t use the ice if you see paint flakes in the cubes.
67. Inlet Valve Screen
Clean the inlet valve screen for sediment.
68. Water Hammer
Install a water hammer arrestor if pipes bang.
69. Vibration
Level the fridge to reduce vibration.
70. Noise
Identify and silence strange noises—could be a failing fan or motor.
71. Recirculation Pump
If equipped, check the recirculation pump.
72. Ice Thickness Adjustment
Adjust the ice thickness screw if cubes are too thin.
73. Ice Stuck In Mold
Warm the mold gently with a hair dryer (on low) to free stuck ice.
74. Frozen Water Line
Thaw a frozen fill line with warm cloth.
75. Ice Maker Test Button
Press the test button to run a cycle.
76. Indicator Light
Watch the indicator light for error signals.
77. Water Valve Buzz
A buzzing valve may mean low pressure or a stuck valve.
78. Electrical Contacts
Clean any corroded electrical contacts.
79. Humidity
High humidity can cause frost and clumping.
80. Ice Production Delay
Allow 24 hours after installation for full ice production.
81. Delivery Line
Ensure the ice delivery line is clear.
82. Ice Cutting Grid
If present, check the cutting grid for breaks.
83. Ice Maker Module
Replace the module if all else fails and it’s not cycling.
84. Insulation
Check that insulation around the ice maker is intact.
85. Freezer Light
Replace a burned-out freezer light—may affect door switch operation.
86. Reset Procedure
Reset the ice maker by unplugging for 5 minutes.
87. Ice Maker Harness Plug
Reconnect a loose harness plug.
88. Ice Maker Fuse
Replace a blown fuse on the control board.
89. Ice Maker Relay
Swap a faulty relay if the motor doesn’t start.
90. Ice Bin Full Indicator
Clean the bin full sensor for accurate reading.
91. Ice Bin Rails
Lubricate ice bin rails for smooth movement.
92. Faulty Timer
Replace a broken timer if the cycle doesn’t advance.
93. Freezer Seal
Replace a worn freezer seal to keep cold air in.
94. Ice Maker Overfilling
Adjust the fill level screw if overfilling.
95. Low Ice Output
Increase freezer setting or check water flow for low ice output.
96. Damaged Ice Mold
Replace a cracked or worn ice mold.
97. Ejector Motor Gears
Replace stripped ejector motor gears.
98. Ice Maker Cover
Reinstall or replace a missing ice maker cover.
99. Compressor
Listen for the compressor to ensure it’s running.
100. Internal Frost
Defrost any internal frost buildup.
101. Freezer Shelves
Arrange freezer shelves to allow good airflow.
102. Ice Scoop
Use a clean ice scoop to avoid contamination.
103. Ice Production Test
Manually add water to the tray—if it makes ice, water supply is the issue.
104. Manufacturer Support
Contact Kenmore support for unusual problems.
105. Service Bulletin
Check for service bulletins for your model.
106. Replacement Parts
Use only OEM replacement parts for repairs.

Common Problems And Solutions
Ice Maker Not Making Ice
First, confirm power and water supply. Next, check the ice maker arm position and the freezer temperature. If everything looks normal but no ice forms, try resetting the ice maker and checking for error codes.
Ice Maker Not Dispensing Ice
If ice is present but won’t dispense, inspect the auger motor, ice bin position, and dispenser switch. Clear any blockages in the ice chute or crusher.
Ice Maker Making Too Much Ice
A stuck ice level sensor or arm can cause overproduction. Clean the sensor and check for proper movement.
Poor Ice Quality
Cloudy or off-tasting ice usually means you need a new filter or to clean the ice bin. Also, check for mold or mineral buildup.
Leaks Or Water Issues
Leaks often mean a loose water line, bad valve, or clogged drain. Tighten, replace, or unclog as needed.
Maintenance Tips For Long Life
- Change the water filter every 6 months.
- Clean the ice bin and mold monthly.
- Check the door gasket for air leaks.
- Defrost the freezer if frost builds up.
- Keep condenser coils clean for efficient cooling.
When To Call A Professional
If you’ve checked all 106 items and your ice maker still doesn’t work, it’s time to call a licensed technician. Electrical faults, sealed system issues, or complex board failures require expert help. Always use OEM parts for replacements to protect your warranty.
For detailed technical diagrams and part numbers, the official Sears PartsDirect page is an excellent resource.
Frequently Asked Questions
Why Is My Ice Maker Making Thin Or Hollow Ice Cubes?
Thin or hollow ice means low water pressure or a partially blocked water filter. Make sure the water supply valve is fully open and replace the filter if it’s old.
How Do I Reset The Kenmore Coldspot Model 106 Ice Maker?
To reset, turn off the fridge for five minutes or press the ice maker test button (if your model has one). Listen for a cycle start sound when power returns.
What Temperature Should My Freezer Be For Proper Ice Making?
Set your freezer to 0°F to 5°F. Higher temperatures slow ice production or prevent it entirely.
My Ice Maker Is Loud. Is This Normal?
Some noise is normal during ice harvest. However, loud grinding or banging may mean a problem with the motor, auger, or dispenser. Inspect these parts for damage or blockages.
How Often Should I Clean My Ice Maker And Bin?
Clean both every 1–2 months with warm water and mild detergent. Rinse and dry thoroughly before refilling.
Getting your Kenmore Coldspot Model 106 ice maker back to normal often just needs a careful, step-by-step approach. By checking each of the 106 key areas, you can save time, avoid unnecessary repairs, and enjoy clean, fresh ice every day.
If all else fails, professional service is just a call away.


