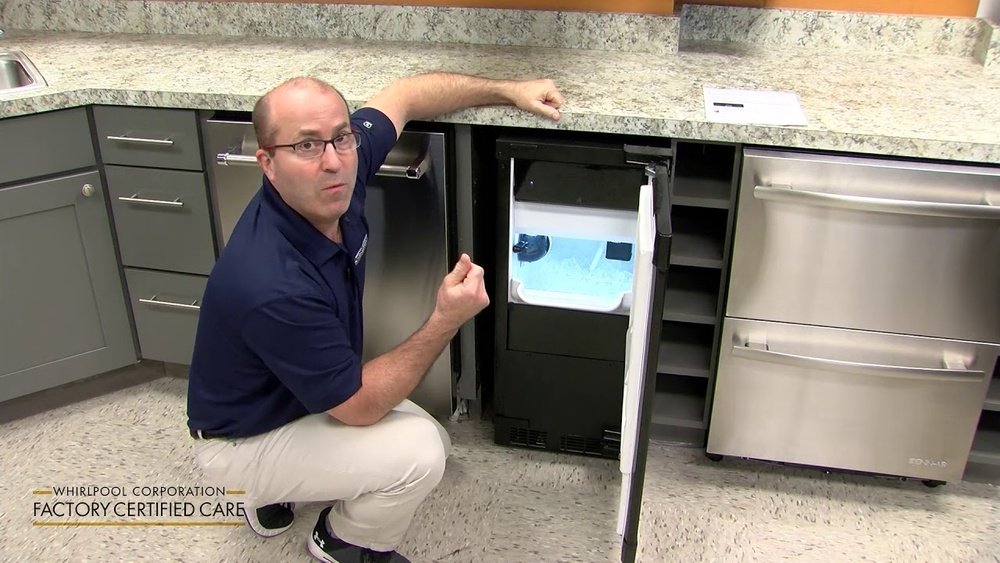
If you own a Whirlpool undercounter ice maker, you probably enjoy the convenience of having fresh ice ready at all times. But what happens when your machine stops working or makes less ice than it should? Many owners feel frustrated when their ice maker malfunctions, especially if they rely on it for family gatherings or home bars. The good news is that most Whirlpool ice maker problems have clear causes and solutions. Learning how to troubleshoot your appliance can save time, money, and maybe even your next party.
This guide will help you understand the most common issues with Whirlpool undercounter ice makers. We’ll explain why these problems happen, how to fix them, and what steps you can take before calling a professional. You’ll also find helpful tables, practical examples, and non-obvious insights you won’t get from a quick manual scan.
By the end, you’ll feel confident handling almost any ice maker issue.
Understanding Your Whirlpool Undercounter Ice Maker
Before solving problems, it helps to know how your ice maker works. A typical Whirlpool undercounter ice maker uses water from your home supply. It chills this water on a metal plate to form ice, then heats the plate so the cubes drop into a storage bin. A sensor tells the machine when the bin is full or empty, starting or stopping ice production.
Key components include:
- Water filter: Keeps debris out of the system
- Water inlet valve: Controls water flow
- Condenser coils: Cool the refrigerant for freezing
- Recirculation pump: Moves water over the freezing plate
- Thermostat or sensor: Monitors temperatures
- Compressor: Powers the refrigeration cycle
- Control board: The “brain” of the machine
Understanding these parts helps you spot where things might go wrong.
Common Whirlpool Ice Maker Problems And Solutions
Some problems are minor and easy to fix. Others need technical skill. Let’s look at the most frequent issues and how to tackle them.
1. Ice Maker Not Making Ice
This is the most common complaint. If your ice maker doesn’t produce any ice, consider these causes:
- No power: Check if the ice maker is plugged in and the outlet works.
- Water supply off: Make sure the water valve is open and the line isn’t kinked.
- Clogged filter: A dirty water filter can block flow. Replace if older than 6 months.
- Full bin sensor: Ice piled up against the sensor can fool the machine into thinking the bin is full.
- Frozen water line: If it’s too cold, water can freeze before reaching the tray.
Practical Steps:
- Check the power cord and reset the circuit breaker if needed.
- Inspect the water line for kinks or blockages.
- Replace the water filter, especially if you notice a drop in water flow or taste issues.
- Gently move ice away from the bin sensor.
- Defrost the water line by unplugging the unit for a few hours.
Tip: Some users miss that a simple power surge can reset the control board. Try unplugging and re-plugging your machine before deeper troubleshooting.
2. Ice Maker Making Small Or Hollow Ice
If your ice cubes are smaller than usual or have holes, it usually points to water flow issues or temperature problems.
Possible reasons:
- Low water pressure: The ice maker needs a steady supply (usually at least 20 psi).
- Clogged filter or valve: These restrict flow.
- Dirty condenser coils: The machine can’t cool properly, making poor ice.
Solutions:
- Test water pressure at the source. If it’s low, check for leaks or contact a plumber.
- Clean or replace filters and valves as needed.
- Use a coil cleaning brush or vacuum to remove dust from condenser coils.
Non-obvious insight: Sometimes, hollow ice means the freezing cycle is too short. This can happen if the room is hot, forcing the machine to work overtime.
3. Ice Maker Leaking Water
Leaks are messy and can cause floor damage. Most leaks come from:
- Loose or damaged water line connections
- Cracked or overfilled ice bin
- Blocked drain line
- Faulty water inlet valve
Fixes:
- Tighten all water line connections.
- Check for cracks in the bin and replace if needed.
- Clear the drain line with a thin brush or gentle water stream.
- If the valve drips, it may need replacement.
4. Ice Maker Running But Not Freezing Water
If you hear the machine running but no ice forms, the cooling system is likely at fault.
Check:
- Condenser coils: Clean if dusty.
- Compressor: Listen for unusual sounds (clicking, buzzing).
- Thermostat or sensor: Test with a multimeter (if comfortable).
If the compressor is hot but not working, turn off the machine and call for service. Compressors are not user-replaceable.
5. Ice Maker Freezes Up Or Has Frost Build-up
Too much frost means water isn’t draining or warm air is leaking in.
Possible causes:
- Bad door seal: Gaps let in warm air.
- Drain blockage: Water pools and freezes.
- Long door openings: Humidity enters, creating frost.
Solutions:
- Inspect and replace worn seals.
- Clean out the drain line regularly.
- Limit how long you keep the door open.
How To Run A Diagnostic Cycle
Many Whirlpool undercounter ice makers have a self-diagnostic mode. Check your manual for the exact steps. Usually, you press and hold certain buttons to start the test. The machine will run through its cycles and may flash error codes.
Common error codes might include:
- E1: Water supply problem
- E2: Ice thickness sensor error
- E3: High temperature
- E4: Bin sensor error
Write down the code and check your manual or Whirlpool’s website for solutions.
Regular Maintenance To Prevent Problems
Prevention is always better than repair. Regular maintenance keeps your ice maker running smoothly and extends its life.
Cleaning
- Every 3-6 months, run a cleaning cycle using ice machine cleaner. This removes mineral deposits and slime.
- Rinse well after cleaning to avoid chemical taste in your ice.
Filter Replacement
- Swap the water filter every 6 months or as recommended. This keeps ice clear and tasting good.
Coil Cleaning
- Clean condenser coils every 6 months. Dusty coils make the machine overheat and use more energy.
Check For Leaks
- Monthly, check all hose connections and the bin for signs of leaks or drips.
Sanitize The Bin
- Wipe the inside bin with a mild bleach solution (1 tablespoon bleach in 1 gallon water) every few months.
Troubleshooting By Problem Symptoms
Sometimes, it’s easier to find solutions based on what you see, hear, or feel. Here’s a quick reference table to match symptoms with likely causes and fixes.
| Symptom | Likely Cause | Quick Fix |
|---|---|---|
| Not making ice | No power, water off, clogged filter | Check power, water, replace filter |
| Small/hollow ice | Low water flow, dirty coils | Check pressure, clean coils |
| Leaking water | Loose line, blocked drain | Tighten, clear drain |
| Frost build-up | Poor seal, humid air | Replace seal, limit door time |
| Machine noisy | Loose parts, overworking compressor | Tighten, clean coils, call service if needed |
When To Call A Professional
Not every problem is safe for a DIY fix. Call a Whirlpool-certified technician if:
- You smell burning or see sparks
- The compressor is hot and not running
- You hear loud banging or grinding
- There’s a refrigerant leak (oily puddle, chemical smell)
- Electrical components or the control board are involved
Non-obvious insight: Attempting to repair sealed system parts (like the compressor or refrigerant lines) can void your warranty and may be illegal without a license in some areas.
Whirlpool Ice Maker Vs. Other Brands: How Troubleshooting Differs
Many ice makers share similar designs, but Whirlpool models have unique diagnostic codes and features. Here’s a comparison of troubleshooting Whirlpool ice makers with two other popular brands.
| Brand | Diagnostic Mode? | Common Error Codes | Parts Availability |
|---|---|---|---|
| Whirlpool | Yes, button sequence | E1-E4 (varies by model) | High (parts easy to find) |
| GE | Limited, some models | Few, often manual check | Moderate |
| KitchenAid | Yes, similar to Whirlpool | K1-K4 | High |
Tip: Whirlpool and KitchenAid parts are often interchangeable, as both brands share many designs.
Understanding Error Codes And What They Mean
Error codes can seem confusing, but they actually speed up troubleshooting. Here are some typical Whirlpool undercounter ice maker error codes and their meanings:
| Error Code | Meaning | User Action |
|---|---|---|
| E1 | Water supply error | Check water line, filter, and supply valve |
| E2 | Ice thickness sensor problem | Clean sensor, check wiring |
| E3 | High temperature detected | Clean condenser coils, check room temp |
| E4 | Bin full sensor error | Clear ice from sensor, test function |
Always consult your model’s manual for code specifics, as some codes may differ by version.
Parts Replacement: What You Can (and Can’t) Do Yourself
Many users wonder if they can swap out parts themselves. Here’s a guide to which parts are safe for DIY and which should be left to pros:
DIY-Friendly:
- Water filter
- Bin sensor (simple plug-in models)
- Water line and connectors
- Door seal (with basic tools)
- Drain hose
Professional-Only:
- Compressor
- Refrigerant lines
- Control board
- Recirculation pump (on complex models)
Caution: Always unplug the ice maker before replacing any part. If you’re unsure, watch a few video tutorials or check the official Whirlpool service manuals.
Cleaning Cycle: Step-by-step
A deep clean can resolve many performance issues and prevent future problems. Here’s how to safely clean your Whirlpool undercounter ice maker:
- Turn off and unplug the ice maker.
- Remove all ice from the bin.
- Take out removable parts (shelves, bins) and wash with warm, soapy water.
- Prepare a cleaning solution (follow your model’s instructions; Whirlpool often recommends nickel-safe ice machine cleaner).
- Pour cleaner into the water reservoir.
- Run the cleaning cycle (use the clean button or follow the manual).
- When done, run at least two cycles with fresh water to rinse.
- Wipe the inside with a clean cloth.
Insider tip: Many people forget to clean the ice thickness sensor, which often gets slimy or mineral-coated. Gently wipe this with a soft cloth during every cleaning.

The Role Of Water Quality In Ice Maker Problems
The quality of your water affects ice maker performance more than you might think. Hard water leads to mineral build-up, which can clog lines and sensors. High-iron water causes yellowish ice. If you notice white flakes in your ice or cloudy cubes, your machine might need more frequent cleaning.
What to do:
- Install a water softener if you have hard water (over 7 grains per gallon).
- Use a filter rated for your specific water issues.
- Clean the machine every 3 months instead of 6 in tough water areas.
Non-obvious insight: In regions with very soft water, low mineral content can trigger false sensor readings, causing the machine to stop prematurely. If this happens, consult your manual for sensor calibration.
Energy Efficiency And Operating Cost
Running an undercounter ice maker adds to your electricity bill, but regular maintenance helps reduce costs. On average, a modern Whirlpool model uses about 350-450 kWh per year, or roughly $50-$60 depending on local rates.
Tips to save energy:
- Keep condenser coils clean.
- Don’t overload the bin.
- Place the machine away from ovens or dishwashers (heat makes it work harder).
- Use the “eco” or vacation mode if you’re away for long periods.
Why Your Ice Maker Needs Airflow
Many owners install their ice maker under counters without enough room for airflow. Poor ventilation can overheat the compressor and slow ice production. Always follow the clearance guidelines in your manual—usually at least 2 inches on the sides and back.
Quick test: If the sides of your ice maker are hot to the touch, airflow is likely blocked. Move items away and check again in a few hours.
Frequently Asked Questions
Why Is My Whirlpool Undercounter Ice Maker Making Loud Noises?
Loud noises often come from loose panels, a vibrating compressor, or ice cubes dropping. If you hear grinding or banging, check for loose screws or foreign objects in the bin. Persistent loud sounds may mean a failing compressor and need a technician’s help.
How Often Should I Clean My Whirlpool Undercounter Ice Maker?
Clean every 3-6 months, or more often if you have hard water or heavy usage. Regular cleaning prevents mineral build-up, bacteria, and strange tastes in your ice.
Can I Use Vinegar Instead Of Ice Machine Cleaner?
No, vinegar isn’t recommended for most Whirlpool models. Use a nickel-safe ice machine cleaner. Vinegar can damage internal parts and void your warranty.
What Size Ice Cubes Should My Whirlpool Ice Maker Produce?
Most Whirlpool undercounter models make cubes about 3/4 inch thick and 1 inch square. If yours are much smaller or hollow, check water pressure and the freezing cycle.
Do I Need A Water Filter For My Ice Maker?
A water filter is strongly recommended. It keeps ice clear, removes bad tastes, and protects your machine from mineral deposits. Replace every 6 months for best results.
Taking care of your Whirlpool undercounter ice maker doesn’t have to be a chore. With regular maintenance and a few simple troubleshooting steps, you can avoid most common problems and keep your ice flowing year-round. If you ever face a complex issue, don’t hesitate to contact a professional for safe, lasting repairs.