
Kenmore 110 Dryer Troubleshooting: Most problems are simple fixes you can do yourself.
I have repaired and serviced household dryers for years, and this Kenmore 110 Dryer Troubleshooting guide collects practical steps, clear checks, and real-world tips. Read on to diagnose symptoms, test parts, and decide when to fix the dryer yourself or call a pro.

Common Symptoms and What They Mean
Kenmore 110 Dryer Troubleshooting starts with spotting common symptoms early. A dryer that won’t start usually means a power issue, a faulty door switch, or a blown thermal fuse. If the dryer runs but does not heat, suspect a bad heating element, a failed thermostat, or a blocked vent that chokes airflow.
Common signs and likely causes
- Dryer does not start — check power, outlet, and door switch.
- No heat — check the heating element, fuses, and venting.
- Long drying times — likely clogged vent or failed thermostat.
- Loud noises — worn drum rollers, idler pulley, or foreign objects.

Step-by-Step Troubleshooting Guide
Kenmore 110 Dryer Troubleshooting works best when you follow a clear order. Always disconnect power before inspecting electrical parts. Start with the easy checks and move to internal parts only if needed.
Basic troubleshooting steps
- Confirm power and breaker. Test the outlet with a lamp or multimeter.
- Inspect the door switch. If the dryer acts like the door is open, replace the switch.
- Check the lint trap and vent. Clean the lint and use a vacuum to remove blockages.
- Test the thermal fuse. A blown thermal fuse usually means no heat and must be replaced.
Quick questions (PAA-style)
What if my dryer runs but takes forever to dry?
Blocked venting or a failing thermostat is often the cause. Clean the vent and test components.
How do I test the heating element?
Use a multimeter to check for continuity. No continuity means the element is bad.
Is the door switch easy to replace?
Yes. It typically unclips or unscrews and can be replaced in under 20 minutes.

Parts to Check and How to Replace Them
Kenmore 110 Dryer Troubleshooting often points to a few repeat parts. Knowing how to inspect and replace these parts saves time and money. Work slowly and keep small parts organized.
Key parts to inspect
- Thermal fuse — located on the blower housing; replace if open.
- Heating element — visible behind a rear panel; replace if broken or open.
- Door switch — quick check with a multimeter; easy swap if faulty.
- Drum rollers and belt — inspect for wear; a squeal or thump usually means replacement.
Simple replacement tips
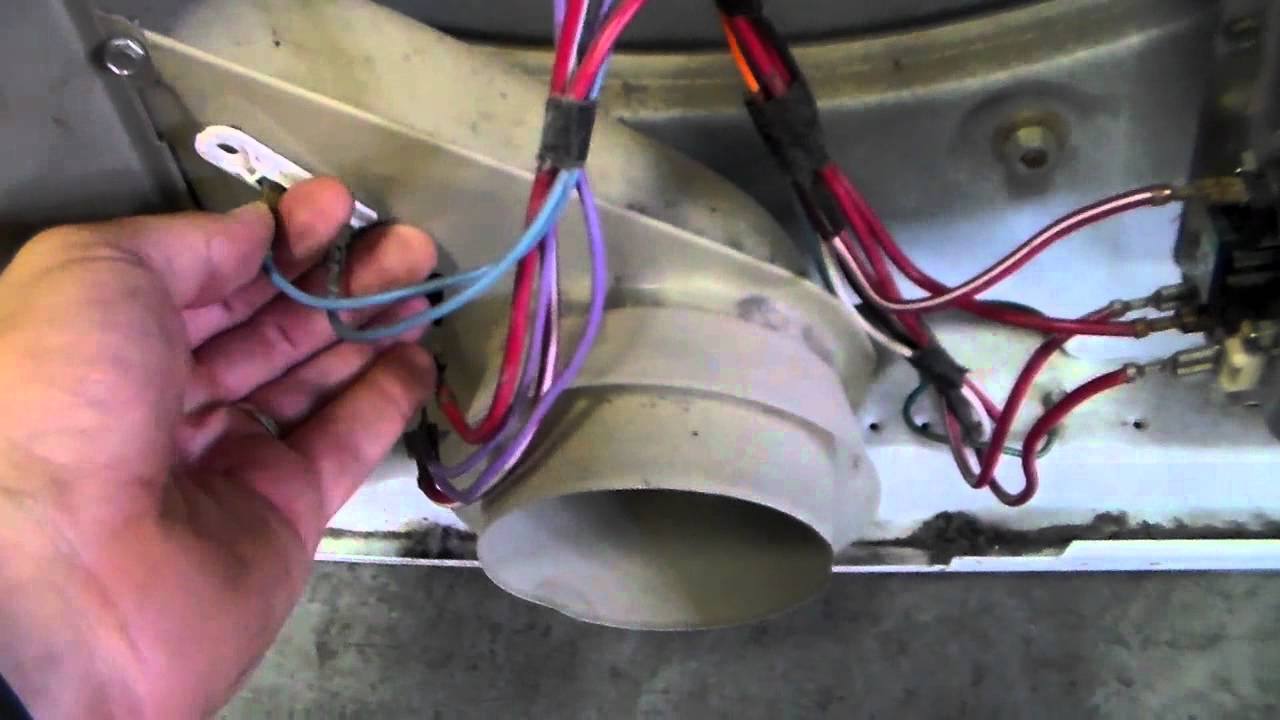
- Take photos while disassembling. They help during reassembly.
- Label wires with tape. This prevents incorrect reconnection.
- Use OEM or high-quality aftermarket parts for reliability.
Preventive Maintenance and Tips
Kenmore 110 Dryer Troubleshooting includes routine care that prevents most breakdowns. Simple maintenance keeps the dryer efficient and safe. Aim for small tasks monthly and deeper cleaning yearly.
Maintenance checklist
- Clean the lint trap after every load.
- Vacuum the lint from the cabinet and behind the dryer twice a year.
- Clean the vent to the outside once a year or more often if you dry many loads.
- Inspect vent hose for kinks and replace crushed ducts with rigid or semi-rigid metal venting.
Benefits of regular care
- Shorter drying times.
- Lower energy use.
- Reduced fire risk.
When to Call a Professional
Kenmore 110 Dryer Troubleshooting tells you what you can fix and when to bring in help. Call a technician for complex electrical issues or when repairs require specialized tools. If you find damage to the motor, control board, or gas components (for gas models), stop and hire a pro.
My experience note
- I once replaced a drum support and thought the dryer sounded fine, but a loose wire later caused intermittent starts. Calling a pro early would have saved time. Trust your comfort level and safety.
Signs to call a professional
- Burning smell or smoke.
- Repeated tripping of breakers.
- Gas smells or suspected gas leaks.
- Complex control board failures.

Frequently Asked Questions of Kenmore 110 Dryer Troubleshooting
How do I reset my Kenmore 110 dryer?
Most Kenmore 110 dryers reset by unplugging the unit for one to five minutes, then plugging it back in. If the control has a reset button, follow the model-specific instructions in the manual.
Why is my Kenmore 110 dryer not heating?
Common reasons include a blown thermal fuse, bad heating element, failed thermostat, or blocked venting. Test each component with a multimeter and clear the vent before replacing parts.
How often should I clean the dryer vent?
Clean the dryer vent at least once a year, or more often if you run many loads. A blocked vent causes long drying times and increases fire risk.
Can I replace the drum belt myself?
Yes, replacing the drum belt on a Kenmore 110 is usually straightforward and can be done with basic tools. Follow step-by-step instructions and keep track of belt routing.
What tools do I need for basic troubleshooting?
A screwdriver set, pliers, a 1/8 to 3/8 inch socket set, and a multimeter cover most basic checks. A flashlight and small container for screws help keep things organized.
Conclusion
This Kenmore 110 Dryer Troubleshooting guide gives clear steps to diagnose issues, check parts, and maintain your dryer. Start with power and vent checks, move to parts testing, and call a pro for electrical or gas concerns. Try the simple fixes, keep up with maintenance, and leave complex repairs to technicians; your dryer will run longer and safer. Share your experiences, ask questions, or subscribe for more appliance repair guides.

