
Most Chamberlain wall mount openers fail from sensor, power, or programming issues.
I have spent years installing, repairing, and testing Chamberlain Wall Mount Garage Door Opener Troubleshooting routines. This guide breaks down common causes, step-by-step fixes, and real-world tips so you can diagnose and repair your opener with confidence.
How Chamberlain Wall Mount Garage Door Opener Works
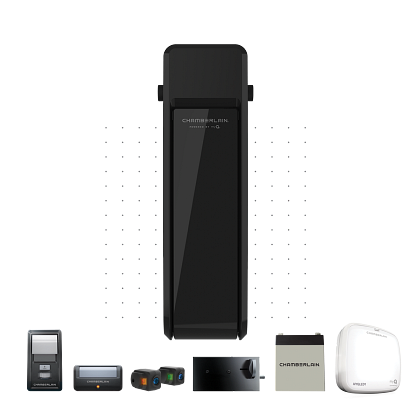
Chamberlain Wall Mount Garage Door Opener Troubleshooting starts with understanding the unit. The wall mount design places the motor on the wall and uses a direct arm to move the door. That layout removes the need for ceiling tracks and changes how sensors and limits behave.
Key parts you should know:
- Motor and logic board that control movement and safety
- Safety sensors that stop the door if something crosses the path
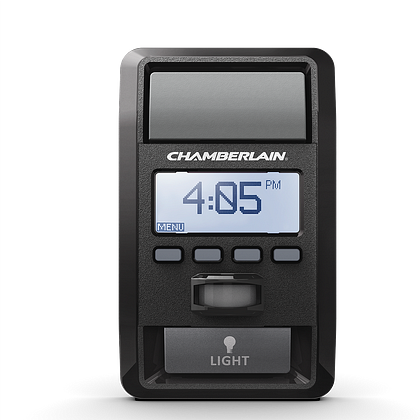
- Wall control for power, learn, and programming
- Remote transmitters and MyQ wireless module for smart control
Knowing how these parts interact makes troubleshooting faster. When you see an error, you can narrow the cause quickly.

Common Problems and Quick Checks
Most issues are simple to spot. Chamberlain Wall Mount Garage Door Opener Troubleshooting often resolves in minutes with these checks.
Common symptoms and first checks:
- Opener does not run. Check power at the outlet and wall switch. Confirm breaker and outlet voltage.
- Door reverses or won’t close. Inspect safety sensors for alignment and dirt. Clean lenses and secure wiring.
- Remote or app won’t connect. Check battery in remotes and restart the MyQ module. Re-pair devices if needed.
- Motor hums but door doesn’t move. Inspect the drive arm connection and manual release. Look for stripped gears or loose bolts.
- LED codes or flashing lights. Note blink patterns and consult the manual for code meaning.
I always start with power and sensor checks. These fixes solve more than half of problems I’ve seen.
Step-by-step Troubleshooting Guide
Follow these steps in order. Chamberlain Wall Mount Garage Door Opener Troubleshooting becomes safe and predictable when you work methodically.
- Safety first
- Disconnect power before touching wiring. Keep hands clear of moving parts. Use gloves and eye protection.
- Verify power
- Test outlet with a lamp or meter. Replace a blown fuse or reset the breaker.
- Test wall control
- Press the wall button. If the opener responds, remote or app is the issue. If not, continue.
- Inspect safety sensors
- Look for misalignment, dirt, or damaged wires. Re-align sensors until the LED is steady.
- Check travel and force settings
- Run a test close and watch behavior. Reduce force if the door stops often. Increase travel if the door won’t fully close.
- Reprogram remotes and MyQ
- Use the learn button on the motor or wall control. Follow the model-specific steps for pairing devices.
- Manual release and physical inspection
- Use the emergency release to move the door manually. Look for binding, broken springs, or bent rollers.
- Look for error indicators
- Note any blink patterns or LCD codes. These point to sensors, motor, or logic board faults.
If a step ends any uncertainty, stop and document the symptom. A clear note helps if you call support or a technician.

Advanced Diagnostics and Repairs
When basics fail, advanced checks help. Chamberlain Wall Mount Garage Door Opener Troubleshooting at this level may need tools and part swaps.
Advanced tests and actions:
- Multimeter checks on motor power and transformer output to confirm voltage.
- Inspect the circuit board for burnt components or loose connectors.
- Swap a known-good wall control to isolate wiring versus logic board faults.
- Replace worn gears or broken capacitors if the motor hums but won’t turn.
- Test safety sensor wiring for continuity and shorts using a meter.
- Update or reset MyQ firmware when connectivity is intermittent.
I once misdiagnosed a motor hum as a board failure. After testing the capacitor, I found it weak and replaced it. The opener ran quietly afterward. That taught me to test components before full replacements.

Maintenance and Preventive Tips
A little maintenance extends life and cuts service calls. Chamberlain Wall Mount Garage Door Opener Troubleshooting is easier when units are cared for.
Routine tasks to schedule:
- Clean sensor lenses monthly and keep the area clear.
- Lubricate rollers, bearings, and hinges twice a year with recommended lubricant.
- Check fasteners and the drive arm for tightness every season.
- Test reverse function with an object to confirm safety systems work.
- Replace remote batteries yearly and keep MyQ app updated.
Small checks prevent most emergency repairs. I keep a checklist on my phone for each client. It saves time and avoids repeat visits.
When to Call a Pro
Some problems need trained help. Chamberlain Wall Mount Garage Door Opener Troubleshooting has limits when it comes to springs, high-voltage work, and complex boards.
Call a pro if:
- Torsion or extension springs need adjustment or replacement.
- The opener shows burnt board components or smells like burning.
- You lack tools like a multimeter or safe ladder access.
- The door binds, and manual movement is difficult or unsafe.
A certified technician can also preserve warranty coverage. I always recommend pros for spring work because it can be dangerous.

PAA-style questions
Why does my Chamberlain wall mount opener beep and flash?
The unit often signals safety sensor misalignment, low battery backup, or a notification from MyQ. Note the pattern and check sensors and the battery backup first.
Can I reset my Chamberlain wall mount opener myself?
Yes. Most models have a learn or reset button on the wall control or motor module. Follow model steps and reprogram remotes after reset.
How do I know if the safety sensors are bad?
If LEDs on sensors are not steady or wiring is damaged, sensors may be bad. Swap with known-good sensors or test wiring continuity to confirm.
Frequently Asked Questions of Chamberlain Wall Mount Garage Door Opener Troubleshooting
Why won’t my Chamberlain wall mount opener respond to remotes?
Check remote battery and range first. Re-pair the remote using the learn button if the battery is good.
How do I align safety sensors on a wall mount opener?
Loosen the sensor brackets slightly and move them until both sensor LEDs are steady. Tighten brackets and test the close function.
My door reverses when closing. What should I check?
Inspect sensor alignment and clean lenses. Check force settings and door balance; an unbalanced door often trips reversal.
How do I reset MyQ connectivity for my Chamberlain wall opener?
Power-cycle the opener and router, then follow the app pairing steps to reconnect MyQ. Ensure the opener’s Wi‑Fi module has power.
Is it safe to lubricate a Chamberlain wall mount opener motor?
Avoid lubricating the motor and gearbox unless the manual suggests it. Lubricate door hardware instead to reduce motor load.
Conclusion
You can diagnose and fix many issues with calm, stepwise Chamberlain Wall Mount Garage Door Opener Troubleshooting. Start with power and sensors, then move to programming and advanced testing when needed. Keep a simple maintenance routine to avoid most problems.
Take action today: run the basic checks listed here, note any blink codes, and decide if a DIY fix or a pro call is best. Share your experience or questions below, or subscribe for more practical repair guides.

