
If your KitchenAid ice maker stops working, it can quickly turn into a hassle. No more cold drinks, and entertaining guests becomes awkward. But before you call for service, you can often solve the problem yourself. Many issues have simple fixes, and understanding how your ice maker works helps you find the best solution. This guide will walk you through KitchenAid ice maker troubleshooting step by step, so you can get back to enjoying fresh ice with confidence.
How A Kitchenaid Ice Maker Works
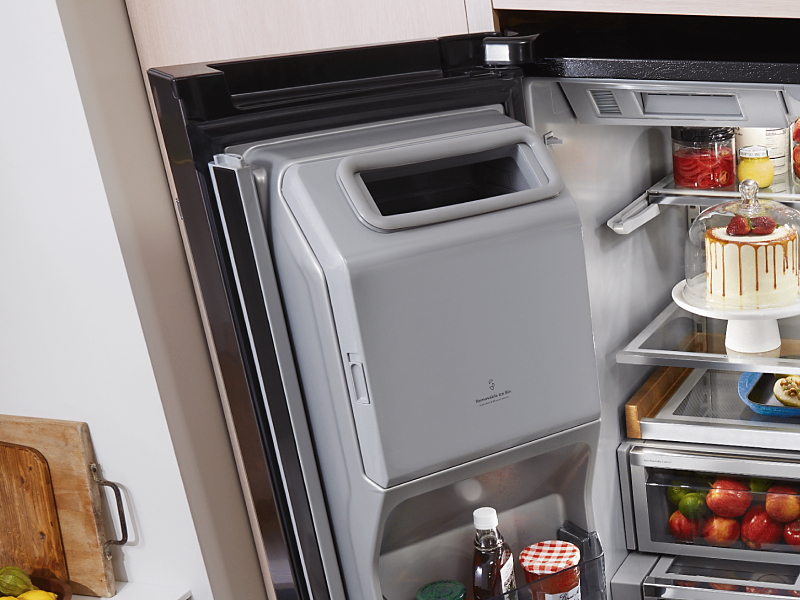
KitchenAid ice makers, whether built into a refrigerator or as a standalone unit, follow a clear process. First, water from your home supply enters the unit through a water inlet valve. The water fills the ice mold. The machine then lowers the temperature, causing the water to freeze. Next, a heating element slightly warms the mold to release the ice cubes, which drop into the storage bin. A sensor tells the unit when the bin is full, pausing production.
When any of these steps fail, the ice maker may stop working, make less ice, or produce cubes with problems. Knowing the parts and process helps you pinpoint issues quickly.
Common Problems And Quick Checks
When your KitchenAid ice maker stops making ice, start with these basic checks:
- Power connection: Is the unit plugged in and switched on?
- Water supply: Is the water line properly connected and the water valve open?
- Control settings: Is the ice maker turned on at the control panel?
- Door alignment: On fridge models, is the freezer door closing fully? If not, the ice maker may not operate.
Many people overlook these basics, but they cause a large number of ice maker problems.
Problem: Ice Maker Not Making Ice
An ice maker that doesn’t produce ice is frustrating. Here’s how to troubleshoot:
1. Check The Power Source
KitchenAid ice makers need a reliable power supply. Test by plugging another device into the same outlet. If the outlet works, move to the next step.
2. Inspect The Water Line
Look for kinks or leaks in the water line behind your fridge or ice maker. A blocked line means no water reaches the ice mold. If your home has hard water, mineral build-up inside the line is possible. Disconnect the line and flush it with water to clear clogs.
3. Examine The Water Filter
A clogged water filter limits water flow. KitchenAid recommends changing the filter every six months. If ice production slows or stops, try replacing the filter.
4. Reset The Ice Maker
Many KitchenAid models have a reset button. Check your manual for location and instructions. Resetting the machine can clear minor errors and restore function.
5. Test The Inlet Valve
If you hear the unit running but no water enters, the water inlet valve might be faulty. This part opens and closes to let water in. If it’s defective, you’ll need a replacement. Testing usually involves a multimeter to check for continuity—a task for more advanced DIYers.
Problem: Ice Maker Making Small Or Misshapen Ice
If your ice cubes are smaller than usual or oddly shaped, water flow is the likely issue.
1. Low Water Pressure
KitchenAid ice makers need at least 30 psi of water pressure. If pressure is too low, cubes may be small or incomplete. Check your home’s water pressure using a gauge. If it’s low, consult a plumber.
2. Partially Clogged Filter
Even if water flows, a partially blocked filter can reduce the amount entering the ice mold. Replace the filter and monitor the next batch of ice.
3. Freezer Temperature
If the freezer is too warm, ice cubes may not freeze completely. KitchenAid recommends setting freezers to 0°F (-18°C) for best results.
Problem: Ice Tastes Or Smells Bad
Unpleasant-tasting ice is a common complaint. This usually comes from one of three sources:
- Old water filter: Filters remove odors, chemicals, and particles. Replace every six months.
- Dirty ice bin: Wash the storage bin with mild soap and rinse well.
- Absorbed odors: Ice can pick up smells from uncovered food in the freezer. Store food in sealed containers.
A less obvious tip: If your fridge or ice maker is new, run and discard the first three bins of ice to remove “factory” tastes.
Problem: Ice Maker Leaking Water
Water leaks can cause damage to floors or cabinets. Here’s what to check:
- Ice maker level: If the unit isn’t sitting flat, water may spill from the mold. Adjust the legs or position as needed.
- Fill cup alignment: The water fill cup must line up perfectly under the water tube. If bumped out of place, adjust it back.
- Blocked drain: Standalone ice makers have a drain at the bottom. If clogged, water backs up and overflows. Clean with a pipe cleaner or small brush.

Problem: Ice Stuck In The Mold
Sometimes ice gets jammed and won’t release. This issue stops new ice from forming.
- Check for ice clumps: Gently break up clumps in the bin with a plastic utensil.
- Inspect the ejector arm: If ice is stuck here, it can’t move. Wait for ice to melt a little, then try to free it.
- Defrost buildup: Excess frost inside the freezer can jam moving parts. Defrost the freezer fully if you see thick ice.
How To Clean A Kitchenaid Ice Maker
Regular cleaning keeps your ice clean and prevents breakdowns. KitchenAid recommends cleaning every 3–6 months.
Steps:
- Unplug the ice maker.
- Remove the ice bin and discard ice.
- Wash the bin with warm, soapy water. Rinse and dry thoroughly.
- Wipe the interior with a soft cloth and mild detergent.
- For hard water deposits, use a 1: 1 solution of vinegar and water.
- Rinse all parts well before reassembling.
- Plug in and run two batches of ice. Discard both before using ice for drinks.
When To Call For Service
Some problems require a professional. Call for service if:
- The ice maker is making loud, unusual noises.
- The display shows error codes you can’t clear.
- Resetting and cleaning don’t solve the issue.
- The water inlet valve or control board needs replacement.
Trying to repair electrical or mechanical parts yourself can void your warranty or cause injury.
Comparing Kitchenaid Ice Maker Models
Different KitchenAid ice makers have unique features and troubleshooting steps. Here’s a simple comparison:
| Model Type | Main Feature | Common Issues | Unique Troubleshooting |
|---|---|---|---|
| Refrigerator Ice Maker | Built into fridge/freezer | Small ice, slow production | Check door switches, freezer temp |
| Standalone Ice Maker | High-volume ice output | Leaking, cloudy ice | Clean drain, use ice machine cleaner |
| Under-counter Ice Maker | Fits under kitchen counter | Drain issues, loud fan | Check drain hose, clean condenser |
Knowing your specific model can speed up troubleshooting.
Essential Tools For Troubleshooting
You don’t need many tools, but a few basic items make the job easier:
- Multimeter: For testing electrical parts (like the inlet valve)
- Adjustable wrench: For tightening water line connections
- Flashlight: To see inside small spaces
- Pipe cleaner or small brush: For clearing drains
If you often fix home appliances, these tools are worth having on hand.
Maintenance Tips For Longer Life
Regular care prevents most ice maker problems. Here are habits that extend your ice maker’s life:
- Change the water filter every 6 months.
- Clean the ice bin and interior quarterly.
- Inspect the water line for leaks or kinks twice a year.
- Defrost your freezer at least once a year (for manual-defrost models).
- Use only food-safe cleaners.
- Run and discard the first batch of ice after cleaning or replacing parts.
Skipping maintenance is a common beginner mistake. Regular care is easier and cheaper than big repairs.
Troubleshooting Error Codes
Some KitchenAid ice makers have a display that shows error codes. Here’s a quick guide to common ones:
| Error Code | Meaning | Action |
|---|---|---|
| E2 | Ice maker stuck | Reset or clear jam |
| E3 | Ice bin sensor fault | Check for obstructions, clean sensor |
| E4 | Water supply error | Check water line and filter |
| E7 | Internal temperature high | Check freezer temperature setting |
Always check your model’s manual for error codes, as meanings can vary.
Safety Precautions
Whenever you work on your ice maker:
- Unplug the unit before removing panels or working inside.
- Use only KitchenAid-approved parts for replacements.
- Never force parts back into place.
- Wear gloves to protect your hands from sharp edges or ice.
These steps can prevent injury and protect your machine.
Two Overlooked Troubleshooting Tips
- Check the child lock: Many newer KitchenAid fridges have a child lock feature. If active, it can disable the ice maker. Look for a lock symbol on your control panel.
- Inspect the ice level arm: On some models, a small arm or paddle senses when the bin is full. If this arm is stuck in the “up” position, the ice maker won’t run. Gently move it down.
Many people miss these simple fixes and assume the unit is broken.
Where To Find More Help
If you need model-specific guides, KitchenAid’s official support site offers manuals, diagrams, and videos. For in-depth repairs, you can also visit KitchenAid Product Help.
Frequently Asked Questions
Why Is My Kitchenaid Ice Maker Making A Clicking Noise?
A clicking noise can mean the ice maker is cycling or trying to eject ice. If the noise is loud or constant, check for stuck ice in the mold or ejector arm.
How Often Should I Clean My Kitchenaid Ice Maker?
Clean your ice maker every 3–6 months. If you notice cloudy or bad-tasting ice, clean it sooner. Hard water areas may need more frequent cleaning.
What Should I Do If My Ice Maker Is Frozen Solid?
Turn off the ice maker and let it defrost completely. Remove any visible ice buildup with a plastic tool. Check for causes like freezer temperature set too low or a blocked vent.
Can I Use Generic Water Filters In My Kitchenaid Ice Maker?
KitchenAid recommends using only their approved filters. Generic filters may not fit properly or filter as well, and using them could void your warranty.
How Do I Reset My Kitchenaid Ice Maker?
On most models, locate the reset button (check your manual for the location). Press and hold the button for several seconds, or unplug the unit for 5 minutes, then restart.
Taking the time to understand your KitchenAid ice maker pays off. Most issues have simple solutions, and careful troubleshooting can save you money and frustration. If these steps don’t work, don’t hesitate to call a professional—sometimes, that’s the fastest way back to fresh, clean ice.

