
Keurig K25 troubleshooting fixes common brewing, power, and cleaning issues quickly and safely.
I have spent years repairing and testing single-serve brewers, and I know the Keurig K25 inside out. This guide walks you through clear Keurig K25 troubleshooting steps, real fixes, and easy maintenance tips. Read on to solve machine errors, improve coffee taste, and keep your K25 running longer with simple tools and everyday items.

How the Keurig K25 works — quick overview and parts to know
The Keurig K25 is a compact single-serve brewer. It uses K-Cup pods, a water reservoir, a heating element, a pump, and two needles that puncture the pod. The machine heats water, pumps it through the pod, and brews a cup in about a minute.
Key parts to check during Keurig K25 troubleshooting:
- Water reservoir and lid
- K-Cup pod holder and funnel
- Upper and lower brew needles
– Heating element and pump - Power cord and on/off switch
Knowing these parts helps you isolate problems fast and fix them with confidence.
Common problems and quick fixes for Keurig K25 troubleshooting
Here are the most common Keurig K25 issues and simple fixes that work most of the time.
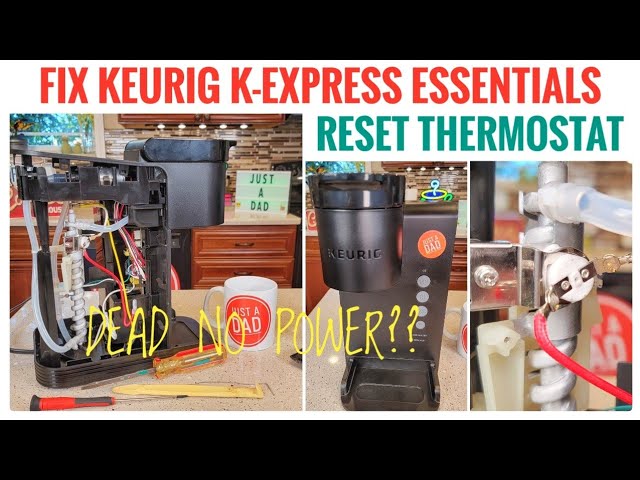
Problem: Machine won’t power on
- Cause: Faulty outlet, loose plug, blown fuse, or internal board issue.
- Fix: Try a different outlet and inspect the power cord. Reset the outlet breaker and unplug the K25 for 5 minutes, then plug back in.
Problem: Not brewing or pump sounds but no water
- Cause: Clogged needles, air pocket, empty reservoir, or failed pump.
- Fix: Refill reservoir, check reservoir seated correctly, and clean needles. Run a water-only brew to flush air.
Problem: Weak or thin coffee
- Cause: Small brew size, low water temperature, stale pod, or scale build-up.
- Fix: Use a fresher pod, choose a larger cup size, descale the machine, and preheat the machine by running a water-only brew first.
Problem: Grounds in cup
- Cause: Damaged pod holder or puncture needle, or using a damaged K-Cup.
- Fix: Inspect the pod holder for damage and clean needles. Replace the pod and try again.
Problem: Leaks from base or reservoir
- Cause: Cracked reservoir, loose seal, or overflow during brewing.
- Fix: Check reservoir for cracks and ensure it sits flush. Clean and reseat the reservoir and check the rubber gasket.
Problem: Machine displays lights or error and stops
- Cause: Internal fault, sensor error, or descaling needed.
- Fix: Unplug and reset, clean and descale, and if lights persist, contact support.
These quick steps solve most issues without special tools. If the problem returns often, deeper cleaning or part replacement may be needed.

Step-by-step Keurig K25 troubleshooting guide
Follow these steps in order to fix most problems safely and quickly.
-
Check power and reset
- Unplug the machine for 60 seconds. Plug it back in and try turning it on.
- Test the outlet with another device to rule out outlet problems.
-
Inspect reservoir and water level
- Remove and reseat the reservoir. Fill to the recommended max line.
- Check the reservoir lid and seals for damage.
-
Clean brew needles
- Lift the pod holder and carefully poke out debris in the needles with the provided tool or a paperclip.
- Run a water-only brew to flush debris.
-
Run water-only brews to purge air
- Without a pod, brew with just water to clear air pockets from the pump.
- Repeat until flow is steady.
-
Descale the machine
- Use a descaling solution or white vinegar following the regular method.
- Run multiple water-only cycles after descaling to remove residues.
-
Test with a known-good pod
- Use a fresh, undamaged K-Cup from a new box to eliminate pod variables.
-
Check for leaks and seals
- Inspect the drip tray, reservoir gasket, and pod holder for damage and replace if needed.
-
Contact service if needed
- If the K25 still fails after these steps, the pump or control board may be at fault. Reach out to authorized repair or support.
Work through these steps patiently. Most Keurig K25 troubleshooting issues clear by step 4 or 5.
Deep cleaning, descaling, and maintenance for reliable performance
Routine cleaning prevents many Keurig K25 troubleshooting visits. Here’s a simple care plan I use and recommend.
Daily care
- Empty and rinse the reservoir each day to prevent bacteria.
- Remove used pods and wipe the pod area.
Weekly care
- Remove the drip tray and wash with warm, soapy water.
- Wipe the exterior and pod holder with a damp cloth.
Monthly care
- Clean the needles: remove any coffee buildup using the needle-clean tool or a paperclip.
- Run two water-only brews to flush the system.
Every 3 months (or sooner with hard water)
- Descale the machine using a commercial descaling solution or diluted white vinegar.
- Follow with several water-only cycles to remove any taste.
Personal tip: I once ignored descaling for months and the brewer slowed and tasted metallic. After a full descale cycle, brewing speed and taste returned to normal. Regular upkeep avoids that hassle.

Parts, replacements, and when to seek professional service
If cleaning and standard Keurig K25 troubleshooting fail, you may need a part replaced.
Common replaceable parts
- Water reservoir: cracked or warped reservoirs are easy to swap.
- Pod holder and funnel: replace if the holder is dented or leaking.
- Needles: if bent or severely clogged, replacement restores flow.
- Pump or heating element: more complex fixes, often needing tech service.
When to seek professional repair
- No power despite outlet checks and resets.
- Strange electrical smells or smoke.
- Persistent leaks from internal seals.
- Repeated failure after full descale and needle cleaning.
Warranty and support
- Check your original purchase for warranty status. Keurig often offers limited warranties and repair options.
- If out of warranty, compare authorized repair cost versus buying a replacement unit.
I recommend trying simple part swaps like a new reservoir yourself. For pump or board issues, get a quote from service to weigh repair vs. replacement.

Tips to avoid future Keurig K25 troubleshooting issues
Small habits prevent many problems and keep coffee tasting great.
- Use filtered water to reduce mineral build-up and extend pump life.
- Empty the reservoir before travel or long storage to avoid leaks.
- Clean needles monthly and descale regularly if you have hard water.
- Use fresh pods and avoid punctured or crushed pods.
- Store the machine in a cool, dry place away from direct sun and dust.
These tips saved me time and money over years of testing brewers. They also make coffee taste better every morning.

Keurig K25 troubleshooting — real examples and lessons learned
Example 1: No brew but power light on
- Symptom: Machine lit but no water flow.
- Fix: I found the reservoir wasn’t seated fully. Reseating fixed it in 30 seconds.
Example 2: Weak tasting coffee
- Symptom: Brewed coffee was thin and cool.
- Fix: Descaled the unit and ran warm water cycles. Coffee returned to normal strength.
Mistakes to avoid
- Don’t use metal tools that can bend needles. Use the tool provided or a small plastic pick.
- Avoid skipping descaling; it leads to pump stress and failures.
These simple fixes are often faster and cheaper than calling for repairs.
Frequently Asked Questions of Keurig K25 Troubleshooting
Why won’t my Keurig K25 power on?
Check the power cord and try a different outlet first. Unplug the machine for 60 seconds to reset it and ensure the reservoir is seated correctly.
How do I clean the brew needles on the K25?
Lift the pod holder and use the included needle-clean tool or a paperclip to clear debris from the upper and lower needles. Run a water-only brew to flush any loosened particles.
How often should I descale my Keurig K25?
Descale every 3 months for average use, or every 1–2 months if you have hard water. Regular descaling prevents slow flow and off-tastes.
What if the Keurig K25 brews slowly or makes weak coffee?
Slow brews often mean scale build-up or air in the pump. Descale the machine and run multiple water-only cycles to clear air pockets.
Is it safe to use vinegar to descale my K25?
Yes, diluted white vinegar is an effective home descaler. Rinse the machine with several water-only brews afterward to remove any vinegar taste.
Can I replace parts of the Keurig K25 myself?
Yes, simple parts like the reservoir, drip tray, or pod holder are user-replaceable. For pump or circuit board issues, professional service is recommended.
Why is my Keurig K25 leaking?
Leaks often come from a misaligned reservoir, cracked reservoir, or damaged gasket. Inspect seals and the reservoir, and replace damaged parts if found.
Conclusion
Keurig K25 troubleshooting is mostly about simple checks, cleaning, and regular care. Work through power and reservoir checks first, then clean needles and descale as needed. Small habits like using filtered water and monthly needle cleaning prevent most issues and keep coffee tasting great.
Try the steps here, keep notes on what you tried, and don’t hesitate to contact support for complex failures. If this guide helped, leave a comment with your problem or subscribe for more coffee machine tips.

