
Most Maytag dryer issues come from clogged vents, failed heating parts, or simple power faults.
I have worked on dozens of dryers and written guides for appliance repair. This step-by-step Maytag Dryer Troubleshooting article explains causes, checks, fixes, and when to call a pro. Read on to learn clear tests, safe DIY tips, and real-life tricks that save time and money with Maytag Dryer Troubleshooting.
Common problems you’ll see with Maytag dryers
Maytag Dryer Troubleshooting starts by spotting the most common faults. This helps you fix the easiest problems fast.
Common faults include no power, no heat, no tumbling, long cycles, and loud noise. Each fault has distinct causes and checks you can do at home.
I have tested these checks in real laundry rooms. They are simple and they work.

Causes and quick diagnostic checklist
A short checklist speeds Maytag Dryer Troubleshooting. Follow these checks before calling a technician.
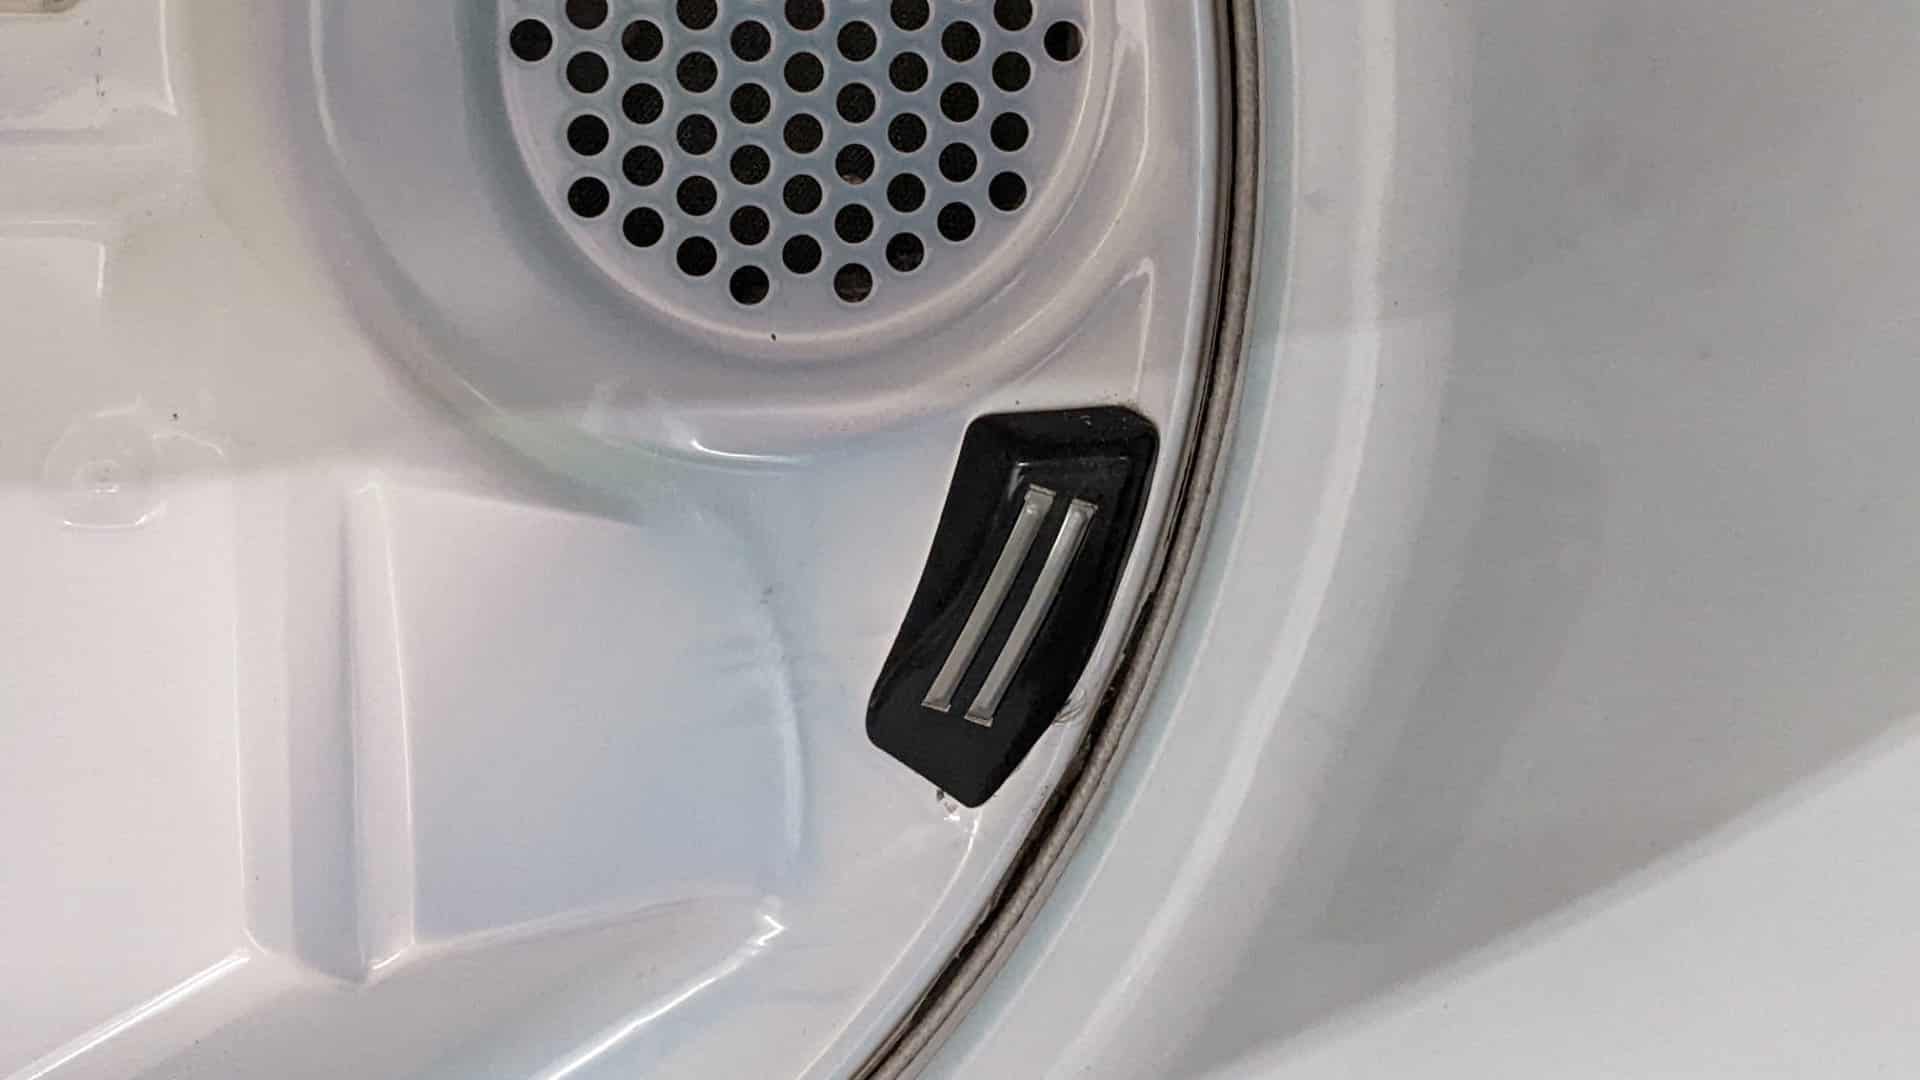
- Power and door checks: Ensure the dryer is plugged in and the door latch closes. A loose plug or bad door switch will stop the dryer immediately.
- Lint and vent issues: A clogged lint screen or vent reduces airflow and heat. Clean both before more tests.
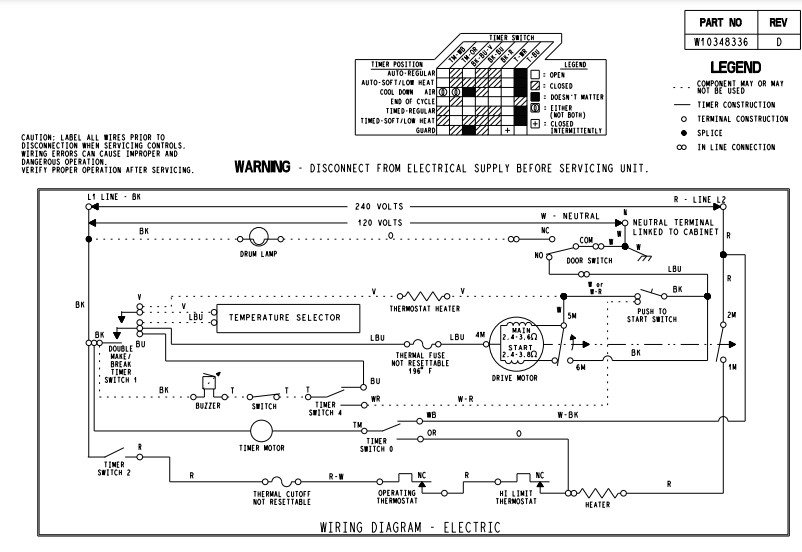
- Thermal and heating components: Failed heating elements, thermal fuses, or high-limit thermostats cause no-heat problems. Use a multimeter if you can.
- Motor and belt: If the drum does not spin but power is present, the belt or motor could be the issue.
Source: mastersamuraitech.com
Step-by-step Maytag Dryer Troubleshooting guide
Follow this ordered plan for effective Maytag Dryer Troubleshooting. Work safe and unplug the dryer before deeper checks.
-
Visual and power checks
- Check the outlet by plugging a lamp or using a voltage tester. Confirm 240V for electric units or proper gas supply for gas models.
- Inspect the cord and plug for damage. Replace damaged cords.
-
Clean the lint trap and vents
- Remove lint from the lint trap every load.
- Disconnect the vent and clean it with a brush. Poor airflow causes long dry times and overheating.
-
Test the door switch and controls
- With the dryer unplugged, press the door switch. It should click. Replace if it does not.
- Cycle through controls to see if the display or LEDs show error codes. Note any codes for reference.
-
Check heating components (electric dryers)
- Test the heating element and thermal fuse with a multimeter for continuity. No continuity means a failed part.
- A blown thermal fuse often means a clogged vent caused overheating.
-
Check gas components (gas dryers)
- Confirm the gas valve is supplying gas. Spark or igniter faults will prevent heating. Work with a pro if you smell gas.
-
Inspect the drum, belt, and motor
- Look for a broken belt or worn rollers. Replace worn parts to stop squeaks and restore tumbling.
- If the motor hums but does not spin, the motor or start capacitor could be bad.
-
Run a test cycle
- After fixes, run an empty cycle to confirm the dryer heats, tumbles, and completes cycles correctly.
I use this plan as a checklist during real repairs. It keeps Maytag Dryer Troubleshooting simple and safe.

Quick PAA-style questions
Why won’t my Maytag dryer heat but it runs?
Most often a clogged vent, blown thermal fuse, or failed heating element is the cause. Clean the vent and test parts with a multimeter.
How do I read error codes on a Maytag dryer?
Restart the dryer and consult the model’s code chart in the manual. Codes match faults like thermostat or motor errors.
Can I replace a belt myself?
Yes, belts are often user-replaceable with basic tools and a manual. Unplug the dryer and follow model-specific steps.

Fast fixes: common Maytag Dryer Troubleshooting solutions
These quick fixes solve many user problems without heavy work.
- No power
- Check house breaker and outlet. Reset the breaker or replace a tripped fuse.
- No heat
- Clean the vent and lint trap. Test the thermal fuse and heating element with a multimeter.
- No tumble
- Inspect the belt and drum rollers. Replace broken belt or seized rollers.
- Long dry times
- Clear the vent, clean lint, and avoid overloading the drum.
- Loud noise
- Tighten loose panels. Replace worn rollers, idler pulley, or drum glides.
I fixed a neighbor’s dryer that took three cycles to dry. A full vent clean restored normal runtime and cut energy use.

When to call a technician
Maytag Dryer Troubleshooting is great for simple problems. Call a pro when:
- You smell gas or suspect a gas leak. This needs immediate, licensed attention.
- You lack tools or comfort with electrical testing. High-voltage parts can be dangerous.
- The repair requires major disassembly or electronic board replacement.
Expect a service call cost range that varies by region. If your dryer is under warranty, contact official support first.
Preventive maintenance to avoid future problems
Simple maintenance reduces the need for Maytag Dryer Troubleshooting. Do these tasks regularly.
- Clean lint trap after every load to maintain airflow and efficiency.
- Clean the dryer vent and outside vent twice a year or more with long or large loads.
- Inspect the vent hose and clamps for leaks or kinks at least once a year.
- Avoid overloading the dryer. Follow capacity guidance for your model.
- Level the dryer to prevent excess wear on rollers and belts.
Small, regular steps keep your dryer safe and extend its life. I keep a reminder on my phone to check vents every six months.
Parts, tools, and safe DIY guidance
Typical parts you may replace during Maytag Dryer Troubleshooting include the thermal fuse, heating element, belt, drum rollers, idler pulley, and door switch.
Useful tools
- Multimeter to test continuity
- Nut drivers and screwdrivers for panels and parts
- Vent cleaning brush and vacuum for airflow
- Work gloves and safety glasses
Safety tips
- Unplug the dryer or turn off the breaker before working on electrical parts.
- For gas dryers, shut off the gas supply and ventilate the area if you smell gas.
- Keep your model number handy when ordering parts. It ensures the right fit.
I always buy OEM parts or high-quality replacements. They fit better and last longer than generic parts.
Frequently Asked Questions of Maytag Dryer Troubleshooting
What should I check first if my Maytag dryer won’t start?
Check power first. Confirm the dryer is plugged in, the breaker is on, and the door latch is fully closed.
Why does my Maytag dryer run but not heat?
A clogged vent, blown thermal fuse, or failed heating element usually causes no heat. Clean vents and test heating parts.
How often should I clean the dryer vent?
Clean the external vent and duct at least twice a year, more often for heavy use or long drying times.
Are error codes on Maytag dryers easy to read?
Yes, error codes display on many models. Check your manual for the code list and quick fixes.
Can I fix a noisy drum myself?
Yes, often noise comes from worn rollers or glides. Replace those parts after unplugging the dryer and following model instructions.
Is it safe to use the dryer if it overheats occasionally?
No. Repeated overheating can cause fires. Stop use, clean vents, and replace failed thermal safety parts before running again.
Conclusion
Maytag Dryer Troubleshooting is about smart checks, clean vents, and safe tests. Start with power and airflow, then move to thermal and mechanical parts. Use the step-by-step plan to save time and money, and call a licensed pro for gas or complex electrical issues. Try one maintenance task this week, like cleaning the vent, and see immediate improvement. If this guide helped, subscribe, leave a comment, or share your own Maytag Dryer Troubleshooting story.

