
Most millivolt gas valve issues come from a weak thermopile, dirty pilot, or poor wiring connections.
I write, install, and repair gas fireplaces and heaters for over a decade. I’ve fixed dozens of millivolt systems and I’ll walk you through clear, safe steps to diagnose and fix problems. This guide on Millivolt Gas Valve Troubleshooting blends hands-on tips, testing steps, and clear safety rules so you can find the root cause fast and act with confidence.

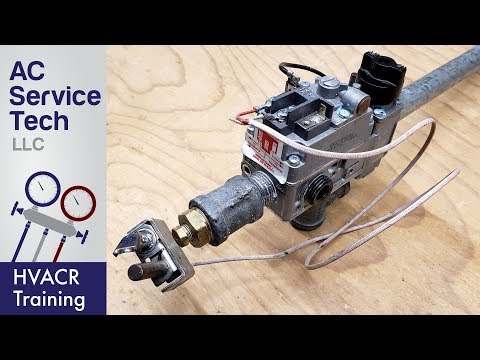
How millivolt systems work — basics you must know
A millivolt system uses heat from a pilot flame to generate a small voltage. That voltage comes from a thermopile. The thermopile powers the gas valve and controls the main burner without house power. The system is simple and reliable. But the low volt output makes the system sensitive to small faults.
Common parts to know:
- Thermopile: creates millivolts when heated by the pilot.
- Pilot assembly: pilot flame that heats the thermopile.
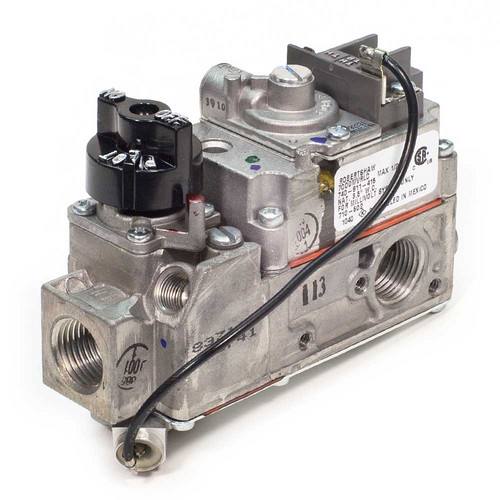
- Millivolt gas valve: opens with the thermopile signal.
- Thermocouple: in some systems, used for pilot safety.
Knowing this layout helps with Millivolt Gas Valve Troubleshooting. If the thermopile drops below its rated output, the valve will not open. I’ve seen units fail because of a loose wire or a barely visible crack in the pilot tube. These faults are common and repairable.
Common symptoms and causes of failure
Symptoms tell you where to look. Symptoms are usually simple and repeatable.
Typical symptoms:
- Pilot lights but main burner won’t ignite.
- Flame drops out when you release the knob.
- Intermittent operation of the burner.
- No pilot or weak pilot flame.
Likely causes:
- Weak thermopile output due to age or soot.
- Dirty or misaligned pilot orifice.
- Loose or corroded wiring at the valve.
- Faulty gas valve or internal mechanical wear.
I once diagnosed a fireplace where the pilot looked fine but the main would not light. A meter showed 150 millivolts on the thermopile; the valve needed at least 350 millivolts. Replacing the thermopile fixed it. Small numbers matter in Millivolt Gas Valve Troubleshooting.
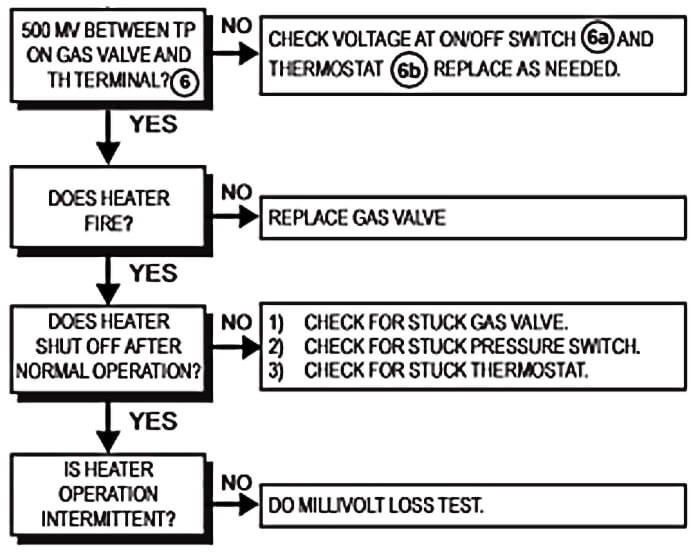
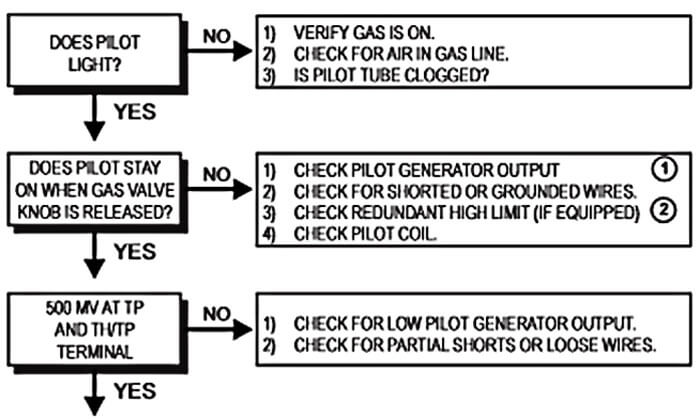
Step-by-step Millivolt Gas Valve Troubleshooting
Follow this checklist. Work slowly and safely. Turn off gas when you disassemble parts.
- Visual check
- Confirm the pilot flame is steady and blue.
- Look for soot, spider webs, or debris near the pilot.
- Check for loose or corroded wires at the valve and pilot.
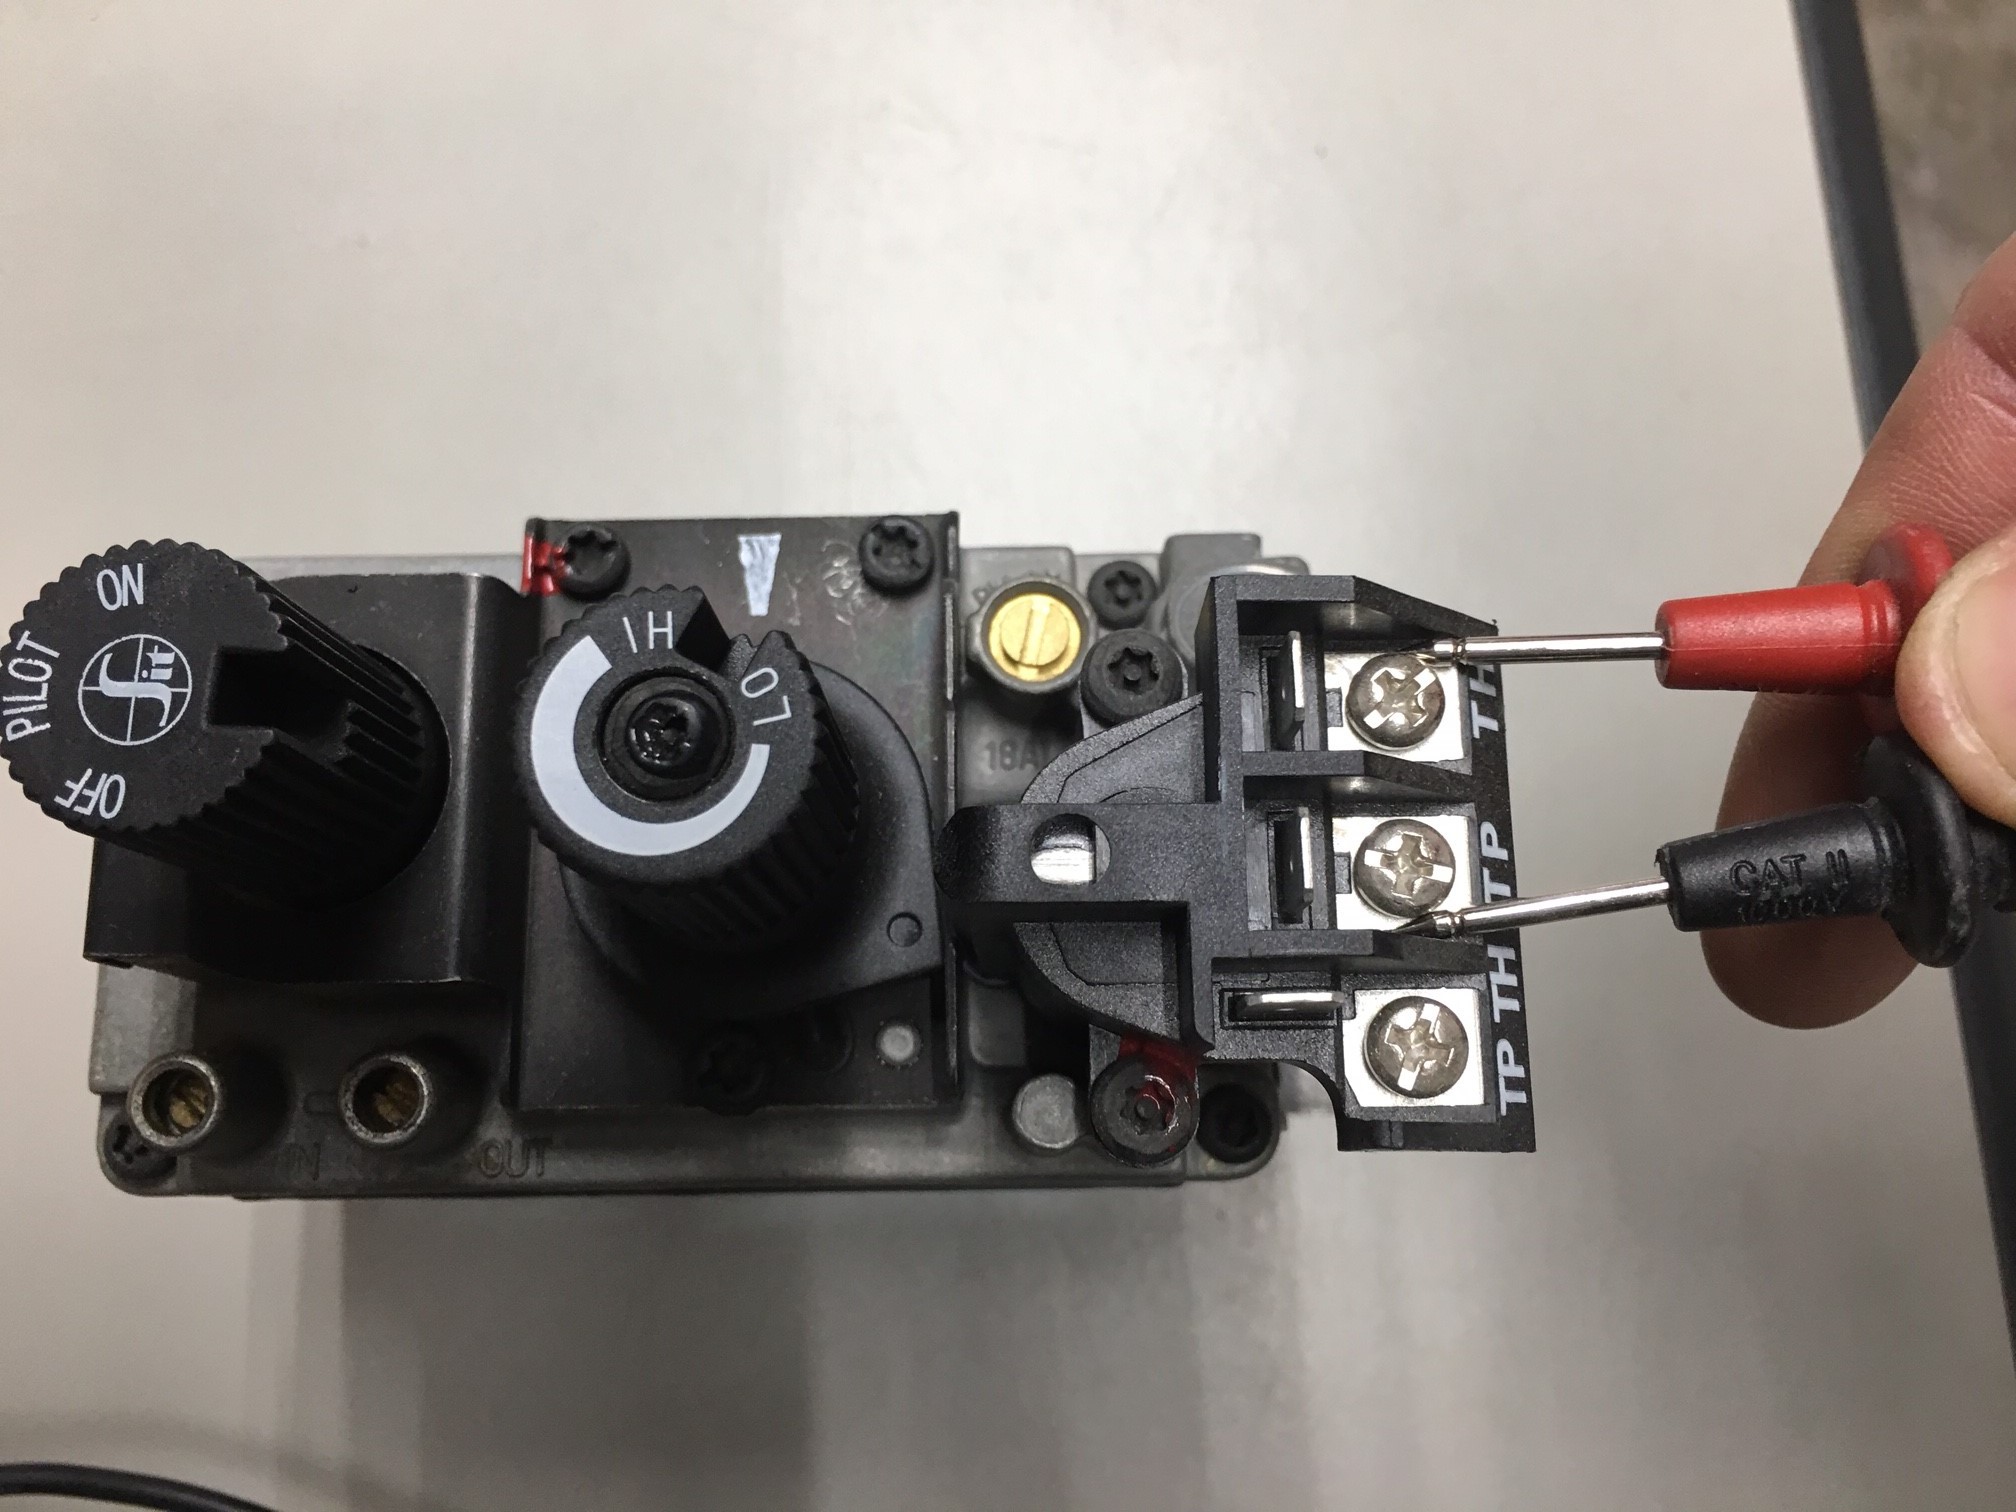
- Measure thermopile voltage
- Use a multimeter set to millivolts DC.
- Heat the pilot for several minutes then measure across the thermopile terminals.
- A good thermopile typically reads 350 to 750 millivolts under load. Check your unit’s spec.
- Test under load
- Connect the multimeter in series if needed or use the valve terminals to simulate load.
- If open-circuit voltage is high but load voltage drops, the thermopile internal resistance is high and it needs replacement.
- Inspect pilot assembly
- Clean the pilot orifice with compressed air or pick pipe cleaners gently.
- Reposition the pilot flame to fully envelop the thermopile tip.
- Check wiring and connections
- Tighten screws and remove corrosion with a small wire brush.
- Replace any frayed or stiff wires. Bad wire can mimic a bad thermopile.
- Valve testing
– If thermopile voltage is correct and wiring is sound, the valve may be faulty.
- Some valves can be bench-tested. Otherwise, replace the valve assembly.
Safety note: If you smell gas or suspect a leak, stop and call a licensed pro.
This approach is what I use in the field. It keeps the work logical and reduces wasted parts swapping.

Tools and safety steps you’ll need
Tools are simple but must be the right ones.
Essential tools:
- Digital multimeter with millivolt range.
- Small screwdrivers and nut drivers.
- Compressed air can or low-pressure air.
- Soft wire brush and needle files.
- Replacement parts: thermopile, pilot assembly, gasket kits.
Safety steps:
- Shut off gas at the appliance or fuel supply before major work.
- Work in a well-ventilated area.
- Keep a fire extinguisher nearby when testing flames.
- If you lack a gas shutoff or smell persistent gas, call a licensed technician.
I once tried troubleshooting without a proper meter and wasted hours. A good multimeter saves time and prevents guesswork during Millivolt Gas Valve Troubleshooting.
Repair vs replace: deciding the right fix
Decide based on age, cost, and safety. Here’s a quick guide.
When to repair:
- Loose wiring or corroded connection.
- Dirty pilot or misaligned flame.
- Thermopile is under spec but repairable with cleaning or repositioning.
When to replace:
- Thermopile output is below spec and cleaning doesn’t help.
- Valve shows internal wear, sticking, or slow response.
- Multiple failures or appliance is near end of service life.
Parts and cost notes:
- Thermopiles are relatively low cost and easy to replace.
- Valves are pricier and sometimes appliance-specific.
- Always use OEM or certified replacements for safety.
From my experience, replacing the thermopile fixes 60–70% of Millivolt Gas Valve Troubleshooting calls.

Preventive maintenance to avoid future trouble
A little care prevents most problems. Set up a routine.
Maintenance tips:
- Clean pilot assembly yearly.
- Inspect wiring annually.
- Run a full test before heating season starts.
- Replace thermopile every 8–12 years or when output drops.
Small habits save money. I service clients the week before winter and catch many issues early. That prevents emergency calls on cold nights.
PAA-style quick questions (People Also Ask)
What voltage should a thermopile produce?
- A healthy thermopile often produces 350 to 750 millivolts when heated properly. Check the appliance spec for exact values.
How do I test a millivolt gas valve?
- Measure thermopile voltage with a multimeter, inspect wiring, and test valve operation under load. If voltage and wiring are good, the valve may be faulty.
Can I replace a thermopile myself?
- Yes, if you are comfortable shutting off gas and using basic tools. Follow manufacturer instructions and test after installation.
Frequently Asked Questions of Millivolt Gas Valve Troubleshooting
What causes a pilot to stay lit but the main burner not to ignite?
A weak thermopile or poor electrical connection can supply insufficient millivolts to open the valve. Cleaning the pilot and checking wiring is the first step.
How do I know if the thermopile is bad?
Measure the thermopile output with a multimeter while the pilot is lit; low voltage under load indicates a failing thermopile. Replace if cleaning and repositioning fail.
Is a multimeter necessary for troubleshooting?
Yes. A multimeter gives clear readings that help avoid guesswork. It tells you whether the issue is electrical or mechanical.
Can dirt or spiders cause Millivolt Gas Valve Troubleshooting issues?
Yes. Debris can block the pilot or misdirect the flame, reducing thermopile heating and voltage output. Cleaning often fixes it.
When should I call a professional?
Call a licensed pro if you detect gas smell, feel unsure about disassembly, or if valve replacement or leak testing is needed. Safety first.
Conclusion
Millivolt Gas Valve Troubleshooting is methodical work. Start with visual checks, verify thermopile voltage, clean the pilot, and inspect wiring. If you follow the steps here, you’ll solve most problems yourself and know when to call a pro. Take action: check your pilot and thermopile now, keep a meter on hand, and plan yearly maintenance to avoid cold-night failures. Leave a comment with your symptoms or subscribe for more hands-on repair guides.

