
Replace the filter every six months, reset the indicator, and fix leaks or flow issues.
I have spent years fixing home appliances and helping neighbors with Whirlpool Refrigerator Water Filter Replacement Troubleshooting. This guide explains why the filter matters, how to replace it, and how to troubleshoot common issues so you can get clear water and ice fast. Read on for step-by-step instructions, real-life tips, and simple fixes you can try today.

Why the filter matters
A working filter keeps water clean and ice tasty. Whirlpool Refrigerator Water Filter Replacement Troubleshooting protects your family from sediments, chlorine taste, and some contaminants. Replacing the filter on time also keeps water flow strong and the dispenser and icemaker working well.
Common facts to know:
- Filters often last about six months.
- A clogged filter cuts flow and can taste bad.
- Resetting the filter indicator after replacement avoids false alerts.

Common signs and causes
Knowing the signs speeds fixes. Here are clear clues that need Whirlpool Refrigerator Water Filter Replacement Troubleshooting.
Common signs:
- Low or slow water flow from the dispenser.
- Cloudy or off-tasting ice and water.
- Water leaks or drips near the filter area.
- Filter change indicator stays on even after swap.
- Strange noises from the dispenser pump.
Common causes:
- Filter reached end of life or is clogged.
- Incorrect filter model or poor fit.
- Air trapped in the lines after replacement.
- O-rings damaged or missing.
- Internal valve or tubing issues.
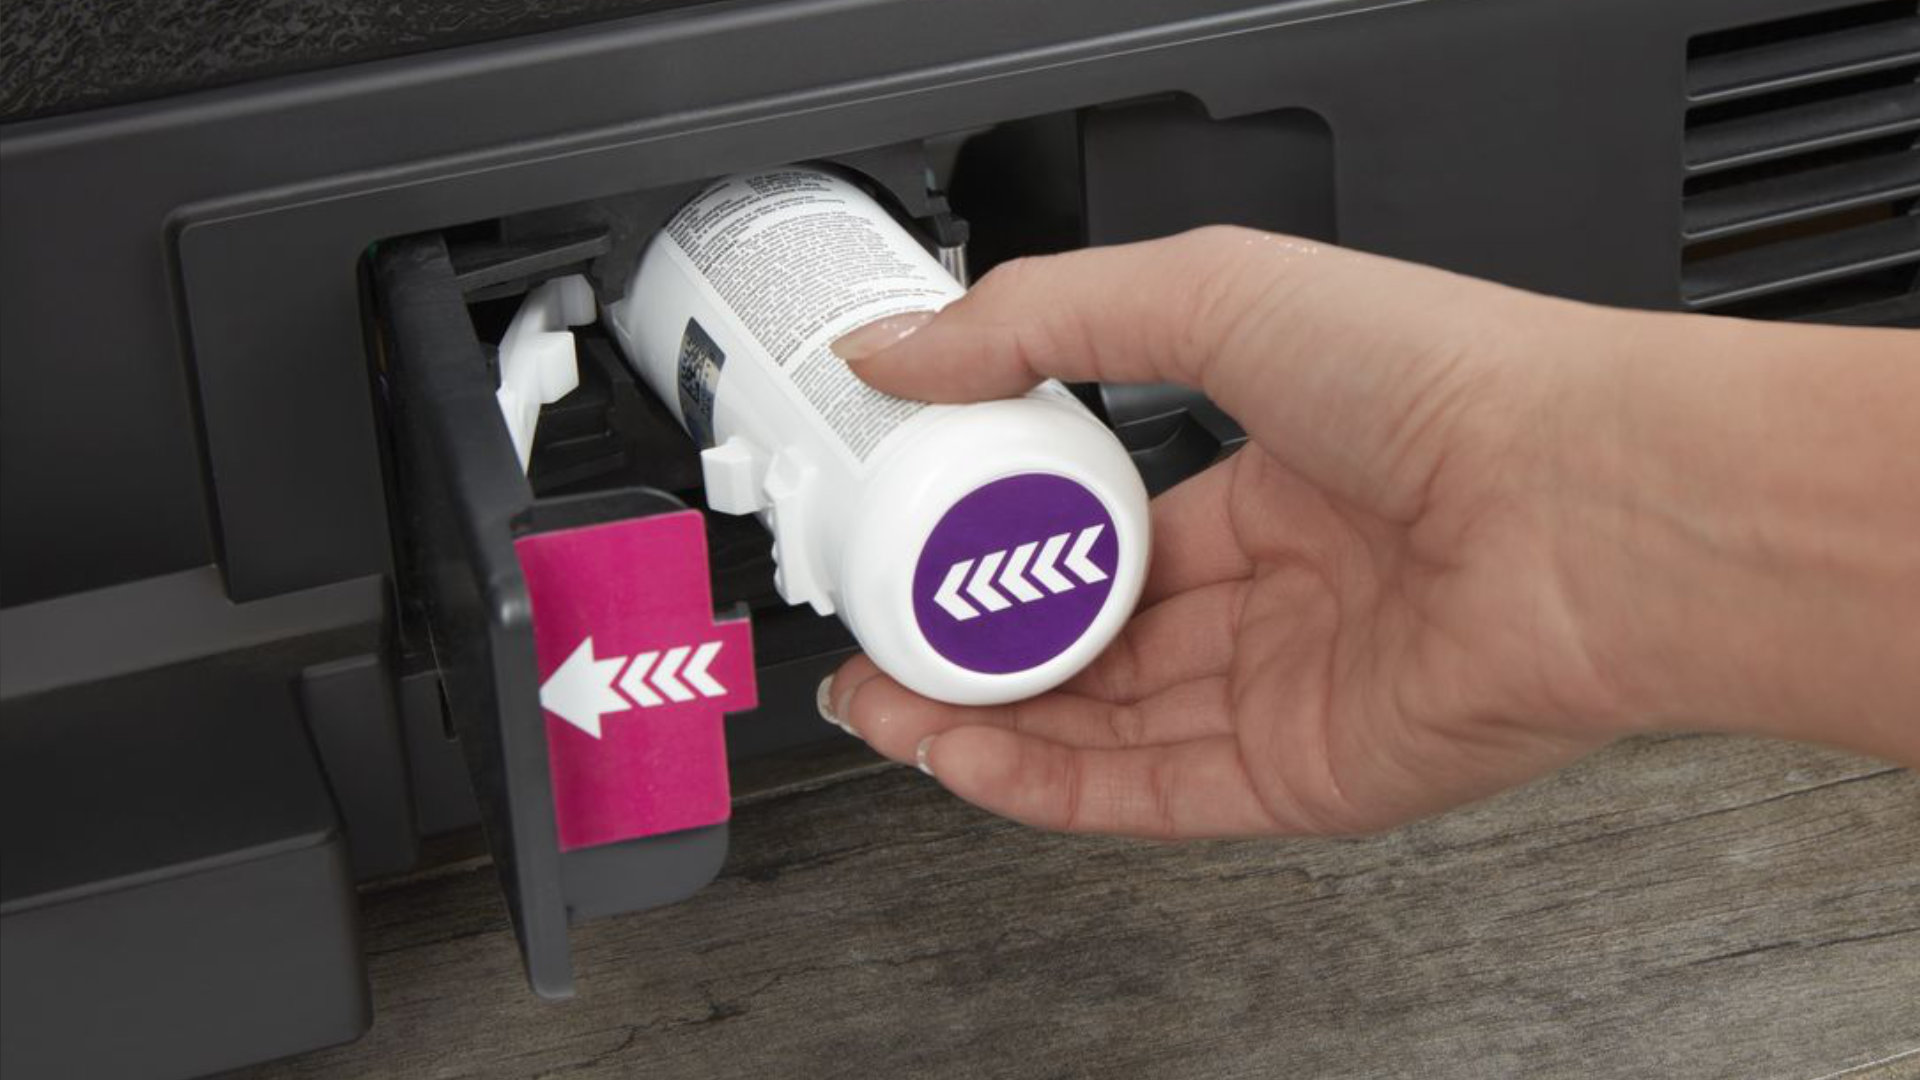
Step-by-step replacement guide
Follow these steps for safe Whirlpool Refrigerator Water Filter Replacement Troubleshooting and a clean swap.
- Turn off the water supply or close the fridge water valve.
- Locate the filter. Many Whirlpool models place it in the grille or upper right interior.
- Remove the old filter. Twist or pull per your model’s instructions. Keep the manual if you have it.
- Inspect the new filter. Remove caps and check O-rings. Lubricate O-rings with water if dry.
- Insert the new filter. Twist or push until it locks. Do not force.
- Turn the water back on. Dispense and discard 2–3 gallons to clear air and carbon fines.
- Reset the filter indicator. Most Whirlpool models have a button or settings menu for reset.
Tips during Whirlpool Refrigerator Water Filter Replacement Troubleshooting:
- Use only compatible Whirlpool filters for best fit and performance.
- Keep the old filter until you confirm no leaks.
- If flow is weak, re-seat the filter and purge more water.

Troubleshooting common problems
Here are fast fixes for the most common issues during Whirlpool Refrigerator Water Filter Replacement Troubleshooting.
No water or very low flow:
- Check the water valve and supply line.
- Re-seat the filter and run water for several minutes.
- If still low, test water pressure at the valve.
Leaking at filter or housing:
- Turn off water. Remove and inspect the O-ring for damage.
- Replace O-rings if cut or missing. Use the correct size.
- Ensure the filter is fully seated and locked.
Bad taste or cloudy ice after swap:
- Run 2–3 gallons through dispenser to flush the filter.
- If taste persists, repeat flush and check filter model compatibility.
Filter indicator won't reset:
- Consult the manual for the reset sequence.
- Try unplugging the fridge for one minute, then plug back in and reset.
- If indicator still misbehaves, the control board or sensor may need service.
Strange noises after replacement:
- Air in the lines can cause noise. Dispense water until steady.
- If noise continues, a kinked supply tube or failing pump might be the cause.
Personal note from my experience:
I once installed a filter that fit loosely. Flow was poor and the indicator never reset. Replacing with the exact Whirlpool part fixed both within minutes. Small things like fit and O-rings matter.

Maintenance, tips, and best practices
Simple care prevents most issues with Whirlpool Refrigerator Water Filter Replacement Troubleshooting and keeps your fridge working well.
Routine tips:
- Replace every six months or per the indicator.
- Use genuine or certified compatible filters.
- Flush new filters fully before use.
- Keep spare O-rings and a small towel on hand when replacing.
- Write the install date on the filter or calendar.
Safety and checks:
- Turn off water when work is needed behind the fridge.
- Inspect the filter area for signs of mold or buildup.
- If your water tastes odd after multiple changes, test your home water supply.

When to call a professional
Some problems need a tech. Use Whirlpool Refrigerator Water Filter Replacement Troubleshooting first. Then call a pro if you see these signs.
Call a technician if:
- Leaks continue after replacing O-rings and reseating the filter.
- The dispenser or icemaker stops working after a proper filter change.
- Electronics fail to reset or show error codes.
- You find damaged internal tubing or frozen lines.
A trained tech can test water pressure, check valves, and replace parts safely.

Frequently Asked Questions of Whirlpool Refrigerator Water Filter Replacement Troubleshooting
How often should I replace the Whirlpool refrigerator water filter?
Replace it every six months under normal use. If water flow drops or taste changes, replace it sooner.
Can I use non-Whirlpool filters in my fridge?
You can use certified compatible filters, but genuine Whirlpool filters ensure proper fit and performance.
Why is my water still cloudy after replacing the filter?
Cloudy water is often air or carbon fines. Run 2–3 gallons through the dispenser to clear it.
How do I reset the filter indicator after replacement?
Most models have a reset button or a menu option. If unsure, unplug the fridge for a minute and then follow the manual’s reset steps.
What should I do if the filter leaks after installation?
Turn off the water, remove the filter, check O-rings, and reseat the filter. Replace O-rings if damaged and try again.
Conclusion
Regular Whirlpool Refrigerator Water Filter Replacement Troubleshooting keeps water clear, ice fresh, and your fridge working well. Follow the step-by-step guide, check O-rings, flush new filters, and swap filters every six months. If problems persist, reach out to a qualified technician. Try these tips today and leave a comment with your experience or questions to help others.

