
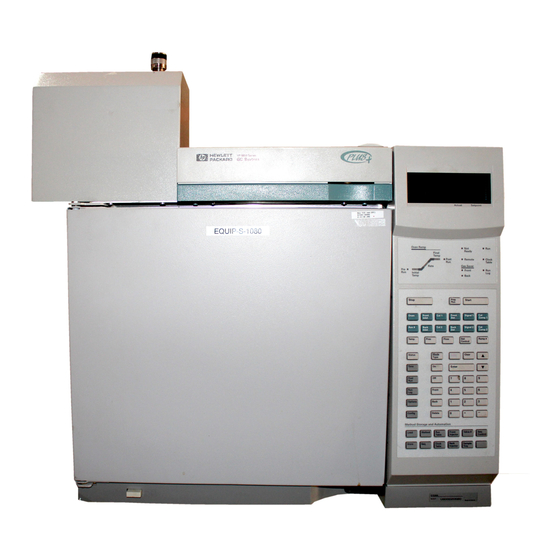
Agilent 6890 Troubleshooting Guide quickly fixes common GC faults with clear steps and practical tips.
I have worked with gas chromatographs for years and know the Agilent 6890 well. This Agilent 6890 Troubleshooting Guide brings hands-on fixes, clear diagnostics, and preventive tips. Read on to get practical workflows, error explanations, and real examples that make troubleshooting faster and less stressful.
Why the Agilent 6890 Troubleshooting Guide matters
The Agilent 6890 Troubleshooting Guide helps you restore uptime fast. The 6890 is a robust GC, but issues still occur. This guide gives clear steps to find and fix leaks, unstable baselines, detector faults, and shutdowns. Use it to save time, protect data, and avoid costly service calls.
Quick glossary and key parts
Know the parts. This makes the Agilent 6890 Troubleshooting Guide work for you. Key items include the injector, column, oven, carrier gas lines, flow regulators, detector (FID, TCD, MSD interface), and electronics. Each part can cause unique faults. Learn what each part does and common failure signs.

Common problems, root causes, and quick fixes
This section lists frequent faults and what to check first. Use it as a quick reference while you work.
-
No signal or zero baseline drift
- Cause: No carrier flow, detector off, column break, or electronic fault.
- Quick fix: Check carrier gas pressure and flow. Confirm detector power and settings. Inspect column and ferrules.
-
Unstable baseline or noise
- Cause: Contamination, leaks, or detector electronics warming up.
- Quick fix: Bake out column, tighten fittings, check detector temperature and grounding.
-
Poor peak shape or tailing
- Cause: Column contamination, inlet split issues, or wrong liner.
- Quick fix: Replace liner, check split ratio, and perform column conditioning.
-
Retention time shifts
- Cause: Flow changes, column age, or oven temperature errors.
- Quick fix: Verify flow stability, run standards, and check oven calibration.
-
High backpressure
- Cause: Column blockage, trapped septa, or debris.
- Quick fix: Trim column, change septum, and purge lines.
-
Autosampler or injection errors
- Cause: Syringe fault, misalignment, or software glitch.
- Quick fix: Clean or replace syringe, re-zero sampler, and restart software.
This Agilent 6890 Troubleshooting Guide pairs each fault with simple checks. Start simple, then move to complex fixes.

Step-by-step troubleshooting workflow
Follow a standard workflow to avoid wasted effort. This sequence works reliably on the Agilent 6890.
- Safety and prep
- Turn off detectors if needed. Vent and secure gases. Wear PPE.
- Reproduce the fault
- Run a simple standard or blank. Note symptoms and times.
- Check basics
- Confirm carrier gas pressure and flows. Verify power and cooler/heater states.
- Isolate subsystems
- Run with detector off. Swap detector or column if possible.
- Inspect fittings and seals
- Tighten ferrules, replace septa, and inspect column connections.
- Replace consumables
- Swap liners, trims, and filters before deep repair.
- Use diagnostics and logs
- Read on-board errors and PC logs. Note error codes and timestamps.
- Consider electronics
- If symptoms persist, check grounding, cables, and power supplies.
This workflow keeps troubleshooting logical and efficient. Use it each time you work on the Agilent 6890 Troubleshooting Guide.

Leak detection and carrier gas issues
Leaks and gas problems are common. Here’s how to find and fix them.
- Visual checks
- Look for loose tubes, damaged fittings, and cracked lines.
- Soap test
- Apply a leak detector solution at fittings while system is pressurized.
- Pressure decay test
- Close system and monitor pressure drop over time.
- Flow meter checks
- Compare set vs actual flow on the front panel.
- Replace suspect parts
- Ferrules, nuts, and tubing are cheap and often fix the issue.
Remember: even tiny leaks affect retention and baseline. Include leak checks in routine maintenance.

Detector-specific troubleshooting
Detectors behave differently. Here are focused tips.
- Flame Ionization Detector (FID)
- Check hydrogen and air supplies. Confirm flame presence. Replace jet or clean tip if needed.
- Thermal Conductivity Detector (TCD)
- Verify reference gas and bridge balance. Warm-up time matters for stability.
- Electron Capture Detector (ECD)
- Use clean gas and stable flow. ECDs are sensitive to contamination.
- Mass Spectrometer interface (when used)
- Inspect transfer line temperature, vacuum levels, and septa.
Follow detector manuals for safety. Gas supplies for detectors must be pure and plumbed correctly. This keeps results reliable.
Calibration, validation, and software checks
Bad calibration causes bad data, not bad instruments.
- Run standards regularly
- Use calibration standards to verify retention and response.
- Validate after repairs
- Run a validation sequence to confirm the system is back to specs.
- Check software and drivers
- Ensure instrument drivers and GC software are current and compatible with the 6890.
- Review method settings
- Confirm split ratios, flow programs, and detector gains.
Document each calibration and change. This helps trace future issues and keeps audits clean.
Parts, tools, and consumables checklist
Have these items on hand to speed repairs.
- Common parts
- Septa, ferrules, liners, column trim, and O-rings.
- Tools
- Wrenches, leak detector solution, flow meter, and simple voltmeter.
- Consumables
- Carrier gas cylinders, detector gases, and syringe needles.
- Documentation
- Manuals, error code lists, and method logs.
A well-stocked bench reduces downtime and prevents rushed buys.
Advanced diagnostics and error codes
When basics fail, use detailed diagnostics.
- Read error logs
- Note codes and timestamps from the GC and PC software.
- Use self-tests
- Run built-in diagnostics on the 6890 to test fans, sensors, and heaters.
- Electronic checks
- Inspect power supply voltages and ribbon cables for wear.
- Replace suspect modules
- Swap modules if you have spares and the error tracks to one board.
Keep a record of error patterns. Over time, patterns reveal weak parts or repeated user errors. This improves long-term uptime.
Personal experience and lessons learned
I once faced a noisy baseline that resisted fixes. I tried cleaning and swapping detectors. The true cause was a tiny leak under a heater clamp. Tightening a single screw solved it. My key lessons:
- Check the simple things first.
- Replace cheap parts early.
- Keep records of repairs and settings.
- Train users to note exact symptoms and times.
These simple habits cut repair time and boost lab confidence. They form the practical heart of this Agilent 6890 Troubleshooting Guide.
PAA-style questions (People Also Ask)
Q: How long should a column condition take?
A: Conditioning time varies with column type and bake temperature. Start with manufacturer guidance and watch the baseline stabilize over hours to a day.
Q: When should I replace the septum?
A: Replace the septum at the start of each day for heavy use or after 50–100 injections for lighter use. A worn septum causes bleed and leaks.
Q: Can software cause retention shifts?
A: Yes. Incorrect method edits, flow tables, or driver mismatches can shift retention. Always verify method settings after software updates.
Frequently Asked Questions of Agilent 6890 Troubleshooting Guide
How do I check carrier gas flow on the Agilent 6890?
Use the front-panel readout and an external flow meter. Compare setpoint flow with actual flow and inspect regulators if readings differ.
Why is my FID not igniting?
Check hydrogen and air pressures and purity. Confirm the pilot flame or ignite sequence and replace the jet or electrode if ignition persists as a problem.
What if my baseline drifts after a column change?
Allow the column to condition and stabilize. Check connections and make sure the new column is properly trimmed and baked.
How often should I run maintenance on the 6890?
Do basic checks daily, consumable replacement weekly to monthly, and full service annually or per usage. Regular checks prevent most faults.
Can electrical noise affect my detector?
Yes. Poor grounding and nearby equipment can add noise. Verify grounding and isolate cables to reduce interference.
What steps should I take before calling service?
Document error codes, run a blank and a standard, check gas and power, and replace obvious consumables. This saves time and can fix many issues.
How do I handle a high backpressure reading?
Trim the column or replace it if clogged. Also check for blocked inlet liners or filters and inspect connectors for debris.
Is it safe to run the GC with a small leak?
No. Even small leaks affect data and can be hazardous with flammable gases. Fix leaks before routine runs.
Conclusion
This Agilent 6890 Troubleshooting Guide gives clear steps to find and fix common GC issues. Start with basics, use a standard workflow, and keep a kit of parts and tools. Document changes and run validations after repairs. Take action now: apply the workflow on your next fault, keep good logs, and consider routine training for lab staff. Share your experience in the comments or subscribe for more tips on GC troubleshooting.

