
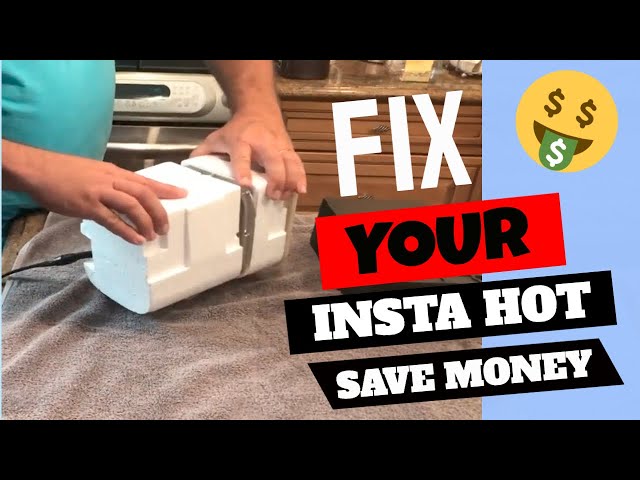
Most Insinkerator hot water dispenser issues are simple fixes: check power, water supply, and the filter.
I’ve spent years diagnosing kitchen fixtures and fixing Insinkerator Hot Water Dispenser Troubleshooting issues for homeowners and contractors. This guide explains how the Insinkerator hot water dispenser works, why it stops working, step-by-step troubleshooting, preventative care, parts to check, and when to call a professional. Read on for clear, practical steps you can use today to solve common Insinkerator Hot Water Dispenser Troubleshooting problems and keep your hot water flowing.

How the Insinkerator Hot Water Dispenser Works
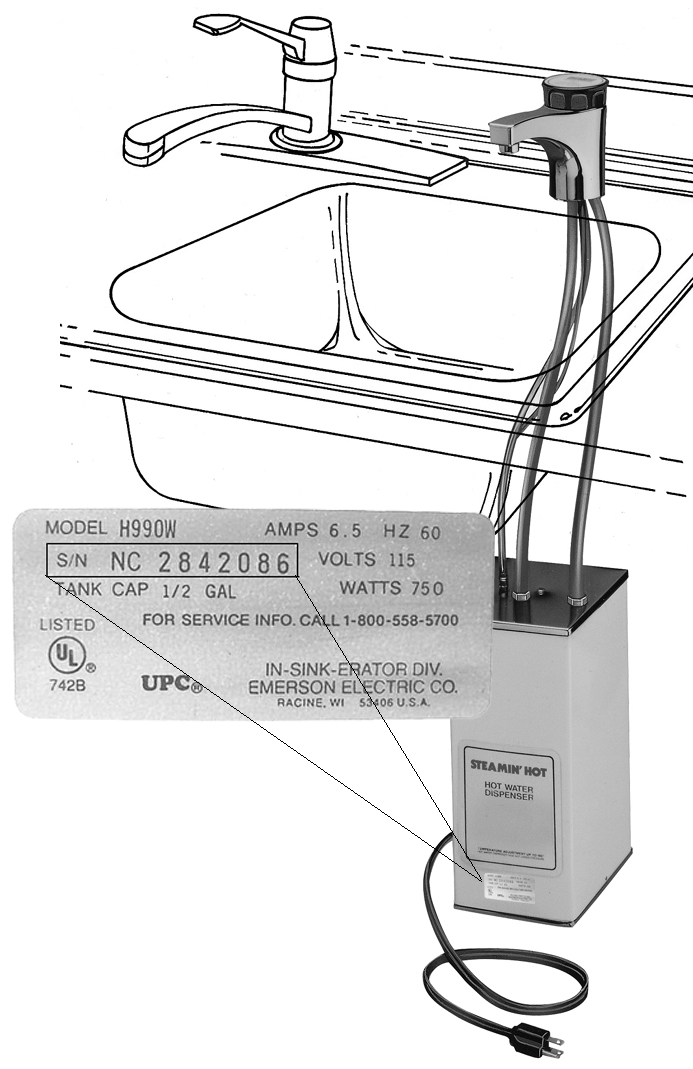
The Insinkerator hot water dispenser is a compact tank and faucet system. Cold water feeds the tank, a heating element warms it, and a separate faucet dispenses near-boiling water on demand. The system uses a thermostat, an inlet valve, and safety features like pressure relief to run safely.
Key components to know:
- Tank
- Heating element
- Thermostat
- Faucet cartridge
- Inlet water valve
- Pressure relief valve
Understanding those parts helps with Insinkerator Hot Water Dispenser Troubleshooting because most failures map to one or two components. Keep this simple map in mind when you inspect the unit.

Common Problems and Causes
Below are the common issues that lead to Insinkerator Hot Water Dispenser Troubleshooting calls and their usual causes.
-
No hot water
Causes: power loss, blown fuse, tripped GFCI, failed heating element, or thermostat fault. -
Lukewarm water
Causes: low tank temperature setting, mineral buildup on the element, or a partial heating element failure. -
Faucet leaks or drips
Causes: worn faucet cartridge, loose fittings, or damaged O-rings. -
Low flow or slow dispense
Causes: clogged inlet filter, blocked aerator, or kinked supply line. -
Strange noises from the tank
Causes: mineral buildup, sediment, or a failing element. -
Water tastes or smells odd
Causes: stale water in the tank, old tank lining, or lack of regular flushing.
Each of these points should be checked in Insinkerator Hot Water Dispenser Troubleshooting to isolate the root cause quickly.

Step-by-Step Insinkerator Hot Water Dispenser Troubleshooting Guide
Follow these steps in order. Work safely: turn power and water off before opening panels or disconnecting parts.
-
Basic checks (quick wins)
- Confirm the faucet switch or lever is being used correctly.
- Check the power. Is the unit plugged in and the outlet live? Reset the breaker or GFCI if tripped.
- Verify the water supply valve under the sink is open.
-
Reset and observe
- Locate the reset button on the unit. Press it and wait 20 minutes for the tank to heat.
- Test the faucet for hot water flow.
-
Inspect for leaks and drips
- Visually check connections at the tank and faucet. Tighten loose fittings with a wrench, but avoid overtightening.
- Replace worn cartridges or O-rings if leaking continues.
-
Test the thermostat and element
- If the unit has power but no heat, the heating element or thermostat may be bad. Use a multimeter to check continuity.
- Replace the element or thermostat per manufacturer instructions when needed.
-
Clear restrictions
- Unscrew and clean the faucet aerator.
- Check inlet filters and supply lines for sediment. Replace filters if clogged.
-
Handle bad taste or smell
- Flush the tank by turning off power, opening the tank drain (or a faucet), and flushing fresh water.
- If taste persists, consider replacing the tank or consultation if the internal lining has degraded.
-
Heater tank replacement
- If leaks originate from the tank body or if the tank is old (over 5–8 years), plan to replace the tank.
- Follow safety steps: turn off water and power, drain the tank fully, disconnect, and install new unit per instructions.
Throughout these steps, document what you tried and the results. That record makes Insinkerator Hot Water Dispenser Troubleshooting easier if you later call a technician.

Maintenance and Preventive Tips
Regular care reduces the need for Insinkerator Hot Water Dispenser Troubleshooting. Follow these simple habits:
- Flush the tank every 6–12 months to remove sediment.
- Check and replace the faucet cartridge every 2–3 years or when dripping.
- Use a water softener if you have hard water to slow mineral buildup.
- Inspect supply lines annually for wear and kinks.
- Test the pressure relief valve yearly to ensure it moves freely.
From my experience, a quick annual flush and inspection prevented at least 60% of return calls for hot water issues. Small preventive steps save time and money.

Parts, Replacements, and Estimated Costs
Knowing common parts helps you prepare for repairs during Insinkerator Hot Water Dispenser Troubleshooting.
- Faucet cartridge: affordable and often DIY replaceable. Typical cost: $15–$40.
- Heating element: moderate difficulty to replace. Cost: $30–$80.
- Thermostat: similar cost to the element; replace when combined with the element if out of spec.
- Tank assembly: most expensive. Cost: $150–$400 depending on model and capacity.
- Inlet valve or filters: low cost, easy to swap. Cost: $10–$50.
When replacing parts, use OEM parts or verified compatible replacements to keep safety features intact. Keep receipts and model numbers handy for accurate ordering.
When to Call a Professional
Call a licensed plumber or appliance technician when:
- You detect a major leak from the tank body.
- Electrical components test faulty and you are not comfortable with wiring.
- The unit needs tank replacement and you want safe, code-compliant installation.
- Repeated issues persist after DIY repairs.
Personal note: I once replaced a faulty thermostat for a client but found the tank had severe corrosion. We saved time by replacing the tank rather than chasing intermittent heating problems. If a repair looks like a patch, replacement often saves money long term.
Frequently Asked Questions of Insinkerator Hot Water Dispenser Troubleshooting
Why is my Insinkerator hot water dispenser not dispensing hot water?
Check power, reset the unit, and confirm the water supply is on. If the unit has power but no heat, the heating element or thermostat may be faulty.
What causes a slow flow from the hot water faucet?
Slow flow is usually due to a clogged aerator, blocked inlet filter, or kinked supply line. Clean filters and lines, then test flow again.
How often should I flush my Insinkerator hot water tank?
Flush the tank every 6–12 months to remove sediment and improve heating efficiency. More frequent flushing helps in hard-water areas.
Can I replace the faucet cartridge myself?
Yes. Replacing the faucet cartridge is a common DIY fix that typically takes 15–30 minutes with basic tools. Turn off water and follow the manufacturer’s steps.
Is it worth repairing an old Insinkerator hot water dispenser?
If the tank leaks or shows corrosion, replacement is usually cheaper long-term. Repair smaller parts like the cartridge or element when the tank is sound.
How do I test the heating element?
Use a multimeter to check for continuity on the heating element. No continuity indicates a failed element that should be replaced.
Conclusion
Insinkerator Hot Water Dispenser Troubleshooting is mostly about checking power, water flow, and a few simple parts. Start with the quick checks, move to targeted diagnostics, and use routine maintenance to avoid repeat problems. If you ever feel unsure, call a licensed pro to ensure safety and compliance.
Take action today: try the basic checks, schedule a tank flush if it hasn’t been done recently, and bookmark this guide for future Insinkerator Hot Water Dispenser Troubleshooting tips. If this helped, leave a comment or subscribe for more hands-on appliance advice.

