
Water Worker pressure tank problems are usually caused by low air charge or a failed bladder.
I have spent years fixing well systems and guiding homeowners through Water Worker Pressure Tank Troubleshooting. This guide breaks down how these tanks work, how to spot issues, and how to fix them step by step. Read on for clear checks, safe fixes, and real-world tips you can use today.
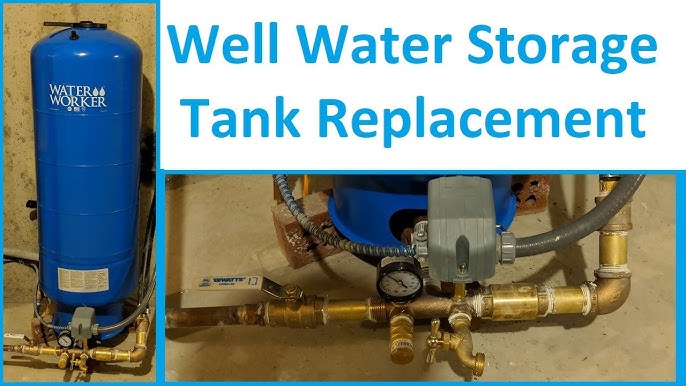
How Water Worker Pressure Tanks Work
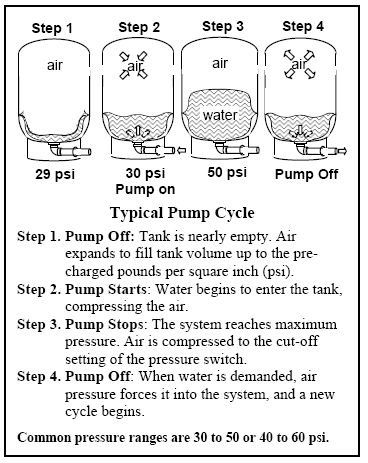
A pressure tank stores water and keeps pump cycles low. The tank has air and water separated by a bladder or diaphragm in many models. When pressure drops, the pump runs until the tank refills and pressure rises to the cut-out point. Understanding this cycle makes Water Worker Pressure Tank Troubleshooting faster and clearer.
Common Problems with Water Worker Pressure Tanks
Here are the issues you will see most often when doing Water Worker Pressure Tank Troubleshooting.
- Waterlogged tank: The tank holds too much water and the pump cycles often. This is a classic sign of lost air charge or a ruptured bladder.
- Ruptured bladder or diaphragm: Water gets into the air side and causes pulsing pressure and short pump runs. This often needs tank or bladder replacement.
- Low or no air charge: The tank pressure is low and the pump runs more than normal. A simple precharge fix can help if the bladder is intact.
- Faulty pressure switch: The switch may stick or be set wrong, creating irregular cut-in and cut-out. Cleaning or replacing the switch often fixes the issue.
- Leaks and corroded fittings: Water at the tank base or corroded nipples can cause slow loss of air or water and reduce performance. Replace corroded parts quickly to avoid larger failures.
Water Worker Pressure Tank Troubleshooting focuses on these patterns. Spotting the pattern helps you choose the right fix.

Source: youtube.com
Step-by-Step Water Worker Pressure Tank Troubleshooting Guide
Follow these steps in order. Keep safety in mind. Turn off power before opening any electrical or plumbing parts.
- Check the pump cycle behavior. Note how long the pump runs and how often it starts. Short, frequent cycles point to a tank problem.
- Read the pressure gauge. Note cut-in and cut-out pressures. Compare them to the pump and switch specs.
- Tap the tank. A hollow thump at the top and a dull sound at the bottom shows air above and water below. A dull sound all around often means waterlogged.
- Test the air charge. Use a tire gauge at the tank’s air valve with power off and tank drained. The air pressure should be 2 psi below the pump cut-in pressure.
- Drain and watch behavior. Drain some water at the tank to see if pump cycles change. If draining brings the tank back to normal, the bladder may be failing.
- Inspect the pressure switch. Look for corrosion, burnt contacts, or debris. Clean contacts or replace the switch if it fails to respond properly.
- Check the check valve and foot valve. A bad check valve can let water back into the well or tank and cause odd cycles. Replace worn valves to restore proper flow.
Emphasize these steps when doing Water Worker Pressure Tank Troubleshooting. I learned to follow the list exactly after costing myself time from skipping the gauge check once.
Source: homedepot.com
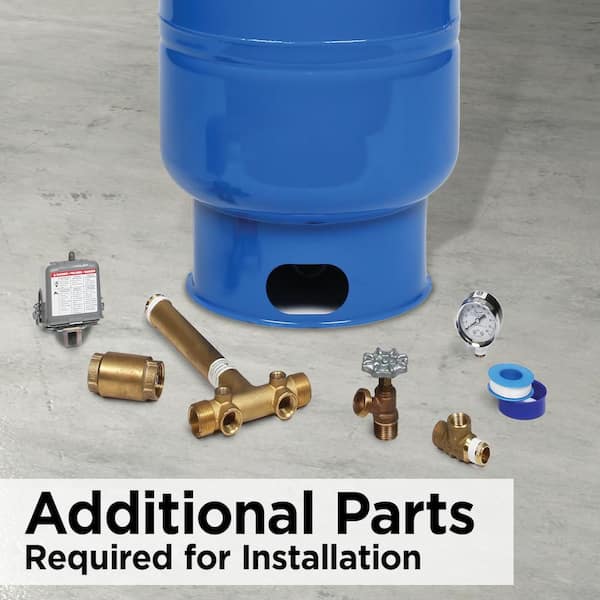
Maintenance, Parts, and When to Replace
Good upkeep keeps the tank working and the pump healthy. Regular checks prevent big failures.
- Precharge checks: Test tank air pressure every 6 to 12 months. Maintain pressure at 2 psi below cut-in.
- Bladder replacement: Replace the bladder if the tank is waterlogged and the air valve shows water. In some tanks you can replace just the bladder.
- Pressure switch servicing: Clean contacts and check settings. Replace the switch if it misbehaves.
- Fittings and nipples: Replace corroded fittings and leaking nipples quickly. Small leaks grow into big problems fast.
- When to replace the tank: If the shell corrodes, the bladder fails repeatedly, or repairs cost more than half the price of a new tank, replace it.
From my experience, a simple yearly check of the air charge and the switch saves pump life and money. Water Worker Pressure Tank Troubleshooting becomes routine with a short maintenance list.

Source: amazon.com
Practical Tips and Real-Life Experience
I have replaced bladders in summer heat and fixed pressure switches in cold snaps. A few lessons stood out.
- Avoid overcharging air in the tank. It causes rapid cycling and pump stress.
- Label the cut-in and cut-out pressures on the switch after testing. It saves headaches later.
- Keep a spare pressure switch and a small hand pump in your toolbox. They solve most emergency calls quickly.
One repair taught me to always test air charge before assuming a bad bladder. That saved the homeowner money and time. Use these practical tips while doing Water Worker Pressure Tank Troubleshooting.
Source: homedepot.com
PAA-style Questions about Water Worker Pressure Tank Troubleshooting
How do I know if my pressure tank bladder is bad?
A waterlogged tank, short pump cycles, and water at the air valve are key signs. A quick drain and air test confirm the issue.
Can I add air to my pressure tank myself?
Yes, use a bicycle pump or air compressor and a tire gauge, with the pump off and the tank drained. Keep air 2 psi below cut-in pressure.
How often should I check my tank pressure?
Check every 6 to 12 months or after a major system repair to keep the tank working well.
Frequently Asked Questions of Water Worker Pressure Tank Troubleshooting
What causes my pump to short cycle?
Short cycling usually comes from low air charge, a ruptured bladder, or a bad pressure switch. Check the tank air pressure and the switch contacts to diagnose the cause.
How do I test the tank air charge safely?
Turn off power to the pump, drain water from the tank until the pump stops, and measure air pressure at the valve. The pressure should be 2 psi below the pump cut-in point.
Will adding air fix a waterlogged tank?
Adding air can help if the bladder is intact and the air side is simply low. If water comes from the air valve or the tank stays waterlogged, the bladder is likely ruptured and needs replacement.
How do I adjust the pressure switch settings?
Turn off the pump power, remove the switch cover, and adjust the nuts on the switch to change cut-in and cut-out. Make small changes and test after each adjustment to avoid over-pressurizing the system.
When should I replace the whole pressure tank?
Replace the tank if the shell is corroded, the bladder fails repeatedly, or repair costs approach the cost of a new tank. New tanks save pump wear and offer better long-term value.
Is it safe to repair the tank myself?
Basic checks and air charging are safe for most homeowners if power is off and you follow safety steps. For electrical work, large tanks, or buried installations, call a pro to avoid risk.
How much does a bladder or tank replacement cost?
Prices vary by size and brand, but bladder repairs cost much less than full tank replacement. Factor labor and local rates when planning a fix.
Conclusion
Water Worker Pressure Tank Troubleshooting is a task you can learn and do with basic tools and safety habits. Check the air charge, watch pump cycles, and test the pressure switch first. Use the step-by-step guide and the practical tips here to save time and money on repairs. Take action today: test your tank pressure, label settings, and keep a small toolkit handy. Share your results or questions below, or subscribe for more troubleshooting guides.

