

Building a greenhouse is more than just a weekend project. It’s a way to unlock year-round gardening, protect plants from harsh weather, and even grow food for your family. Whether you want a small hobby greenhouse or a larger structure for serious cultivation, the right planning and construction can make your greenhouse efficient and long-lasting.
For beginners, the process might seem complicated, but with simple guidance, you can build a greenhouse that fits your needs and budget.

36% off Today’s Exclusive Deals
Limited-time Exclusive Deals. Check current discount on Amazon.
Check Price on Amazon As an Amazon Associate I earn from qualifying purchases.Let’s walk through the entire process step by step. You’ll learn how to choose the right design, select materials, build the foundation, assemble the frame, and add useful features. Along the way, you’ll discover practical tips and common mistakes to avoid, plus some smart ways to maximize your investment.
By the end, you’ll have a clear roadmap to build a greenhouse that’s both functional and beautiful.
Deciding Why You Need A Greenhouse
Before you start buying materials or drawing plans, it’s important to define your goals. The purpose of your greenhouse will affect every decision, from size to location.
Some people want a greenhouse for vegetables in winter. Others want a space for starting seedlings or sheltering delicate flowers. Maybe you want a greenhouse to extend your growing season or experiment with exotic plants.
Ask yourself:
- What plants will you grow? (Vegetables, flowers, herbs, tropical plants)
- How much space do you need?
- Will you need climate control? (Heating, cooling, ventilation)
- Is your budget tight, or can you invest more?
Understanding these points will help you pick the right design and materials. For example, orchids need warmth and humidity, but salad greens can survive in cooler conditions. A greenhouse for tomatoes may need more space than one for herbs.
Choosing The Right Type And Design
Greenhouses come in several shapes and sizes. Your choice depends on your purpose, space, and budget. Here are the most common types:
| Type | Features | Best For |
|---|---|---|
| Lean-to | Attached to an existing wall, saves space | Small yards, easy access |
| Freestanding | Standalone, flexible size and shape | Larger gardens, full sun exposure |
| Hoop House | Curved plastic or metal frame, inexpensive | Budget projects, seasonal use |
| Geodesic Dome | Unique shape, strong in wind and snow | Extreme climates, modern style |
Size Matters
A greenhouse can be as small as 6×8 feet or as large as 30×100 feet. Most home gardeners choose structures between 100 and 300 square feet. Bigger greenhouses cost more, but allow for more plants and easier movement inside.
Design Features
Consider these when planning:
- Height: Tall greenhouses allow for hanging plants and better air circulation.
- Doors and windows: Good access and ventilation.
- Benches or shelving: For pots and trays.
- Double doors: Useful if you want to move wheelbarrows or large containers.
Most beginners skip planning for ventilation and regret it later. Without proper airflow, plants can overheat or suffer from fungal diseases.
Picking Materials For Frame And Covering
The materials you choose will affect the greenhouse’s durability, insulation, and appearance. Let’s break down the options.
| Frame Material | Pros | Cons |
|---|---|---|
| Wood | Easy to work with, natural look | Can rot, needs maintenance |
| Aluminum | Lightweight, rust-resistant | More expensive, less strong than steel |
| Galvanized Steel | Strong, durable | Heavy, harder to cut and assemble |
| PVC | Cheap, easy to handle | Less sturdy, breaks down under sunlight |
Covering Materials
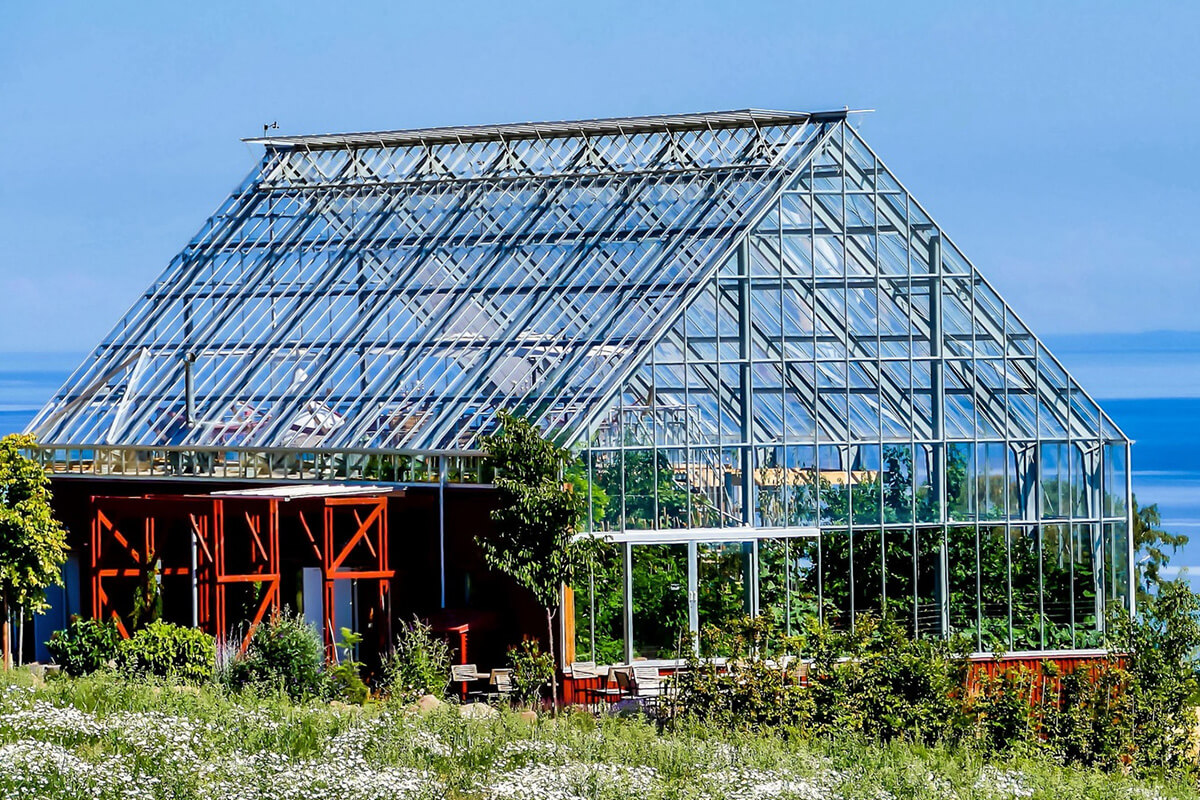
- Glass: Excellent light transmission, lasts decades, but heavy and expensive. Can break in storms or from impacts.
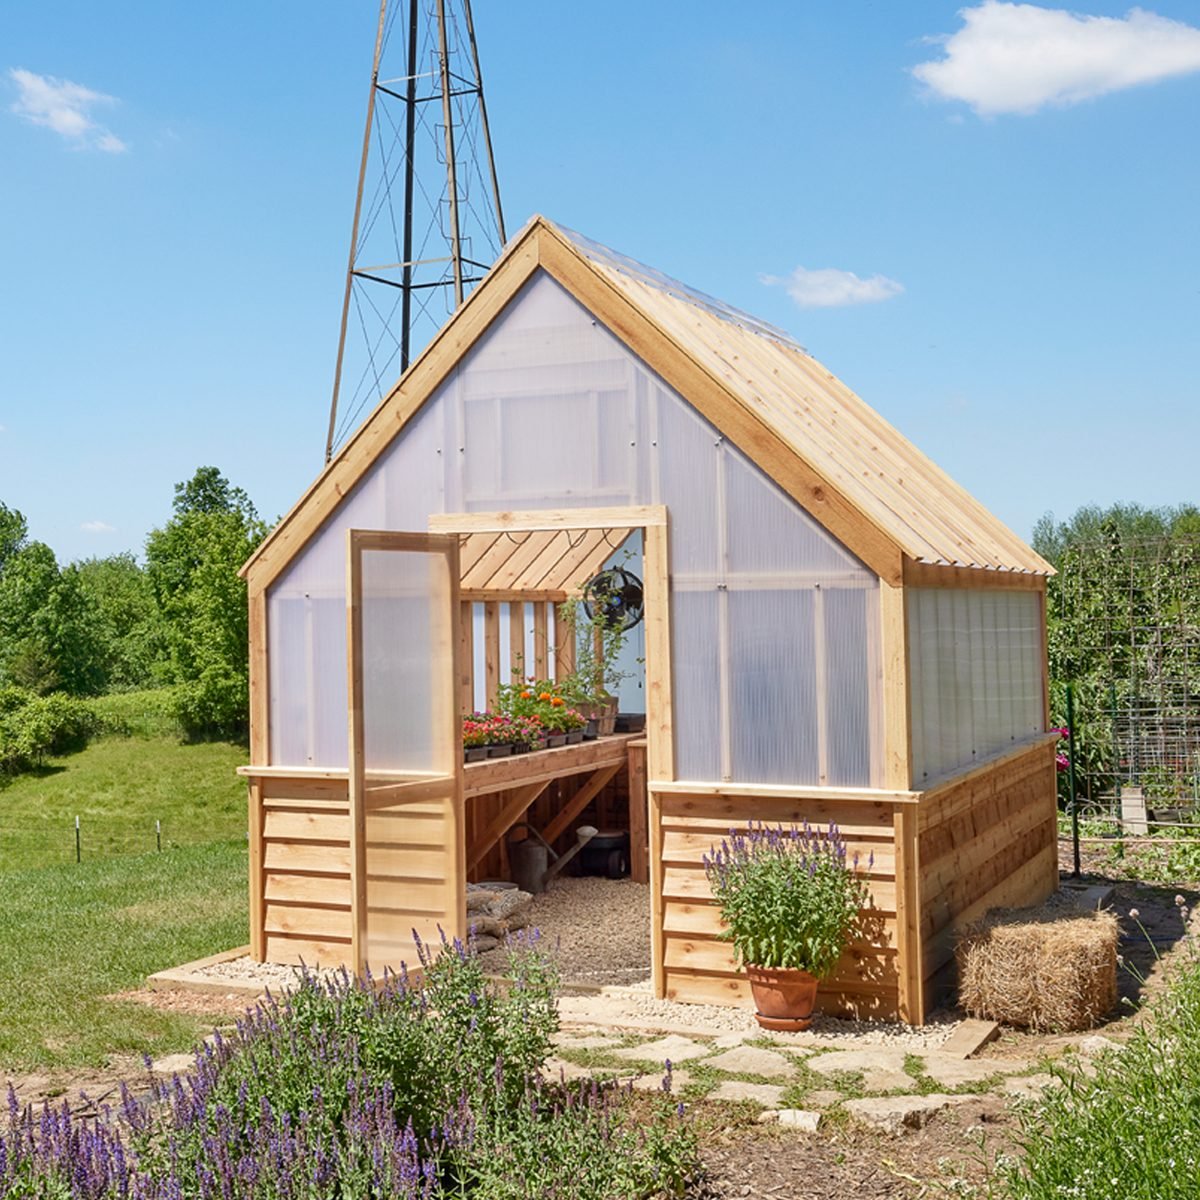
- Polycarbonate Panels: Light, strong, good insulation. Twin-wall polycarbonate is especially efficient.
- Polyethylene Film: Cheap and easy to install. Needs replacing every 2-3 years. Used mostly in hoop houses.
For most home greenhouses, polycarbonate panels offer the best balance between price, durability, and insulation.
Selecting The Location
Choosing the right spot is crucial. Here’s what to consider:
- Sunlight: Aim for at least 6 hours of direct sunlight daily. South-facing locations work best in the US.
- Wind protection: Avoid exposed areas. Use fences, hedges, or existing buildings as windbreaks.
- Drainage: The site should not flood. If your area is prone to heavy rain, build up the foundation to prevent water pooling.
- Access: Place the greenhouse near water sources and close to your house for easy visits.
- Electrical supply: If you plan to use heaters, fans, or grow lights, make sure you can run power safely.
A common mistake is placing the greenhouse under trees. This causes shade and falling debris, which can damage the structure.
Preparing The Foundation
A solid foundation keeps your greenhouse stable and dry. There are three main types:
- Concrete slab: Very stable, good for large or permanent greenhouses. Expensive and hard to modify.
- Gravel bed: Cheap, drains well, easy to install. Works for most small and medium greenhouses.
- Timber frame: Simple, often used for DIY projects. Needs regular maintenance.
Steps For A Gravel Foundation
- Mark out the area with stakes and string.
- Dig out 4–6 inches of soil.
- Fill with compacted gravel.
- Level the surface carefully.
For larger greenhouses, consider adding a perimeter of concrete blocks for extra support.
Building The Frame
Once the foundation is ready, you can assemble the frame. The process depends on your material, but the steps are similar.
Step-by-step Overview
- Lay out parts: Organize all frame pieces and check for missing items.
- Assemble base: Attach the bottom frame to the foundation. Use anchors if needed.
- Build sides and roof: Connect walls and roof sections. Double-check measurements.
- Install cross-bracing: These diagonal supports prevent twisting.
- Add doors and windows: Make sure they open smoothly.
Many beginners forget to square the frame. This leads to problems fitting panels later. Use a carpenter’s square and measure diagonals to ensure accuracy.
Safety Tips
- Wear gloves and safety glasses.
- Work with a partner if the frame is heavy.
- Take extra care with ladders or elevated sections.

Adding The Covering
The covering is what makes your greenhouse work. It traps heat and lets sunlight in. Each material has a different installation method.
Polycarbonate Panels
- Cut panels to size.
- Attach using screws or clips. Start at the base and work up.
- Seal edges with tape or silicone to prevent drafts.
- Leave space for expansion (polycarbonate expands with heat).
Polyethylene Film
- Stretch film over the frame.
- Secure with clips or boards.
- Avoid wrinkles, as they block light and trap moisture.
- Replace every few years as needed.
Glass Panels
- Install glazing bars first.
- Fit panels carefully to avoid breakage.
- Use special glass sealant to keep out water.
A common mistake is leaving gaps at the edges. Even small holes can let in pests or cause drafts. Double-check all seams.
Installing Doors, Vents, And Windows
Good ventilation is essential for healthy plants. Heat and humidity can quickly build up in a closed greenhouse.
Doors
- Place doors at the widest side for easy access.
- Double doors are helpful for moving tools and soil.
Vents
- Roof vents let hot air escape.
- Side vents allow fresh air in.
- Automatic vent openers can react to temperature changes.
Windows
- Hinged windows are easy to open.
- Add screens to keep insects out.
For small greenhouses, two roof vents and one door are usually enough. In larger structures, use more vents to prevent overheating.
Setting Up Benches, Shelving, And Paths
Inside the greenhouse, you need space to work and organize plants.
Benches
- Metal or plastic benches resist moisture.
- Wood benches are fine but may rot over time.
- Place benches along the sides for easy access.
Shelving
- Wall-mounted shelves save space.
- Adjustable shelves let you change height for different plants.
Paths
- Gravel or paving stones are best. They drain well and are easy to clean.
- Leave paths at least 18 inches wide for walking and carrying supplies.
Some gardeners add a central aisle and two side benches. This makes watering and harvesting easier.
Installing Heating, Cooling, And Watering Systems
Climate control can turn a basic greenhouse into a year-round growing space.
Heating
- Electric heaters: Easy and safe, but cost more to run.
- Propane heaters: Cheaper fuel, but need ventilation.
- Passive solar heating: Use dark barrels filled with water to store heat.
Cooling
- Shade cloth: Blocks excess sun.
- Fans: Move air and reduce humidity.
- Evaporative coolers: Useful in hot, dry climates.
Watering
- Drip irrigation: Saves water, delivers moisture directly to roots.
- Mist systems: Good for seedlings and tropical plants.
- Rainwater collection: Set up barrels to catch runoff.
Here’s a quick comparison of common heating methods:
| Heating Type | Initial Cost | Running Cost | Ease of Use |
|---|---|---|---|
| Electric Heater | Medium | High | Easy |
| Propane Heater | Low | Medium | Moderate |
| Passive Solar | Low | Free | Easy |
A non-obvious tip: Many gardeners forget to insulate the greenhouse in winter. Adding bubble wrap or thermal screens can reduce heating costs by up to 30%.
Maintaining Your Greenhouse
Once your greenhouse is built, regular maintenance keeps it working well.
- Clean panels: Dust and algae reduce light transmission.
- Check for leaks: Fix holes or gaps before pests enter.
- Inspect frame: Look for rust, rot, or loose bolts.
- Update covering: Replace film or panels as needed.
- Sanitize benches: Prevent disease by cleaning surfaces.
Most problems start small. Catching issues early prevents expensive repairs later.
Cost Estimates And Budget Planning
Building a greenhouse can cost anywhere from $500 to $10,000 or more. Your cost depends on size, materials, and features. Here’s a rough breakdown:
| Component | DIY Cost | Professional Cost |
|---|---|---|
| Foundation | $100–$600 | $500–$1,200 |
| Frame | $300–$1,500 | $800–$2,500 |
| Covering | $150–$800 | $400–$1,200 |
| Heating/Cooling | $100–$700 | $500–$1,500 |
| Benches/Shelving | $75–$300 | $150–$500 |
You can save money by building yourself, using recycled materials, or starting with a small structure. Avoid overspending on unnecessary features—focus on essentials first.
Common Mistakes And How To Avoid Them
Greenhouse building is easy to mess up if you rush or skip planning. Here are mistakes to watch for:
- Ignoring sunlight: Shade reduces growth.
- Skipping ventilation: Causes overheating and disease.
- Wrong materials: Cheap frames or covers fail quickly.
- Poor foundation: Leads to flooding or instability.
- No insulation: Higher heating bills.
- Neglecting maintenance: Small issues become big repairs.
- Bad location: Hard to access or prone to wind damage.
- Underestimating space: Crowded plants suffer.
A smart tip: Always plan for future expansion. Leave room to add benches, shelves, or extend the structure if your gardening ambitions grow.
Real-life Example: Success Story
Sarah, a home gardener in Ohio, wanted to grow fresh vegetables year-round. She built a 10×12-foot freestanding greenhouse using aluminum framing and twin-wall polycarbonate panels. She placed it in a sunny spot, added gravel foundation, and installed benches and drip irrigation.
Over one winter, Sarah harvested lettuce, spinach, and radishes—even when snow covered her yard.
She spent about $2,200 in total. Her biggest lesson: Investing in good panels and proper ventilation made all the difference. Without roof vents, she noticed plants wilted on sunny days. After fixing this, her crops thrived.
Non-obvious Insights
- Many people overlook the importance of orientation. Aligning the longest side east-west helps capture more sunlight in winter.
- Insulating the base with foam boards prevents cold drafts and keeps soil warmer, boosting growth.
- Using light-colored gravel inside reduces heat buildup compared to dark surfaces.
Recommended Resources
If you want detailed plans, climate advice, or plant-specific tips, visit University of Minnesota Extension. Their guides cover everything from greenhouse crops to pest management.
Frequently Asked Questions
How Long Does It Take To Build A Greenhouse?
Most DIY greenhouses take 2–5 days to assemble, depending on size and complexity. Professional installation can be faster, but scheduling may add delays.
What Is The Best Covering For A Home Greenhouse?
Polycarbonate panels are best for most home gardeners. They offer good insulation, are durable, and let in plenty of light. Glass is excellent but costly and heavy; polyethylene film is budget-friendly but needs frequent replacement.
Do I Need A Permit To Build A Greenhouse?
Many locations require a building permit for structures over a certain size (often 120 square feet). Check with your local zoning office before starting. Permits ensure your greenhouse meets safety standards.
Can I Grow Plants Year-round In A Greenhouse?
Yes, with proper heating, cooling, and insulation, you can grow vegetables, herbs, and flowers all year. Some crops, like tomatoes and peppers, may need extra warmth and light in winter.
How Do I Prevent Pests And Diseases In My Greenhouse?
Keep your greenhouse clean, use screens on vents and windows, and sanitize benches regularly. Watch for early signs of pests and treat them quickly. Good ventilation reduces disease risk.
Building a greenhouse is a rewarding journey. With careful planning, smart material choices, and regular care, your greenhouse can provide healthy plants and fresh food for many years. Start small if you’re new, and expand as your skills and passion grow.
The right greenhouse not only protects your crops—it turns your backyard into a thriving, green oasis.

