

Changing brake pads is a task that many car owners can handle at home with the right tools and patience. Good brake pads are essential for safe driving—they help your car stop quickly and smoothly. If your brakes squeak, feel less responsive, or your car takes longer to stop, it’s time to check the pads.
Learning to change brake pads saves money, builds confidence, and gives you a better understanding of your vehicle. For those new to car maintenance, the process may seem complex, but with clear steps and practical advice, you can finish this job safely and efficiently.

36% off Today’s Exclusive Deals
Limited-time Exclusive Deals. Check current discount on Amazon.
Check Price on Amazon As an Amazon Associate I earn from qualifying purchases.Even if you haven’t worked on cars before, starting with brake pads is a good introduction to hands-on maintenance. Mistakes are rare if you follow instructions closely, and the sense of achievement after finishing is real.
Why Brake Pads Matter
Brake pads are small but crucial. They press against the brake rotors to slow or stop your car. Over time, brake pad material wears down, reducing stopping power and increasing risk. Worn pads can damage rotors, leading to expensive repairs. According to the National Highway Traffic Safety Administration, brake-related issues contribute to over 20% of vehicle crashes caused by mechanical failure. Keeping pads in good condition is a key step in staying safe on the road.
It’s easy to overlook brake pads because they’re hidden behind your wheels, but their job is vital. When you press your brake pedal, hydraulic pressure forces the pads to clamp onto the rotors. If the pads are too thin, your car can’t stop as quickly, and the metal backing may touch the rotor, causing scratches or grooves.
Even a few millimeters of pad material lost can affect performance. In regions with steep hills or heavy traffic, brakes work even harder and wear down faster. Regular inspection and prompt replacement are not just about saving money—they help prevent accidents and protect everyone on the road.
Signs Your Brake Pads Need Changing
You shouldn’t wait until your brakes fail. Watch for these signs:
- Squealing or grinding sounds – High-pitched noises often mean the pads are worn.
- Longer stopping distance – It takes more time for your car to stop.
- Brake warning light – Some cars alert you if pads are thin.
- Vibration when braking – This can mean uneven wear or damaged rotors.
- Visual check – If you can see less than 1/4 inch of pad, it’s time to replace.
Ignoring these signals can lead to costly rotor damage or dangerous driving conditions. Sometimes, the first symptom is a squeal that disappears when braking hard. This is a built-in warning—a small metal tab scrapes the rotor when pads are low.
Grinding noises are worse, indicating metal-to-metal contact, which can ruin rotors quickly. If you notice your brake pedal feels “soft” or sinks lower than usual, this can also mean the pads are too thin or the brake system needs attention.
Don’t wait for multiple symptoms; even one sign means you should inspect your brakes soon.
What You Need Before Starting
Preparation is vital. Here’s what you’ll need:
- New brake pads (make sure they match your car model)
- Car jack and jack stands
- Lug wrench (to remove wheel nuts)
- Socket set or wrench
- C-clamp or brake piston tool
- Brake cleaner
- Gloves and safety glasses
- Flathead screwdriver
- Shop rags
Having all tools ready prevents delays and makes the process smoother. Buy quality pads—cheap ones wear faster and may not perform well. If you’re unsure which pad to get, check your car’s manual or ask at an auto parts store.
Some cars use unique pad shapes or sizes, so double-check before buying. It’s also wise to have a small container for loose bolts and nuts, so nothing gets lost during the job.
Brake Pad Types Comparison
Choosing the right pad matters. Here’s a quick comparison:
| Type | Performance | Lifespan | Noise | Cost |
|---|---|---|---|---|
| Ceramic | Excellent | Long | Low | High |
| Semi-Metallic | Good | Medium | Medium | Medium |
| Organic | Fair | Short | High | Low |
Ceramic pads last longer and are quieter, but cost more. Semi-metallic pads are common and offer good balance. Organic pads are cheaper but wear quickly and make more noise. If you drive mostly in cities with lots of stopping and starting, ceramic pads are a smart choice for their durability.
For trucks or cars that tow heavy loads, semi-metallic pads handle heat better. Organic pads are best for light cars and gentle driving, but expect to change them more often.
Step-by-step Guide: Changing Brake Pads
Changing brake pads takes about 1–2 hours for most cars. Here’s a detailed process:
1. Prepare Your Workspace
Pick a flat area, like a driveway or garage. Make sure your car is parked, with the parking brake on. Put on gloves and safety glasses—brake dust is harmful. If you’re working outside, avoid windy days to prevent dust blowing into your eyes. Lay out your tools so they’re easy to reach. Have a flashlight ready if visibility is low.
2. Loosen Lug Nuts
Before lifting the car, use a lug wrench to loosen (not remove) the nuts on the wheel where you’ll change pads. This prevents the wheel from spinning when raised. Sometimes lug nuts are very tight, especially if a shop used a power tool. If you struggle, a longer wrench or a “breaker bar” gives extra force.
3. Lift The Car Safely
Use a car jack to raise the vehicle. Place jack stands under the frame for safety—never rely just on the jack. Make sure the car is stable before you continue. If your jack stands have adjustable heights, set them evenly. Gently shake the car to check stability before removing the wheel.
4. Remove The Wheel
Take off the loosened lug nuts and pull the wheel away. Set the nuts aside so you don’t lose them. You may need to wiggle the wheel slightly if it’s stuck—corrosion sometimes makes wheels hard to remove. A rubber mallet helps loosen stubborn wheels without damaging them.
5. Locate The Brake Caliper
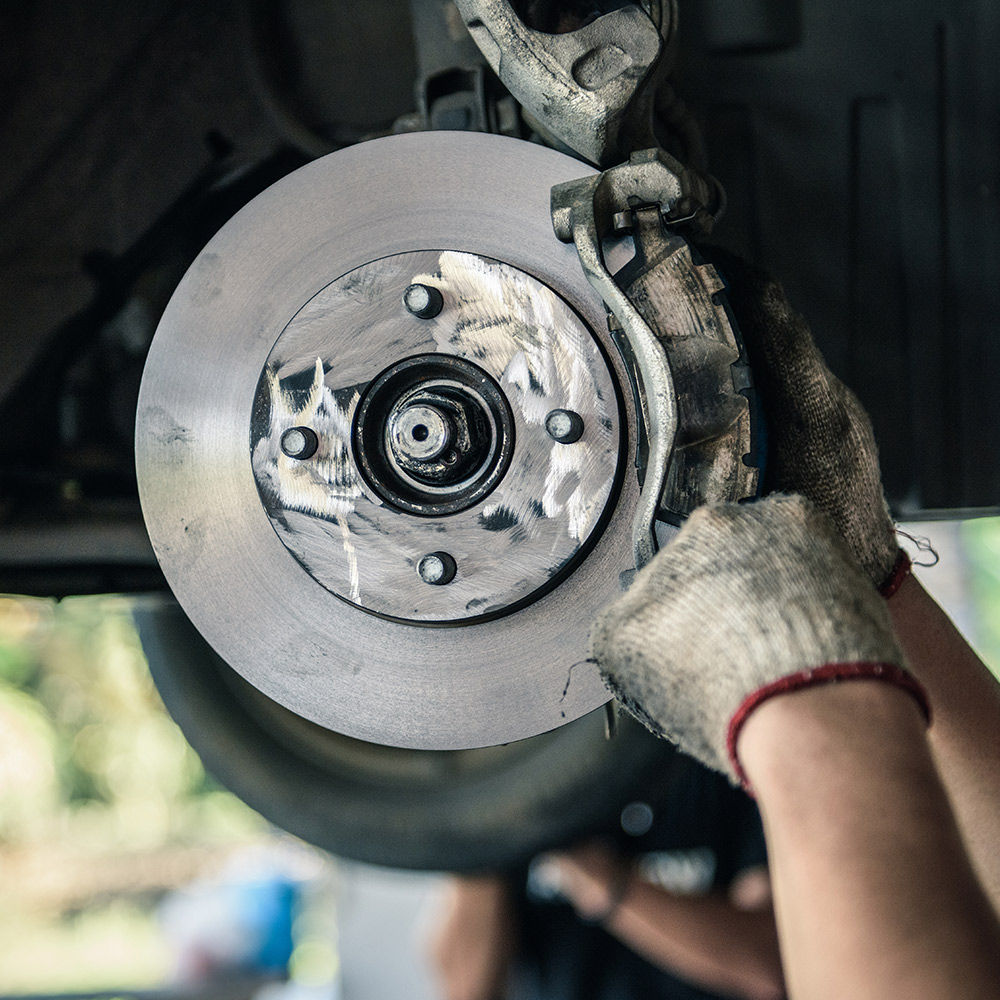
The caliper holds the brake pads. It’s usually near the top of the rotor. Look for bolts or pins securing it. The caliper may be covered in dust or grime, so use a shop rag to wipe it down for a better view.
6. Remove The Caliper
Use your socket set or wrench to remove caliper bolts. Carefully slide the caliper off the rotor. Don’t let it hang by the brake line—rest it on a box or hang it with a wire. Hanging the caliper can strain the rubber hose, leading to leaks or future brake failure.
7. Remove Old Pads
Pull out the old brake pads. They may slide out or need a gentle nudge with a flathead screwdriver. Notice how they fit—this helps when installing new pads. Compare the old pads to the new ones to make sure they match exactly. If the old pads are very thin or uneven, inspect for hardware damage.
8. Compress The Caliper Piston
New pads are thicker. Use a C-clamp or brake tool to gently push the caliper piston back. Place the old pad against the piston to avoid damage. Go slowly—too much force can cause leaks. Some calipers require twisting as you push, so check your manual. If brake fluid spills, clean it up right away—it’s corrosive to paint.
9. Install New Pads
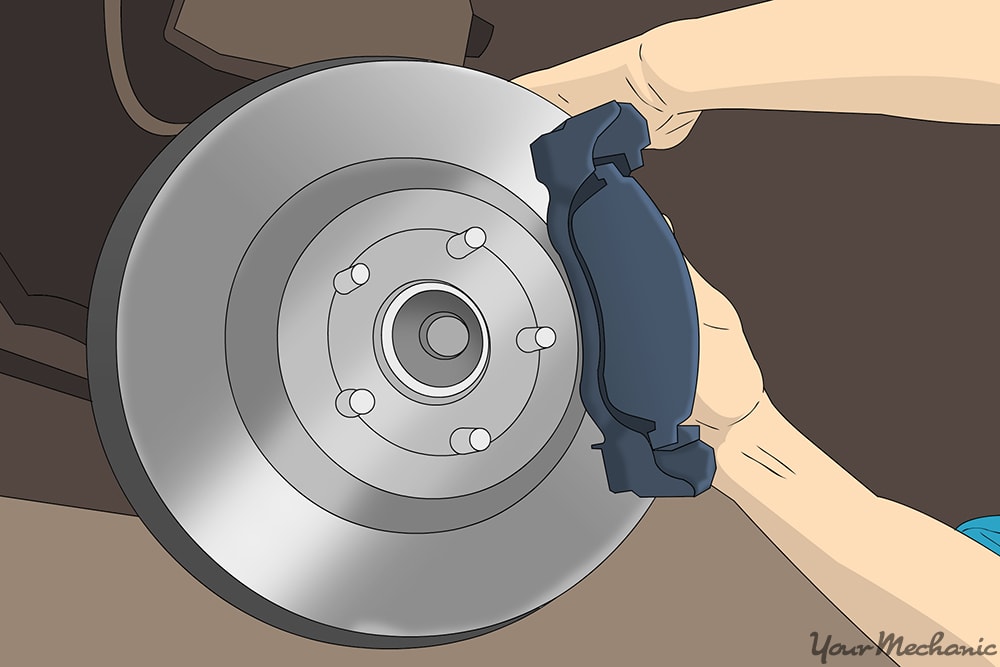
Slide the new pads into the caliper bracket. Make sure they sit the same way as the old ones. Some pads have wear indicators—these should face the right way. If your pads come with shims or clips, install them as directed.
This reduces noise and helps pads fit snugly.
10. Reinstall The Caliper
Fit the caliper back over the new pads. Tighten the bolts securely. Check that nothing is loose. Use a torque wrench if possible—too loose and the caliper may move, too tight and bolts can break.
11. Put The Wheel Back
Place the wheel on the hub. Hand-tighten the lug nuts. If the wheel won’t fit easily, check that the rotor is seated and nothing blocks the hub.
12. Lower The Car And Tighten Lug Nuts
Remove the jack stands, lower the car, and use the lug wrench to fully tighten the nuts in a star pattern. This helps the wheel sit evenly. After tightening, double-check all nuts—they should feel firm, not loose.
13. Pump The Brakes
Before driving, pump the brake pedal several times. This seats the pads and ensures proper braking. The pedal may feel soft at first, but should firm up after a few pumps.
14. Repeat For Other Wheels
If you’re changing pads on all wheels, repeat these steps. Most cars only need front pads more often, but check your owner’s manual. Rear brakes may use drum systems, which are different—review instructions if needed.

Practical Tips For Success
Many beginners miss these important points:
- Never mix pad types – Using ceramic on front and semi-metallic on rear can cause uneven braking.
- Clean rotor surface – Use brake cleaner and a rag to remove dust and oil.
- Check brake fluid – Compressing the piston may raise fluid in the reservoir. If it’s full, remove some before starting.
- Inspect rotors – Deep grooves or rust mean you should replace or resurface rotors.
- Torque specs matter – Tighten bolts to the manufacturer’s recommended torque. Overtightening can strip threads.
- Test drive carefully – After changing pads, drive slowly and test brakes before normal driving.
Another key tip: If you remove brake hardware (clips, shims, pins), clean and lubricate them with a special brake grease. This prevents squeaks and allows pads to move smoothly. Always protect painted surfaces from brake cleaner—it can cause fading. If you notice brake fluid low after finishing, top it up with the correct type (usually DOT 3 or DOT 4).
Brake Pad Lifespan And Maintenance
How long do brake pads last? It depends on driving habits, pad type, and car model. On average:
- Ceramic pads: 40,000–60,000 miles
- Semi-metallic pads: 30,000–50,000 miles
- Organic pads: 20,000–40,000 miles
Aggressive driving, heavy loads, and city traffic shorten lifespan. Check pads every 6 months, or during tire rotations. If you drive mostly highway miles, pads last longer. Stop-and-go city driving wears them faster. Always inspect pads after winter if you live in snowy areas—road salt can cause corrosion.
Brake Pad Wear Data
This table shows average pad lifespan by type:
| Pad Type | Average Lifespan (miles) | Best For |
|---|---|---|
| Ceramic | 50,000 | Daily driving, city |
| Semi-Metallic | 40,000 | Performance, towing |
| Organic | 30,000 | Light, eco-friendly |
If you notice uneven wear, check for caliper or rotor issues. Sometimes, brake pads wear out faster on one side due to stuck calipers or improper installation. If you see pad wear that’s much faster on one wheel, inspect the caliper for sticking or check for debris blocking pad movement.
Common Mistakes To Avoid
Changing brake pads is simple, but mistakes can lead to safety issues:
- Forgetting to pump brakes – If you don’t pump the pedal after pad change, brakes may feel loose or not work right.
- Letting caliper hang – Hanging the caliper by the brake hose can cause leaks or damage.
- Using dirty hands – Oil or grease on pads reduces braking power.
- Ignoring torque specs – Overtightening or undertightening bolts can cause failures.
- Skipping test drive – Always check brakes in a safe area before normal driving.
- Incorrect pad placement – Some pads have wear indicators or need to face a certain way.
Another mistake is skipping hardware replacement. Springs, shims, or clips can be reused only if in good condition. If they’re rusted or bent, replace them. Never use brake pads that don’t fit snugly—they may rattle or cause uneven wear. If you drop a pad, inspect it for chips or cracks before installing.
Should You Change Pads Yourself?
If you have basic tools and patience, changing brake pads is doable for most people. However, there are situations where you should call a professional:
- If you’re unsure about any step
- If rotors are badly damaged
- If brake lines look worn or leaking
- If your car has complex electronic brakes
Professional service costs more, but ensures safety. DIY brake pad replacement saves $100–$300 per axle, but only if done right. If your car has sensors or electronic parking brakes, special tools or software may be needed. If you feel nervous during any step, stop and seek advice.
Cost Comparison: Diy Vs Professional
Here’s a quick look at costs:
| Service | Average Cost (per axle) | Includes |
|---|---|---|
| DIY | $30–$80 | Pads only |
| Professional | $150–$300 | Pads, labor, inspection |
DIY is cheaper, but you must follow steps carefully. Professional services include inspection and guarantee. If you want to save money, investing in quality pads and tools pays off over time. If you do the job yourself, keep your receipts and note the pad type and mileage for future reference.
Advanced Advice For Beginners
Two insights often missed:
- Brake pad bedding – After changing pads, do several slow stops from 30 mph to 5 mph, then let brakes cool. This helps pads and rotors wear evenly, improving performance.
- Check brake hardware – Springs, clips, and shims help pads fit and stop quietly. Replace worn hardware when changing pads.
Ignoring bedding can lead to noisy brakes. Worn hardware can cause uneven wear and squeaking. Another advanced tip: If you notice brake dust build-up, clean it regularly. Excess dust can affect pad performance and cause rotor scoring. Also, keep a record of pad changes. Noting the date and mileage helps track pad lifespan and makes future maintenance easier.
Environmental Impact
Many pads contain metals and chemicals. Dispose of old pads properly—never toss them in regular trash. Some auto parts stores accept used pads. Proper disposal prevents pollution and protects water sources. Used brake pads may contain copper, asbestos, or other toxins.
If your local area has hazardous waste collection, use it. Protecting the environment starts with responsible disposal.
Where To Find Reliable Information
Always use your car’s manual for specs and procedures. Online forums and YouTube can help, but make sure advice matches your car model. For detailed brake system info, visit Wikipedia. If you’re learning, watch several videos before starting, and compare steps to your manual.
Frequently Asked Questions
How Often Should I Change Brake Pads?
Most drivers need new pads every 30,000–60,000 miles. City driving and heavy loads mean more frequent changes. Check pads every 6 months or during oil changes. If you hear noise or notice less braking power, inspect right away.
Can I Drive With Worn Brake Pads?
It’s unsafe to drive with worn pads. They reduce stopping power and can damage rotors. If you hear squealing or grinding, change pads soon. Delaying replacement can double repair costs and risk accidents.
Are Ceramic Brake Pads Better?
Ceramic pads last longer, make less noise, and produce less dust. They cost more but offer better performance for daily driving. For most cars, ceramic pads are a good upgrade.
Do I Need Special Tools To Change Brake Pads?
You need basic tools: jack, wrench, C-clamp, and safety gear. Some cars require special piston tools. Check your manual before starting. If your car uses “Brembo” or other performance brakes, extra tools may be needed.
What Happens If I Don’t Pump The Brakes After Changing Pads?
If you don’t pump the pedal, pads may not seat properly, leading to weak brakes or longer stopping distances. Always pump the pedal several times before driving. If brakes feel soft after pumping, double-check your work.
Changing brake pads is a practical skill that saves money and boosts your confidence. With clear steps, careful work, and attention to detail, you can do the job safely. Remember to check your manual, use quality parts, and test your brakes before driving.
If you’re ever unsure, ask a professional—your safety comes first. Even one successful repair makes future maintenance easier and less stressful.

