
Keeping your Apus RV tankless water heater clean is more important than many RV owners realize. Cleanliness isn’t just about looking nice—it’s about keeping water safe, ensuring your system lasts longer, and making sure you always have reliable hot water on the road. Many beginners think tankless means “maintenance-free.” But even tankless water heaters need regular care, especially in an RV where water sources can vary in quality. If you skip cleaning, you risk buildup that can reduce efficiency, damage parts, or even cause the heater to stop working when you need it most. This guide will walk you through every step, from preparation to flushing and reassembly, so you can handle the job confidently—even if it’s your first time.
Why Cleaning Your Apus Rv Tankless Water Heater Matters
Some RV owners believe that because tankless water heaters don’t store water, they don’t need cleaning. In reality, minerals like calcium and magnesium can quickly collect inside the unit, especially if you travel through areas with hard water. Over time, this scale buildup restricts water flow, makes the heater work harder, and increases energy use. In the worst cases, it can clog the heat exchanger or trigger error codes.
A clean heater is not just about performance. It’s also about health. Bacteria can grow in warm, damp places, and while the risk is lower in a tankless system, it’s not zero. Regular cleaning helps make sure the water flowing through your RV is safe.
Key benefits of regular cleaning:
- Longer system life: Parts last longer, saving money on repairs.
- Consistent hot water: Fewer temperature swings or cold showers.
- Lower energy costs: Clean systems heat more efficiently.
- Safer water: Less risk of bacteria or mold.
How Often Should You Clean Your Tankless Water Heater?
How often you clean your Apus RV tankless water heater depends on your water source and usage. For most RV owners, once a year is enough if you use treated or soft water. If you travel in regions with hard water, or you notice any drop in performance (like slow water flow or strange noises), cleaning every six months is better.
Here are some clear signs that it’s time to clean:
- Reduced hot water output
- Unusual noises (like popping or banging)
- Visible scale or mineral buildup at fittings
- Error codes on the heater display
Ignoring these signs can lead to expensive repairs later. If you’re unsure, it’s better to clean a bit too often than not enough.
Tools And Supplies You’ll Need
Before you begin, gather all the necessary tools and supplies. Having everything ready makes the process smoother and helps prevent mistakes.
You’ll need:
- White vinegar (at least 2-3 gallons) – breaks down mineral deposits
- Submersible pump – circulates vinegar through the heater
- Two hoses (flexible, 3–4 feet each) – attaches to inlet and outlet
- Bucket (at least 5 gallons) – holds vinegar and catches water
- Screwdriver – for removing panels or covers
- Wrench or pliers – for loosening fittings
- Teflon tape – resealing connections if needed
- Gloves and safety glasses – protects from splashes
- Clean water – for flushing after vinegar
- Towels or rags – cleanup and drying
Pro tip: Some owners use commercial descaling solutions instead of vinegar. These can work faster, but always check your user manual to be sure they’re safe for your Apus heater.
Safety Precautions Before You Start
Tankless water heaters use both electricity and propane gas. Before you begin, it’s vital to keep safety in mind.
- Turn off power: Switch off the main breaker or unplug the unit.
- Shut off gas supply: Turn the gas valve to “off” to prevent leaks.
- Let the system cool: Wait at least 30 minutes after last use.
- Close water supply: Turn off the main water valve to the heater.
- Read your manual: Always check the Apus manual for specific warnings or steps unique to your model.
A little care at this stage can prevent serious accidents.
Step-by-step Cleaning Process
Step 1: Access The Water Heater
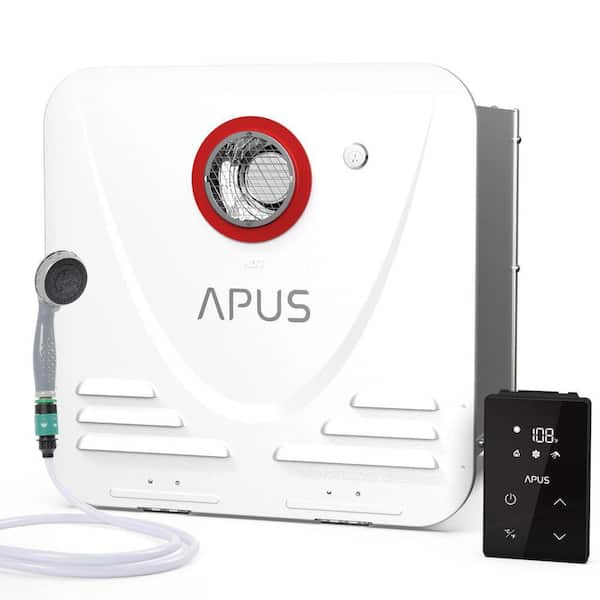
Most Apus RV tankless water heaters are installed behind a small exterior hatch. Use a screwdriver to remove the cover. Inside, you’ll see the cold water inlet and hot water outlet pipes, along with the gas and electrical connections.
Non-obvious insight: Take a quick photo before disconnecting anything. This makes reassembly much easier, especially if you’re new to RV maintenance.
Step 2: Disconnect Water And Prepare For Flushing
You need to isolate the heater from the RV’s plumbing.
- Close both the inlet and outlet shut-off valves (if installed).
- If you don’t have valves, you’ll need to disconnect the hoses directly from the heater.
- Place a bucket under the fittings to catch any water that spills.
Step 3: Attach Hoses And Set Up The Pump
Attach one hose to the cold water inlet and the other to the hot water outlet. Connect the other end of the inlet hose to the output on your submersible pump. Place both the pump and the loose end of the outlet hose into your bucket.
Non-obvious insight: Make sure hoses fit tightly. Even small leaks can cause vinegar to spray, which can damage nearby surfaces or create a mess.
Step 4: Fill The Bucket With Vinegar
Pour 2–3 gallons of white vinegar into the bucket. Vinegar is a gentle, natural acid that dissolves mineral deposits without harming the metal inside your heater.
Why vinegar? Unlike harsher chemicals, vinegar won’t damage seals or leave harmful residues.
Step 5: Circulate The Vinegar
Plug in the pump and let it run for 45–60 minutes. The vinegar will circulate from the bucket, through the heater, and back into the bucket. This steady flow breaks down scale inside the heat exchanger.
During this time, check the hoses and pump occasionally to ensure everything is running smoothly and there are no leaks.
Step 6: Flush With Clean Water
Once the hour is up, turn off the pump and discard the used vinegar. Fill the bucket with clean water and repeat the process for 5–10 minutes. This flushes out any leftover vinegar and loosened minerals.
You may need to refill the bucket once or twice, depending on how much water you use and how dirty the system was.
Step 7: Inspect For Debris And Reassemble
After flushing, remove the hoses and reconnect the RV’s water lines. Check for any visible debris or residue at the fittings. If you see any, wipe it away with a clean rag.
If you disconnected any electrical or gas connections (usually not needed for basic cleaning), double-check that they’re reattached correctly and tightly.
Step 8: Restore Power, Gas, And Water
- Open the shut-off valves (or reconnect hoses fully).
- Turn the gas back on and restore power to the unit.
- Open the water supply and check for leaks at every connection.
- Run hot water at a faucet for a few minutes to make sure the heater works and the water runs clear.
If Everything Looks And Sounds Normal, You’re Done!
What If You Find Scale Or Debris Inside?
Sometimes, heavy scale buildup can break loose and block parts of the heater. If you notice large chunks of debris coming out during flushing, repeat the vinegar flush a second time. For stubborn deposits, you may need to use a soft brush or pipe cleaner—but never use anything metal, which could damage the heat exchanger.
If the water still runs slowly or you see error codes after cleaning, contact a qualified RV technician. Some problems require specialized tools or replacement parts.
Comparing Vinegar To Commercial Descaling Solutions
Many owners wonder if commercial descalers are “better” than vinegar. Here’s a quick comparison:
| Cleaner | Effectiveness | Safety | Cost | Odor |
|---|---|---|---|---|
| White Vinegar | Good for light to moderate scale | Very safe, food-grade | Low | Strong vinegar smell |
| Commercial Descaler | Very effective, even on heavy deposits | Check compatibility with Apus models | Moderate to high | Mild to no odor |
For most RV owners, vinegar is the best choice for regular cleaning. Use a commercial product only if you have heavy buildup and your manual says it’s safe.
Common Mistakes To Avoid
Many first-time cleaners make simple mistakes that can cause leaks or damage.
- Forgetting to turn off power or gas: This is dangerous—always double-check.
- Using too little vinegar: Not enough acid won’t remove all the scale.
- Skipping the water flush: Vinegar left inside can cause odors or taste issues.
- Over-tightening fittings: Can crack plastic parts or strip threads.
- Not checking for leaks: Even small leaks can lead to bigger problems over time.
Tip: Keep a small notepad to track cleaning dates and any issues you notice. This helps with troubleshooting later and can be helpful if you ever sell your RV.

How Cleaning Impacts Water Heater Performance
Neglecting regular cleaning can lead to real-world problems fast. Here’s what you might notice as scale builds up:
- Reduced water pressure: Minerals block flow in the heat exchanger.
- Inconsistent water temperature: Scale insulates the heating elements, making the heater work harder for less heat.
- Longer heating times: More energy is wasted, and it takes longer for water to get hot.
- System shutdowns or error codes: Modern Apus heaters will sense a problem and may stop working to prevent damage.
A clean heater uses less propane or electricity, heats water more quickly, and lasts years longer. That’s a lot of value from one hour of maintenance.
How Does Apus Compare To Other Rv Tankless Water Heaters?
Understanding how Apus stands in the market helps you appreciate its specific cleaning needs.
| Brand | Cleaning Frequency | Common Issues | Ease of Access |
|---|---|---|---|
| Apus | Every 6–12 months | Mineral scale, occasional error codes | Easy (removable panel) |
| Girard | Every 6 months | Sensor buildup, ignition issues | Moderate (some models tight) |
| Suburban | Annually | Anode rod corrosion, scale | Easy (standard access) |
| Truma | Every 12 months | Low flow, descaling alerts | Easy (quick-release hoses) |
Apus heaters are generally among the easiest to access and clean, which makes regular maintenance less of a hassle.
Troubleshooting After Cleaning
Most cleanings go smoothly, but sometimes issues appear afterwards. Here are quick solutions for common problems:
- Leaking at hose connections: Tighten slightly or use new Teflon tape.
- Heater won’t ignite: Double-check that gas and power are restored, and all wires are reconnected.
- Water smells like vinegar: Flush longer with clean water.
- Error codes show up: Check your user manual for the specific code—some require a manual reset after maintenance.
For stubborn problems, don’t guess—call a professional. Trying to fix complex parts without the right tools can void your warranty.
Preventing Scale And Buildup In The Future
Regular cleaning goes a long way, but you can do even more to reduce scale and keep your Apus heater running smoothly.
- Install a water softener: These systems remove minerals before they reach your heater. Portable models are easy to use and make a big difference in hard water areas.
- Flush the heater briefly after every trip: Even a quick rinse with clean water can remove loose particles.
- Use filtered water: This reduces not just scale, but also sediment and bacteria.
- Check your anode rod: Some Apus models include an anode rod. Inspect and replace it yearly to prevent corrosion.
Over time, these small habits save money and prevent problems on the road.
Cost Of Cleaning: Diy Vs Professional Service
Cleaning your Apus RV tankless water heater is a job most owners can handle. But if you’re short on time or worried about making mistakes, you can hire a professional.
Here’s a quick cost comparison:
| Cleaning Method | Materials Cost | Labor Cost | Total Estimate |
|---|---|---|---|
| DIY (Vinegar Flush) | $15–$30 | Free | $15–$30 |
| Professional Service | $20–$40 | $100–$150 | $120–$190 |
DIY cleaning is much cheaper and gives you valuable experience with your RV systems. But if you’re ever unsure, a certified technician is a safe investment.
Extra Tips For First-time Cleaners
- Label your hoses: This makes setup quicker next time.
- Keep old towels nearby: Vinegar spills can stain, especially on carpets.
- Work on a warm, dry day: Moisture can make electrical parts harder to handle.
- Take your time: Rushing increases the chance of missing a step or causing a leak.
Cleaning might seem intimidating at first, but most owners find it much easier after the first time.

Frequently Asked Questions
How Long Does It Take To Clean An Apus Rv Tankless Water Heater?
Most cleanings take about 1.5 to 2 hours from start to finish. The vinegar needs about one hour to circulate, and setup plus flushing takes another 30–60 minutes.
Can I Use Lemon Juice Instead Of Vinegar For Descaling?
Lemon juice can help remove minor scale, but it’s much less effective than vinegar. Stick with white vinegar or a recommended commercial descaler for best results.
Is It Safe To Use My Water Heater Right After Cleaning?
Yes, once you’ve finished flushing with clean water and reconnected everything, it’s safe to use. Run the hot water for a few minutes to make sure all vinegar is out.
What Happens If I Skip Cleaning For Too Long?
Skipping cleaning can cause heavy scale buildup, lower performance, strange noises, and even heater failure. Repairs for a neglected unit can be expensive, sometimes costing more than a new heater.
Where Can I Find More Maintenance Tips For Apus Rv Water Heaters?
The official Apus website has manuals, troubleshooting guides, and updates. For general RV maintenance tips, check sources like RV.com.
Taking care of your Apus RV tankless water heater is one of the simplest ways to improve your RV experience. With just a few tools and a little time, you’ll enjoy reliable hot water and fewer surprises on your travels. Remember, a little maintenance today can save a lot of trouble tomorrow. Safe travels and happy camping!

