

Upgrading to a smart thermostat is one of the easiest ways to make your home more comfortable, energy-efficient, and modern. With a smart thermostat, you can control your heating and cooling from your phone, set schedules that fit your lifestyle, and sometimes even save money on your energy bill.
But many homeowners worry that installation is complicated. The truth is, with careful planning and the right instructions, installing a smart thermostat is a straightforward project for most people—even if you’re not an expert in electrical work.

36% off Today’s Exclusive Deals
Limited-time Exclusive Deals. Check current discount on Amazon.
Check Price on Amazon As an Amazon Associate I earn from qualifying purchases.This guide takes you step-by-step through the process of installing a smart thermostat, from choosing the right model to testing your system. You’ll also learn about wiring types, common mistakes to avoid, and how to get the most from your new device.
Whether you’re upgrading from a basic programmable thermostat or replacing an older smart model, this article gives you the clear, practical advice you need to finish the job with confidence.
Understanding Smart Thermostats
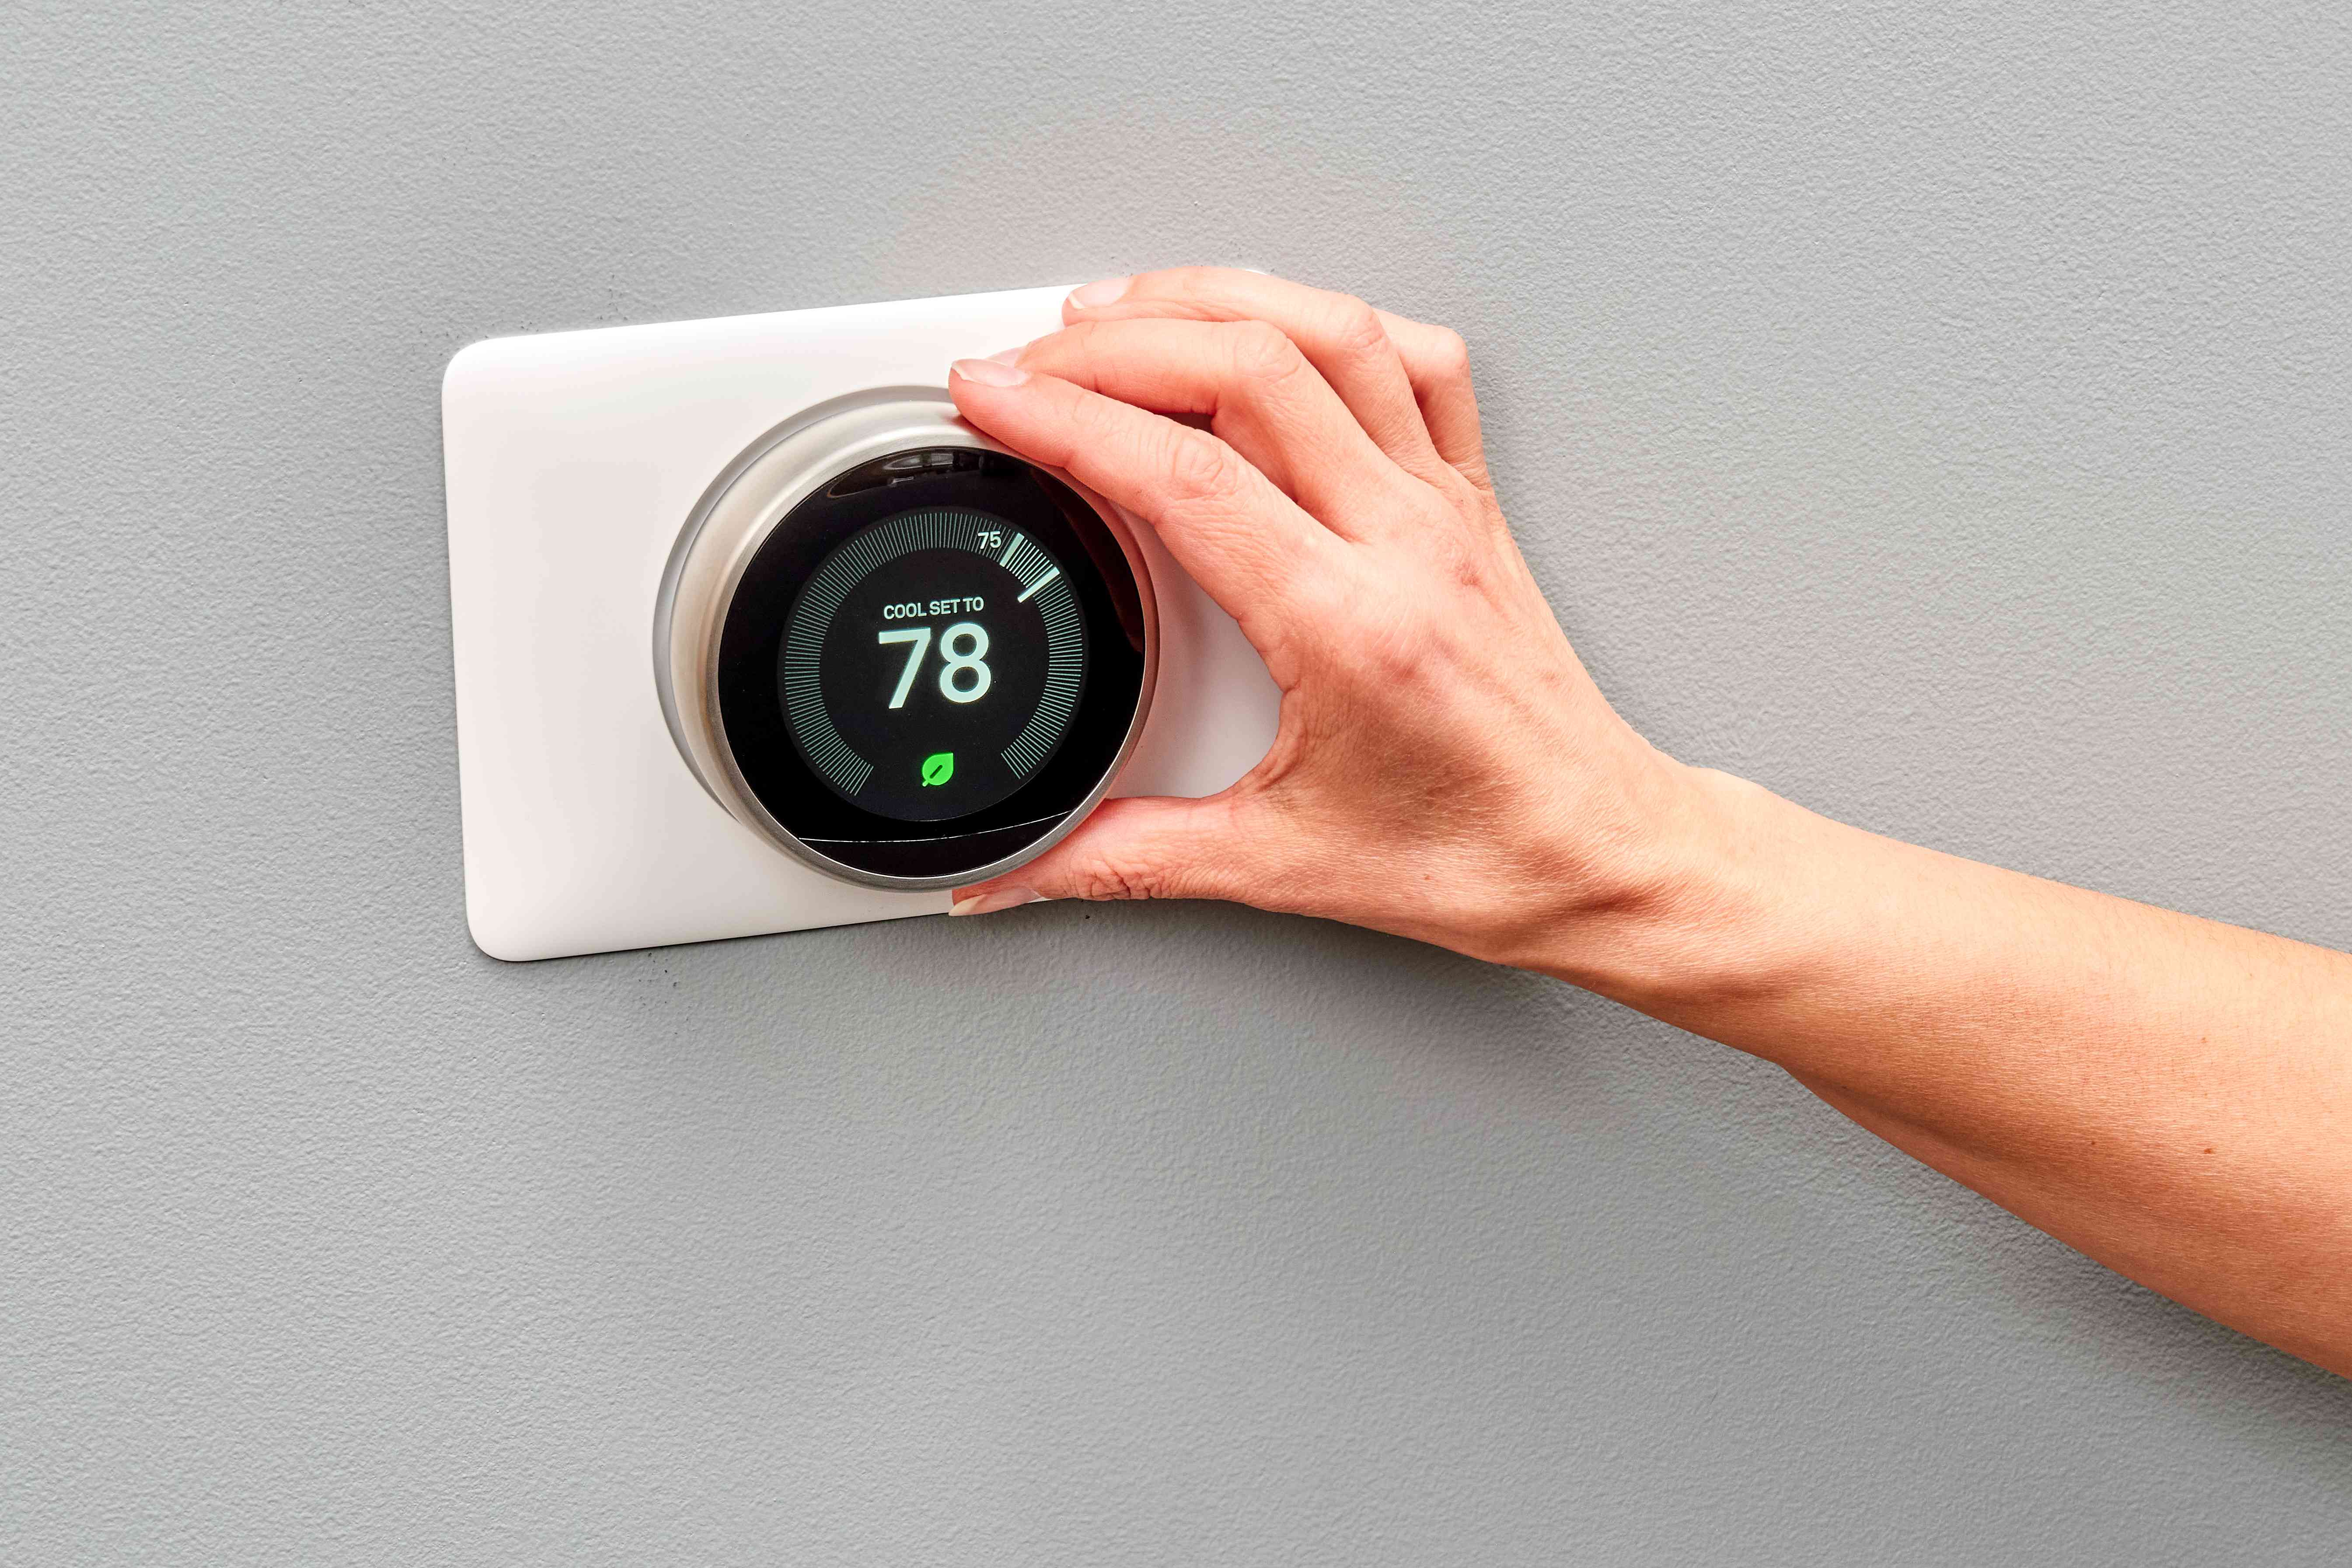
Before you get started, it’s important to know what a smart thermostat is and how it works. Unlike traditional thermostats, smart models connect to your Wi-Fi and let you control them remotely through an app or voice assistant. Some models use sensors to learn your schedule and adjust the temperature automatically. Others give you detailed reports about your energy use.
Key Benefits
- Remote access: Change your home’s temperature from anywhere using your phone.
- Energy savings: Many people save 10-20% on heating and cooling costs.
- Custom schedules: Program heating and cooling to match your routine.
- Integration: Work with smart home devices like Alexa, Google Assistant, or Apple HomeKit.
Popular Smart Thermostat Brands
There are many smart thermostats on the market. Here’s a quick comparison of three top models:
| Brand/Model | Key Features | Approximate Price | Voice Control | Energy Reports |
|---|---|---|---|---|
| Nest Learning Thermostat (3rd Gen) | Auto-scheduling, remote control, energy history | $220 | Yes (Google Assistant, Alexa) | Yes |
| ecobee SmartThermostat | Smart sensors, voice control, HomeKit compatible | $250 | Yes (Alexa built-in) | Yes |
| Honeywell Home T9 | Room sensors, scheduling, geofencing | $180 | Yes (Alexa, Google Assistant) | Yes |
Smart thermostats are not all the same. Some require a “C-wire” (common wire) for power, while others can work with battery power or with certain types of wiring. Before buying, always check your HVAC system’s compatibility.
Is Your Home Compatible?
Not every home can use a smart thermostat out of the box. The biggest factor is your home’s thermostat wiring.
Checking Your Wiring
- Turn off power to your heating and cooling system at the circuit breaker.
- Remove the cover of your current thermostat.
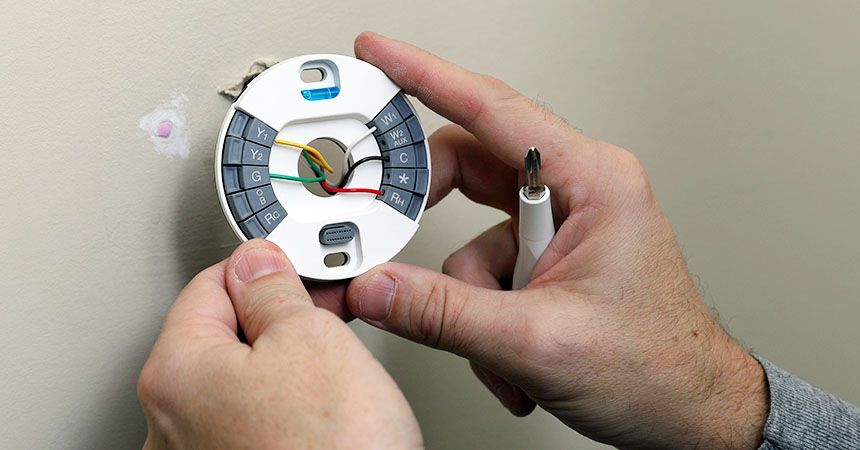
- Look at the wires connected to the terminals. Most smart thermostats need these wires:
- R or Rh/Rc: Power wire(s)
- G: Fan
- Y/Y1: Air conditioner
- W/W1: Heater
- C: Common wire (for constant power)
If you see a C-wire (usually blue or black), you’re in good shape. If not, some thermostats offer “power extender kits,” but installation is more complex.
Older Systems
Homes built before the 1980s may have only two wires or use high-voltage (120/240V) systems. Smart thermostats are not compatible with high-voltage systems, which are common in electric baseboard heating. If you’re unsure, take a photo of your wiring and check your system’s manual.
Multi-stage And Heat Pump Systems
If you have a multi-stage heating/cooling system, heat pump, or other special setup, check the smart thermostat’s compatibility guide. Most brands have online tools to help you check before you buy.
Choosing The Right Smart Thermostat
Selecting the right thermostat is about more than price. Think about your home, your needs, and the features you want.
Important Factors
- Wiring compatibility: Does your home have a C-wire?
- System support: Do you have central heat/AC, a heat pump, or multi-stage equipment?
- Integration: Do you want to control your thermostat with voice assistants?
- Remote sensors: Some models offer sensors for different rooms.
- Display and usability: Is the screen easy to read? Is the app simple to use?
Top Picks For Different Needs
| Scenario | Recommended Model | Reason |
|---|---|---|
| No C-wire | Google Nest Thermostat (2020) | Works with fewer wires, simple installation |
| Large home/multiple rooms | ecobee SmartThermostat | Extra room sensors for better comfort |
| Budget option | Emerson Sensi | Good value, easy to use, app control |
If you’re still not sure, check reviews or ask your HVAC professional. The wrong thermostat can lead to poor performance or even damage your system.
Tools And Materials You’ll Need
Installing a smart thermostat doesn’t require many tools. Here’s what you should have ready:
- Screwdriver set (usually Phillips and flat-head)
- Drill and small bits (optional, for mounting)
- Smartphone or camera (to take a photo of wiring)
- Wire labels (often included in the smart thermostat box)
- Level (for straight mounting)
- Pencil
- Thermostat manual
- New batteries (if your thermostat uses them)
- Voltage tester (optional, for extra safety)
Having everything within reach will save time and reduce mistakes.
Step-by-step Installation Guide
Follow these steps to install your smart thermostat safely and correctly.
1. Turn Off Power
Always start by turning off the power to your HVAC system. This is usually done at your home’s circuit breaker panel. Don’t just turn off the thermostat—power can still flow through the wires.
2. Remove The Old Thermostat
- Carefully pull off the faceplate of your old thermostat.
- Take a photo of the wires connected to the terminals. This step is crucial for remembering where each wire goes.
- Use the wire labels to mark each wire with its terminal letter (e.g., R, W, Y, G, C).
3. Disconnect The Wiring
- Unscrew each wire from its terminal.
- Gently pull the wires out and keep them separated so they don’t slip back into the wall.
4. Prepare The Wall
- Remove the old thermostat’s mounting plate.
- Patch any holes if you want a clean look. Most smart thermostats include a trim plate to cover old marks.
- Hold the new thermostat’s base against the wall. Use a level to ensure it’s straight.
5. Connect The Wires
- Insert each labeled wire into the correct terminal on the new thermostat’s base.
- Tighten the screws to hold the wires in place. The C-wire is especially important for smart thermostats.
- Make sure there are no loose strands touching other terminals.
6. Attach The New Thermostat
- Snap or screw the thermostat’s faceplate or main unit onto the base.
- Double-check that all wires are connected securely.
7. Restore Power
- Turn the circuit breaker back on.
- The smart thermostat should power up. If it doesn’t, check your wiring or refer to troubleshooting steps in the manual.
8. Follow Setup Instructions
Most smart thermostats will guide you through an on-screen or app-based setup process:
- Connect to your Wi-Fi network.
- Enter your heating/cooling system details.
- Set your preferred temperature schedule.
- Download the thermostat’s app on your smartphone.
9. Test Your System
- Run a test of the heating and cooling systems.
- Check that the fan, heat, and AC respond to the thermostat’s commands.
- If something doesn’t work (e.g., only the fan turns on), double-check your wiring.
Common Installation Problems And Solutions
Even careful installers can run into issues. Here are some common problems and how to solve them.
Thermostat Won’t Turn On
- Possible cause: No power to the thermostat or missing C-wire.
- Solution: Check the circuit breaker, confirm wire connections, and make sure your system supports the thermostat.
Heating/cooling Not Responding
- Possible cause: Wires connected to wrong terminals.
- Solution: Compare your photo of the old wiring to your new connections. Use the thermostat’s wiring guide.
Wi-fi Issues
- Possible cause: Weak signal or incorrect password.
- Solution: Move your router closer, use the correct Wi-Fi password, or check for firmware updates.
System Cycles On And Off Too Fast
- Possible cause: Thermostat settings not matched to your HVAC type.
- Solution: Check the “system type” setup in the app and adjust settings like “cycle rate” or “system type.”
Advanced Features And Setup Tips
Smart thermostats do much more than basic temperature control. Here’s how to get the most from your device.
Geofencing
Some thermostats use your phone’s location to adjust settings when you leave or come home. This can save energy automatically.
Learning Algorithms
Models like the Nest learn your schedule over time. At first, you may need to adjust the temperature manually, but after a week or two, the thermostat will start making smart decisions for you.
Energy Reports
Most smart thermostats show you energy usage data. Use these reports to spot wasteful habits and adjust your schedule for savings.
Voice Control
If you have a voice assistant (like Amazon Alexa or Google Assistant), you can set up your thermostat to respond to voice commands. For example, “Alexa, set the temperature to 72 degrees. ”
Smart Home Integration
Smart thermostats can work with other devices, like smart lights or security systems. This lets you create custom routines—for example, lowering the temperature when you lock the door at night.
Mistakes To Avoid
Many first-time installers make simple mistakes. Here’s how to avoid them:
- Forgetting to label wires: Always label before disconnecting, even if you took a photo.
- Skipping the C-wire check: Don’t assume your system has a common wire—look before you buy.
- Not turning off power: Working with live wires is dangerous. Turn off power at the breaker.
- Not reading the manual: Every thermostat and HVAC system is different. Follow the instructions for your model.
- Ignoring compatibility: If your system isn’t compatible, you could damage both the thermostat and your furnace or AC.
- Loose connections: Make sure wires are tightly secured in the terminals.
- Mounting the thermostat in a bad spot: Avoid direct sunlight, drafts, or behind doors—these can affect temperature readings.

Real-world Example: Smart Thermostat Savings
A study by the US Department of Energy found that households using smart thermostats saved an average of 8-15% on their heating and cooling bills. For a typical US family, this means saving $131 to $145 a year. Over five years, the thermostat pays for itself.
One homeowner in Chicago installed an ecobee SmartThermostat and used the energy reports to adjust their schedule. After six months, their energy bill was 12% lower than the previous year, even with similar weather.
What To Do If You Run Into Trouble
Sometimes, installation doesn’t go as planned. Here’s what you can do:
- Check the manual: Most brands have troubleshooting guides.
- Contact support: Most smart thermostat companies offer phone or online help.
- Hire a professional: If you’re uncomfortable with wiring, a qualified HVAC technician can install your thermostat in less than an hour.
Maintaining Your Smart Thermostat
Smart thermostats need very little maintenance, but a few simple habits keep them working perfectly.
- Update firmware: Check for app or thermostat software updates every few months.
- Clean the unit: Dust the thermostat gently with a dry cloth.
- Check the schedule: Review your heating/cooling schedule seasonally.
- Replace batteries: If your model uses batteries, change them once a year.
- Test system: Run a quick test of heat and AC before summer or winter starts.
Smart Thermostat And Privacy
Because smart thermostats connect to the internet, you might wonder about privacy. Brands like Nest and ecobee use encryption and let you control data sharing. Always use a strong Wi-Fi password and enable two-factor authentication if available. For more on privacy, visit the Wikipedia page about smart thermostats.
Frequently Asked Questions
What Is A C-wire And Why Is It Important?
The C-wire (common wire) provides continuous power to your smart thermostat. Most smart thermostats need this wire to run Wi-Fi and advanced features. If your system doesn’t have a C-wire, some thermostats include a power adapter kit, or you can hire a technician to add one.
Can I Install A Smart Thermostat If I Rent My Home?
Yes, but you should always ask your landlord first. Some smart thermostats are easy to remove and won’t damage walls. Keep your old thermostat and reinstall it before moving out.
Will A Smart Thermostat Work During A Power Outage?
No, most smart thermostats stop working during a power outage because they need electricity to control your HVAC system. They will usually return to your settings when the power comes back.
How Much Money Can I Really Save?
Most people save between 8-15% on heating and cooling costs, depending on their home and habits. Using features like scheduling, geofencing, and energy reports helps maximize savings.
What If My System Is Not Compatible?
If your HVAC system doesn’t support smart thermostats, you may be able to upgrade your wiring or use a different control method. Always check compatibility before buying, or consult an HVAC professional for options.
Upgrading to a smart thermostat is one of the best investments for comfort, control, and energy savings. With the right model and careful installation, you’ll enjoy a smarter, more efficient home for years to come.

