
Most Skytech remote issues come from batteries, pairing faults, or signal interference.
I have worked with gas and electric fireplace controls for years, and Skytech Fireplace Remote Troubleshooting is a common task I handle. This guide walks you through clear steps, easy tests, and practical fixes you can use today. You will learn why remotes fail, how to diagnose receivers and remotes, and when to call a pro. Read on to gain confidence and save time and money when your Skytech remote acts up.
How Skytech Fireplace Remotes Work
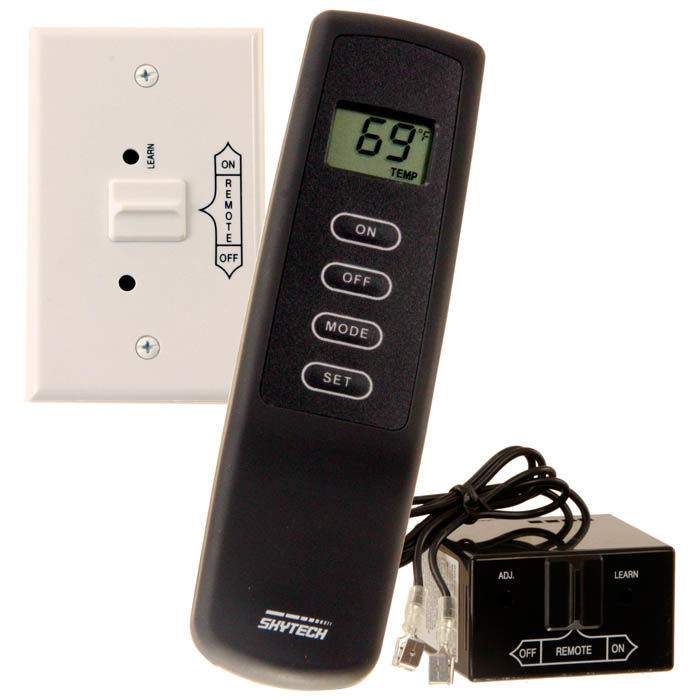
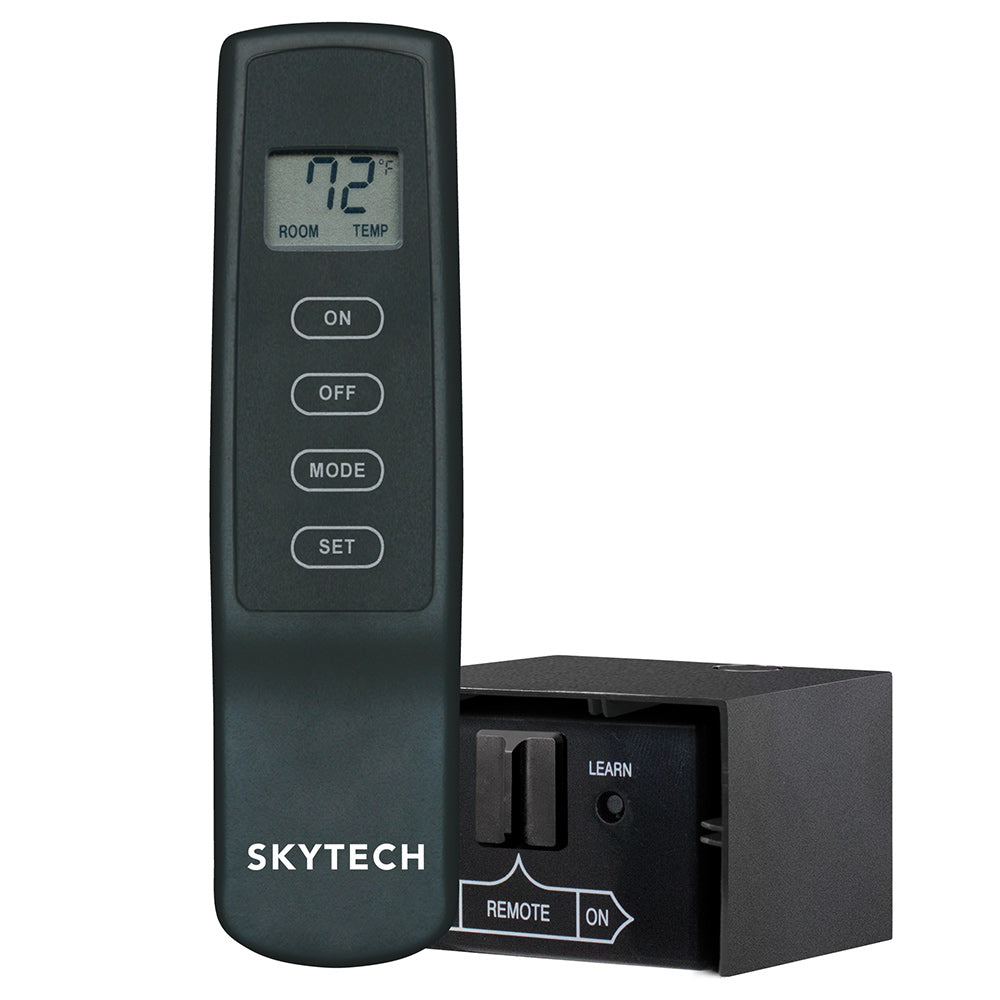
Skytech fireplace remotes use a simple signal chain. The remote sends a radio or infrared signal. The fireplace receiver decodes that signal and triggers the valve, blower, or ignition.
Key parts of the system:
- Remote: Sends commands and runs on small batteries.
- Receiver: Mounted on the fireplace or control box. It listens for signals and sends power to components.
- Ignition and valve: The receiver activates these to start or stop the flame.
- Sensors and safety switches: Ensure safe operation and can block commands when open.
Understanding this chain is essential for Skytech Fireplace Remote Troubleshooting. If the chain breaks, the remote will not work. Often the fix is simple and safe. Follow steps in this guide to find the broken link.

Common Problems and Root Causes
Most Skytech Fireplace Remote Troubleshooting issues fall into a few clear categories. Knowing these helps you narrow the cause fast.
Typical causes:
- Batteries: Weak or dead batteries are the top cause.
- Pairing: The remote and receiver can lose sync after power loss or battery change.
- Signal interference: Metal objects, glass, or other electronics can block the signal.
- Receiver power: A loose wire or blown fuse can stop the receiver from working.
- Faulty components: The remote, receiver, or ignition can fail over time.
Example scenario: I once replaced a receiver that looked fine, only to find a loose connector on the control board. Tightening it fixed everything. Small checks save time and money.
Step-by-Step Skytech Fireplace Remote Troubleshooting Guide
Follow these steps in order. Each step uses simple tools and checks. Most fixes take under 20 minutes.
- Check batteries
- Remove the battery cover and test batteries with a meter or swap with known good ones.
- Look for corrosion and clean contacts if needed.
- Test remote signal
- Point the remote at a phone camera and press a button. If you see a light in the camera viewfinder, the remote emits a signal.
- No light means replace the remote or batteries.
- Power cycle the receiver
- Turn off main power or switch off the fireplace at the breaker for 30 seconds.
- Turn power back on and test the remote.
- Re-pair the remote
- Follow the Skytech pairing steps: usually press and hold the receiver button while pressing the remote key.
- Consult the manual for the exact sequence for your model.
- Inspect receiver wiring
- Turn off power and inspect for loose connectors, burnt wires, or blown fuses.
- Tighten and clean as needed.
- Check safety switches
* Verify pilot safety, high-limit switch, and door switches are closed.- Bypassing safety switches is dangerous; only test continuity, do not bypass for normal use.
- Reduce interference
- Move metal objects or large electronics away from the receiver.
- Test remote at close range to rule out weak range issues.
- Swap with spare parts
- If you have a spare remote or receiver, substitute to isolate the faulty part.
- This is the fastest way to find which device is bad.
These steps will handle most Skytech Fireplace Remote Troubleshooting cases. Keep a simple tool kit: meter, small screwdriver set, and fresh batteries.

Advanced Diagnostics and Tools
When basic steps fail, use these advanced checks. They require caution and basic electrical knowledge.
Useful tools:
- Multimeter: Check battery voltage and receiver power rails.
- Infrared tester or camera: Confirm IR emission if needed.
- Small mirror or borescope: Inspect receiver wiring in tight spaces.
Advanced checks:
- Measure battery voltage under load. Low voltage under load can mean poor contact or old cells.
- Test receiver input voltage at the terminal block with the unit powered on.
- Check continuity of safety switches with power off. An open circuit may block remote commands.
- Look for error LEDs on the receiver. Many models blink codes for faults. Count blinks and match to manual.
I once used a meter to find the receiver was not getting 12V due to a failed transformer. Replacing the transformer solved the issue. If you are unsure, call a licensed technician for high-voltage checks.
Replacement, Repairs, and When to Call a Pro
Not every problem is DIY. Here is how to decide.
When you can fix it yourself:
- Batteries, pairing, and interference fixes.
- Tightening connectors and replacing remote batteries.
- Simple fuse replacement if you can access it easily.
When to call a pro:
- You see charred wires, burning smells, or melted plastic.
- Receiver or control board needs replacement.
- Troubleshooting shows missing input voltages or complex faults.
- You are uncomfortable working with gas, high voltages, or pilot systems.
Replacement tips:
- Match model numbers when buying a replacement receiver or remote.
- Keep the original serial or model info to ensure compatibility.
- Use manufacturer-approved parts to maintain safety and warranty.
Safety first. If gas connections or ignition systems are involved, a licensed technician should handle repairs.

Tips to Prevent Remote Issues
Routine care prevents many Skytech Fireplace Remote Troubleshooting cases. These are simple habits that save time.
Maintenance tips:
- Replace remote batteries yearly or at the start of season.
- Keep receiver and remote away from moisture and dust.
- Store the remote in a consistent spot to avoid drops.
- Cycle power to the fireplace monthly to keep electronics active.
- Inspect wiring annually for wear or corrosion.
Personal tip: I label remotes with the install date. It helps track battery life and avoids mid-season surprises.
Frequently Asked Questions of Skytech Fireplace Remote Troubleshooting
Why is my Skytech remote not turning on the fireplace?
Most often the issue is weak batteries or lost pairing. Replace batteries and re-pair the remote to the receiver using the manual steps.
How do I re-pair a Skytech remote with the receiver?
Power cycle the receiver, then press and hold the receiver pairing button while pressing the remote button. Follow the model-specific sequence from the manual for exact timing.
Can interference cause intermittent remote response?
Yes. Metal objects, glass panels, and other electronics can block signals. Test at close range and move possible blockers away to confirm.
Is it safe to open the receiver and inspect wiring myself?
You can check for loose connectors with power off. Do not work on live gas valves or high-voltage circuits. Call a licensed technician for those tasks.
How long do Skytech remote batteries typically last?
Battery life varies by use but often lasts 6 to 18 months. Replace annually to avoid failures during the heating season.
Conclusion
Skytech Fireplace Remote Troubleshooting starts with simple checks: batteries, pairing, and power. Clear steps and basic tools solve most problems quickly. When the issue is complex or involves gas or high voltage, call a licensed technician for safety. Try the fixes here, keep good maintenance habits, and note model details for faster repairs in the future. If this guide helped, subscribe for more troubleshooting tips or leave a comment with your model and symptoms so I can offer specific advice.

