
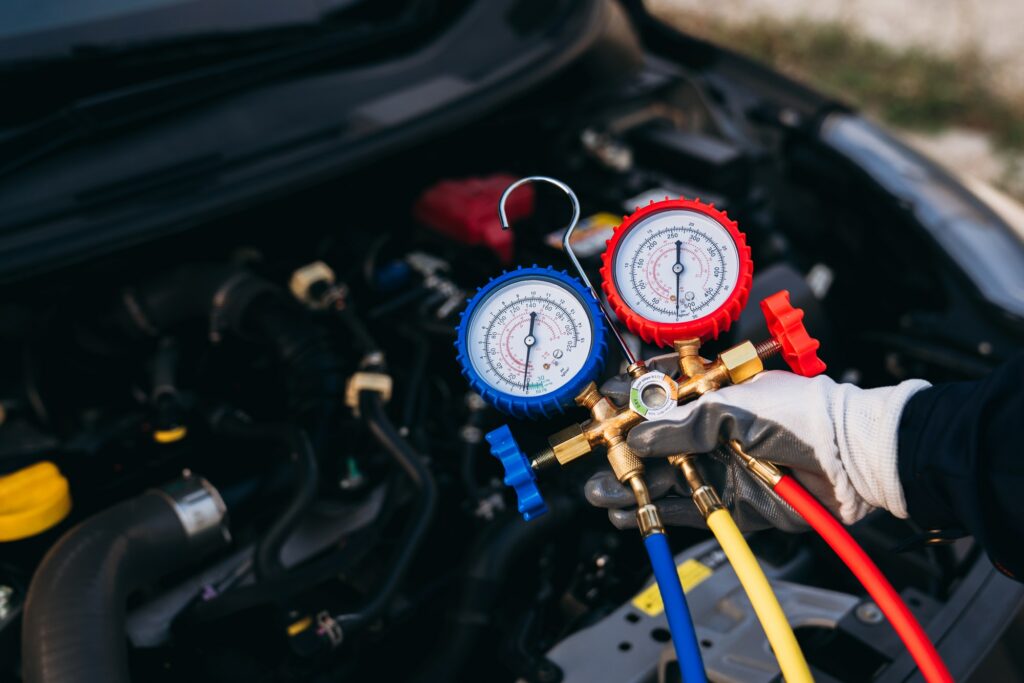
Use manifold gauges to read pressures, spot faults, and guide repairs quickly and safely.
I have worked on HVAC systems for over a decade. I know how confusing gauges can seem at first. This guide on How do you troubleshoot an AC system with gauges? will teach you clear steps. You will learn safety checks, gauge basics, step‑by‑step tests, and real tips from the field. Read on to gain the skills to diagnose most home AC problems with confidence.

Why use gauges to troubleshoot AC systems
Gauges let you read system pressures. Pressures tell you if the charge, flow, or compressor is wrong. Gauges convert those pressures into real clues. Using them saves time and cuts guesswork.

Tools, safety, and prep before you connect gauges
Prepare before you work. Safety keeps you and the system safe.
- Manifold gauge set: Use a set matched to the refrigerant type.
- Hoses and adapters: Inspect for wear and leaks.
- Thermometer clamp: Measure suction and liquid line temps.
- Protective gear: Wear safety glasses and gloves.
- Leak detector and vacuum pump: For advanced checks and repairs.
- Manufacturer specs or service data: Know target pressures and temps.
Turn power off before connecting hoses. Work in a ventilated area. Never mix refrigerant types. If you are unsure, stop and call a pro.

Understand manifold gauges: low side, high side, and readings
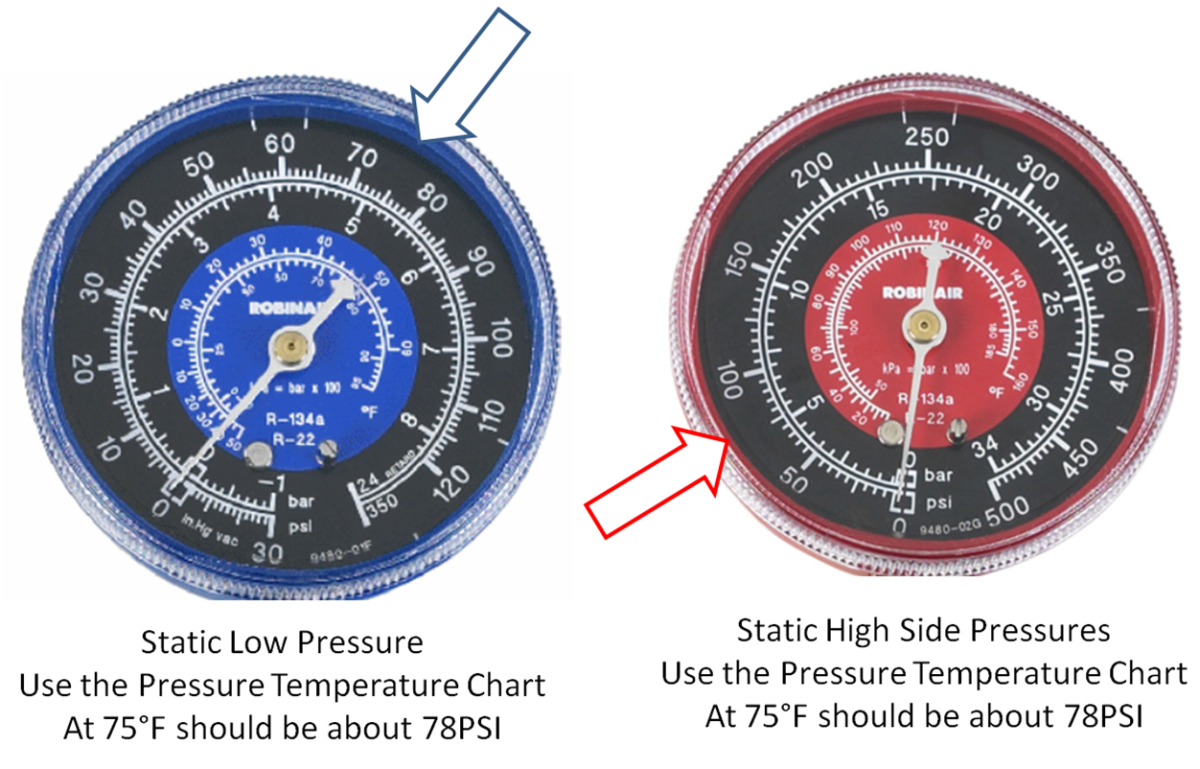
A manifold has two gauges. The low side (blue) reads suction pressure. The high side (red) reads discharge pressure. These pressures change with load and refrigerant type. Compare readings to expected values for your refrigerant and conditions.
Learn superheat and subcooling. Superheat is the heat added after the evaporator. Subcooling is the liquid cooling below saturation. Both tell you about charge and airflow. Use a temperature clamp and charts for accurate values.
How do you troubleshoot an AC system with gauges? Step-by-step
Follow a clear process. Do one test at a time.
- Visual inspection first.
- Check filters, coils, fins, and airflow.
- Fix visible problems before testing with gauges.
- Record ambient and return temps.
- Note outside and indoor temps.
- These numbers help interpret pressures.
- Connect gauges safely.
- Attach blue to suction service port and red to liquid or discharge port.
- Keep hoses clear of moving parts.
- Start the unit and let it stabilize.
- Run 10–15 minutes to reach steady state.
- Record static and operating pressures.
- Compare pressures to expected values for your refrigerant.
- Use charts or software for the correct refrigerant type.
- Check for low charge, high charge, or restrictions.
- Measure superheat and subcooling.
- Use a clamp thermometer on the suction and liquid lines.
- Calculate superheat and subcooling to pinpoint charge vs airflow issues.
- Test with load changes.
- Increase thermostat setpoint to force cooling load changes.
- Watch how pressures move. Rapid swings suggest restriction or failing valves.
- Check for leaks and loss of charge.
- If low, use an electronic leak detector or soap.
- Repair leaks then evacuate and recharge per spec.
- Verify compressor health.
- High discharge and low suction may mean compressor issues.
- Check amps and listen for unusual noise.
- Document findings and act.
- Write down all numbers and actions.
- Replace parts or adjust charge based on clear data.

Common gauge readings and what they mean
You will see patterns often. Knowing them saves time.
- Low suction and low head pressure
- Often means low refrigerant charge or weak compressor.
- Check for leaks and oil return.
- Low suction and normal/high head pressure
- Likely airflow problem across the evaporator.
- Check filter, coils, and blower.
- High suction and high head pressure
- Overcharge or hot condenser conditions.
- Check condenser fan and outdoor coil cleanliness.
- High head pressure with normal suction
- Condenser restriction or dirty coil.
- Clear debris and test again.
- Close pressures between sides when running
- Could be a shorted compressor or severe restriction.
- Further diagnostics needed.
When you ask How do you troubleshoot an AC system with gauges? use these patterns as a guide. Match numbers to symptoms. Always confirm with temperature measurements.
Advanced diagnostics and when to call a pro
Some issues need deeper tools and skills.
- Use a vacuum gauge and micron pump for leaks and evacuation.
- Use oil analysis for compressor wear.
- Use amp draw and motor tests to assess compressor health.
- Use refrigerant identifiers when in doubt about mixed refrigerants.
Call a licensed technician if you find oil stains, burned wiring, mixed refrigerants, or if the compressor fails basic tests. Major repairs need proper tools and certification.

Personal tips, real-world mistakes, and lessons learned
I have over ten years of HVAC field work. I learned three big lessons.
- Always check airflow first. I wasted time chasing charge issues when the air filter was the culprit.
- Record every reading. Good notes help on follow-up and warranty work.
- Use the right chart for the refrigerant. I once used R‑22 targets on R‑410A and misdiagnosed a system.
Avoid topping off refrigerant without finding a leak. Filling without fixing the cause causes repeat visits and damage.
Frequently Asked Questions of How do you troubleshoot an AC system with gauges?
How do you know which service ports to use when connecting gauges?
Most systems have a low side and a high side service port. Low side is larger and usually on the suction line. High side is smaller on the liquid or discharge line.
What does low suction pressure on gauges usually mean?
Low suction pressure often indicates low refrigerant charge or poor airflow across the evaporator. Check for leaks, dirty filters, and blocked coils.
How do you calculate superheat with gauges?
Measure suction line temperature at the evaporator outlet, then find the saturation temp from the suction pressure. Subtract saturation temp from measured temp to get superheat.
Can gauges tell you if the compressor is bad?
Gauges show pressure patterns that hint at compressor issues, like low suction with high head. But amps and internal tests are needed to confirm compressor failure.
Is it safe to add refrigerant based only on gauge readings?
It is not safe to add refrigerant without a full diagnosis. Gauge readings must be paired with temperature, airflow, and leak checks to avoid overcharge or damage.
How often should I check my AC with gauges?
Check your system when you see cooling problems or yearly during seasonal service. Routine checks prevent small issues from becoming big failures.
Conclusion
Gauges are one of the best tools for answering How do you troubleshoot an AC system with gauges? They turn pressure clues into clear actions. Follow a steady process: inspect, measure, compare, and test. Use superheat and subcooling to separate charge issues from airflow problems. Take safety seriously and call a pro for complex fixes.
Now try the step‑by‑step checks on a simple unit. Record your readings. Share what you find or ask questions below. If this guide helped, subscribe for more practical HVAC tips and case studies.

