
Most Hwh Leveling System Troubleshooting fixes start with checking power, fuses, and ground connections.
I have spent years fixing RV leveling systems and helping owners solve Hwh Leveling System Troubleshooting issues fast. This guide explains how the Hwh Leveling System works, common faults, step‑by‑step diagnostics, parts to check, real repair tips from my shop work, and when to call a pro. Read on to get clear, practical fixes that save time and money.

How the Hwh Leveling System Works
The Hwh Leveling System uses hydraulic jacks, sensors, and a control module to level your RV. It senses vehicle angle and commands jacks to raise or lower until level.
Key parts include:
- Control module that runs the logic and timing.
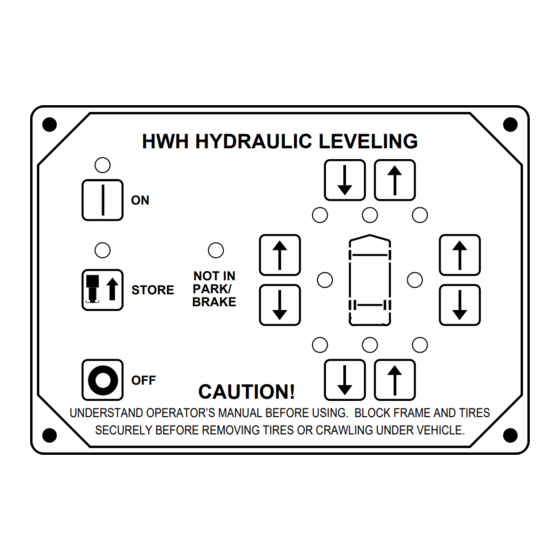
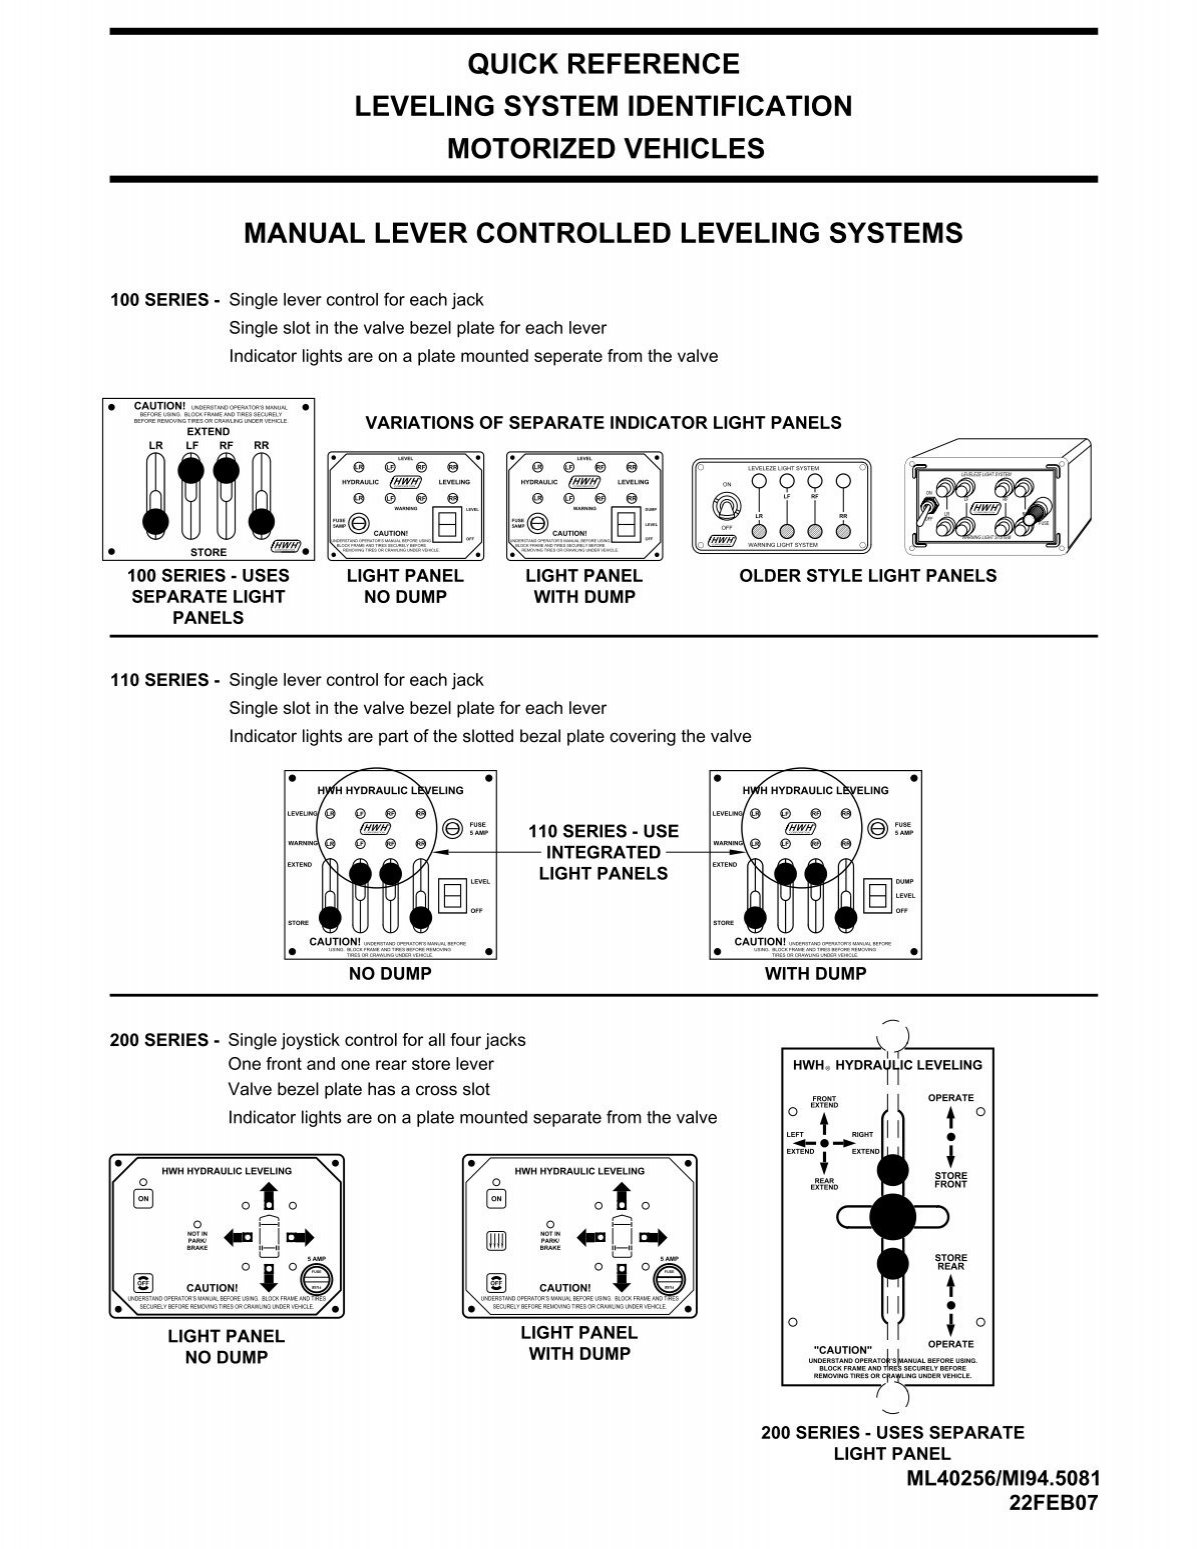
- Joystick or keypad that sends user commands.
- Hydraulic pump and motor that pressurize fluid.
- Solenoids and valves that route fluid to jacks.
- Height sensors or switches that tell the module jack position.
The system relies on good power and solid ground to work. If power is weak, the pump may not run and the system will fail. Hwh Leveling System Troubleshooting often begins by verifying these basic items.
Common Problems and Causes
Many faults repeat across units. Spotting the cause speeds repair.
Common issues:
- System won’t power on. This often means a blown fuse, weak battery, or bad switch.
- Pump runs but jacks don’t move. Could be low fluid, bad motor, or a stuck valve.
- Jacks move slowly. Likely low battery voltage or clogged filters.
- One jack won’t move. Check cylinder, hose, or a defective valve.
- System stops mid-cycle. Could be safety interlock, sensor fault, or module error.
- Error codes on control panel. These point to sensors, communications, or module failures.
These causes are the first things I check when doing Hwh Leveling System Troubleshooting in the field.

Step-by-Step Troubleshooting Guide
Follow this short plan. Work safe. Use wheel chocks and block jacks.
- Verify power and ground
- Check battery voltage at the system fuse block. You need 12.2 volts or higher for reliable operation.
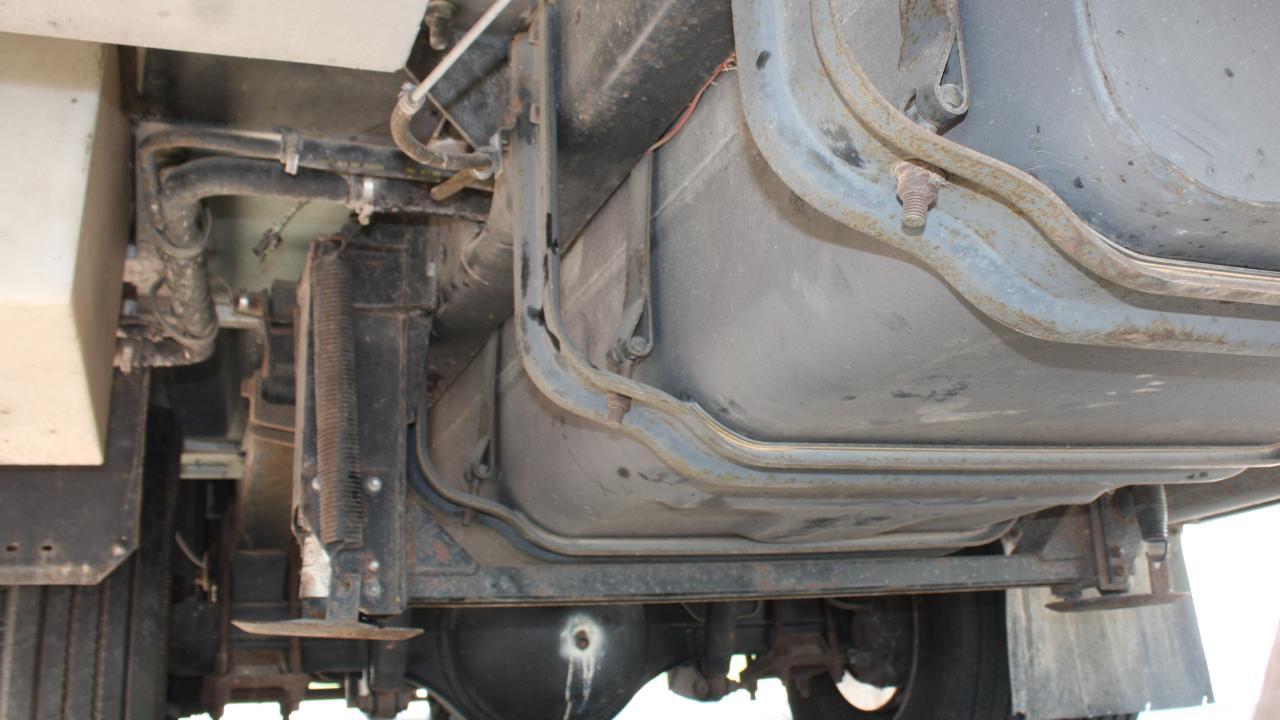
- Inspect ground connections for corrosion or loose bolts.
- Inspect fuses and relays
- Look for blown fuses at the chassis and system panels.
- Swap relays with a known good one if available.
- Listen to the pump
- Press the auto or manual switch and note pump sound. No sound means no power or bad motor.
- A labored or weak sound often means low charge or worn motor brushes.
- Check hydraulic fluid and filters
- Low fluid makes the pump run dry and heat up. Top to the specified level.
- Replace any inline filters that look dirty.
- Test valve and solenoid function
- Use the manual mode to operate one jack at a time. If a jack doesn’t respond but others do, suspect a local valve or hose.
- Swap solenoids if identical to isolate a bad coil.
- Read codes and reset module
- Clear error codes and run an auto cycle. If codes return, note exact code and pattern.
- If the module shows repeated faults, module replacement may be needed.
- Inspect sensors and switches
- Clean and test height sensors and tilt switches. Replace if intermittent.
- Perform pressure checks
- Use a pressure gauge to test pump output and pressure under load. Compare to specs.
I once fixed an RV that tripped mid‑cycle. A loose ground at the pump caused intermittent voltage drop. Tightening the ground solved the problem in five minutes. That is the kind of small fix you can miss without a checklist.

Diagnostic Tools and Tests
Good tools make troubleshooting fast and safe.
Must-have tools:
- Multimeter for voltage and continuity checks.
- 12V test light to quickly test power.
- Small pressure gauge for hydraulic testing.
- Hand pump or off‑vehicle test rig if available.
- Basic socket set and wire brush for cleaning terminals.
Simple tests:
- Voltage under load: measure battery with pump running. If voltage drops below 11.5 V, the pump will struggle.
- Continuity test: check harness wires for broken strands.
- Solenoid activation: apply 12V to solenoid lead and listen or feel for click.
When I work on Hwh Leveling System Troubleshooting, I start with a meter and a good flashlight. Often the fix is a corroded terminal.
Repairs and Parts to Check or Replace
Common parts that fail and what to do.
Parts to inspect:
- Fuses and fusible links. Replace with correct amperage.
- Pump motor. Replace if noisy, hot, or no longer builds pressure.
- Solenoids and valves. Replace if they fail to operate or stick.
- Control module. Replace if it shows repeated faults after power and sensors are good.
- Hydraulic hoses and seals. Replace if leaking or cracked.
- Height sensors and wiring. Replace or repair if intermittent.
Cost and tips:
- Fuses and relays are inexpensive and a good first step.
- Pumps and modules are costly. Confirm other parts before replacing these.
- Use OEM or high‑quality replacements to avoid repeat visits.
My shop once replaced a control module only to find a bad ground was the root cause. Save money by testing basics first during Hwh Leveling System Troubleshooting.
Preventive Maintenance Best Practices
A little care keeps the system running longer.
Do this often:
- Check battery health each season.
- Inspect fluid level and top with manufacturer fluid as needed.
- Clean electrical connections and apply dielectric grease.
- Cycle the system monthly to keep valves moving.
- Keep the area free of dirt and rodents that chew wiring.
Annual tasks:
- Change hydraulic filter and inspect hoses.
- Load test battery and inspect charger or converter.
Regular checks prevent most Hwh Leveling System Troubleshooting calls. Small steps save time and avoid roadside failures.
When to Call a Professional
Know when to stop and call help.
Call a pro if:
- You find a leaking hydraulic line under pressure. This is a safety risk.
- The control module shows internal faults after basic checks.
- Electrical faults involve complex harnesses or multiple sensors.
- You lack tools for pressure or electrical testing.
A trained tech has the right tools and parts. They also use diagnostic software and service data that save time. I recommend professionals for pump or module swaps to ensure proper bleeding and calibration.
Frequently Asked Questions of Hwh Leveling System Troubleshooting
What should I check first if my Hwh Leveling System won’t power on?
Check battery voltage, main fuses, and the ground connection first; these are the most common causes and quick to test.
Why does the pump run but jacks don’t move?
This usually means low hydraulic fluid, stuck valves, or a failed pump that can’t build pressure; test fluid level and listen for load sound.
How often should I run my leveling system to keep it healthy?
Cycle the system once a month to keep valves and seals moving; this helps prevent stuck parts and leaks over time.
Can I replace the control module myself?
You can if you have wiring skills and the right tools, but be careful to verify all sensors and grounds first to avoid replacing a good module.
What are signs of a failing pump motor?
Loud grinding noise, overheating, weak or no pressure, and voltage that drops badly under load are common signs of pump failure.
Is hydraulic fluid type important for Hwh Leveling System Troubleshooting?
Yes. Use the fluid specified by the manufacturer to ensure correct viscosity and seal compatibility; wrong fluid can cause poor performance and leaks.
Conclusion
Hwh Leveling System Troubleshooting is mostly method and patience. Start with power, fuses, and grounds, then move through the pump, valves, and sensors. Use simple tools and follow the steps above to diagnose most issues. If you hit a leak or a stubborn module fault, get professional help to avoid damage or injury.
Try the checklist today: test power, listen to the pump, check fluid, and clear codes. Share your experience or ask a question below — I read and reply to comments that describe the problem and steps tried.

