
Most outdoor gas light issues come from pilot, valve, or simple blockage problems.

Today's Exclusive Deals
Limited-time Exclusive Deals. Check current discount on Amazon.
Check Price on Amazon As an Amazon Associate I earn from qualifying purchases.I have spent years fixing yard lamps, lanterns, and coach lights, and I will walk you through reliable Outdoor Gas Light Troubleshooting steps. This guide combines hands-on experience, safety advice, and clear diagnostics so you can find and fix common problems fast. Read on to learn simple checks, step-by-step repairs, and smart maintenance for lasting results in Outdoor Gas Light Troubleshooting.
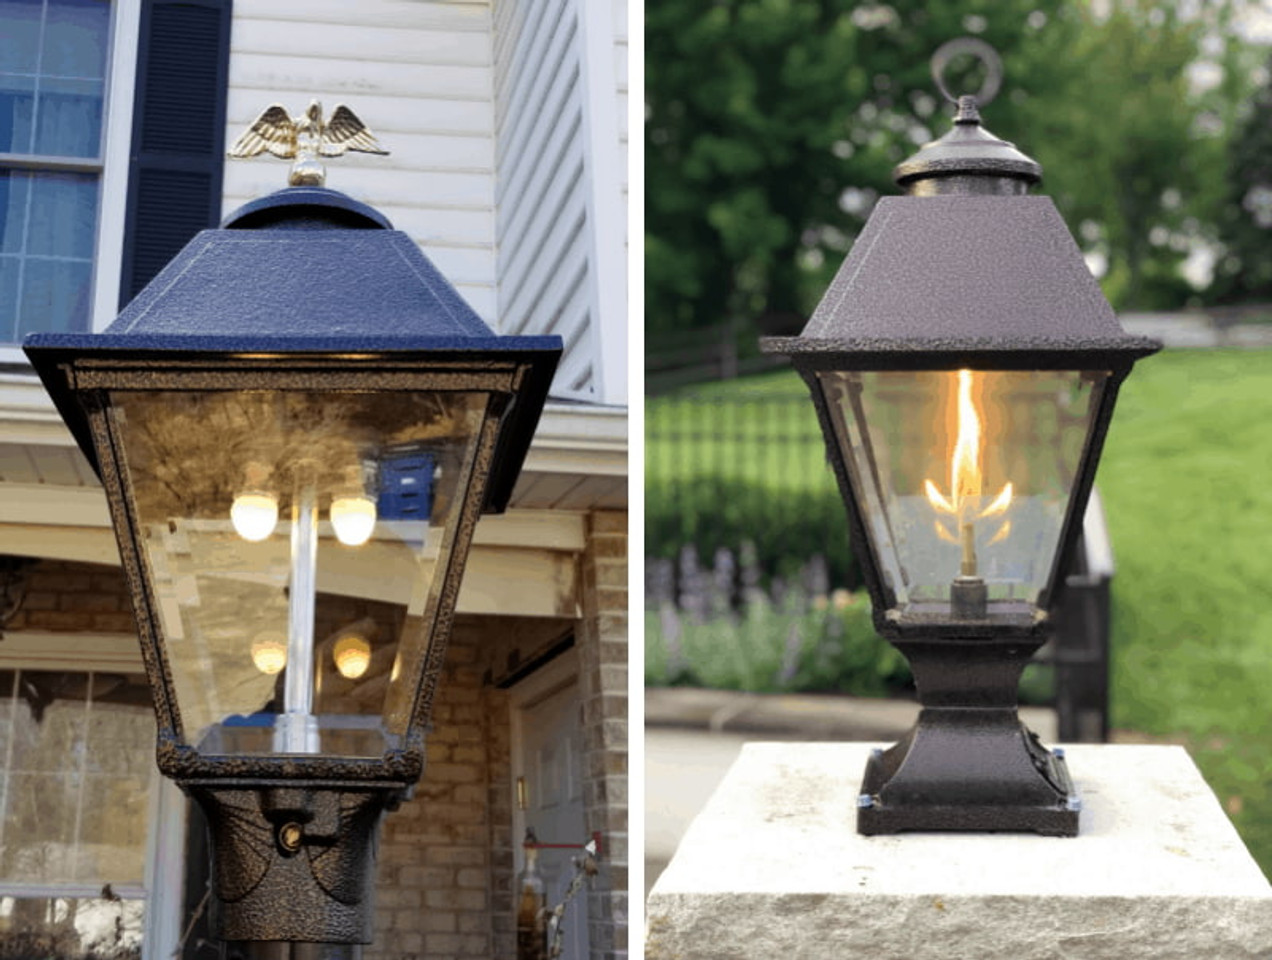
Why outdoor gas lights fail: common causes and quick definitions
Outdoor Gas Light Troubleshooting begins with knowing what can go wrong. A pilot that won’t light, a clogged burner, or a faulty valve are the most common causes. Weather, insects, and old seals also cause weak or flickering flames.
Today's Exclusive Deals
Limited-time Exclusive Deals. Check current discount on Amazon.
Check Price on Amazon As an Amazon Associate I earn from qualifying purchases.Common faults to watch for:
- Blocked or dirty burner ports that reduce gas flow.
- Thermocouple or pilot assembly failure that stops the pilot.
- Leaky or loose gas fittings that cause smell or low pressure.
- Corrosion inside the fixture from rain or salt air.
You will find that many issues are simple to spot and fix. Outdoor Gas Light Troubleshooting saves money and keeps your yard safe.
Today's Exclusive Deals
Limited-time Exclusive Deals. Check current discount on Amazon.
Check Price on Amazon As an Amazon Associate I earn from qualifying purchases.Safety first: precautions before any troubleshooting
Safety is key in Outdoor Gas Light Troubleshooting. Always shut off the gas supply before you touch the fixture. Use soapy water to check for leaks; bubbles mean a leak.
Wear eye protection and gloves when you work. If you detect a strong gas smell, leave the area and call your gas supplier or an emergency plumber. These steps reduce risk and let you troubleshoot calmly.

Tools and materials you need for reliable troubleshooting
Having the right tools shortens the job and avoids mistakes in Outdoor Gas Light Troubleshooting. Keep this simple kit ready:
- Adjustable wrench and pliers for nuts and fittings.
- Screwdrivers, both flat and Phillips.
- Soft wire brush or toothbrush for cleaning burners.
- Small mirror and flashlight to inspect hidden parts.
- Soapy water in a spray bottle to test for leaks.
- Replacement parts: pilot assembly, thermocouple, gasket, and O-rings.
A portable propane torch is useful for testing ignition but use it sparingly. Good tools make Outdoor Gas Light Troubleshooting safer and faster.
Step-by-step Outdoor Gas Light Troubleshooting process
Follow these steps in order. They are simple and repeatable.
-
Visual check
- Inspect the fixture for cracks, insect nests, and corrosion.
- Look for loose connections and soot buildup.
-
Confirm gas supply
- Verify the gas valve to the fixture is open.
- Check other gas appliances to confirm overall supply.
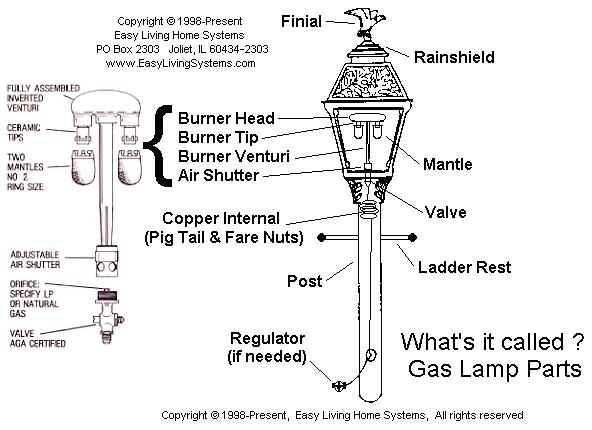
-
Test the pilot
- Try to light the pilot by the manufacturer’s instructions.
- If it won’t stay lit, the thermocouple may be bad or dirty.
-
Clean the burner
- Remove the burner cap and clean ports with a wire brush.
- Use compressed air to clear debris if available.
-
Check for leaks
- Spray soapy water on fittings and joints.
- Watch for bubbles while the gas is on.
-
Replace small parts
- Swap in a new thermocouple or pilot assembly if needed.
- Replace old gaskets and seals to restore pressure.
-
Test the fixture
- Light the pilot and main burner. Watch for steady flame.
- Re-check for leaks and stable operation.
Outdoor Gas Light Troubleshooting works best when you take each step slowly. This method reduces guesswork and reveals the true problem.
Diagnosing specific symptoms and fixes
No flame or pilot won't light
- Likely causes: no gas supply, clogged pilot, weak thermocouple.
- Fix: confirm supply, clean pilot or replace thermocouple, tighten fittings.
Weak or yellow flame
- Likely causes: air/gas mixture wrong, dirty ports, low gas pressure.
- Fix: clean burner ports, check for obstructions, test pressure.
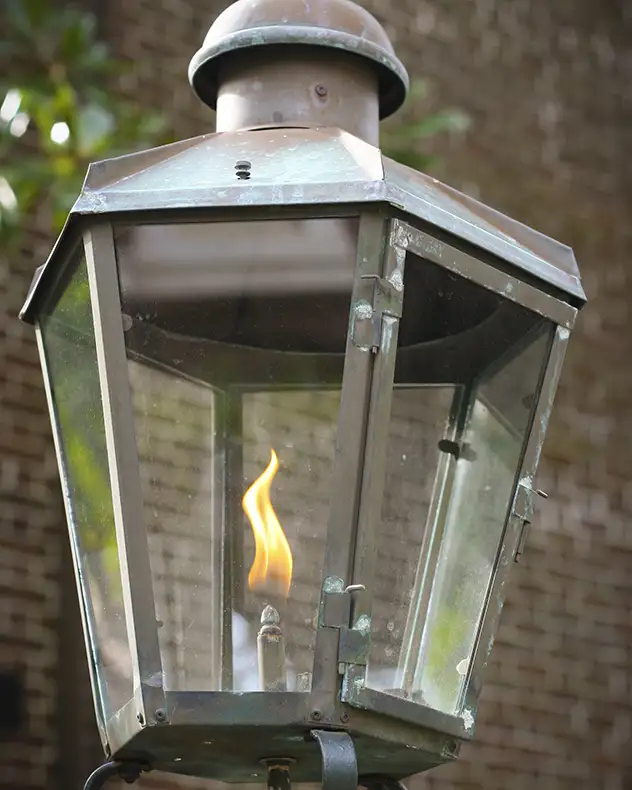
Flickering flame
- Likely causes: wind, loose gas line, partial blockage.
- Fix: shield fixture, tighten lines, clean burner.
Gas smell but no flame
- Likely causes: leak in line or fitting.
- Fix: shut off gas, ventilate area, test joints with soapy water, call pro if bubbles appear.
Pilot lights but main burner fails
- Likely causes: clogged orifice, faulty control valve.
- Fix: clean or replace orifice, test valve and replace if needed.
These targeted checks speed up Outdoor Gas Light Troubleshooting. Each symptom points to a short list of likely fixes.

Repair vs replace: cost, parts, and when to retire a fixture
Deciding whether to repair or replace is part of Outdoor Gas Light Troubleshooting. Small parts like thermocouples and gaskets cost little and are worth replacing. Control valves and corroded corps may cost more and often justify a new fixture.
Estimate guide:
- Thermocouple or pilot assembly: low cost, easy to replace.
- Burner cleaning and seals: very low cost.
- Control valve or gas line repair: moderate cost, pros recommended.
- Corroded or cracked fixture: consider replacement for safety.
I once repaired an old cast-iron lamp by replacing seals and cleaning ports. It lasted five more years. If corrosion is deep, replacement is safer and cheaper long term.

Maintenance checklist to prevent future problems
Regular care reduces the need for Outdoor Gas Light Troubleshooting. Do these tasks twice a year or after storms:
- Clean burner ports and glass for clear flame.
- Check and tighten fittings.
- Replace worn gaskets and O-rings.
- Remove nests and seal openings to prevent insects.
- Schedule a pro inspection every few years for pressure checks.
A simple seasonal tune-up prevents most common failures and keeps lights reliable.

When to call a professional
Call a licensed gas technician if:
- You smell strong gas or find a major leak.
- A valve or line repair is needed.
- You lack the tools or confidence to work on gas systems.
- The fixture is built into the gas line or hard-piped.
Professional help is worth the cost for complex jobs or safety risks. A pro also provides pressure testing and code-compliant repairs.
Personal experiences, lessons, and practical tips
From years of fixing yard lights, I learned a few truths about Outdoor Gas Light Troubleshooting. Small parts fail more often than big parts. Cleaning usually fixes weak flames. I once spent hours chasing a valve problem only to find an insect nest in the burner. After that, I always check for bugs first.
Tips I use:
- Photograph wiring and parts before disassembly.
- Keep spare thermocouples and gaskets on hand.
- Label shutoff valves to speed future work.
These habits save time and reduce stress when you troubleshoot again.
Frequently Asked Questions of Outdoor Gas Light Troubleshooting
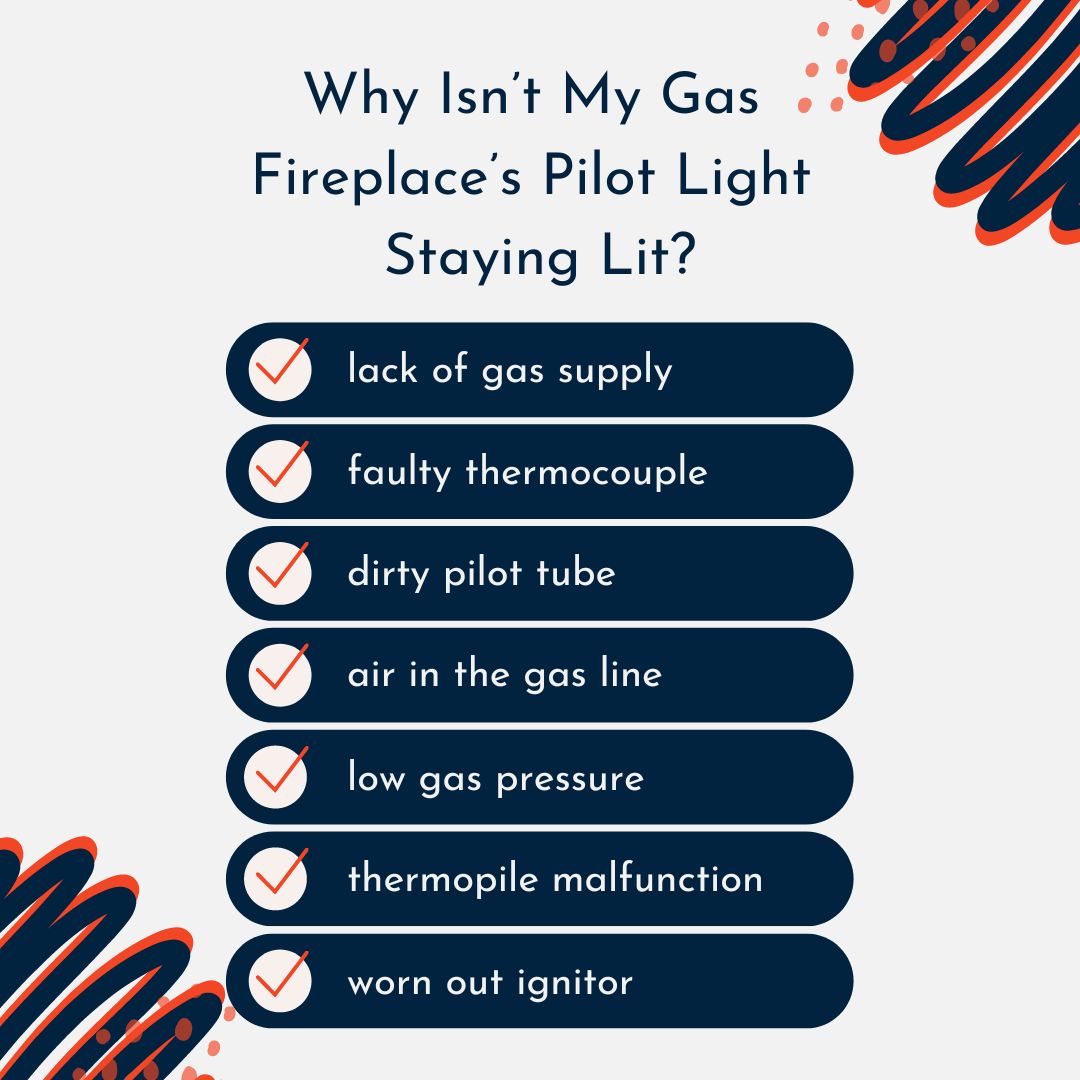
Why won’t my outdoor gas light stay lit?
Most often the thermocouple or pilot assembly is dirty or failing. Clean the pilot area and replace the thermocouple if cleaning does not help.
How do I find a gas leak in my outdoor light?
Shut off the gas and spray soapy water on joints and fittings. Bubbles form where gas leaks are present; shut off and call a pro if you see any.
Can I clean my outdoor gas light myself?
Yes, you can clean burners and glass safely after shutting off gas. Avoid tampering with hard-piped lines or internal valves unless you are trained.
Is a yellow flame a sign of danger?
A yellow flame usually means poor combustion or dirty ports and should be cleaned. Persistent yellow flames can indicate improper ventilation or pressure issues that need a pro.
How often should I service outdoor gas lights?
Do basic cleaning and inspection at least twice a year. Get a professional check every few years or after a storm for pressure and safety tests.
What should I do if I smell gas but can’t find the leak?
Leave the area immediately, avoid open flames, and call your gas supplier or emergency services. Do not try to locate a large leak yourself.
Conclusion
Outdoor Gas Light Troubleshooting can be simple when you follow clear steps, prioritize safety, and use the right tools. Start with visual checks and pilot tests, then clean, tighten, and replace small parts as needed. Keep a maintenance routine to prevent most failures and call a professional for leaks or complex repairs. Try the steps here on your next troubleshooting task, share your results, and consider subscribing or leaving a comment to learn more.


