
Hearing aid troubleshooting helps you diagnose and fix common issues fast for better hearing.
I have worked with hearing aids and patients for years, and I know how small problems can disrupt daily life. This guide on Hearing Aid Troubleshooting explains why issues happen, how to fix them step by step, and when to call a pro. You will gain clear, practical steps and real-world tips to keep your hearing aids working well.
Common hearing aid problems and quick checks
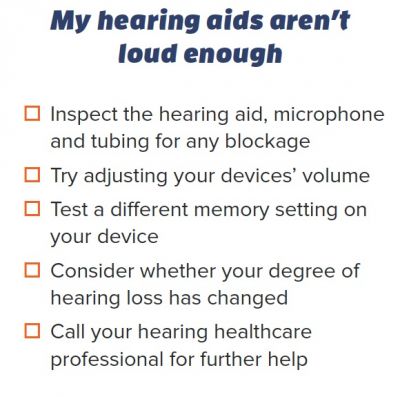
Many people face the same basic problems. The usual issues are no sound, weak sound, feedback (whistling), static noise, poor Bluetooth pairing, and moisture damage. Before deeper work, try simple checks. These small steps fix many issues without tools.
Common quick checks
- Check batteries or charge level. Replace disposable batteries or fully charge rechargeable units.
- Clean the microphone and receiver openings. Use a soft brush or pick designed for hearing aids.
- Inspect for earwax in the tip or earmold. Remove wax gently with a tool or replace the wax guard.
- Test with a phone or other audio source. This tells you if the problem is device or environment related.
- Reboot or reset the hearing aid. Turn it off, wait ten seconds, then turn it back on.
Why these checks matter
- Batteries and charging are the top causes of failure. Replacing or charging often fixes no-sound issues.
- Wax and moisture reduce sound and cause feedback. Regular cleaning avoids more serious repairs.
- Simple reboots clear temporary software or Bluetooth glitches.

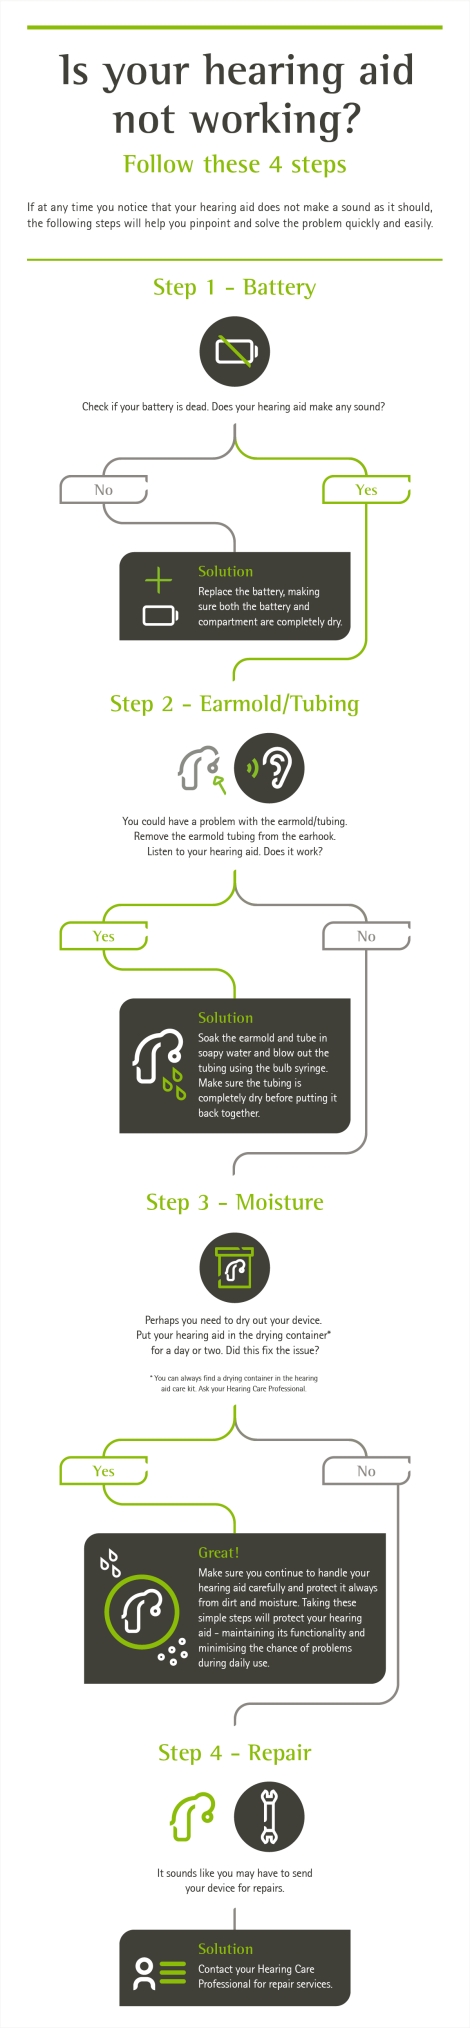
Step-by-step hearing aid troubleshooting guide
Follow this short, clear sequence when your hearing aid acts up. The steps cover most models and problems. Use them in order to save time.
Step-by-step
- Inspect and power cycle
- Turn off the aid. Remove battery or put it on the charger. Wait 10–15 seconds and restart.
- Check power source
- Replace or recharge the battery. Try a new battery even if the indicator shows power.
- Clean openings and wax guards
- Remove wax from domes, filters, and vents. Replace the wax guard if clogged.
- Check volume and program settings
- Ensure programs are correct and volume is not muted. Use the app if available.
- Test with a simple sound
- Use a quiet room and clap or speak near the microphone. Note the sound quality.
- Check for Bluetooth or microphone blocks
- Disconnect wireless devices to isolate the problem. Make sure the microphone is unobstructed.
- Update firmware or app
- If your hearing aid uses an app, ensure firmware is current and the app is updated.
- Try a factory reset as last resort
- Back up settings if possible. Reset only after other steps fail.
What to watch for
- If sound returns after a battery change, the old battery may be the issue.
- If feedback stops after cleaning, wax or poor fit likely caused the whistling.
- Persistent distortion or no sound after all steps means a hardware fault or water damage.
People also ask
How do I clean my hearing aid safely?
Clean daily with a soft, dry cloth and a small brush. Remove wax guards and replace them if blocked, and avoid water or alcohol.
Why does my hearing aid whistle sometimes?
Feedback often comes from poor fit, earwax buildup, or high volume. Refit domes, clean wax, and lower volume to stop whistling.
Will firmware updates fix hearing aid bugs?
Yes, updates can fix Bluetooth issues and improve sound processing. Check your app or audiologist for available updates.

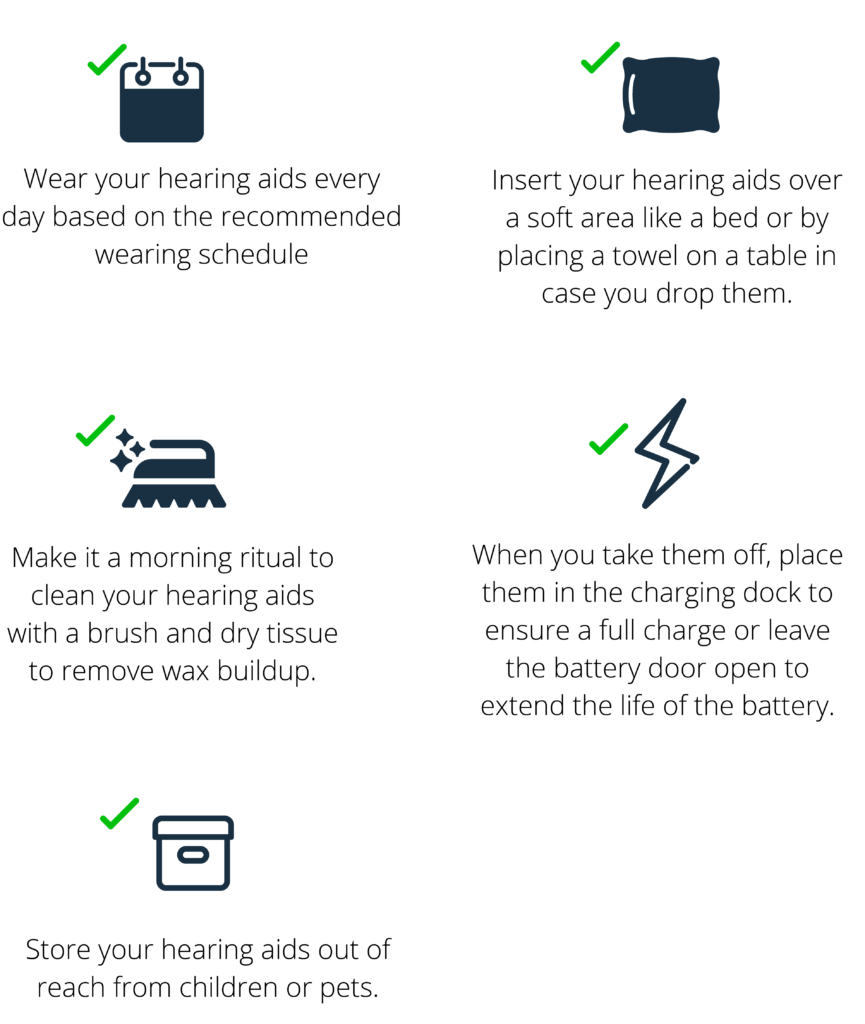
Cleaning and maintenance tips
Regular care prevents many problems. A small routine saves time and money. Make cleaning and checks part of daily life.
Daily care
- Wipe the aid with a dry cloth each night. Remove moisture and skin oils that build up during the day.
- Open battery doors or place the aid in a drying case overnight. This cuts down on moisture damage.
- Check domes and ear molds for obvious wax or debris.
Weekly and monthly care
- Use the brush and pick once a week to clean microphone ports and vents.
- Replace wax guards monthly or sooner if clogged.
- Inspect tubing (for BTE models) for cracks or hardening and replace as needed.
Tools to keep on hand
- Small cleaning brush and pick
- Wax guards and replacement domes
- Battery tester and spare batteries
- Drying case or desiccant packs
When to seek professional help
Some problems need an expert. If basic troubleshooting fails, contact your audiologist or manufacturer.
Signs you need help
- No sound after trying batteries, cleaning, and a reset.
- Distortion or intermittent sound that you cannot trace.
- Visible water damage or cracked housings.
- Repeated failures after professional repairs.
Warranty and service tips
- Check your warranty before attempting repairs beyond cleaning. Many warranties cover internal faults.
- Keep receipts and serial numbers for fast service.
- Regular checkups with an audiologist help keep settings optimized and catch wear early.
Troubleshooting for specific hearing aid types
Different styles need different care. These tips help by type.
Behind-the-ear (BTE)
- Check tubing for blockages or cracks. Replace if hard or cloudy.
- Ensure the earmold fits well to avoid feedback.
In-the-ear (ITE) and in-the-canal (ITC/CIC)
- Wax builds up faster. Use wax guards and clean daily.
- Moisture from sweat can be an issue; use a drying case.
Rechargeable models
- Follow manufacturer charging cycles. Avoid prolonged storage at low charge.
- If the battery won’t hold a charge, the cell may need replacement by a pro.
Bluetooth and wireless aids
- Forget and re-pair devices to fix connectivity. Keep phone OS and hearing aid app updated.
- Remove interference by turning off nearby Bluetooth devices when testing.

Common mistakes and tips from my experience
I’ve helped many patients fix avoidable problems. These lessons cut repeat visits and frustration.
Real-world tips
- Don’t skip daily cleaning. One patient had months of feedback saved by a quick wax-guard change.
- Label batteries with date opened. This helps track weak cells and avoids dead aid surprises.
- Always test hearing aids in a quiet room before blaming the device. Background noise can mask fixes.
Mistakes to avoid
- Avoid using sharp objects to remove wax. You can damage the receiver.
- Don’t open a sealed rechargeable unit yourself. That voids warranty and risks damage.
Frequently Asked Questions of Hearing Aid Troubleshooting
What should I do if my hearing aid emits a constant buzzing?
Check for nearby electronic interference first, then replace the battery and clean the microphone. If buzzing continues, visit your audiologist for internal inspection.
How often should I replace wax guards?
Replace wax guards monthly or when sound drops. Frequent replacement prevents clogging and receiver damage.
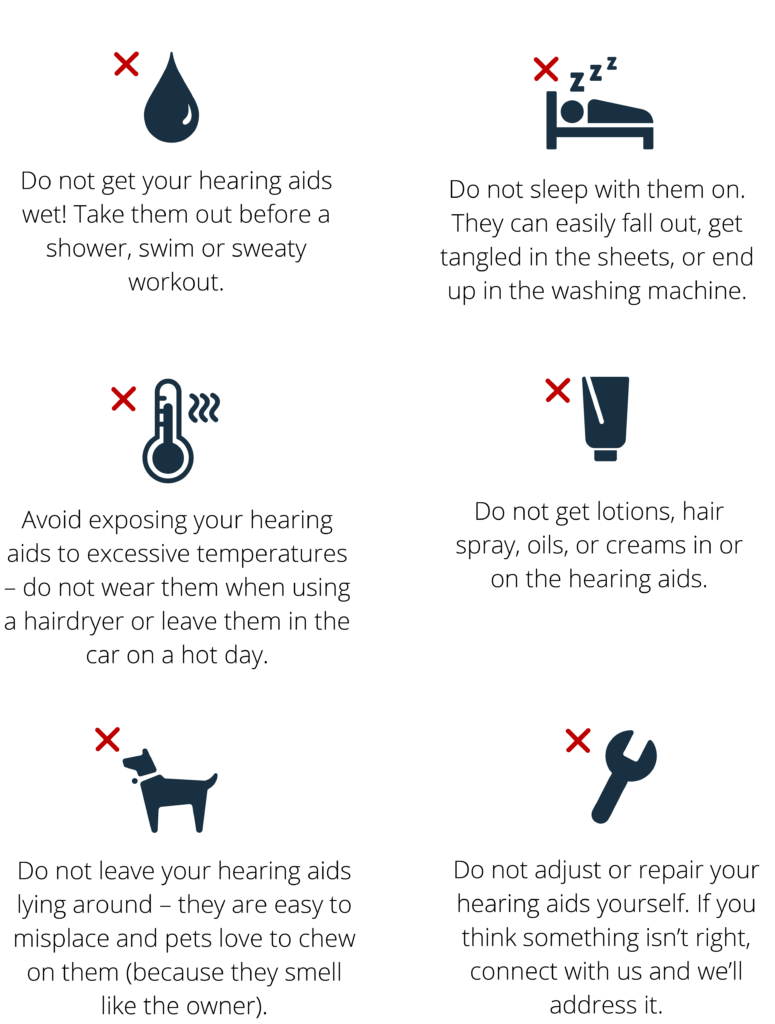
Can moisture ruin my hearing aid permanently?
Moisture can cause corrosion and short circuits if it reaches internal parts. Use drying cases and seek professional repair for wet aids.
Why does my hearing aid sound tinny or hollow?
A tinny sound often means blocked vents, a wrong program, or earwax. Clean the aid and check settings; if it remains, have it reprogrammed.
Is it okay to sleep with hearing aids in?
Sleeping with hearing aids can increase moisture and ear irritation. Remove them at night and store in a dry place for longer life.
Conclusion
Hearing Aid Troubleshooting is a skill you can learn fast. Start with battery and cleaning checks, follow a step-by-step approach, and use simple tools. If problems persist, reach out to an audiologist or the manufacturer for help. Take action today: create a small daily care routine, label batteries, and save your audiologist’s contact for major issues. Share your experience below or subscribe for more tips to keep your hearing aids working at their best.

