
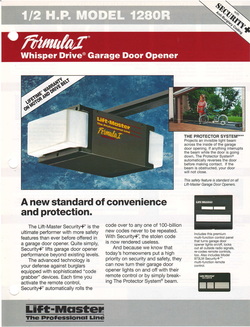
Liftmaster Formula 1 Troubleshooting fixes most common garage opener issues fast and safely.
I have worked on dozens of garage openers and know the quirks of Liftmaster Formula 1 Troubleshooting inside and out. This guide breaks down real faults, step-by-step diagnostics, practical fixes, and when to call a pro. Read on to get confident, safe, and fast results with Liftmaster Formula 1 Troubleshooting.
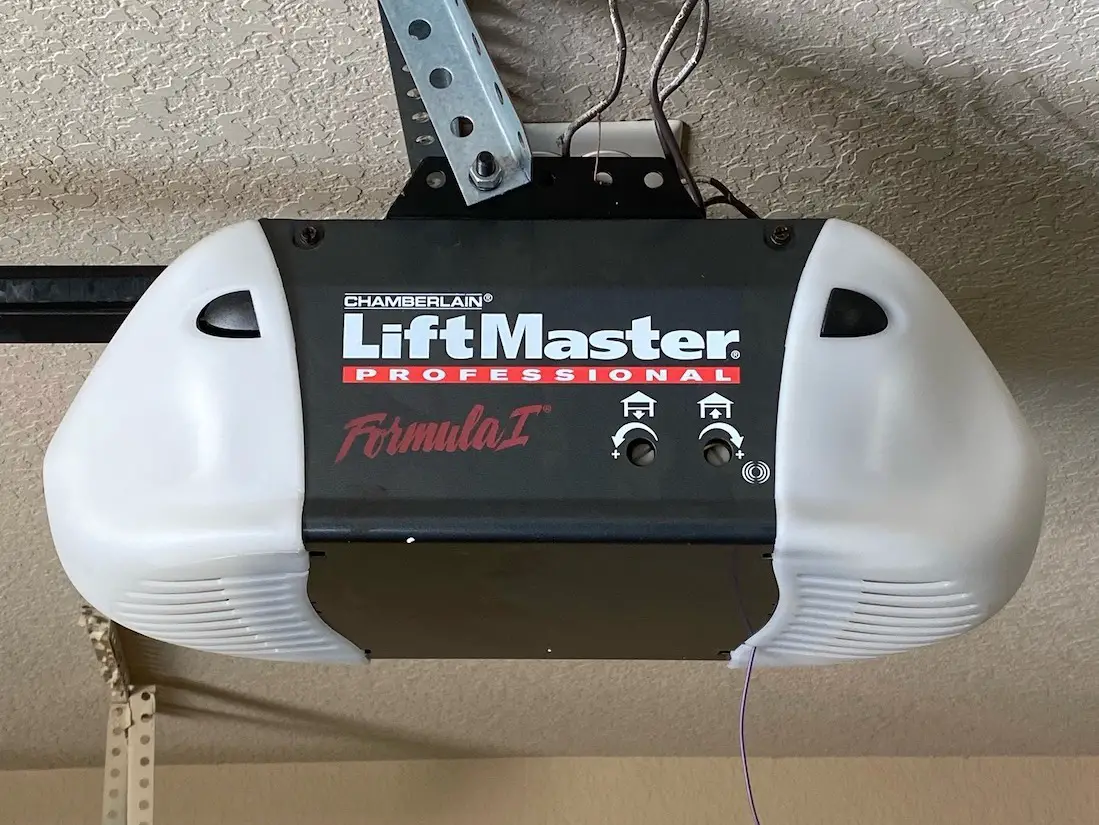
Common Liftmaster Formula 1 Troubleshooting Issues and Quick Fixes
Most Liftmaster Formula 1 Troubleshooting starts with simple checks. A dead remote, blocked photo eyes, or loose wiring often causes failures. Start with the power and safety sensors. These steps solve many issues without tools.
Common problems and quick fixes:
- Remote not working: Replace batteries, reprogram remote, verify line of sight.
- Opener runs but door won’t move: Check door springs, tracks, and disconnect rope.
- Opener hums but won’t move: Inspect belt or gear assembly and motor coupling.
- Safety sensors blocked or misaligned: Clean lenses and re-align sensors until the LED stays steady.
- Intermittent operation: Check antenna, radio interference, and loose connectors.
Personal note: I once fixed a unit that only failed at dusk. The issue was glare on the photo eyes. A small shade and re-align solved it quickly.
Step-by-Step Diagnostic Process for Liftmaster Formula 1 Troubleshooting
A method keeps diagnostics fast and safe. Follow this order to isolate the fault.
- Safety first
- Unplug the opener or disconnect power before touching internal parts.
- Keep kids and pets away while troubleshooting.
- Verify power
- Check outlet, breaker, and power cord.
- Swap outlets or use a known-good power source.
- Test remote and wall control
- Replace batteries in remotes.
- Press wall button next to opener to rule out remote issues.
- Inspect safety sensors
- Look for dirt, spider webs, or paint.
- Ensure both sensor LEDs show proper status.
- Manual operation test
- Pull the emergency release and move the door by hand.
- If the door moves hard, fix tracks or springs first.
- Listen and watch the opener
- Note hums, grinding, or stalling sounds.
- Motor noise patterns help identify gear, belt, or motor problems.
These steps make Liftmaster Formula 1 Troubleshooting clear and repeatable.

Remote, Sensor, and Programming Troubles in Liftmaster Formula 1 Troubleshooting
Programming faults and sensor errors are common. Use clear steps to reprogram and test.
Reprogram remotes and keypads:
- Follow the opener’s learn button sequence to add or remove remotes.
- Replace keypad batteries and re-enter the PIN if needed.
Fix sensor errors:
- Clean lenses with a soft cloth.
- Re-align sensors until the indicator LED is steady.
- Replace sensor if LED fails after cleaning.
Radio interference checks:
- Move other wireless devices away.
- Test operation with nearby devices turned off to see if interference stops.
From my experience, reprogramming after a power outage often restores normal function. Keep the manual or a photo of the opener’s control panel handy.
Power, Motor, and Mechanical Repairs for Liftmaster Formula 1 Troubleshooting
Some problems need mechanical repair. Know what you can do safely and when to call help.
Common mechanical checks:
- Belt or chain tension: Tighten or replace per the manual.
- Gear and sprocket wear: Replace worn gears to stop grinding.
- Motor coupling: Replace if the motor spins but door does not.
Spring and track issues:
- Torsion and extension springs are under high tension. Do not adjust without tools and skill.
- Lubricate rollers and tracks with a silicone-based lubricant, not grease.
When to stop:
- If you see broken springs, frayed cables, or seized drums, call a certified technician.
- Incorrect spring work can cause serious injury.
I once attempted a spring adjustment and quickly called a pro after realizing the tension was beyond my tools. That saved time and risk.

Routine Maintenance and Preventive Liftmaster Formula 1 Troubleshooting Tips
Preventive care reduces failures and saves cost. Regular checks keep the opener running well.
Monthly checks:
- Test safety reversal with a 2×4 on the floor.
- Clean sensors and check for pests or cobwebs.
Every 6 months:
- Lubricate rollers, hinges, and pivot points.
- Inspect belt or chain for wear.
Yearly tasks:
- Tighten fasteners and check door balance.
- Run a full functional test of remotes, keypad, and safety features.
Maintenance prevents many common Liftmaster Formula 1 Troubleshooting calls. Simple chores cut down emergency repairs.

Advanced Diagnostics and When to Call a Technician for Liftmaster Formula 1 Troubleshooting
If basic fixes fail, follow advanced checks before calling a pro.
Advanced diagnostic steps:
- Use a multimeter to check outlet voltage and motor current.
- Inspect internal circuit board for burned components or loose solder.
- Check limit switch settings and adjust per the manual.
Call a technician when:
- The issue involves spring replacement, major disassembly, or complex electronics.
- You lack the tools or comfort to test high-voltage parts.
Pro tip: A certified tech can also test receiver sensitivity and replace the logic board safely.

Troubleshooting Checklist: Quick Reference for Liftmaster Formula 1 Troubleshooting
Keep this checklist handy for fast fixes.
- Power: outlet and breaker confirmed
- Remotes: fresh batteries and reprogrammed
- Wall control: function tested
- Safety sensors: clean, aligned, LEDs normal
- Door balance: moves smoothly when released
- No odd noises: listen for grinding or slipping
- Maintenance: lubricated rollers and tightened fasteners
This checklist helps you triage any Liftmaster Formula 1 Troubleshooting issue fast.

People Also Ask — Common Mini Questions
What if my Liftmaster Formula 1 Troubleshooting LED is blinking?
- A blinking LED usually means sensor misalignment or a safety fault. Clean and re-align the photo eyes and test again.
How do I reprogram a Liftmaster Formula 1 Troubleshooting remote?
- Press the learn button on the opener, then press the remote button within 30 seconds. Follow the manual for exact timing.
Why does my unit hum but not lift the door during Liftmaster Formula 1 Troubleshooting?
- Humming with no movement often points to a stripped gear or broken belt/chain. Inspect the gear assembly and drive system.
Can a dead battery in the remote affect the wall control during Liftmaster Formula 1 Troubleshooting?
- No, a dead remote does not affect the wall button. If the wall button also fails, the issue is likely power or the opener itself.
Is it safe to adjust the spring on my Liftmaster Formula 1 Troubleshooting system?
- No, spring adjustments are risky and should be done by a pro. Springs store high energy and can cause injury if handled incorrectly.

Frequently Asked Questions of Liftmaster Formula 1 Troubleshooting
What are the first things to check when my opener stops working?
Check power, the wall control, remote batteries, and safety sensors. These simple checks solve most Liftmaster Formula 1 Troubleshooting problems.
How do I test the safety reverse feature?
Place a 2×4 on the floor and close the door; the opener should reverse on contact. If it does not, stop using the opener and fix sensors or limit settings.
Why does the opener run but the door won’t move?
This usually means a broken belt, stripped gear, or disengaged trolley. Inspect drive components and the emergency release.
How often should I perform maintenance for Liftmaster Formula 1 Troubleshooting?
Do quick checks monthly, routine maintenance every six months, and a full inspection annually. Regular care prevents most failures.
Can I replace the logic board myself during Liftmaster Formula 1 Troubleshooting?
You can if you are comfortable with wiring and safety. If not, hire a certified technician to avoid wiring mistakes and voiding warranties.
Conclusion
Liftmaster Formula 1 Troubleshooting is a mix of simple checks and careful repairs. Start with power, remotes, and sensors, then move to mechanical and electrical tests. Maintain the opener regularly to prevent common faults. Take action now: use the checklist above, do the quick tests, and schedule a pro for any high-risk repairs. If this guide helped, leave a comment or subscribe for more practical repair tips and step-by-step troubleshooting advice.

