
Most ceiling fan issues stem from loose parts, unbalanced blades, or simple wiring faults.

Today's Exclusive Deals
Limited-time Exclusive Deals. Check current discount on Amazon.
Check Price on Amazon As an Amazon Associate I earn from qualifying purchases.I’ve spent years repairing home fans and training DIYers to handle Ceiling Fan Troubleshooting with safety and confidence. This guide covers common causes, step-by-step fixes, safety checks, and longer-term care. Read on for clear, practical solutions that save time and money while keeping your fan running smoothly.
Common ceiling fan problems and quick causes
Ceiling Fan Troubleshooting begins with knowing the usual issues. These are the problems I see most often when called to a home.
Today's Exclusive Deals
Limited-time Exclusive Deals. Check current discount on Amazon.
Check Price on Amazon As an Amazon Associate I earn from qualifying purchases.- Fan does not run. This often points to power, a bad switch, or a loose wire.
- Fan runs but is slow. This can be a dirty motor, bad capacitor, or poor voltage.
- Fan wobbles or shakes. Imbalanced blades or loose mounting are the usual culprits.
- Fan makes noise. Loose screws, worn bearings, or blade rubbing cause sounds.
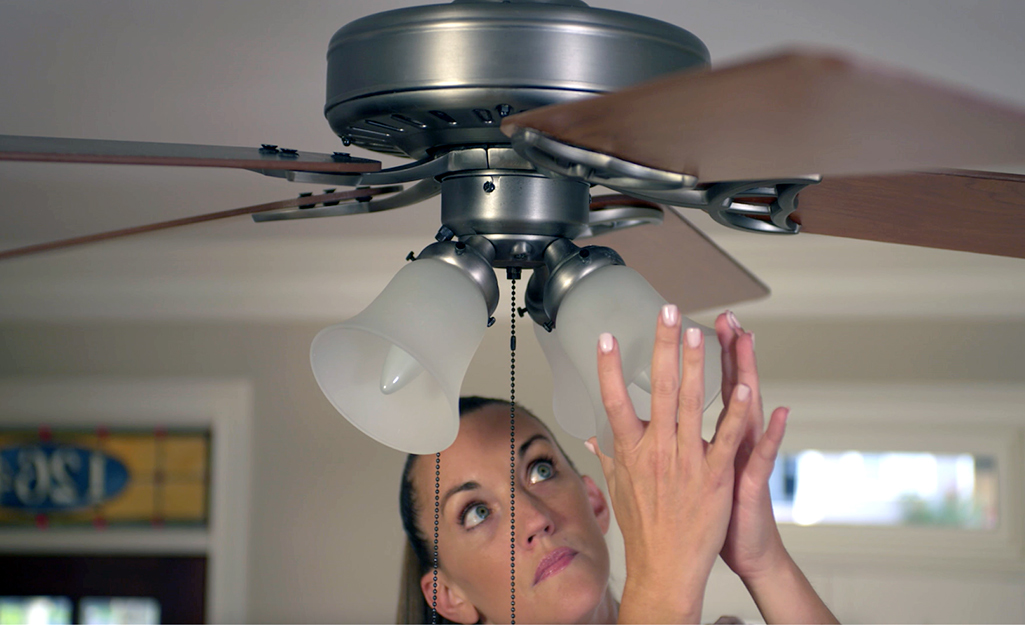
- Light kit issues. Loose bulbs, wiring faults, or a bad socket are common.
Understanding these patterns makes Ceiling Fan Troubleshooting faster. You can usually spot the likely cause by how the fan behaves. In my work, a quick visual check plus a basic voltage test finds the issue in most homes.
Safety first: before you start troubleshooting
Ceiling Fan Troubleshooting must begin with safety. A safe approach protects you and the fan.
Today's Exclusive Deals
Limited-time Exclusive Deals. Check current discount on Amazon.
Check Price on Amazon As an Amazon Associate I earn from qualifying purchases.- Turn off power at the circuit breaker. Do not rely on the wall switch alone.
- Test that the fan has no power. Use a non-contact tester or voltage tester.
- Use a sturdy ladder and a helper for balance if needed.
- Wear safety glasses and keep long hair tied back.
- If you see frayed wires, burn marks, or signs of overheating, stop and call an electrician.
Safety matters more than saving time. If you ever feel unsure about wiring or the motor, bring in a pro. My rule: if a fix would require opening the motor housing or altering house wiring, I stop and consult a certified electrician.

Step-by-step ceiling fan troubleshooting guide
Follow these simple steps for systematic Ceiling Fan Troubleshooting. Work from easy checks to more technical tasks.
-
Visual and basic checks
- Ensure the fan is switched on and remote batteries are fresh.
- Check bulbs in the light kit and the bulb sockets.
- Inspect the blades and housing for visible damage.
-
Check the wall switch and remote
- Swap the switch to confirm it works. Try a different switch or outlet if possible.
- Reset or re-pair the remote. Replace remote batteries.
- Test the fan on another compatible receiver if available.
-
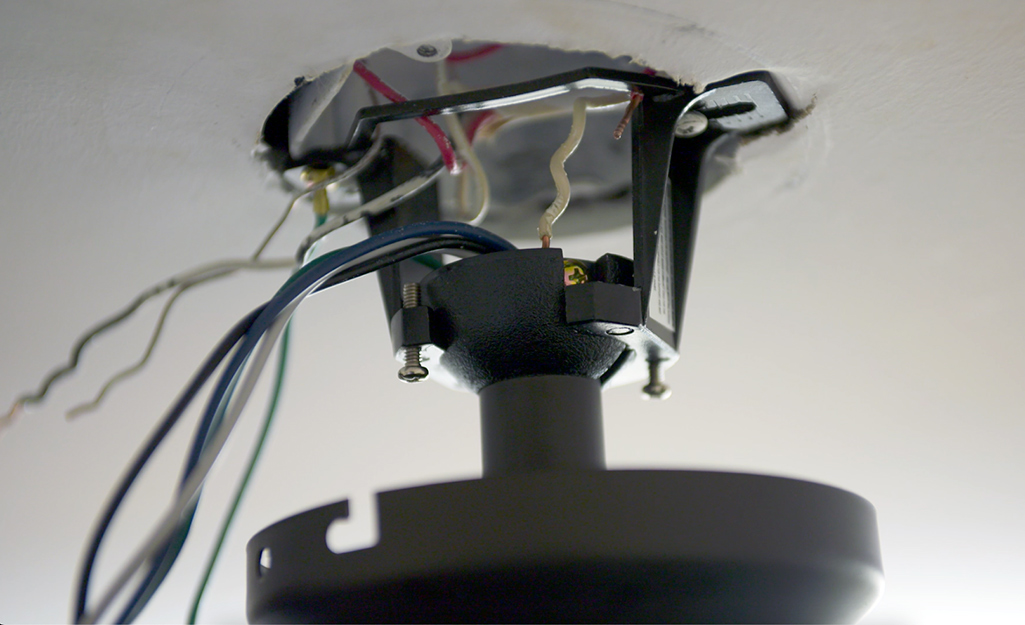
Test power and continuity
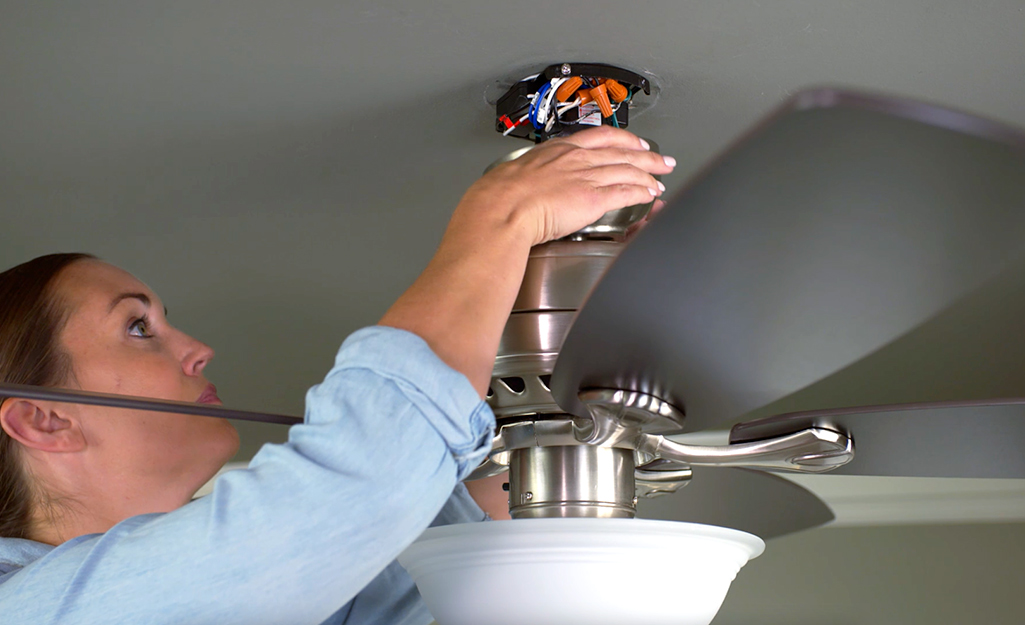
- With power off, remove canopy and inspect connections.
- Turn power on and test the supply to the switch box and fan motor with a voltage tester.
- Check the pull chain switch for continuity with a multimeter.
-
Balance the blades
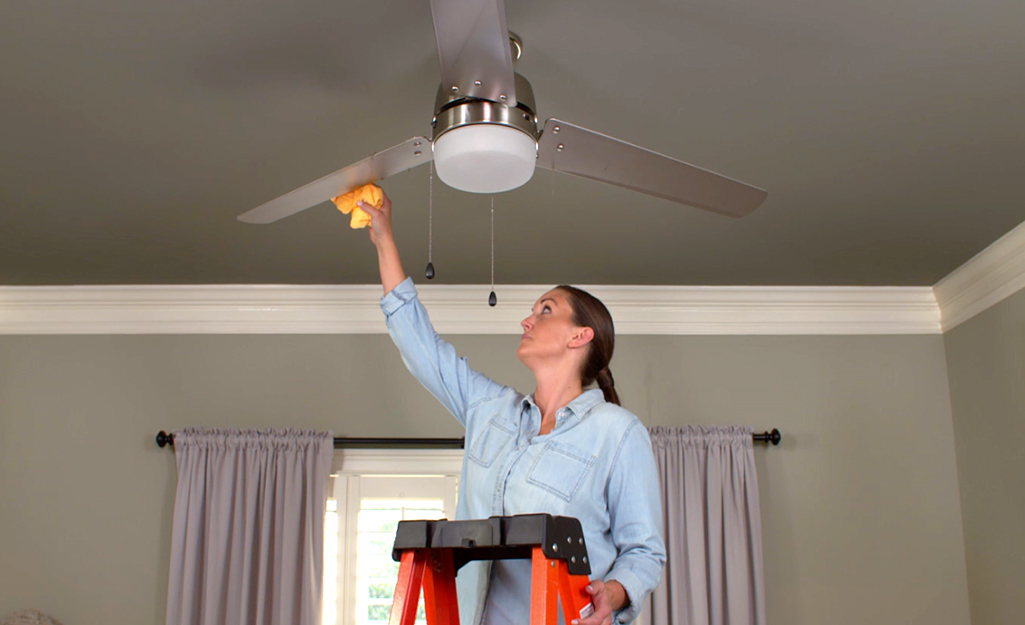
- Clean blades to remove dust. Dust adds weight and imbalance.
- Tighten blade screws at the motor and blade irons.
- Use a balancing kit or swap blade positions to find an outlier.
-
Inspect the capacitor and motor
- A failing capacitor often causes slow speeds or single-speed operation.
- Replace the capacitor with an exact match if readings are abnormal.
- If the motor hums but does not spin, the start circuit may be faulty.
-
Final test and reassembly
- Re-secure the canopy and mounting bracket.
- Restore power and test all speeds and the light kit.
- Listen for noise and check for wobble in each speed setting.
Work slowly and keep notes on what you test. Doing tests in order avoids repeated work. I learned early to always clean and tighten before replacing parts—many calls end up solved by that alone.
Electrical issues and advanced diagnostics
Some Ceiling Fan Troubleshooting needs a bit more electrical skill. Here are clear steps and signs.
-
Voltage problems
- Low voltage can cause weak or slow operation. Measure voltage at the fan with the motor running.
- If voltage is unstable, check the branch circuit, breaker, and connections.
-
Capacitor testing and replacement
- A multimeter with capacitance mode shows if the start capacitor is failing.
- Replace the capacitor with the same microfarad (µF) rating and voltage rating.
- After replacement, confirm fan speeds and starting behavior.
-
Motor and bearing diagnosis
- A hot motor or burning smell indicates motor damage. Stop and call a pro.
- Noisy bearings or grinding usually mean the motor needs service or replacement.
-
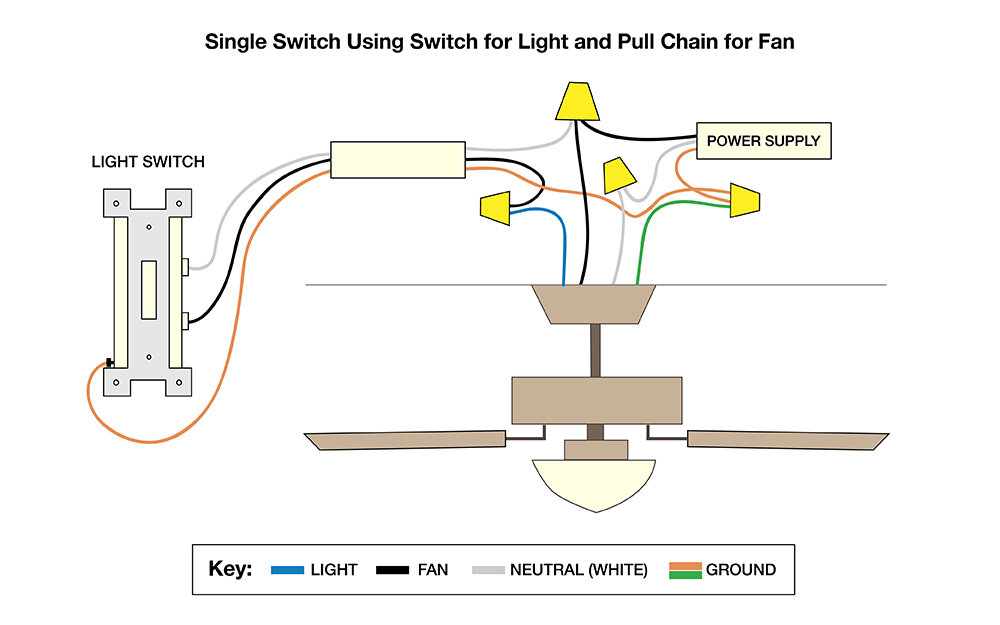
Wiring faults
- Look for loose wire nuts, damaged insulation, or reverse wiring between light and fan.
- Label wires before disconnecting. Reconnect exactly as before or follow the wiring diagram.
If you are not comfortable working with live circuits, hire a licensed electrician. My experience shows that small wiring mistakes cause bigger issues later. When in doubt, call a pro.

Fixing mechanical problems: wobble, noise, and vibration
Mechanical faults are common and usually easy to fix with simple tools.
-
Tighten mounting and blade screws
- Loose screws at the canopy, bracket, or blade irons cause wobble.
- Tighten all screws gently; over-tightening can strip wood or metal.
-
Balance blades
- Clean blades first. Dust changes weight and balance.
- Use a balance kit or a small adhesive weight to counter a heavy blade.
- Swap blade positions to isolate a bad blade.
-
Check the downrod and mounting bracket
- Bent downrods or damaged brackets need replacement.
- Ensure the hanger bracket is fastened to a ceiling joist or brace.
-
Reduce noise
- Tighten light kit screws and check for loose glass or parts.
- Add felt pads where metal meets metal if rubbing occurs.
Often a wobble or noise can be solved in 15–30 minutes. When the fan still shakes after balancing, the mounting or motor bearings may be the issue.
Remote control, switch, and speed control troubleshooting
Many modern fans use remotes or electronic speed controls. These bring unique faults.
-
Remote pairing and interference
- Re-pair remote to the receiver per the manual. Many remotes need a simple button sequence.
- Interference may occur from other devices. Change frequencies or move devices away.
-
Receiver failures
- If the remote stops working but the wall switch does not, test the receiver.
- Replace the receiver with a model that matches the fan’s voltage and wiring.
-
Wall control and dimmer compatibility
- Use only fan-rated dimmers or speed controls. Lamps and fans need different controls.
- If dimming causes motor hum, switch to a fan-compatible control.
-
Firmware and electronics
- Some high-end fans have firmware or app controls. Check for updates or reset options.
- For complex electronics faults, contact manufacturer support or a technician.
In my experience, forgetting to reset a remote or replace batteries accounts for half of "broken remote" calls. Always do the simple checks first.

Preventive maintenance and when to replace a fan
Regular care keeps fans reliable and saves money over time.
-
Simple maintenance tasks
- Clean blades every 1–3 months to keep balance.
- Tighten screws each season.
- Lubricate bearings only if the fan requires it; many modern motors are sealed.
-
Annual checklist
- Inspect wiring and canopy connections.
- Test speeds, reverse function, and lights.
- Check for unusual heat or odors from the motor.
-
When to replace
- Replace the fan if the motor smokes, burns, or trips breakers.
- If repairs cost more than half the fan’s replacement price, consider a new fan.
- Upgrading can add energy savings and quieter motors.
A well-kept fan lasts 10–20 years. I once extended a 12-year-old fan’s life by replacing the capacitor and balancing the blades—an inexpensive fix that bought years of service.
Frequently Asked Questions of Ceiling Fan Troubleshooting
Why does my ceiling fan wobble even after balancing?
A persistent wobble often means a loose mounting bracket, bent downrod, or warped blade. Tighten and inspect the mount and replace any bent parts.
What causes a ceiling fan to hum?
Humming usually comes from a failing capacitor, incompatible dimmer/speed control, or loose components. Test the capacitor and use fan-rated controls to rule out electronics.
How do I know if the fan motor is bad?
If the motor smells burnt, gets very hot, hums without spinning, or the fan won’t start despite correct wiring, the motor may be failing. Stop using it and consult an electrician.
Can I fix a ceiling fan capacitor myself?
Yes, if you are comfortable working safely with power off and can match the exact capacitor rating. If you are unsure, hire a pro to avoid wiring mistakes.
Is it cheaper to repair or replace a ceiling fan?
Small fixes like balancing, replacing a capacitor, or a receiver are cheap. If the motor or mounting is severely damaged, replacement is usually more cost-effective.
Conclusion
Ceiling Fan Troubleshooting is mostly about safe checks, simple fixes, and methodical testing. Start with power and visual checks, tighten and clean, then move to electrical tests if needed. Use the guide above to save time and avoid common mistakes. Try the listed steps for your fan, and if a repair feels beyond your skill, seek a licensed electrician. Share your experience, ask a question below, or subscribe for more home repair guides.


