
Florescent light fixtures often flicker or fail due to tubing, ballast, or connection issues.
I have spent years troubleshooting lighting in homes and small businesses. This guide dives deep into Fluorescent Light Fixture Troubleshooting with clear steps, safety tips, and real-world fixes. You will learn how to diagnose flicker, no-starts, humming, and dim output. Read on to fix fixtures fast and avoid common mistakes I made early in my career.
Why fluorescent lights fail: common causes and basics
Fluorescent Light Fixture Troubleshooting starts with understanding common failure points. Tubes age and lose output. Ballasts wear out or fail electrically. Starters and sockets can corrode or become loose. Wiring and switches are often overlooked causes.
How these parts interact matters. A bad tube can draw excess current and stress the ballast. A failing ballast can cause constant flicker with otherwise good tubes. Loose connections create intermittent operation. Knowing the root cause saves time and parts.
Practical tip from experience: always check the simplest item first. Replace a suspected bad tube before changing a ballast. That saved me several unnecessary part swaps.

Tools and safety checklist before you troubleshoot
Good Fluorescent Light Fixture Troubleshooting begins with the right tools and safe habits. Gather these items before you start:
- Screwdrivers, both flat and Phillips
- Non-contact voltage tester or multimeter
- Replacement tubes and starters (if applicable)
- Replacement ballast (matched to fixture specs)
- Gloves and safety glasses
- Ladder with a stable base
Safety rules to follow:
- Turn off power at the breaker before opening the fixture.
- Test wires with a non-contact tester to confirm power is off.
- Avoid touching live wiring or metal parts when power is on.
- Work in a well-lit area and use a helper if the fixture is large.

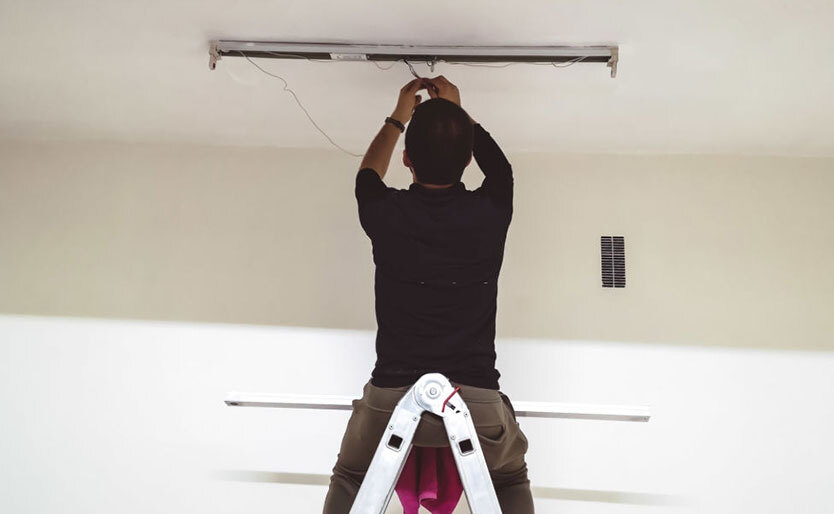
Step-by-step Fluorescent Light Fixture Troubleshooting
Follow a logical path to fix most issues. These steps cover common scenarios and keep you safe.
- Observe the symptoms
- Note if the fixture flickers, hums, glows dimly, or won’t start.
- Observe behavior at cold start and after running for a while.
- Check the power
- Confirm the breaker is on and the switch works.
- Use a non-contact tester at the lamp pins to confirm voltage.
- Inspect tubes
- Look for darkened ends or mercury spots, which signal tube failure.
- Swap tubes with a known-good tube of the same type to test.
- Test the starter (for fixtures that use starters)
- Replace the starter if you hear repeated clicks or slow ignition.
- Starters are cheap. Swap one and watch for improvement.
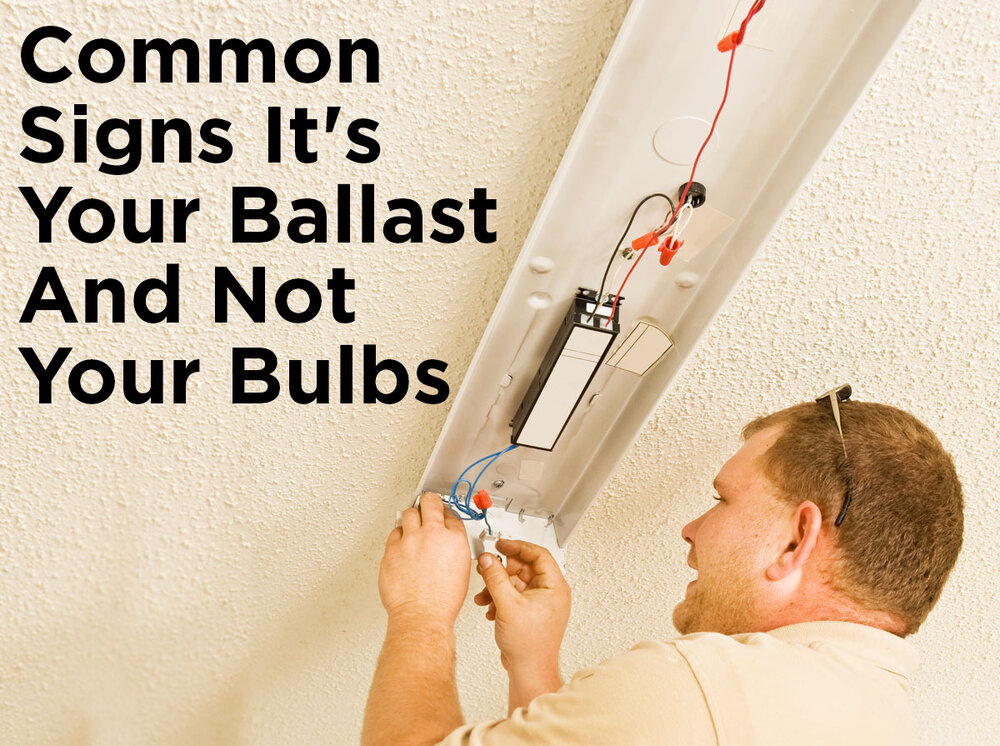
- Evaluate the ballast
- Signs of a bad ballast include buzzing, excessive heat, or visible damage.
- Use a multimeter to check continuity where appropriate.
- Replace electronic or magnetic ballasts following manufacturer specs.
- Check sockets and wiring
- Look for loose or corroded contacts in lamp holders.
- Tighten terminal screws and re-seat tube pins.
- Inspect wiring for brittle insulation or burn marks.
- Test after each change
- Replace one component at a time and run the fixture to see the result.
- Keep a log of changes if you’re troubleshooting multiple fixtures.
People also ask
- Why does my fluorescent light flicker?
- Flicker is often caused by aging tubes, bad ballast, or loose tube pins.
- Can a starter cause slow starting?
- Yes. A faulty starter can delay ignition or cause repeated retries.
- Is a buzzing ballast dangerous?
- Buzzing signals failure risk and can lead to overheating; replace it.

Replacing ballasts, starters, and tubes safely
Replacing parts is a common step in Fluorescent Light Fixture Troubleshooting. Follow these best practices.
Ballast replacement
- Match the ballast type: magnetic or electronic, voltage, and lamp count.
- Turn off power, remove the old ballast, and note wiring colors and connections.
- Wire the new ballast per its diagram and secure it inside the fixture.
Starter replacement
- Starters are plug-in types. Turn off power, twist out the old starter, and insert a new one.
- Test the fixture immediately after replacement.
Tube replacement
- Use the correct tube type (T12, T8, T5) and color temperature.
- Rotate and seat tubes properly in the sockets.
- Replace tubes in pairs when fixtures have multiple lamps for balanced output.
From my experience, labeling wires when removing a ballast speeds reassembly and prevents mistakes.
Upgrading fluorescent fixtures: when to switch to LED
Fluorescent Light Fixture Troubleshooting sometimes leads to upgrades. LED retrofits solve many recurring issues.
Benefits of upgrading
- Longer life and lower energy use.
- Instant start, no flicker, and no ballast needed in many designs.
- Less heat and fewer maintenance cycles.
Retrofit options
- Direct replacement LED tubes that work with existing ballasts.
- Ballast-bypass LED tubes that require rewiring the fixture.
- Complete LED fixture replacements for best reliability.
Limitations and considerations
- Some LED tubes are not compatible with older ballasts.
- Ballast-bypass requires electrical rewiring and should follow local codes.
- Weigh upfront cost against long-term savings and maintenance reduction.

Preventive maintenance and best practices
Regular care reduces the need for Fluorescent Light Fixture Troubleshooting. Set a simple routine.
Maintenance tasks
- Replace tubes on a schedule before output drops below acceptable levels.
- Clean fixture lenses and reflectors to improve brightness.
- Inspect sockets and wiring annually for wear.
- Record tube hours and ballast age to plan replacements.
Smart habits I use
- Keep spare tubes and starters on hand for quick fixes.
- Use higher quality ballasts and tubes for high-use areas.
- Train staff or family on basic checks to catch problems early.

Safety tips and regulatory notes
Safety must guide every Fluorescent Light Fixture Troubleshooting action. Follow these rules.
Key safety points
- Always shut off power at the breaker, not just the switch.
- Dispose of old tubes properly; they contain small amounts of mercury.
- Replace components with rated parts; mismatched ballasts can cause hazards.
- If unsure about wiring or ballast replacement, hire a licensed electrician.
Regulatory and environmental notes
- Many regions require recycling for fluorescent tubes.
- LED upgrades can reduce environmental impact and meet efficiency standards.

Frequently Asked Questions of Fluorescent Light Fixture Troubleshooting
What causes a fluorescent tube to flicker only when warm?
Flicker when warm usually points to a failing ballast or weak tube cathodes. Warm temperatures can change ballast behavior and reveal marginal tubes.
How do I know if the ballast is bad?
A bad ballast often hums, gets hot, or shows burn marks. If swapping tubes and starters doesn't help, the ballast is a likely culprit.
Can I replace a fluorescent fixture myself?
You can replace tubes and starters safely if power is off and you follow instructions. For ballast wiring or major rewiring, hire a licensed electrician.
How often should I replace fluorescent tubes?
Replace tubes when output drops or color shifts, typically every 7,000 to 20,000 hours depending on tube type and usage. Track hours for best timing.
Are LED retrofits worth the cost?
LED retrofits often pay back through energy savings and reduced maintenance, especially in high-use areas. Consider installation cost and compatibility when deciding.
Conclusion
Fluorescent Light Fixture Troubleshooting is a practical skill that saves time and money. Start with simple checks: power, tubes, and starters, then move to ballasts and wiring. Use safety gear and label connections when you disassemble parts. If problems persist, consider LED upgrades to reduce future troubleshooting. Try the steps above on one fixture first, and share your results or questions below to keep learning together.

