
Most GE front load dryer issues can be traced to power, venting, or a failed thermal fuse.

Today's Exclusive Deals
Limited-time Exclusive Deals. Check current discount on Amazon.
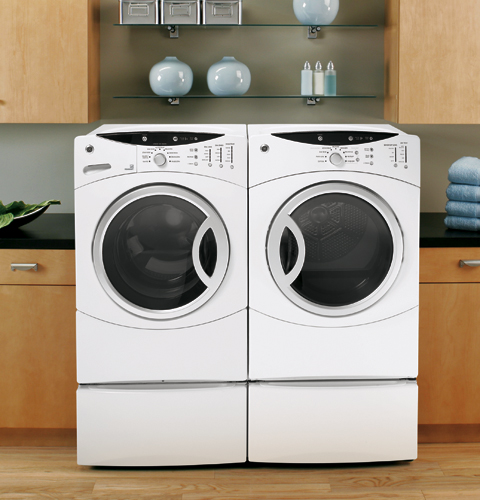
Check Price on Amazon As an Amazon Associate I earn from qualifying purchases.I’ve spent years diagnosing and repairing household dryers, and this guide gives clear, practical steps for Ge Front Load Dryer Troubleshooting. You’ll find easy checks, safety tips, repair options, and when to call a technician. Read on to save time, avoid unnecessary repairs, and keep your dryer running safely and efficiently.

Common problems and causes for Ge Front Load Dryer Troubleshooting
Ge Front Load Dryer Troubleshooting often starts with spotting common symptoms and linking them to typical causes. Below are the usual problems owners face and what usually causes them.
Today's Exclusive Deals
Limited-time Exclusive Deals. Check current discount on Amazon.
Check Price on Amazon As an Amazon Associate I earn from qualifying purchases.- Dryer won’t start
- Often a power issue, tripped breaker, blown fuse, or a faulty door switch.
- Dryer runs but won’t heat
- Typical causes include a blown thermal fuse, bad heating element, or blocked vent restricting airflow.
- Drum won’t turn or tumbles intermittently
- Worn drive belt, seized motor, or idler pulley failure are common.
- Dryer takes too long or cycles too often
- Clogged venting, dirty moisture sensors, or overloaded loads cause long cycles.
- Loud noises during operation
- Noises often come from worn bearings, rollers, or foreign objects in the drum.
- Error codes or flashing lights
- Control board diagnostics show fault codes that point to sensors, motor, or door issues.
- Burning smell or overheating
- Lint build-up, motor strain, or failing heating components can cause odors and high temperatures.
I use this checklist every time I troubleshoot a GE front load dryer. It helps isolate the likely cause fast and guides safe next steps for repair or replacement.
Step-by-step troubleshooting checklist for Ge Front Load Dryer Troubleshooting
Use this checklist before calling a technician. Follow safety tips and unplug the dryer before you open panels.
Today's Exclusive Deals
Limited-time Exclusive Deals. Check current discount on Amazon.
Check Price on Amazon As an Amazon Associate I earn from qualifying purchases.- Confirm power and settings
- Check that the dryer is plugged in, the breaker is on, and the door closes fully.
- Inspect the lint filter and drum
- Remove lint, check for items stuck in the drum, and run an empty short cycle to listen for issues.
- Check venting and airflow
- Disconnect the vent from the back and run the dryer briefly. If airflow is weak, clean the vent to the outside.
- Test heating components
- If the dryer runs but does not heat, check the thermal fuse and heating element for continuity with a multimeter.
- Check the door switch and start switch
- A bad door switch prevents the dryer from starting or sensing the door properly.
- Examine belts, rollers, and motor
- Open the cabinet to inspect the belt and rollers if the drum won’t turn or makes noise.
- Read and record error codes
- Note any code or blinking pattern. Use your manual to interpret common GE codes before replacing parts.
- Reset the control
- Unplug for one minute or use the control lock/reset procedures in the manual to clear electronic glitches.
These steps cover most common situations. If you’re unfamiliar with electrical testing, call a professional to avoid injury.

How to fix specific issues in Ge Front Load Dryer Troubleshooting
Here are practical fixes that I’ve used in the field. Each fix includes a simple action and what to expect.
- No power or won’t start
- Action: Reset the breaker and test the outlet. Replace a tripped fuse or fix a loose plug.
- Expectation: If power is restored but it still won’t start, test the door switch and start relay.
- No heat
- Action: Test the thermal fuse and heating element for continuity. Replace any failed component.
- Expectation: Replacing a blown thermal fuse often restores heat, but check vents to prevent recurrence.
- Drum not spinning
- Action: Inspect and replace a snapped belt or worn motor. Lubricate rollers if noisy.
- Expectation: Drum rotation should return to normal once belt and motor issues are resolved.
- Overheating or burning smell
- Action: Stop use, unplug, and clean lint from internal cavities and the vent. Inspect the motor and heating assembly.
- Expectation: Most smells come from lint or trapped clothing; persistent smells require component replacement.
- Frequent error codes
- Action: Record the code and consult the service manual. Replace the listed sensor or run diagnostics.
- Expectation: Clearing the error and replacing the faulty sensor usually fixes repeat codes.
When you replace parts, always use OEM or high-quality aftermarket parts designed for GE dryers. My experience shows cheap parts often fail quickly and cost more over time.
Maintenance tips to prevent Ge Front Load Dryer Troubleshooting issues
Regular maintenance is the best way to avoid most Ge Front Load Dryer Troubleshooting visits. These easy habits keep performance high and energy use low.
- Clean the lint filter after every load
- A clean filter improves drying time and reduces fire risk.
- Clean the dryer vent at least once a year
- Remove lint from the vent to improve airflow and heat efficiency.
- Run the dryer with a vent check
- Occasionally run the dryer while you inspect the outside vent hood to ensure it opens freely.
- Inspect the drum and seals
- Check seals and the drum for wear or items that could snag and cause damage.
- Keep loads balanced and sized properly
- Overloading stresses belts and motors and extends drying time.
- Use dryer-friendly settings
- Use moisture or sensor cycles instead of timed cycles for better efficiency and fewer repeats.
I once ignored a slow-drying complaint and found the entire vent packed with lint. A quick clean cut drying time in half and prevented a possible fire. Regular care saves money and keeps your dryer safe.

When to call a pro or replace your dryer for Ge Front Load Dryer Troubleshooting
Some problems are DIY-friendly, but others require a trained technician. Consider these guidelines.
- Call a pro if:
- The issue involves internal electrical components, a seized motor, or a complex control board failure.
- You see smoke, burning smells, or persistent overheating.
- Consider replacement if:
- Repair costs exceed 50% of a new dryer, or if the dryer is older than 10–12 years and parts are failing often.
- Warranty and safety
- Check any active warranty or service plan before paying out of pocket.
- Licensed technicians follow safety codes and can supply diagnostic reports for insurance or warranty claims.
When I decide between repair and replacement, I weigh parts cost, age, and reliability. A newer efficient model can justify replacement when long-term savings and safety are factored in.

Frequently Asked Questions of Ge Front Load Dryer Troubleshooting
What should I check first if my GE front load dryer won't start?
First, check power: the plug, circuit breaker, and the outlet. Then inspect the door latch and start switch for obvious faults.
Why is my GE front load dryer running but not heating?
Most often a blown thermal fuse, failed heating element, or blocked vent is the culprit. Test the thermal fuse and clear the vent to diagnose.
How often should I clean the vent for a GE front load dryer?
Clean the vent at least once a year, and more often if you dry heavy loads frequently. A blocked vent causes poor drying and safety risks.
Can I test a thermal fuse myself on a GE front load dryer?
Yes, with basic tools and a multimeter you can test continuity after unplugging the dryer. Replace a blown fuse rather than bypassing it.
When should I replace my GE front load dryer instead of repairing it?
Replace when repair costs are high relative to the dryer’s age, usually after 10–12 years, or when multiple components fail in quick succession.
Conclusion
Ge Front Load Dryer Troubleshooting becomes simple when you follow a method: check power, vents, and common components first, then progress to parts testing. Regular maintenance prevents most problems and helps your dryer run safely and efficiently. Try the checklist and fixes here, and call a licensed technician for complex electrical or mechanical failures. Leave a comment with your dryer issue, subscribe for more appliance tips, or share this guide with someone who needs it.


