
Most tension problems come from wrong threading, bobbin setup, or incorrect tension settings.
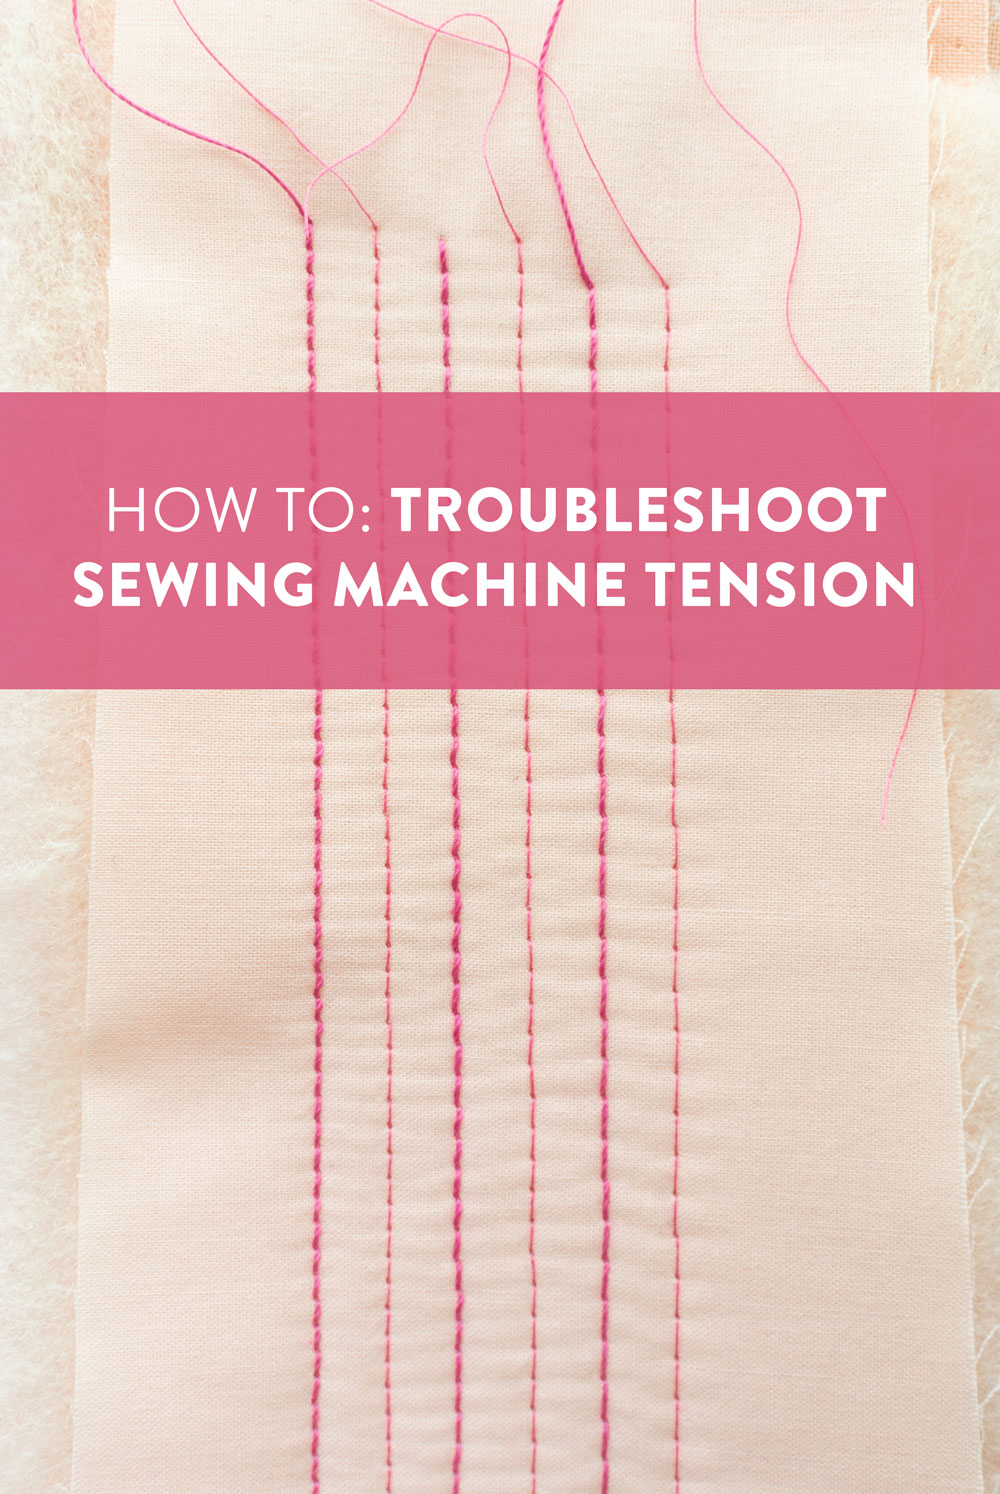
I have spent years fixing home and industrial machines. This guide on Sewing Machine Tension Troubleshooting explains how tension works, how to spot common faults, and clear step-by-step fixes you can do at home. Read on to learn how to diagnose and solve tension issues fast, avoid costly repairs, and get neat, balanced stitches on every project.
How Sewing Machine Tension Works
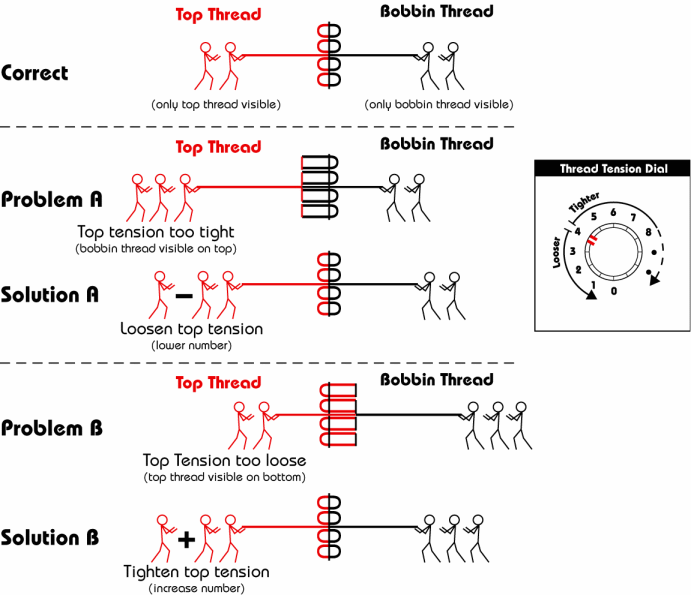
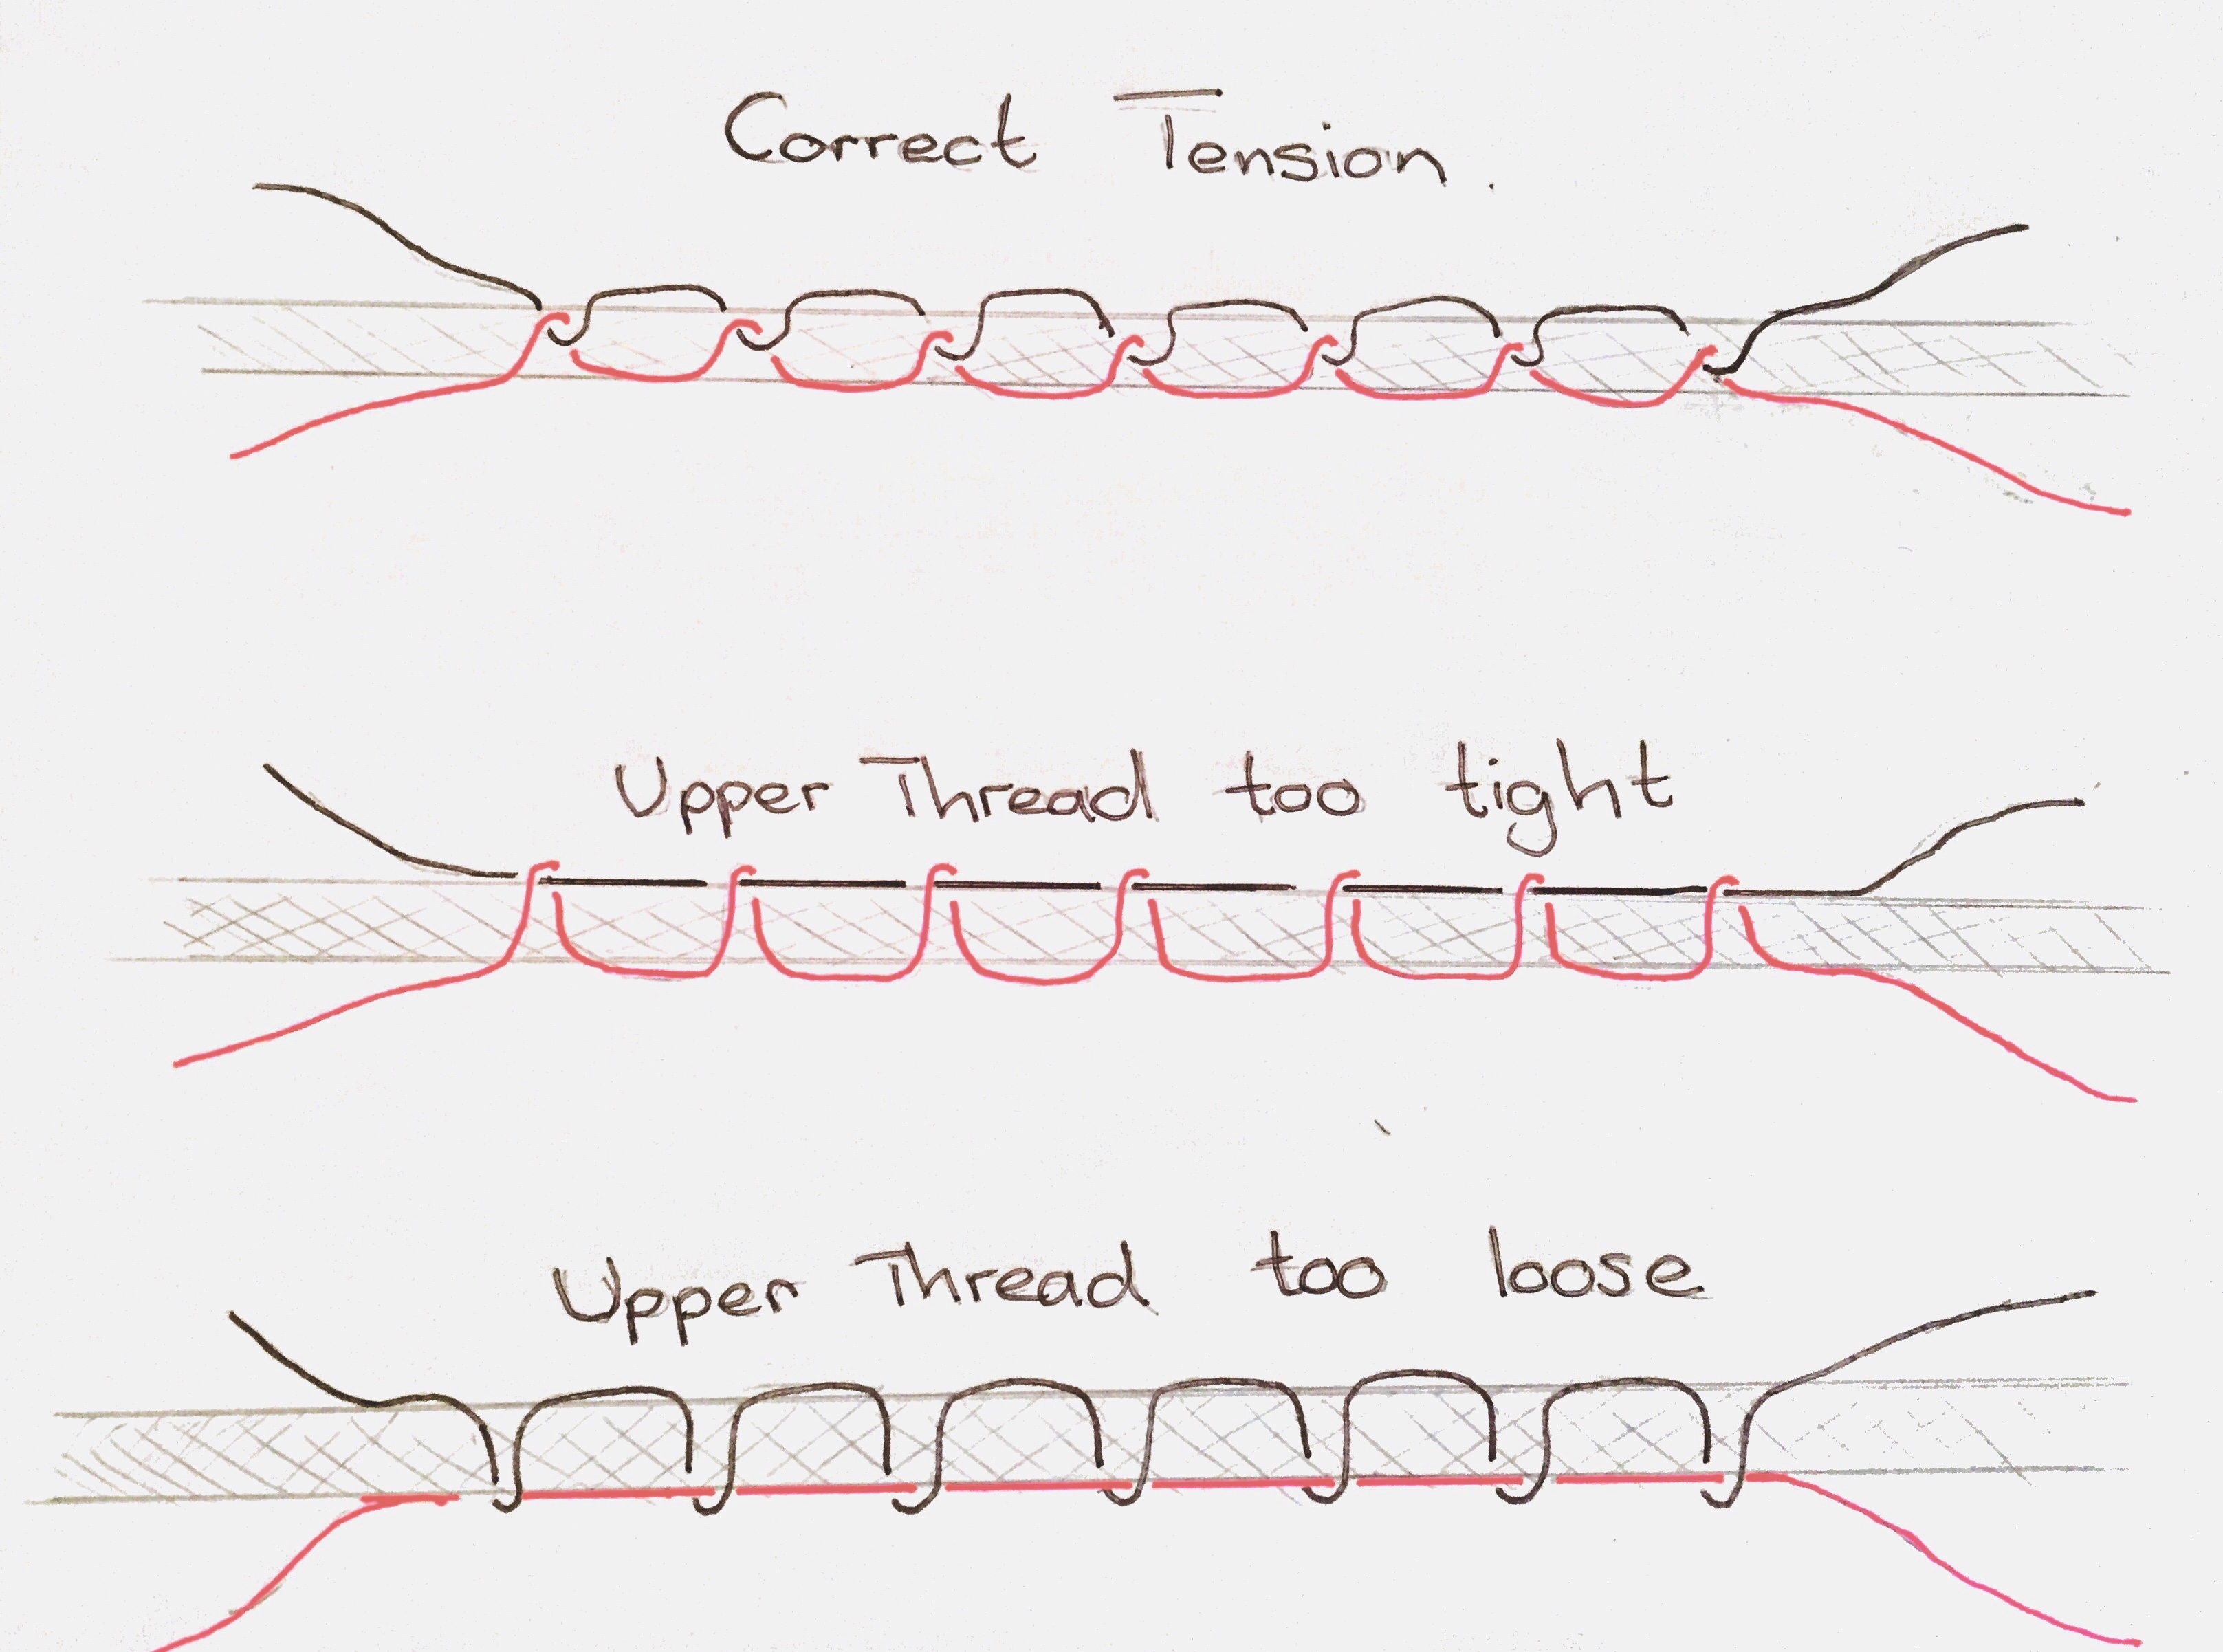
Sewing Machine Tension Troubleshooting starts with knowing how tension works. Tension balances top thread and bobbin thread so stitches lock in the middle of the fabric. Too much top tension pulls bobbin loops to the top. Too little top tension leaves loops on the bottom.
Most machines have a dial for upper tension and a spring retainer or screw for the bobbin. Modern machines add automatic tension features, but basics are the same. When you understand this balance, many problems become easy to fix.

Common Sewing Machine Tension Problems and Causes
Understanding common signs leads to faster fixes when doing Sewing Machine Tension Troubleshooting. Here are frequent issues and usual causes.
- Top thread shows on underside of fabric. This means top thread tension is too tight or bobbin is wound badly.
- Bobbin thread shows on top. This usually means top tension is too loose or the needle is wrong.
- Uneven or skipped stitches. Causes include incorrect threading, needle damage, or dirt in the tension discs.
- Thread bunching (birdnesting) under fabric. This often comes from wrong threading, poor bobbin insertion, or incorrect presser foot pressure.
- Stitches that skip and pull. Could be a blunt or bent needle, or mismatched thread weight and needle size.
From my experience, most home sewists fix 70% of tension issues by simply rethreading both top and bobbin threads and using a new needle. Small habits prevent big headaches.
Step-by-Step Sewing Machine Tension Troubleshooting
Follow these steps to troubleshoot tension. Work in order and test on scrap fabric after each change.
-
Check basic setup
- Unplug the machine. Clean lint near the bobbin case and tension discs.
- Replace the needle if it is old or bent. Use the right needle for your fabric.
- Make sure you have a properly wound bobbin and correct bobbin type for your machine.
-
Rethread top thread and bobbin
- Raise the presser foot to seat the thread in tension discs.
- Rethread following machine threading guides exactly. Thread must sit between discs.
- Reinsert the bobbin so the thread feeds in correct direction under the bobbin case.
-
Set tension to neutral and test
- Put tension dial to the middle setting recommended by the manual.
- Stitch on scrap fabric with same layers you will sew.
- Examine both sides. Adjust one notch at a time and retest.
-
Diagnose top vs bottom tension
- If top thread appears below, loosen top tension by one notch.
- If bobbin thread appears on top, tighten top tension slightly.
- If changes don’t help, check bobbin case spring or bobbin tension screw for uneven drag.
-
Check thread and needle match
- Use thread appropriate for fabric weight. Thin thread needs a small needle and vice versa.
- Swap to a new needle and ensure it’s fully seated.
-
Check feed and presser foot
- Ensure presser foot pressure fits fabric. Too little pressure can cause loose loops.
- Make sure feed dogs move fabric smoothly without slipping.
-
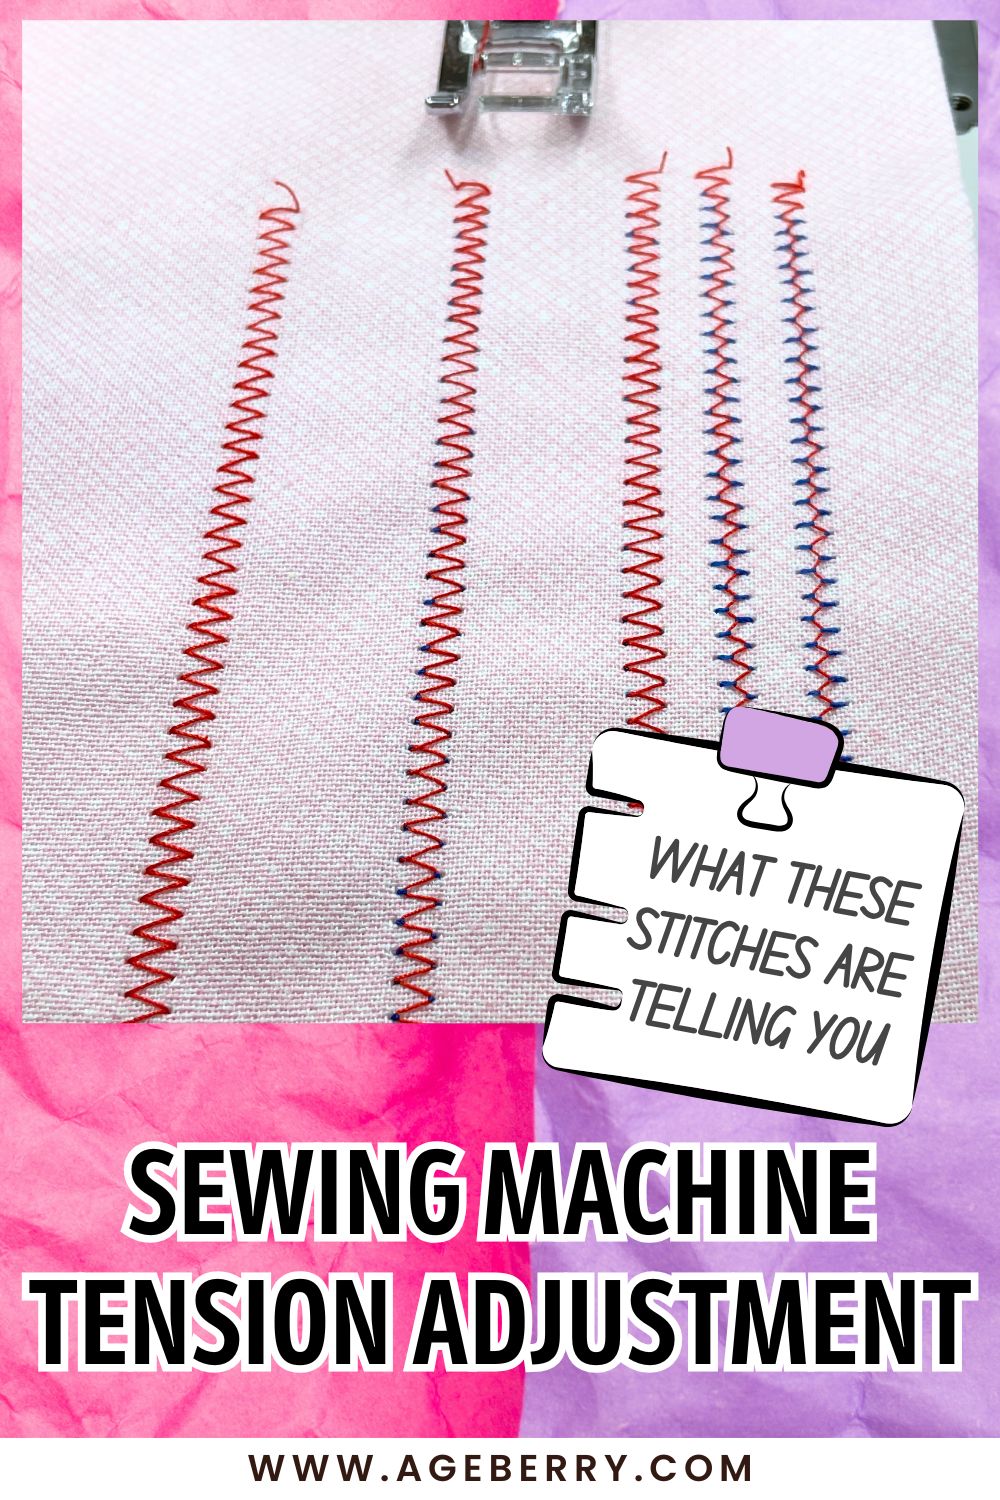
Try a tension test on a clean, single-layer scrap
- Use the same thread and needle you plan to use on the project.
- Stitch 10–20 rows and inspect. If stitches stay even, you’re done.
People also ask
- How do I quickly test tension? Stitch on scrap fabric and look for balanced loops on both sides.
- How do I know if it’s the top tension? If bobbin thread shows on top, top tension is too loose.
During years of repairs, I learned rethreading often cures problems. Take a slow, calm approach. Panic and random tweaks make things worse.
Advanced Tension Fixes and When to Seek Professional Help
Some problems need more than basic Sewing Machine Tension Troubleshooting. Try these advanced checks before visiting a tech.
-
Check bobbin case spring tension
- Small screw on the bobbin case controls its drag. Turn it slightly to change tension.
- Mark starting position so you can return to it.
-
Inspect tension discs and regulator
- Remove thread and clean between discs. Old thread and lint hide there.
- If discs are scored or dented, a technician should replace them.
-
Test with a different bobbin or case
- Some machines are sensitive to aftermarket bobbins. Try an OEM bobbin.
- Swap bobbin cases if available to rule out a faulty case.
-
Firmware or auto-tension issues
- Modern machines may need calibration. If automatic tension gives odd results, consult a technician.
Seek professional help when:
- The machine still pulls loops after cleaning and correct threading.
- Mechanical parts show damage.
- You suspect internal timing or tension regulator failure.
I once spent an afternoon chasing a tension problem that turned out to be a tiny burr on the bobbin case. A quick parts swap fixed it. A pro can save hours when the fault is hidden.
Preventive Maintenance to Avoid Tension Issues
Good maintenance reduces the need for Sewing Machine Tension Troubleshooting. Do these regularly.
-
Clean after every major project
- Remove lint from bobbin area and tension discs.
- Brush and oil where the manual suggests.
-
Replace needles often
- Change needle every 6–8 hours of sewing or with each project using heavy fabrics.
-
Use correct thread and bobbins
- Match thread weight to fabric and needle. Use correct bobbin type.
-
Store thread and machine properly
- Keep thread dry and tangle-free.
- Cover the machine to prevent dust and pet hair.
-
Run a tension test before important seams
- Especially if you changed thread type, needle, or fabric.
My rule: tidy machine, tidy stitches. Small daily care prevents big tension headaches.

Frequently Asked Questions of Sewing Machine Tension Troubleshooting
What is the easiest way to fix tension problems?
Rethread both the top and bobbin threads and replace the needle. Then test on scrap fabric and adjust the top tension a notch at a time.
Why does my machine bunch thread under the fabric?
Thread bunching usually comes from wrong threading, a poorly wound bobbin, or lint in the bobbin area. Clean and rethread to fix the issue.
How do I know if top or bobbin tension is wrong?
If you see top thread on the underside, top tension is too tight. If bobbin thread shows on top, the top tension is too loose.
Can wrong thread cause tension issues?
Yes. Using thick thread on a thin needle or poor-quality thread can disrupt tension. Match thread size to needle and fabric for best results.
When should I take my machine to a technician?
If cleaning, rethreading, and a bobbin case check don’t fix the problem, or if you spot damaged parts, seek a professional to avoid further damage.
Conclusion
Balanced tension makes sewing painless. You can solve most Sewing Machine Tension Troubleshooting tasks by cleaning, rethreading, using the right needle and thread, and testing on scrap fabric. If problems persist, small advanced checks often reveal the cause, but a technician is the right call for damaged parts or complex internal issues. Start with a clean machine and calm steps, and your stitches will thank you.
Try these steps on a small scrap today. If it works, leave a comment with your fix. If you still struggle, subscribe for more sewing tips and troubleshooting guides.

