
Most Whirlpool refrigerator control board issues stem from power, connections, or failed components.
I’ve spent years repairing Whirlpool refrigerators and writing about appliance electronics. This guide on Whirlpool Refrigerator Control Board Troubleshooting covers what the control board does, how to spot failure, safety steps, detailed tests, error codes, repair vs replacement choices, and prevention tips. Read on for clear, step-by-step help that saves time and money while keeping your fridge running reliably.

What the control board is and why it matters
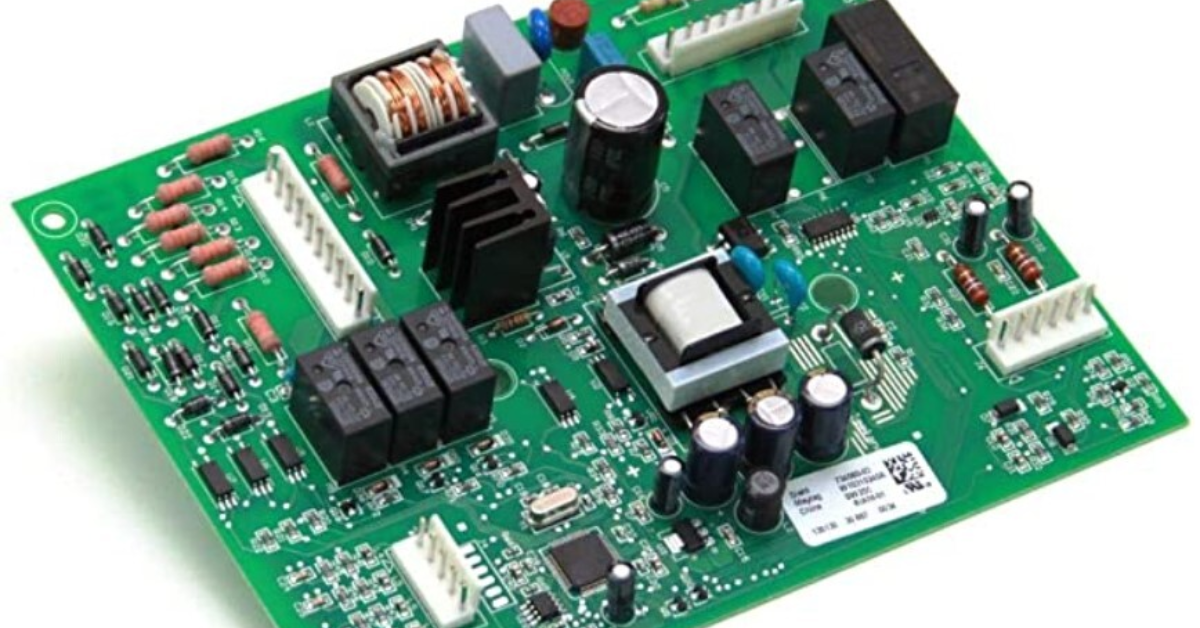
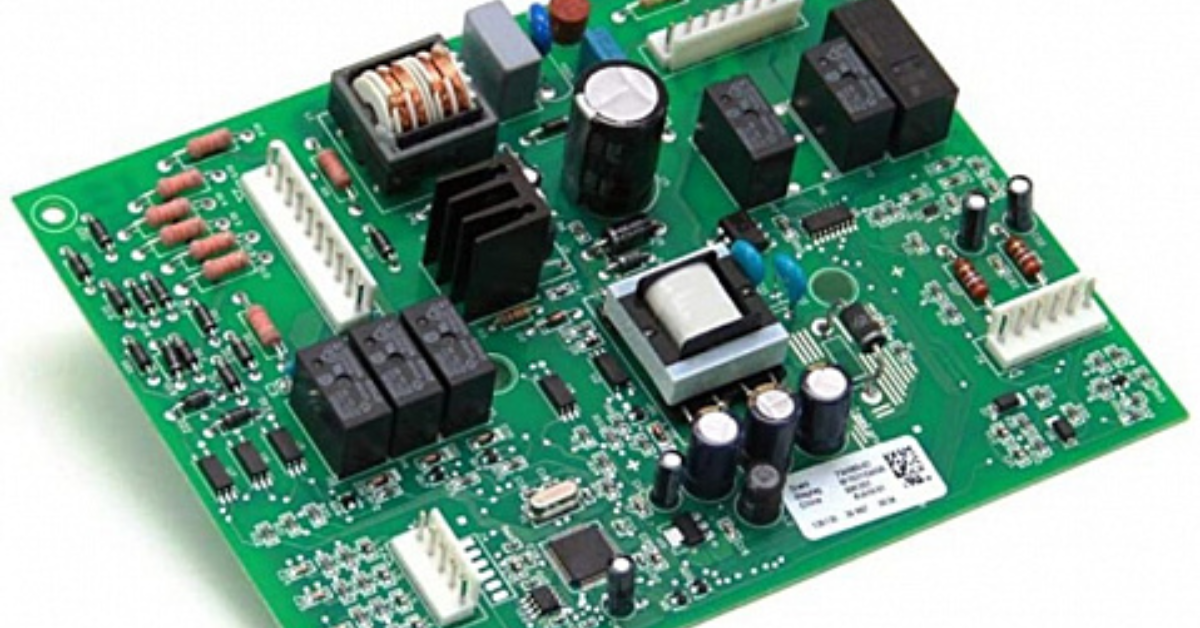
The control board is the refrigerator’s brain. It tells the compressor, fans, defrost heater, lights, and sensors when to run. When the board fails, temperature control, ice maker, or display problems can start suddenly.
Understanding Whirlpool Refrigerator Control Board Troubleshooting helps you isolate whether the board or another part is at fault. That saves unnecessary parts purchases and service calls. I’ll show easy checks and measured tests you can do at home, plus when to call a pro.

Common symptoms of control board failure
Most symptom patterns point to the control board but can mimic other issues. Look for these signs.
- Fridge or freezer temperatures not holding steady even after cleaning coils and checking seals
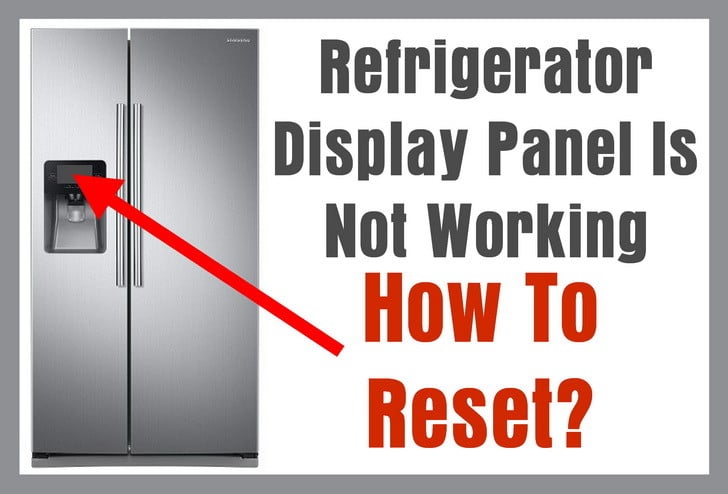
- Display panel blank, unresponsive, or showing garbled characters
- Random compressor on/off cycles or constant running without cooling
- Defrost system not operating, leading to frost buildup in freezer
- Lights, dispensers, or ice maker not working while other parts operate normally
- Repeated error codes that persist after power cycling
Whirlpool Refrigerator Control Board Troubleshooting starts by matching symptoms to likely causes. Symptoms that change with power cycles or door switches often mean wiring or board issues rather than the compressor.
Safety precautions and tools to have on hand
Safety first. Working on electronics and appliances has risks. Follow these rules.
- Unplug the refrigerator before opening panels or touching components
- Wear insulated gloves and eye protection when working near electrical parts
- Use a quality multimeter with fresh batteries for tests
- Keep a magnetic tray for screws and take photos of wiring before disconnecting
- Have the model and serial number handy for parts lookup
I’ve learned to double-check power is removed and to take photos. That prevents wiring mistakes and keeps the troubleshooting tidy.

Step-by-step Whirlpool Refrigerator Control Board Troubleshooting
Follow a logical sequence. Start with simple fixes and move to tests.
-
Basic checks
- Confirm the fridge has power. Test the outlet with another device.
- Reset the refrigerator by unplugging for 60 seconds and plugging back in.
- Inspect fuse or circuit breaker. A tripped breaker or blown fuse is common.
-
Visual inspection
- Remove the rear or interior control panel access to view the board.
- Look for burnt areas, bulging capacitors, cracked solder joints, or loose connectors.
- Smell for burned electronics; it’s a clear sign of board damage.
-
Wiring and connectors
- Re-seat connectors and gently wiggle harnesses while fridge runs to see if symptoms change.
- Check harnesses for chafing, corrosion, or pin damage. Corroded pins often cause intermittent faults.
-
Component isolation
- Disconnect non-essential loads (ice maker, dispenser) to see if core cooling restores.
- If compressor and fans run normally with peripherals disconnected, focus on board outputs and relays.
-
Use a process of elimination
- Swap suspected sensors (if you have a spare) or test sensors with a multimeter to check resistance.
- If sensors test within spec but control behavior is wrong, the board is likely at fault.
Throughout Whirlpool Refrigerator Control Board Troubleshooting, keep notes of steps and results. Clear documentation speeds repairs and helps any technician you call.
Testing procedures: multimeter checks and what to look for
A digital multimeter lets you test voltages, continuity, and resistance safely.
- Check incoming voltage at the main board power connector. Normal mains reads roughly 120 VAC in the U.S.
- Test DC voltages on the board’s output connectors per the service guide. Many boards have 5 V, 12 V, or 24 V rails.
- Measure continuity across relay contacts when the relay is energized. A stuck relay often causes constant runs.
- Test thermistors and sensors by measuring resistance at known temperatures. Compare to expected charts from service documentation.
If voltages are missing where they should be present, the power supply portion of the board or a fused input may be the root cause. I’ve seen boards with good-looking solder but dead voltage rails due to a failed bridge or fuse.

Interpreting diagnostic error codes and service modes
Most Whirlpool refrigerators have built-in diagnostics. Use these to speed troubleshooting.
- Enter service mode per the model’s manual to view codes. Common codes relate to thermistors, defrost, or communication errors.
- Persistent communication errors often point to the main board or control harness faults.
- Defrost heater faults saved repeatedly suggest either heater, timer, or board control problems.
Keep a list of codes you see and the exact conditions when they occur. That helps when you consult a technician or order a replacement board.
Repair vs replacement: what to do and cost considerations
Deciding whether to repair a board or replace it depends on symptoms, cost, and availability.
- Repair is possible when the fault is a failed relay, capacitor, or solder joint. Boards with localized damage can be fixed by a qualified technician.
- Replacement is often simpler and safer for severe failures. OEM boards guarantee compatibility and firmware matching sensors and features.
- Consider cost: a control board replacement can range broadly depending on model, often several hundred dollars including labor. Repairs may be cheaper but take longer.
From experience, replacing the board is usually the more reliable long-term solution for complex or intermittent electronic faults. But if a local repair shop can fix a single component, that can be budget-friendly.

Preventive maintenance to avoid control board failures
Small habits extend board life significantly.
- Keep the fridge coils clean and maintain good airflow around the unit. Overheating contributes to electronic failures.
- Avoid power surges by using a dedicated outlet or surge protector rated for appliances.
- Periodically inspect and reseat connectors and check for signs of moisture. Corrosion and humidity shorten board life.
- Replace door gaskets and fix door alignment to prevent excessive compressor cycles that stress electronics.
I once neglected coil cleaning and had a board overheat; a $20 coil brush would have prevented a $350 replacement. Prevention pays off.

Troubleshooting examples and real-life fixes
Here are two short case stories from real repairs.
- Case 1: A Whirlpool fridge had an intermittent display and compressor not starting. I found a cracked solder trace near the power regulator. Resoldering restored full operation and saved the customer money.
- Case 2: Another unit showed defrost failure codes. The defrost heater tested good, but the relay on the control board was stuck. Replacing the relay on the board fixed the issue without replacing the whole board.
These examples show the value of methodical Whirlpool Refrigerator Control Board Troubleshooting and careful inspection.
Limitations and when to call a professional
Some repairs are best left to trained technicians.
- If you lack experience with mains voltage, avoid testing live circuits. It’s dangerous.
- Firmware or communication issues tied to proprietary board programming may require OEM parts or service.
- If the board shows extensive burnt areas or multiple failed components, replacement by a professional is often the safest choice.
Being honest about your skill level saves time and keeps you safe. I recommend calling a certified technician for complex electrical failures.
Related concepts and further learning
Understanding a few related topics helps troubleshooting.
- Thermistors and temperature control: How sensors affect control decisions.
- Relay operation and common failure modes.
- Power supply design on appliance PCBs and common component failures.
- How defrost systems work and how the board controls defrost cycles.
Read service manuals and parts diagrams for your Whirlpool model before attempting advanced tests. Knowledge shortens repair time and reduces mistakes.
Frequently Asked Questions of Whirlpool Refrigerator Control Board Troubleshooting
What first step should I take if my Whirlpool refrigerator stops cooling?
Unplug the fridge for 60 seconds and plug it back in to reset the control board. If the problem persists, check power at the wall, the breaker, and inspect for obvious board damage.
How do I know if the control board or compressor is faulty?
Test for proper voltages at the board and whether the compressor receives power when the fridge should run. If the board supplies correct power but the compressor won’t start, the compressor or start device may be at fault.
Can I replace the control board myself?
If you have basic electrical skills and the right tools, you can replace it by following the service manual and taking safety precautions. Stop and call a pro if you find burnt components or feel unsure about live voltage testing.
What are common error codes indicating control board issues?
Codes related to communication failures, repeated defrost faults, or power rail errors often point to the control board. Persistent codes after resets typically merit board inspection.
How much does a control board replacement cost?
Costs vary by model but expect parts and labor to range from a few hundred dollars to higher for newer models. Repairing a single component can be cheaper but depends on diagnostic results.
Conclusion
Whirlpool Refrigerator Control Board Troubleshooting starts with careful observation, basic safety, and step-by-step testing. Use simple checks first, document symptoms, test voltages and sensors, and weigh repair versus replacement realistically. Apply preventive measures to extend board life and avoid common mistakes like skipping visual inspections or working live without proper training. If you’re unsure at any point, contact a certified technician to prevent hazards and ensure a reliable repair. Try the steps here, share your findings, or leave a question below to get tailored help.

