
Most Yamaha 48 Volt charger faults are simple fixes like loose leads or low battery voltage.

Today's Exclusive Deals
Limited-time Exclusive Deals. Check current discount on Amazon.
Check Price on Amazon As an Amazon Associate I earn from qualifying purchases.I have worked on Yamaha electric systems for years. I know Yamaha 48 Volt Charger Troubleshooting inside and out. This article explains how the charger works, common faults, step-by-step tests, and safe fixes. You will get clear steps you can follow. I mix real-world tips I learned while repairing Yamaha systems with proven diagnostic steps. Read on to fix your charger fast and safely.
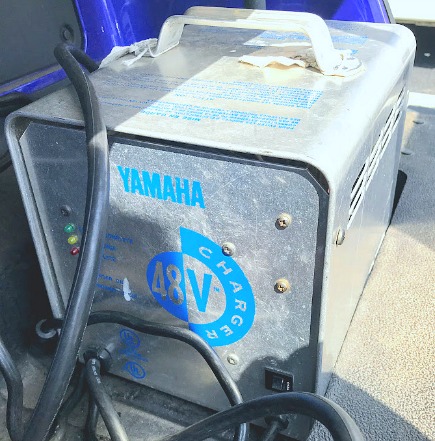
How a Yamaha 48 Volt Charger works and key parts
A Yamaha 48 Volt Charger converts AC house power to DC to charge a 48 V battery bank. It controls charge voltage and current and stops when batteries reach full charge. Key parts are the power cord, AC fuse, internal transformer or switching module, status LEDs, charge lead connectors, and safety circuitry.
Today's Exclusive Deals
Limited-time Exclusive Deals. Check current discount on Amazon.
Check Price on Amazon As an Amazon Associate I earn from qualifying purchases.Common terms to know:
- Battery voltage. The DC level across battery terminals.
- Charge current. How many amps flow into the battery.
- Float mode. Low voltage maintenance charge after bulk charging.
- Fault LED. Status indicator that shows error codes.
Understanding these parts helps with Yamaha 48 Volt Charger Troubleshooting. When you know what each part does, diagnosis is faster and safer.
Today's Exclusive Deals
Limited-time Exclusive Deals. Check current discount on Amazon.
Check Price on Amazon As an Amazon Associate I earn from qualifying purchases.Common problems with Yamaha 48 Volt Charger and their causes
Yamaha 48 Volt Charger Troubleshooting usually starts with common symptoms. Here are typical issues and quick causes.
Common symptoms and likely causes:
- No LEDs on. Possible dead AC feed, blown fuse, or bad power cord.
- Charger LED flashing fault. Could be battery over-voltage, short, or internal fault.
- Slow charging. Weak AC input, bad connection, or aging charger.
- Charger won’t enter float. Faulty sensor or failing control board.
- Charger trips breaker. Ground fault or shorted battery cell.
Real issue patterns I saw:
- Loose ring terminals on the battery caused intermittent charging on a Yamaha unit I serviced. Tightening solved it.
- Corroded battery posts made the charger read low, so the unit ran long without reaching float.

Step-by-step Yamaha 48 Volt Charger Troubleshooting guide
Follow these steps in order. They move from safe, simple checks to deeper tests.
Safety first:
- Disconnect AC power before touching wires.
- Wear eye protection and insulated gloves.
- Work in a dry area and keep metal tools away from battery terminals.
Step 1 — Visual and power checks
- Verify AC wall outlet with a lamp or meter.
- Inspect charger power cord and plug for damage.
- Check AC fuse or breaker feeding the charger.
Step 2 — Inspect connections
- Check battery terminal tightness and cleanliness.
- Ensure charger output connectors are secure.
- Look for corrosion, cracked insulation, or melted plastic.
Step 3 — Read the LEDs and notes
- Note LED color and flash pattern.
- Refer to Yamaha LED codes below to match faults.
Step 4 — Measure voltages
- With charger connected and AC on, measure DC at the battery.
- If no DC present, measure at the charger output plug to isolate wiring.
Step 5 — Test under load
- Try charging while the electrical load is minimal.
- If charge current rises, the charger works but battery may be weak.
Step 6 — Swap or isolate parts
- If possible, connect a known good battery or charger to isolate the failed item.
- Replace suspect fuses, cords, or connectors first.
These steps make Yamaha 48 Volt Charger Troubleshooting simple. Move methodically and keep notes on what you test.

PAA-style questions inside troubleshooting
How do I know if the charger is dead or the battery is bad?
- Measure DC voltage at the battery with AC disconnected. If the battery reads low and charger does not raise voltage when connected, test with a known good charger or battery.
Can charging problems be fixed at home?
- Yes, many fixes are simple like tightening terminals or replacing a fuse. For internal charger faults, professional service is safer.
Interpreting status LEDs and fault codes
Yamaha chargers use LED patterns to show status. Knowing these saves time.
Common LED meanings:
- Solid green. Charger in float or full.
- Solid red. Charging in progress.
- Red flashing. Fault or temperature problem.
- No lights. No AC input or internal failure.
If you see a fault flash:
- Power cycle the charger. Wait 60 seconds and power on.
- Recheck battery polarity and connections.
- If fault returns, note the exact flash pattern and contact Yamaha support or a qualified technician.
For Yamaha 48 Volt Charger Troubleshooting, LED clues are the quickest path to a diagnosis.

Maintenance, safety, and best practices
Routine care extends charger life and prevents faults.
Simple maintenance tasks:
- Clean battery terminals every 3 months.
- Check charger ventilation and remove dust.
- Inspect cables and replace frayed wires.
- Keep charger dry and out of direct sun.
Safety tips from my experience:
- Never bypass safety circuits to force charging.
- Use a proper replacement fuse rating.
- Replace batteries in matched sets to avoid uneven charging.
Good maintenance reduces the need for Yamaha 48 Volt Charger Troubleshooting.

When to repair, replace, or seek professional help
Decide based on cost, safety, and skill level.
Signs to repair at home:
- Broken cords, blown external fuses, or simple connector repairs.
Signs to get professional help:
- Internal component faults, strange smells, burned parts, or persistent fault LEDs.
- If charger repair cost approaches replacement price.
Replacement tips:
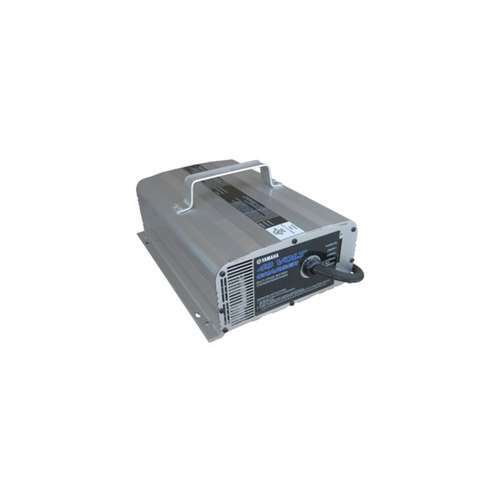
- Match voltage and amp rating. For a Yamaha 48 Volt Charger Troubleshooting need, replace with OEM or equivalent rated charger.
- Keep model number handy when buying a replacement.
I once replaced a charger module after repeated internal faults. The new unit worked for years and cost less than multiple repair attempts.

Troubleshooting checklist (quick reference)
Use this checklist when you begin a diagnosis.
Checklist items:
- Verify AC outlet and breaker.
- Inspect charger cord and plug.
- Tighten and clean battery terminals.
- Note LED status and flash codes.
- Measure DC at battery and charger output.
- Replace external fuses and damaged cables.
- Test with alternate charger or battery.
This checklist speeds Yamaha 48 Volt Charger Troubleshooting and reduces guesswork.
Frequently Asked Questions of Yamaha 48 Volt Charger Troubleshooting
Why does my Yamaha charger show no lights?
If the charger shows no lights, check the AC source, plug, and fuse first. If AC is present and fuse is good, the charger likely has an internal fault and needs service.
Why is charging very slow on my 48V Yamaha unit?
Slow charging can be caused by low AC voltage, poor connections, or a worn charger. Check voltage and clean terminals, then measure charge current to confirm performance.
Can a single bad cell stop the charger from working?
Yes. A bad or shorted cell can pull total voltage down and trigger a fault. Inspect batteries and test each cell if possible.
Is it safe to jump-start a 48V system with another charger?
You can connect a known good charger in parallel if done safely and polarity is correct. Use caution and proper protective gear to avoid sparks or damage.
How often should I service a Yamaha 48 Volt charger?
Check the charger and battery connections every three months. Full service is recommended annually or when you notice irregular behavior.
Conclusion
Yamaha 48 Volt Charger Troubleshooting becomes easy with a patient, step-by-step approach. Start with power and connection checks, read LED signals, and measure voltages. Perform basic maintenance to prevent future faults. If internal faults appear, call a qualified technician or replace the unit. Try the checklist first and keep safety top of mind. Share your experience, subscribe for more guides, or leave a comment with your charger issue.


