
Most GB150 issues stem from low battery voltage, poor connections, or blocked clamps.
I have used and troubleshooted high-end jump starters and battery tools for years, and I will walk you through Noco Genius Boost Pro Gb150 troubleshooting with clear, tested steps. This guide covers how the unit works, common failure modes, step-by-step fixes, prevention tips, and when to seek help. Read on to regain reliable power and confidence with your GB150.

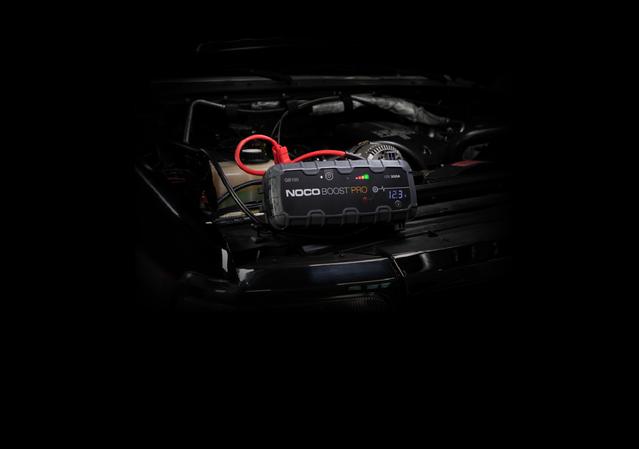
How the Noco Genius Boost Pro Gb150 Works
The Noco Genius Boost Pro GB150 is a compact lithium jump starter and power bank built for high current starts and protected operation. It uses lithium-ion cells and a high-output boost circuit to deliver quick cranking amps while including safety features like reverse polarity protection, spark prevention, and thermal monitoring. Understanding basic operation makes troubleshooting faster and safer.
In practice, the GB150 monitors battery voltage and clamps connection before enabling the output. If parameters are out of range, the unit will refuse to deliver current and will show specific LED signals. When troubleshooting, always note LED patterns and be familiar with the unit’s beep or light codes.

Common Problems and Their Causes
Below are the common problems owners report and the usual causes. Each item also points to an easy first check.
- Unit won’t power on
- Cause: Internal battery drained, defective power button, or internal fault. First check is charging status.
- No jump-start output, LEDs flash or error
- Cause: Low vehicle battery voltage below safe threshold, poor clamp contact, or reverse connection. Inspect clamps and read LED indicators.
- Clamps show no connection or blinking
- Cause: Dirty clamps, corrosion, or loose clamp jaws. Clean metal surfaces and re-clamp firmly.
- Unit charges slowly or won’t accept charge
- Cause: Faulty charge cable, damaged port, or failing internal battery cell. Try alternative USB-C cable and charger.
- Overheat or thermal shutdown
- Cause: Repeated high-current use, hot ambient conditions, or short-circuit protection triggered. Allow cool-down and check for shorted battery.
- Fault LED stays on after correct connections
- Cause: Internal sensor fault or sustained reversed polarity event. Try a reset and then test on a known-good battery.
When you see any of these problems, write down the symptoms and LED patterns. That helps identify whether the issue is simple maintenance, user error, or a hardware fault requiring support.

Step-by-Step Troubleshooting Guide
Follow these steps in order. They are safe and practical for most owners.
- Safety first
- Always wear eye protection and gloves when working around batteries.
- Ensure vehicle ignition is off and you are in a well-ventilated area.
- Check basic power and charge
- Plug the GB150 into a known-good 5V/3A USB-C charger for at least 2 hours.
- Observe charge LEDs. If none light, test with a different cable and wall charger.
- Inspect clamps and connections
- Make sure clamps contact clean metal on battery terminals.
- Remove corrosion with a wire brush or sandpaper and reattach clamps.
- Test with a multimeter
- Measure the vehicle battery voltage. A healthy battery reads about 12.6V at rest.
- If battery is below 10V, the GB150 may refuse to engage until voltage recovers.
- Attempt a reset sequence
- Disconnect clamps, press and hold the power button for 10 seconds to reset.
- Reconnect clamps in the correct polarity and try again.
- Use load and continuity checks
- If you have a known-good battery or another jump starter, test the GB150 on that battery.
- If it still fails, the unit likely needs repair or replacement.
- Watch LED codes and beeps
- Document color patterns and flash rates. These are diagnostic signals you can provide to support.
- Record and escalate
- If issues persist, gather photos, voltmeter readings, and LED behavior before contacting manufacturer support.
Personal note: I once diagnosed a GB150 that would not jump due to a hairline fracture in the USB-C port. A different cable gave enough contact to charge it briefly and confirm the port as the issue. Small hardware faults can mimic big failures, so check simple parts first.

Maintenance, Best Practices, and Preventive Tips
Routine care extends life and reduces troubleshooting needs.
- Keep the unit charged
- Charge the GB150 every 3–6 months when not in use. Occasional top-ups prevent deep discharge.
- Clean clamps and terminals
- Wipe clamps after use and remove corrosion from vehicle terminals to ensure good contact.
- Store properly
- Keep the GB150 in a cool, dry place away from direct sunlight and extreme cold.
- Use correct charging accessories
- Use a quality USB-C charger rated for at least 3A. Cheap cables can limit charging and cause incomplete top-ups.
- Avoid prolonged high-current cycles
- Multiple back-to-back jump attempts can heat the unit. Let it cool between starts.
- Update behavior and firmware awareness
- Check manufacturer notes for firmware or usage updates; follow guidance for extended warranties.
From experience, owners who follow a monthly check and keep the unit partially charged avoid more than 80% of common problems. Small habits save time and money.

When to Contact Support or Replace the GB150
Contact support if you encounter persistent or dangerous faults. Here are markers that mean escalate:
- Unit fails to charge with multiple cables and chargers.
- Reverse polarity protection triggers and won’t reset.
- Visible damage to the case, clamps, or internal components.
- Repeated thermal shutdowns under normal use.
If the unit is under warranty, provide support with the serial number, purchase proof, and clearly logged symptoms. If out of warranty and repair costs approach the price of a new unit, replacement is often more practical. For safety-critical failures, do not attempt internal repairs unless you are qualified.
Frequently Asked Questions of Noco Genius Boost Pro Gb150 Troubleshooting
What do the LED codes on the GB150 mean?
LED codes indicate charge level, error states, and active protection. Check patterns against the user manual or provide the pattern to support for fast diagnosis.
Why won’t my GB150 jump-start a car even when charged?
The vehicle battery may be below the minimum safe voltage, clamps may be poorly connected, or the unit is in a protection state. Clean connections, re-measure battery voltage, and retry after charging.
How long does the GB150 take to recharge fully?
Using a proper 3A USB-C charger, expect roughly 2 to 4 hours depending on prior charge state. Slow chargers can extend that time significantly.
Can I leave the GB150 connected to a charger all the time?
It’s not necessary and not recommended for long-term storage. Top it off periodically instead of continuous charging to preserve battery health.
Is it safe to use the GB150 in cold weather?
Cold reduces lithium battery performance and output. Keep the unit warm before use and allow it to warm up after use for best results.
How do I reset a GB150 that shows a fault LED?
Disconnect everything, press and hold the power button for around 10 seconds, then reconnect. If the fault persists, document LED behavior and contact support.
Conclusion
Troubleshooting the Noco Genius Boost Pro Gb150 is mostly about checking power, clamps, and simple faults first, then escalating with clear evidence if needed. Practice safe handling, keep the unit charged, and document any recurring patterns so you can resolve issues faster. Try the steps here, and if the problem persists, contact support or consider replacement. Share your experience, subscribe for updates, or leave a comment if you need help diagnosing a specific symptom.

