
Most Apollo gate opener issues stem from power, sensor, or remote faults and are usually fixable.
I have spent years installing and fixing gate systems, and I know Apollo gate opener troubleshooting inside out. This article walks you through clear diagnostics, step-by-step fixes, and easy maintenance tips for Apollo gate opener troubleshooting. Read on for proven checks, wiring tests, programming resets, and real-life tips that save time and money.
Why Apollo gate opener failures happen and how to think about them
Apollo gate opener troubleshooting starts with simple checks. Many failures come from basic causes. Common triggers include dead power, misaligned sensors, worn gears, or lost remote sync.
Think of the opener like a car. It needs fuel, a clear road, and working controls. If one part fails, the whole system can stall. When you run Apollo gate opener troubleshooting, start with the easiest items first. This saves time and prevents unnecessary parts replacement.
Quick diagnostic checklist for Apollo gate opener troubleshooting
Use this fast checklist to find the likely cause. Perform these steps before deeper work.
- Check power at the control box. Confirm AC or battery voltage is present.
- Look at indicator lights. Note any steady or blinking error codes.
- Test remote and keypad operations. Try manual release and push the gate.
- Inspect sensors and safety edges. Clean lenses and check alignment.
- Listen for motor noise. Grinding or silence points to specific faults.
Keep notes as you test. Mark what changed after each test. This makes Apollo gate opener troubleshooting faster and clearer.
Step-by-step Apollo gate opener troubleshooting
Below are detailed steps to find and fix common issues. Work methodically. Safety first: disconnect power before major repairs.
1. Power and fuse checks
- Verify mains power at the breaker and outlet. Reset tripped breakers.
- Inspect fuses in the control box. Replace blown fuses with same rating.
- Check backup batteries, if present. A weak battery can cause erratic behavior.
- Use a multimeter to confirm voltages at the motor and control board.
I once blamed a motor for failure. A dead backup battery was the real cause. Simple checks save costly mistakes.
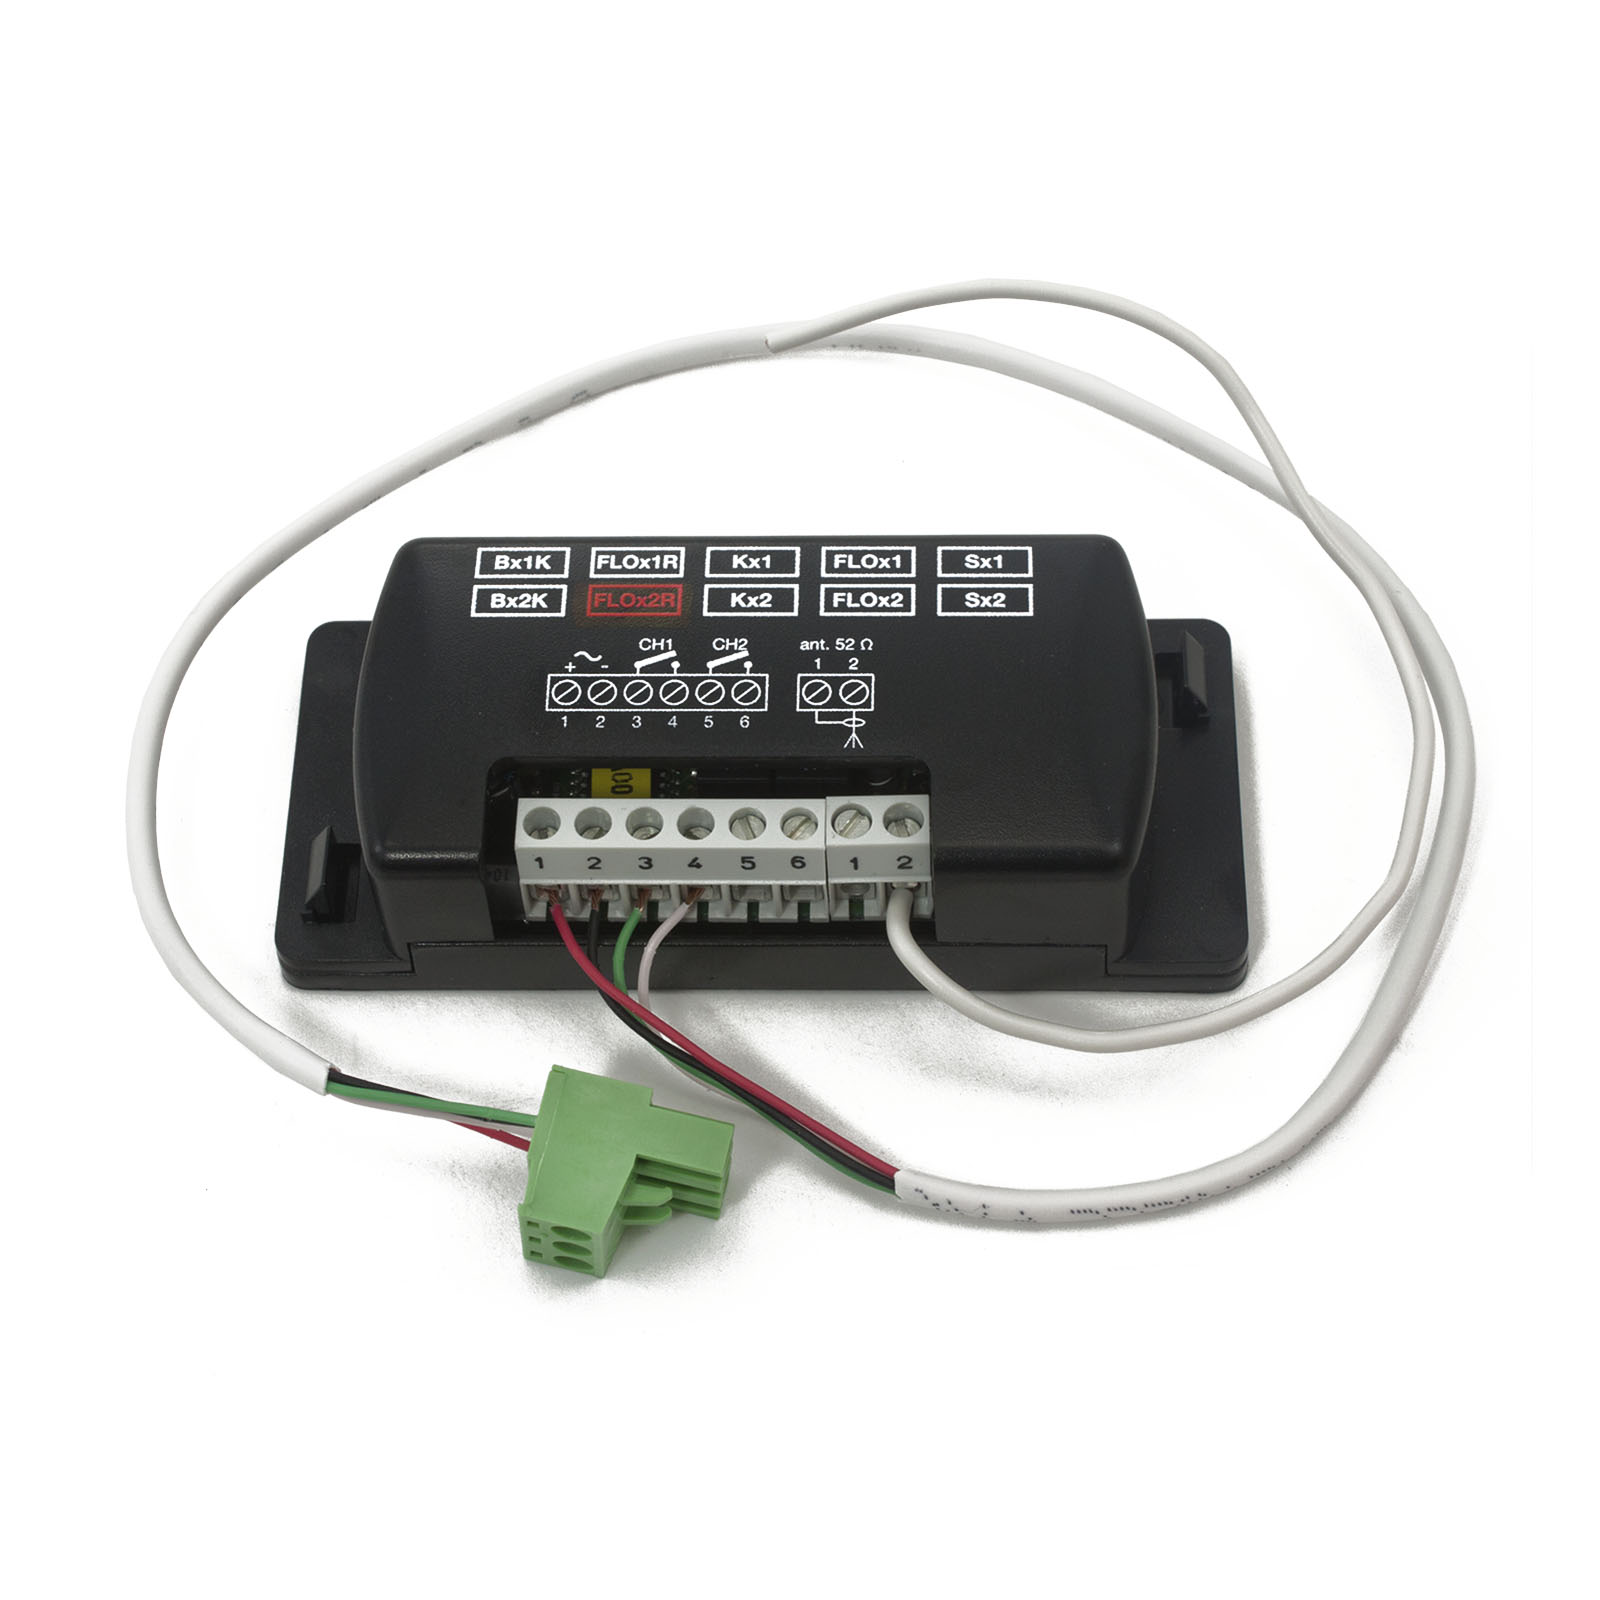
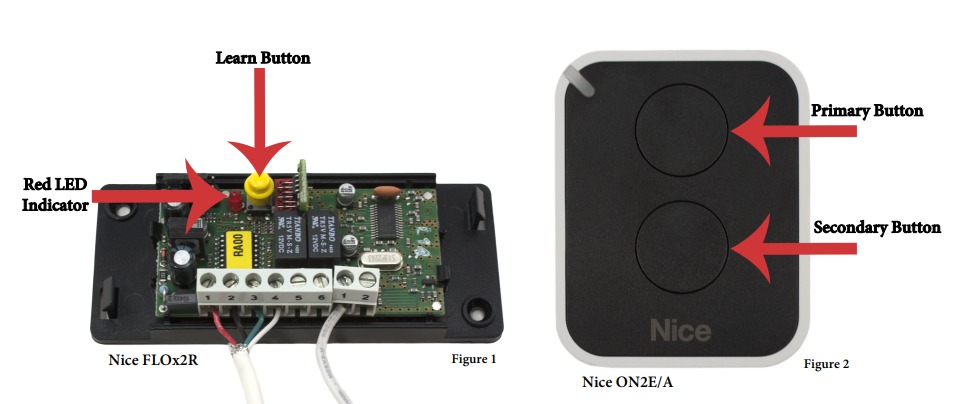
2. Remote, keypad, and transmitter issues
- Replace remote batteries and test at close range.
- Reprogram the remote using the manufacturer steps. Clear old codes first.
- Test with a known good remote or phone app if supported.
- Check for radio interference from new devices or nearby routers.
Many “lost remote” calls end with reprogramming. Keep spare remotes and document codes.
3. Safety beams and sensors
- Clean sensor lenses and remove obstructions.
- Align photoelectric sensors until LED indicators show proper alignment.
- Test by interrupting the beam and observing gate response.
- Inspect wiring for pinches or rodent damage.
Safety sensors often stop gates from closing. Fix them first during Apollo gate opener troubleshooting.
4. Mechanical checks: hinges, rollers, and tracks
- Lubricate hinges and rollers with manufacturer-approved grease.
- Tighten loose bolts and replace worn rollers or bearings.
- Check gate balance. A sagging gate strains the opener motor.
- Look for bent racks or obstructions in the track.
Mechanical drag will overheat motors. Correct motion issues before replacing electronics.
5. Motor and gearbox problems
- Listen for grinding or high-load sounds. These indicate gearbox wear.
- Check for oil leaks or missing lubrication.
- Test motor amp draw against specs. High amps mean binding or overload.
- Replace gears or motor only after confirming mechanical alignment.
Motors can last years if the gate moves freely. Regular Apollo gate opener troubleshooting protects the motor.
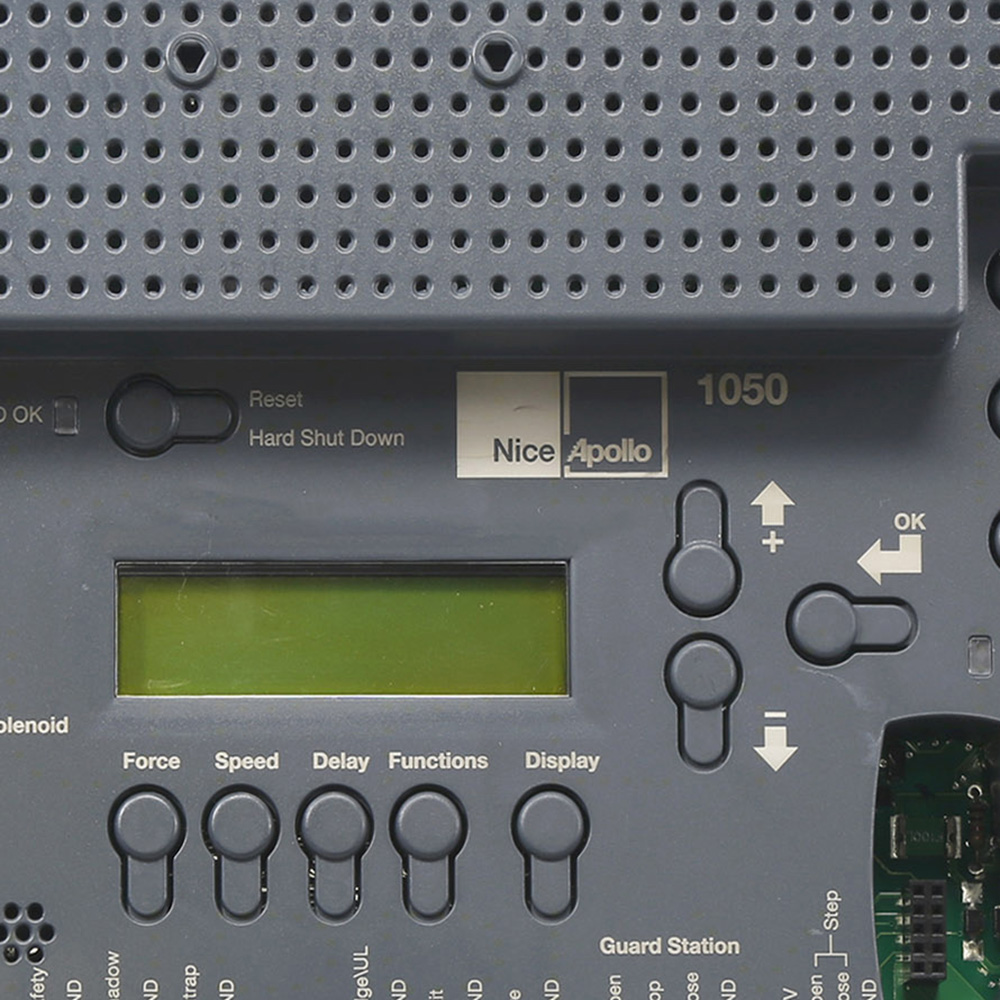
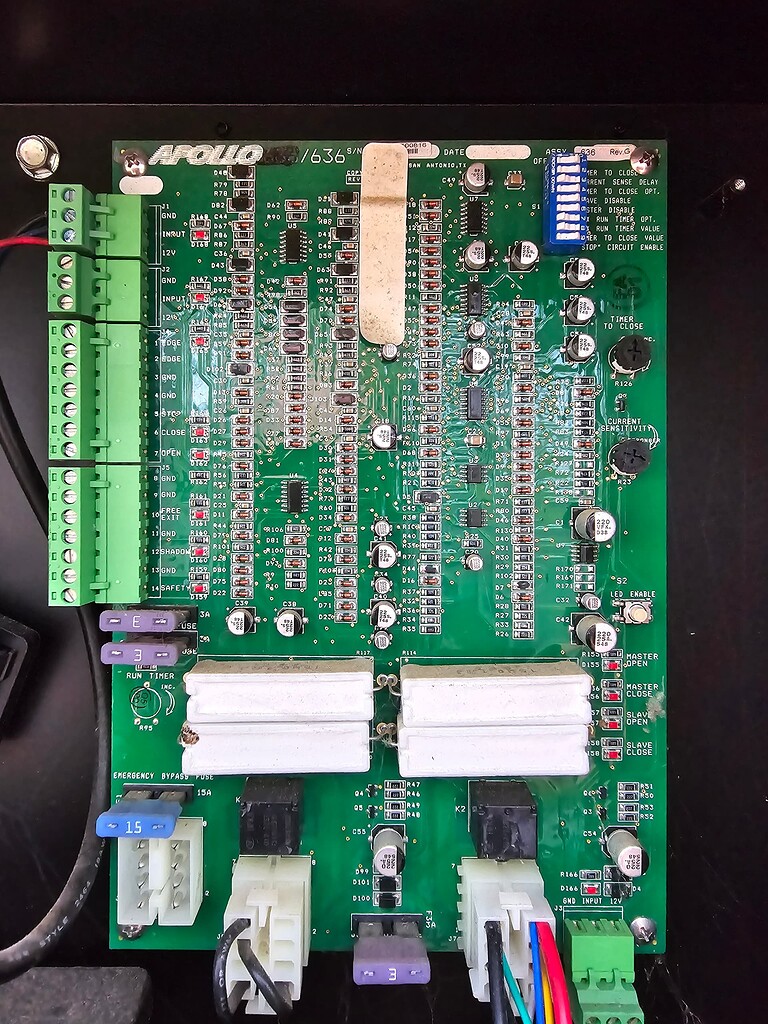
6. Control board and wiring faults
- Inspect the control board for burn marks, bulging capacitors, or corrosion.
- Check terminal connections for tightness and correct wiring.
- Look for error LED patterns and consult the manual for codes.
- If the board is faulty, compare replacement modules to original specs.
I have swapped control boards twice after ruling out wiring. Accurate diagnosis avoids wasted parts.

Common PAA-style questions (short answers)
How do I reset an Apollo gate opener?
Briefly cut power at the breaker or unplug the unit for 30 seconds, then restore power. Some models have a reset button; check your manual and reprogram remotes if needed.
Why does my Apollo gate opener stop halfway?
The gate may hit a sensor, be unbalanced, or the motor may be overheating. Check sensors, grease moving parts, and test motor amp draw.
Can I troubleshoot an Apollo gate opener myself?
Yes, you can handle basic checks like power, remotes, and sensors safely. For motor or control board repairs, get a trained technician.
Wiring, fuses, and electrical tests for Apollo gate opener troubleshooting
Electrical checks require care and the right tools. Use insulated tools and follow local codes.
- Use a multimeter to test for line voltage and motor supply. Record readings.
- Inspect low-voltage wiring to sensors and remotes for continuity.
- Replace tired or corroded connectors and use proper crimping techniques.
- Verify ground connections. A bad ground can cause erratic behavior.
If you see damaged insulation or signs of overheating, stop and get a pro. Electrical mistakes are dangerous. Proper Apollo gate opener troubleshooting includes safe electrical habits.
Software, programming, and reset tips
Modern Apollo gate openers use board settings and programmable limits. Software issues can mimic hardware faults.
- Relearn travel limits if the gate does not open or close fully.
- Update firmware if the model supports it and a stable update is available.
- Reset to factory settings only after backing up custom codes and preferences.
- Clear error logs when possible to track recurring faults.
Document any programming changes. This helps if you call support or replace the control board.

Maintenance and prevention to reduce Apollo gate opener troubleshooting
Regular maintenance prevents most failures. Set a simple schedule.
- Monthly: Visual check, clean sensors, test remotes.
- Quarterly: Lubricate moving parts and check bolts.
- Annually: Full electrical inspection, test backup battery, and measure motor amp draw.
Keep a service log. It helps spot patterns and supports warranty claims. My teams reduced call-backs by 60% with a simple quarterly checklist.
When to call a pro and parts to consider replacing
Call a professional if you see these signs:
- Smell of burnt electronics or visible smoke.
- Motor draws very high current or does not run at all.
- Complex control board diagnostics or firmware issues.
- Heavy damage from impact or weather.
Parts commonly replaced during Apollo gate opener troubleshooting:
- Remote transmitters and keypads
- Photoeye sensors and brackets
- Drive belts, racks, and pinions
- Control board modules and fuses
- Backup batteries and motor brushes
A trained tech can test amp draw, offset forces, and do safe live tests.
Frequently Asked Questions of Apollo Gate Opener Troubleshooting
How long should an Apollo gate opener last?
Apollo gate openers can last 8 to 15 years with good maintenance. Life depends on usage, weather, and how well the gate is balanced.
My gate opens but will not close. What should I check first?
First check safety sensors and edges for blockage or misalignment. Also inspect remotes and keypad settings that might reverse travel.
Why does the opener make noise but the gate won't move?
Likely a gearbox or mechanical disconnect. Check drive gears, belts, and the manual release mechanism.
Can low temperatures affect my Apollo gate opener?
Yes. Cold can thicken lubricants and reduce battery output. Use cold-rated grease and check batteries in winter.
Is it safe to open the control box during troubleshooting?
Only if you disconnect power first and follow safety rules. For complex electrical tests seek a qualified technician.
Conclusion
Apollo gate opener troubleshooting is a mix of logical checks, safe tests, and routine care. Start with power, sensors, and remotes. Move to mechanical and electrical checks only after ruling out simple causes. Keep a service log, use correct parts, and do regular maintenance to avoid common failures.
Take action today: run the quick checklist, fix what you can safely, and plan a pro inspection for electrical or motor faults. Leave a comment with your issue or subscribe for more hands-on gate maintenance tips.

